• About Terri Schurter

Hexy Lady

~ my second act in fiber arts

Hexy Lady

Monthly Archives: July 2015

Kona Log Cabin Quilt Progress: Post Five

30 Thursday Jul 2015

Posted by Terri Schurter in Uncategorized

≈ 4 Comments

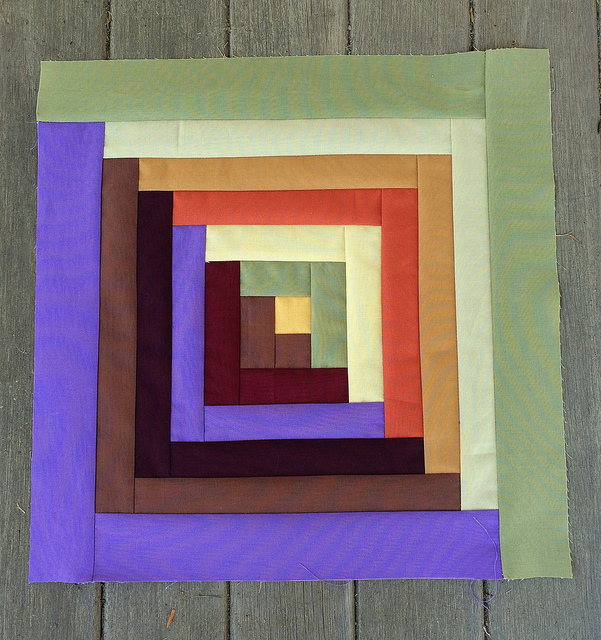
When I first started to work on this project I made my blocks with five “rounds” of fabric on each of the sides. Then I noticed that there is a certain level of variation in the finished size of the blocks. It was very small, but enough that I thought that it would be a good idea to square up the blocks.

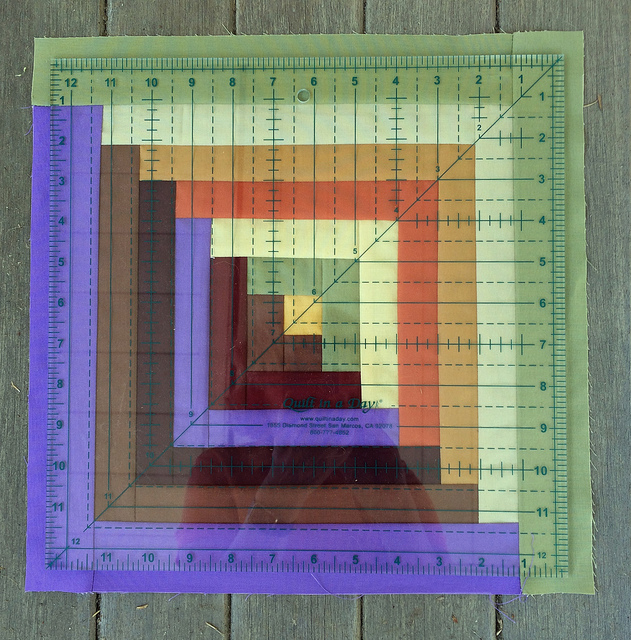
I recently purchased a class from Craftsy called “Piece by Piece: Quilt-As-You-Go Techniques”. In that class the instructor talked about squaring up blocks and showed a ruler specifically designed to accomplish that. I ended up buying such a ruler on Amazon that measures 12.5 inches by 12.5 inches.

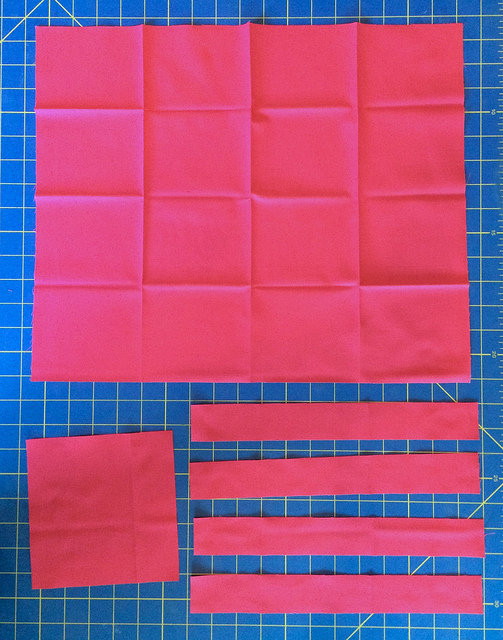
I decided to add one more round of fabric strips to each square using the Sweet Pea and the Morning Glory fabrics. I decided to make these last strips 2 inches wide instead of the 1.5 inches wide I had been using for the rest of the block.

Using wider strips for the final round will give me plenty of extra fabric to be sure that I will be able to square up my blocks nicely. Using these two colors consistently for the final round of each block will also unify the piece.

I will have a bit more waste than I would like due to the trimming of the wider strips, but I would rather waste a bit of fabric than struggle with the trimming.

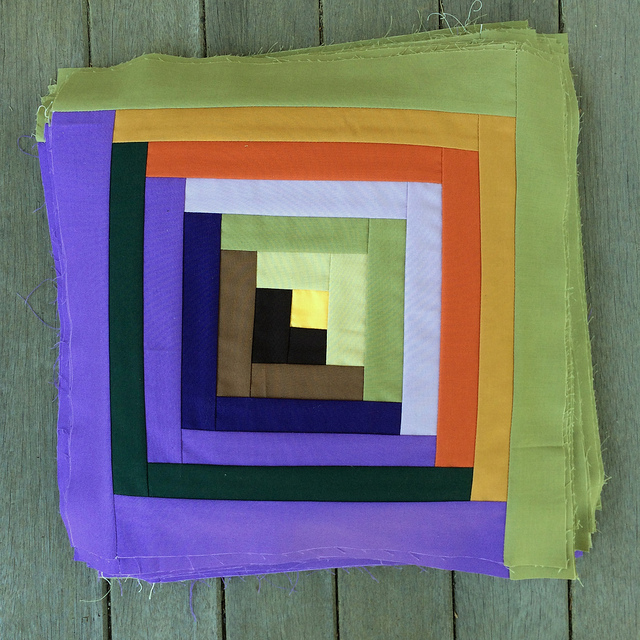
I have forty blocks ready to trim. I anticipate needing 63 blocks for the quilt since I am planning on doing nine rows with seven blocks in each row.

I am planning to purchase a small cutting mat that I can use with my Ikea table at my standing sewing station so I can trim these blocks without having to bend so far over the dining room table. I have a birthday coupon for 20% off at Pennington Quilt Works this month, so I will probably pick up the new mat before the end of the month.

Share this:

  • Email
  • Facebook
  • Twitter
  • Pocket

My EPP UFO Projects

26 Sunday Jul 2015

Posted by Terri Schurter in Uncategorized

≈ 2 Comments

I think it is time to admit that I have a few Unfinished Objects.

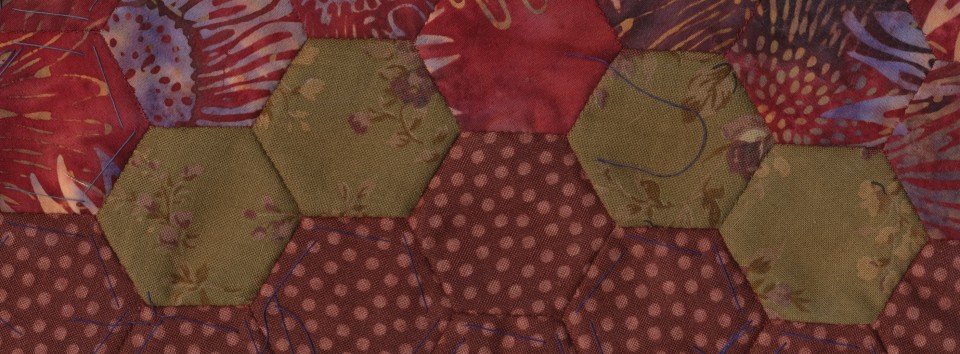
I have not touched the Batik Flower Garden Quilt in nearly three months since getting the Janome Skyline S5, and it is starting to feel like a UFO. I have been devoted to my Log Cabin work since getting my machine, and my EPP production has slowed to a snail’s pace. I wrote about wanting to add a few more rows of hexagons to the edges of the Batik Flower Garden Quilt, but I am seriously thinking of just basting it and getting started with the hand quilting. I definitely want to hand quilt this one. I think it may be large enough.

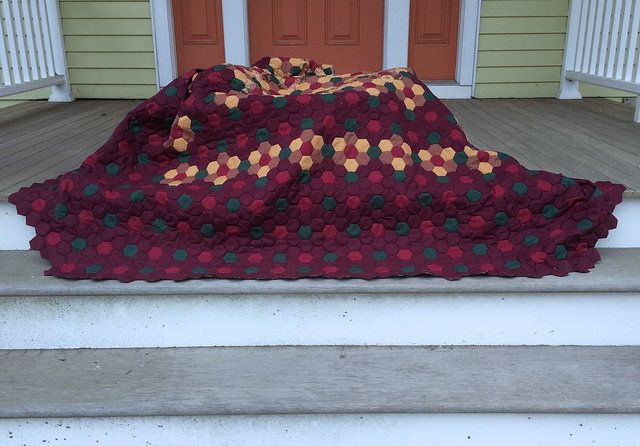
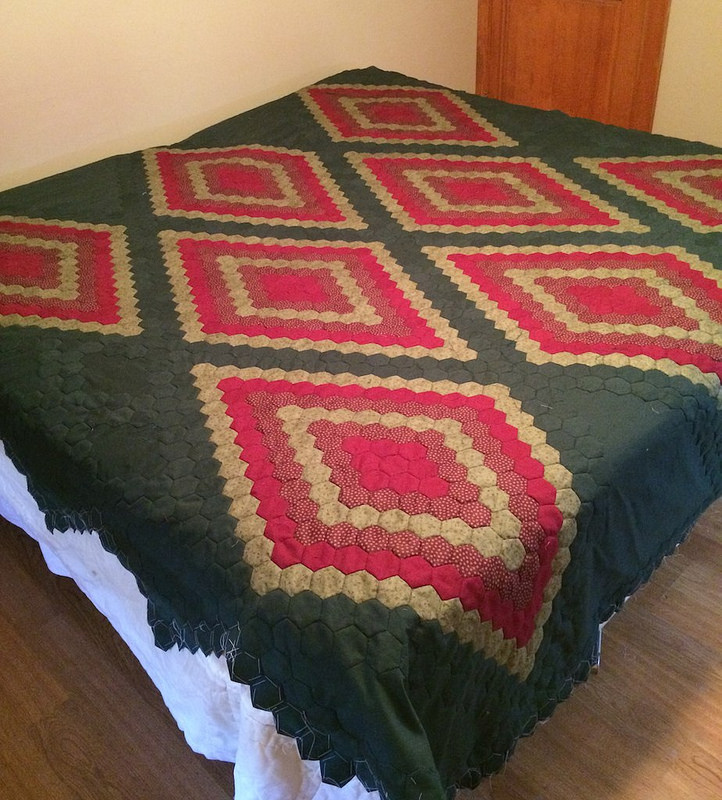
It was December of last year when I put the final border of hexagons on the Diamond Quilt. I think that qualifies it as a UFO. There is something intimidating about a finished quilt top waiting to be basted. That is where I stand with the Diamond Quilt. I am thinking that maybe I will baste it after I do some practice with machine quilting. Nearly a year of psychic distance makes me think that I might be willing to quilt this by machine instead of by hand.

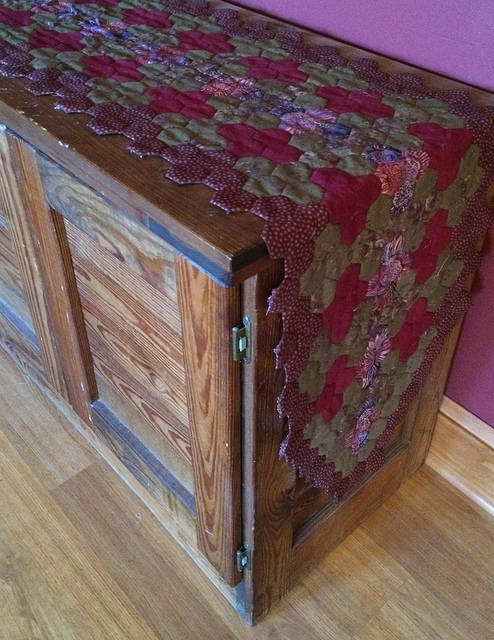
Then there is the table runner that has been sitting on the cabinet in my living room. It hasn’t been batted, backed or quilted yet, but it looks very nice on the cabinet.

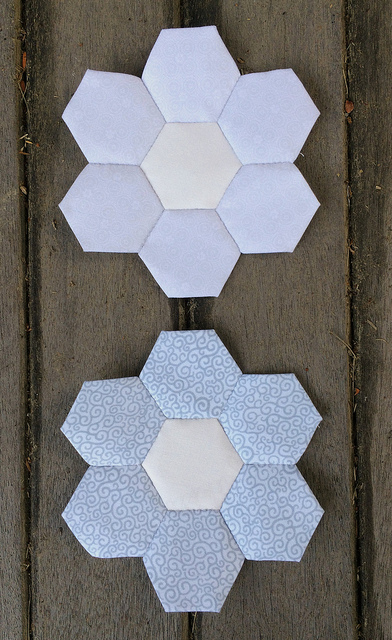
As for my EEP progress this week? I have made six more flowers for the Low Volume Quilt.

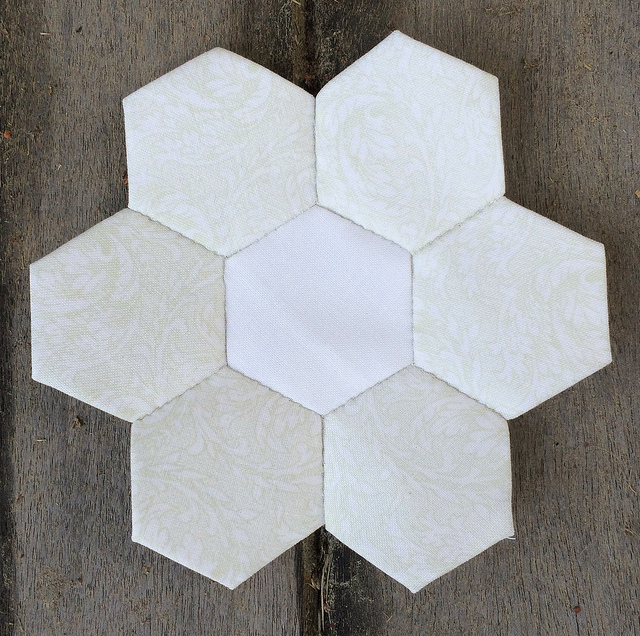
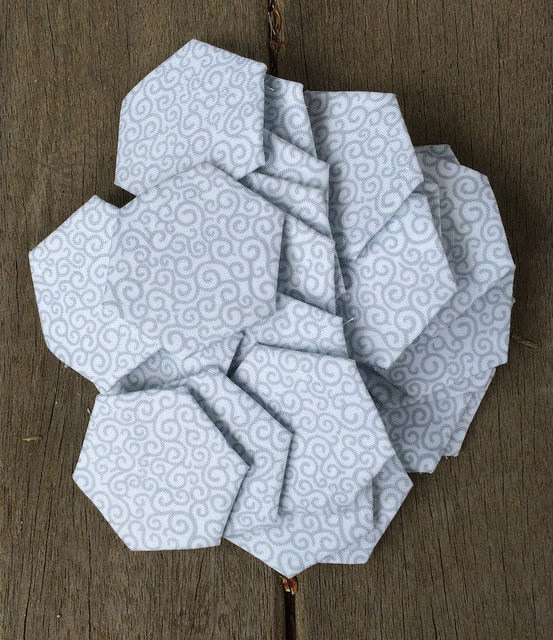
Here is a close up of the fabric I recently cut into squares from my low volume fat quarter bundle.

It is hard to see the pattern, but it is a lovely subtle greenish color.

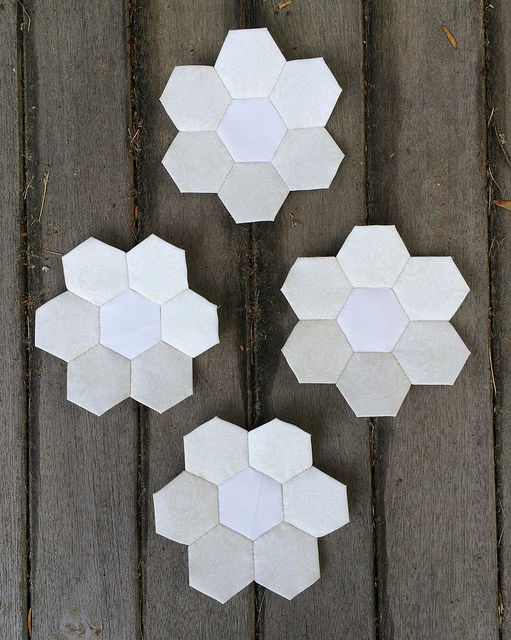
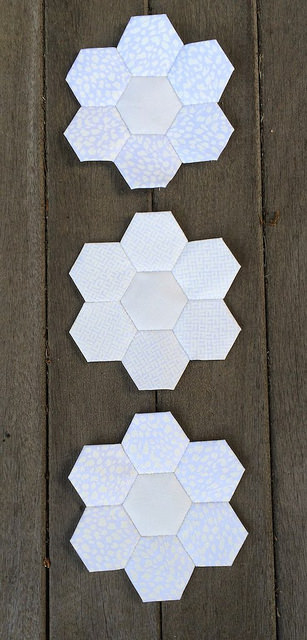
Here are four flowers made of that fabric.

In addition to that I made two other flowers.

I now have a total of 58 flowers for my Low Volume Quilt.

Those of you visiting from Jessica’s Monday Morning Star Count might enjoy reading my post about my first machine quilting project.


Share this:

  • Email
  • Facebook
  • Twitter
  • Pocket

My Very First Machine Quilted Piece

22 Wednesday Jul 2015

Posted by Terri Schurter in Uncategorized

≈ 3 Comments

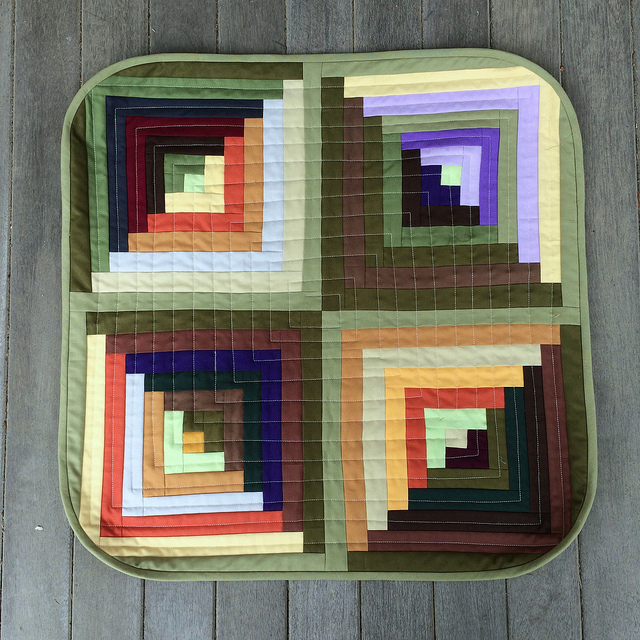
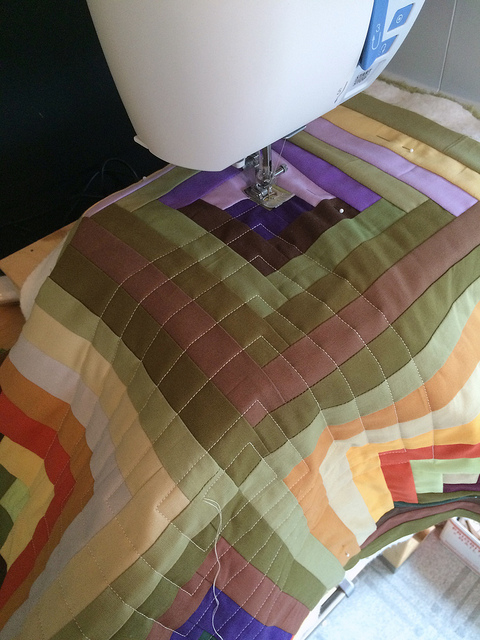
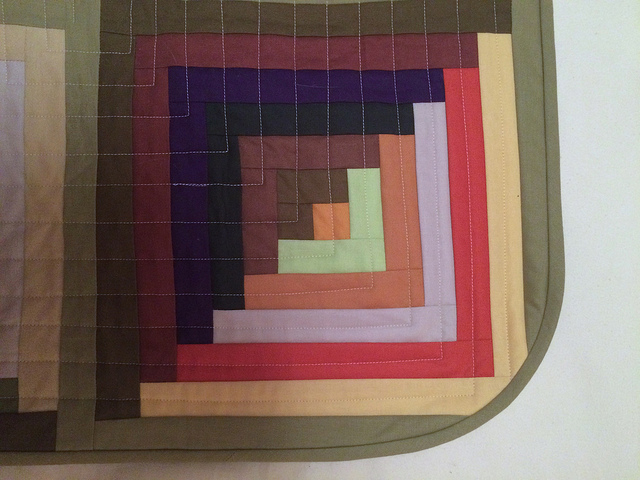
I had done a bit of “quilt-as-you-go” strip piecing to make a pillow cover at one time, but this is the very first time that I pieced something, batted it, backed it, and quilted it by machine rather than by hand. This piece measures 24 inches by 24 inches, and I quilted it standing up on my Janome Skyline S5.

I made this piece specifically to jump into machine quilting with something that I was not emotionally invested in. I used the standard foot that came with my machine, which is called the “A” foot. I wanted to use the Even Feed (Walking) Foot, but I was intimidated by it, and wasn’t really sure how to put the foot on the machine. I am quite sure that the quilting would have come out better if I had used the walking foot.

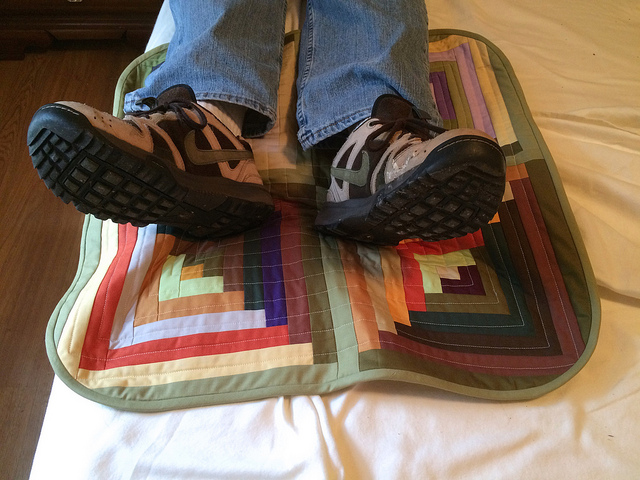
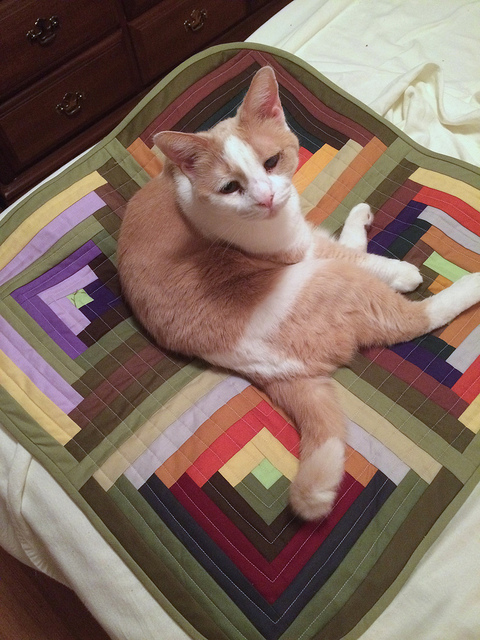
This piece is something for my husband to rest his feet on when he is lounging in bed but does not want to bother to take off his shoes.

I decided to baste this piece with straight pins. Because it was relatively small in size I figured I could get away with using the straight pins. It worked out fine. I eventually want to purchase this Baste Your Quilt Kit from the Leah Day web site, but I have not gotten around to doing that yet.

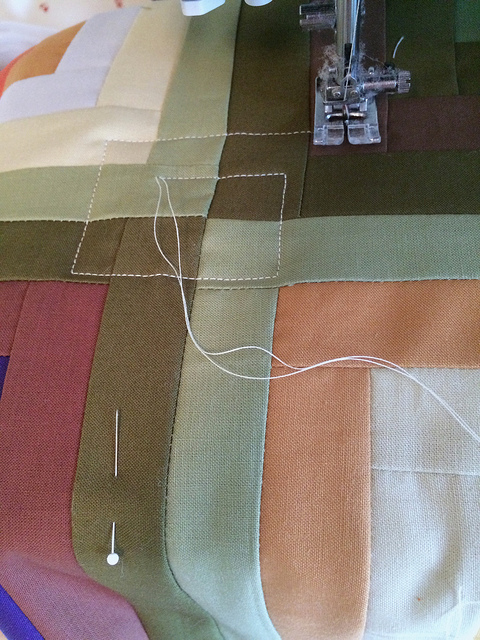
I started quilting from the center of the piece. I originally wanted to do concentric circles, but thought that might be too hard in a first attempt, so I decided to follow the insides of the strips. That worked rather well. I also pulled the bottom thread to the top so I would be able to keep it from getting tangled. Later the ends were sent to the back where they were knotted and buried.

When I got to the point where I had to traverse long portions of the project it seemed more difficult to control the piece. Putting my hands on either side of the work and letting the feed dogs to their job seemed to help.

When I quilt the companion to this piece for my side of the bed I am going to try something different.

Here are some observations about how things worked out.

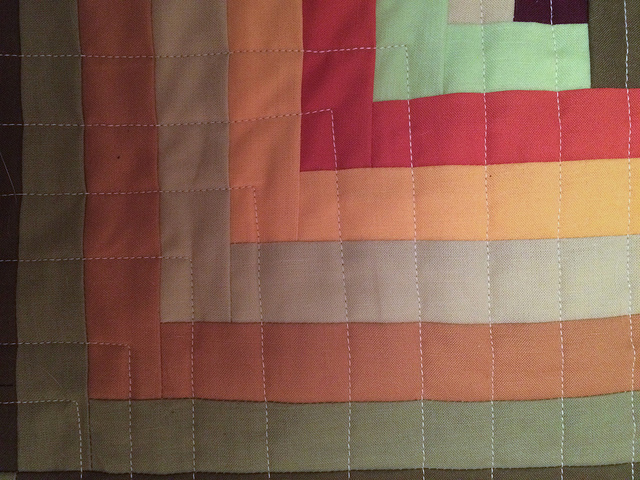
The white thread looked best in the lighter areas of the blocks. That makes sense. I think it might be a good idea to pick one light color of thread and keep it limited to the light areas. I could also pick one dark color and keep that limited to the dark areas.

Light threads on light fabrics don’t look as good when they run in contrast to the direction of the strips.

The light threads on the dark fabric doesn’t look as bad when they follow the direction of the strips.

So there appear to be two factors at work here. The thread color and the thread direction. It seems as if the direction actually matters more than the color in these log cabin blocks. If I can get both factors to harmonize on the next piece I should get a better result.

By the way, I could definitely notice that the top was feeding more slowly than the bottom especially when the lines of stitching traversed large areas of the piece. The walking foot will hopefully fix that.

Note: This post was held for publication today, but was originally written last week before I attended my sewing class at Pocono Sew and Vac where I learned how to use the walking foot.

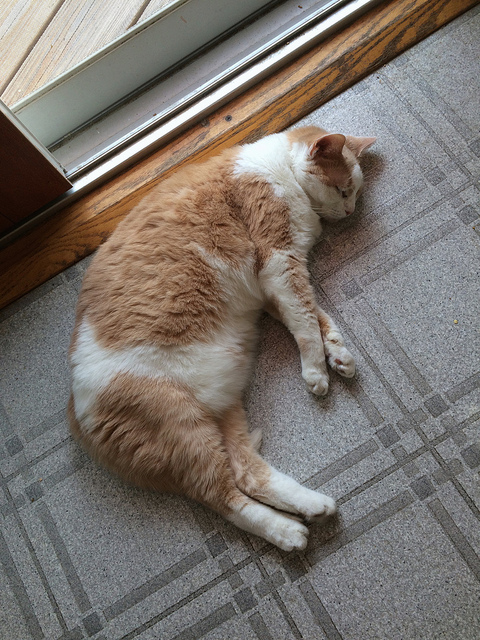
This piece has been kitty approved.

Share this:

  • Email
  • Facebook
  • Twitter
  • Pocket

Low Volume Quilt Progress: Post Seven

19 Sunday Jul 2015

Posted by Terri Schurter in Uncategorized

≈ 1 Comment

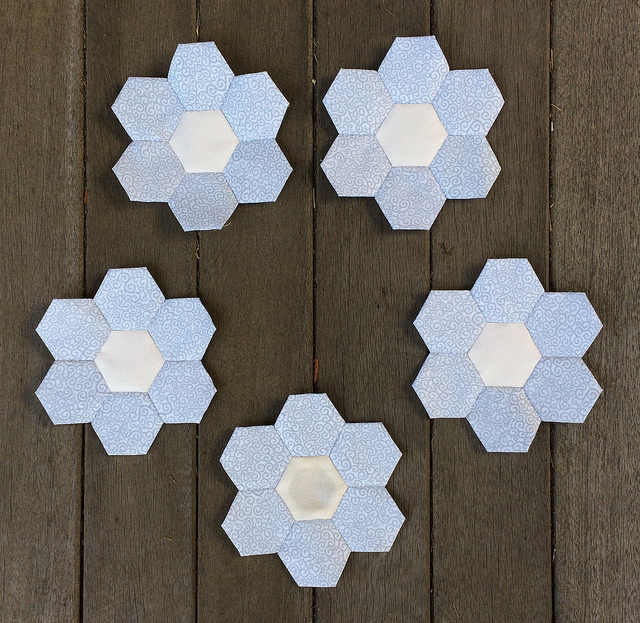
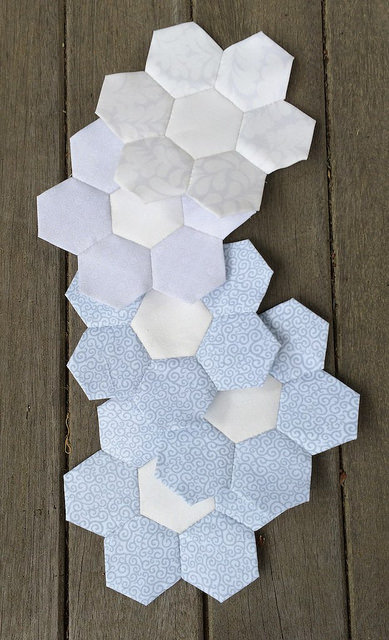
I have made five more low volume flowers this week for a total of 52 flowers so far. The bottom flower has the central paper removed, which doesn’t look great with the dark porch background, so I’ll try not to do that again.

Those of you visiting from Jessica’s Monday Morning Star Count might enjoy reading my post about my standing sewing station, and you also may enjoy reading about my sewing class at Pocono Sew and Vac.

Share this:

  • Email
  • Facebook
  • Twitter
  • Pocket

Sewing Class at Pocono Sew and Vac

19 Sunday Jul 2015

Posted by Terri Schurter in Uncategorized

≈ 5 Comments

When I bought my Janome Skyline S5 at the Slow Stitching Movement Retreat it came with a free class at Pocono Sew and Vac. Today I went for my class to learn how to use my Janome Skyline S5. I have been doing very simple sewing with it for about three months now. I’ve learned how to thread the machine, fill bobbins, and use the A foot. But that is it. I was assuming that using the A foot was giving me a 1/4 inch seam. I was wrong about that, but more on that later.

It also turns out that I wasn’t filling the bobbins properly, but I kind of suspected that all along. Sometimes it takes more than reading the fine manual to learn how to operate an advanced piece of equipment. That’s where Heather comes in. Heather was my instructor today at Pocono Sew and Vac, and she was fantastic. She had four students with four different machines. There was a woman with a Janome 3600, and there were two women with rather advanced Elna machines. Heather made sure that everyone was taken care of, and she covered all of the basics including quilting with the walking foot. She also covered free motion quilting with the darning foot. Those were the two things I was most interested in learning, and they came at the end of the class.

I arrived early and set up my machine. The other three ladies arrived shortly after that, and we chatted a bit before Heather got there. I gave out my business cards because I am always looking to build traffic to my blog, so I hope they find there way here. Before Heather got us started I remembered that I was supposed to have a bright color of thread for the class. I have no bright thread, so I searched the store and found a neon pink. Bright enough for you?
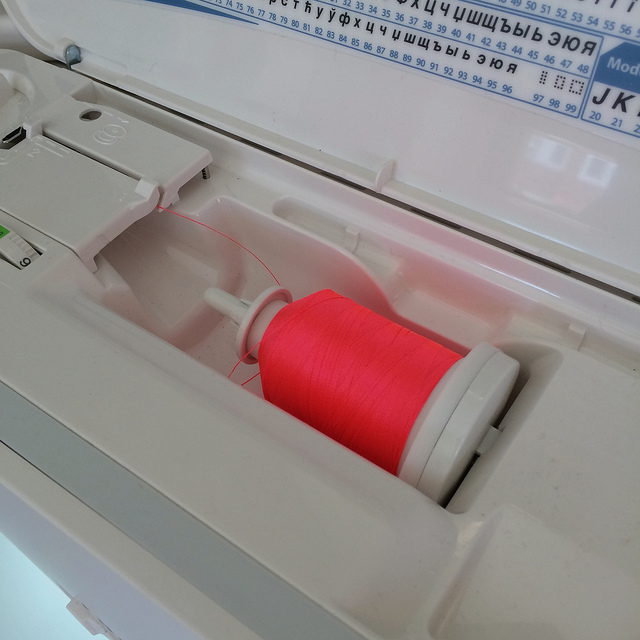
I had no idea that the fabric we were going to be using in the class would be a pink print. It was just lucky I guess that my thread coordinated with it.

I started off by explaining to Heather that I thought there was something wrong with my bobbin filling technique. I described my results as having the thread kind of “bunch up”. She watched me thread the machine to fill the bobbin and pointed out that I was missing going around one little metal part. It made all the difference. I would not have figured that out on my own.

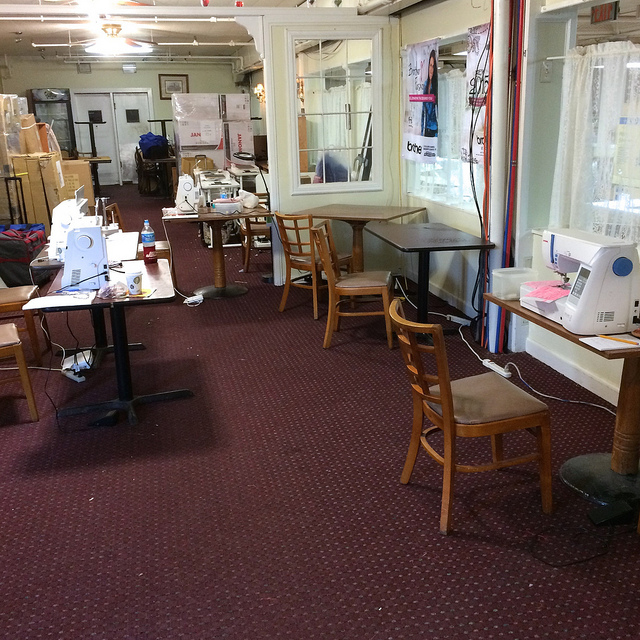
Pocono Sew and Vac is temporarily located across the street from their usual location due to renovations. They will be returning soon to their regular location. Here is a photograph of our four machines set up for the class. I took this photo during the break. My machine is located on the right.
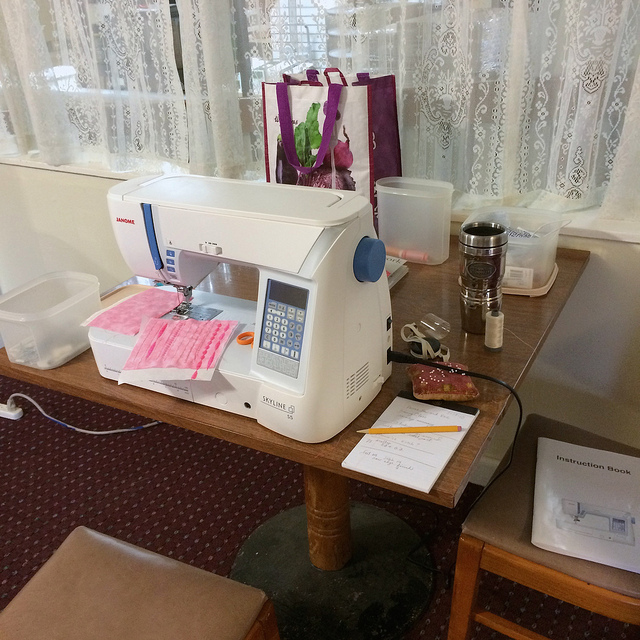
Here is a closeup of my work area. You can see that I was very busy during the first half of the class.
We started off by talking about the importance of using the right bobbins, and good thread. We also talked about some of the settings we could change. I learned that it is a good idea to start off a row of stitches with a medium speed to avoid tangling of the corners. This was something good to know, so I changed that basic setting.

After looking at settings we got started with basic stitches. We learned how to change modes and choose stitches. Heather went from machine to machine to be sure that each person knew how to accomplish every step on their machine. Here is a close up of some of my work from the first half of class.
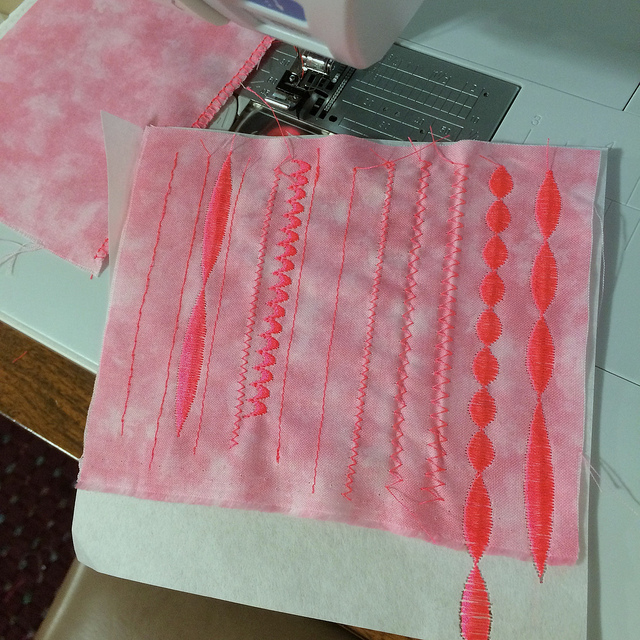
We learned how to modify existing stitches. I was particularly pleased with how I customized the standard scallop stitch, and even wrote down the details so I could reproduce it later. It is the 6th row from the left.

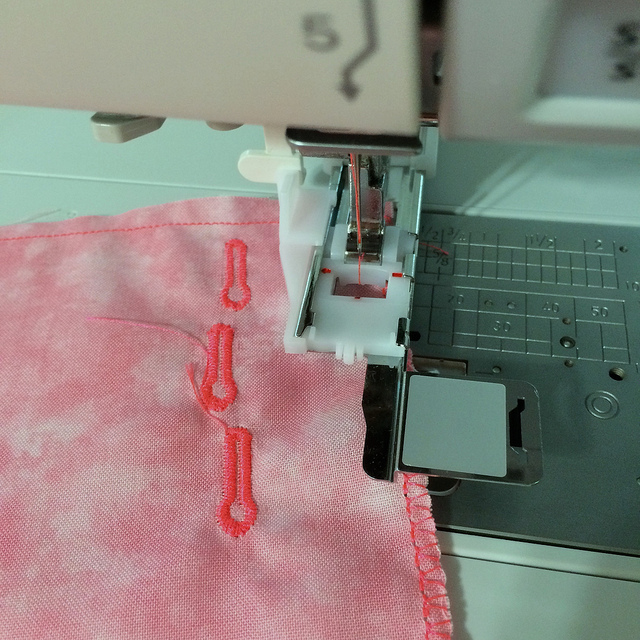
I learned how to make a button hole. I doubt that I will ever make one on a garment, but it was nice to try.
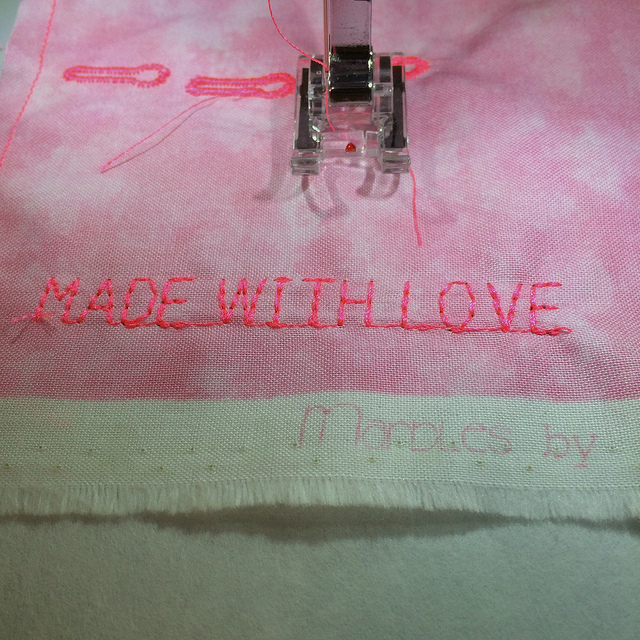
I also learned how to work with text. This may come in handy for quilt labels, but it seems rather laborious to produce them this way since each letter has to be coded, and my machine can’t save the line of text in memory. The women with the Elna machines could save things to memory.
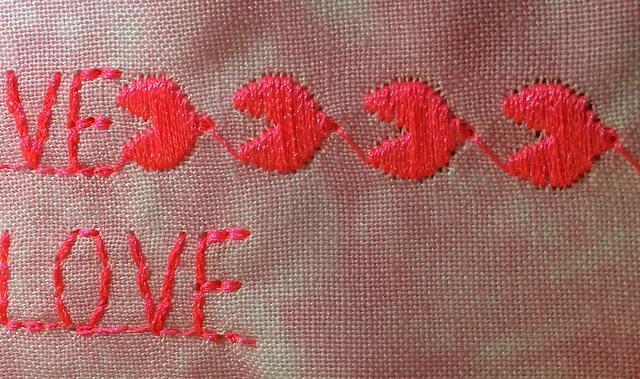
Heather showed us how to add decorative touches along with our text, and I chose to add some hearts. However, given the direction of the hearts they ended up looking more like Pac Men.
One of the things I was very pleased to learn was how to use the foot designed for piecing 1/4 inch seams. It has a little metal plate along the right side of the foot. You rest the edge of the fabric against that little plate when you stitch your seam, and it keeps the seam at a consistent distance from the edge of the fabric.
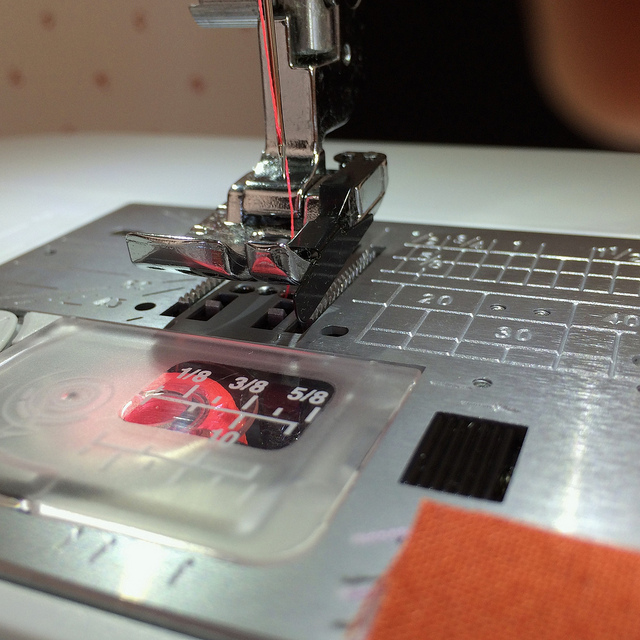
It does make a perfect 1/4 inch seam.
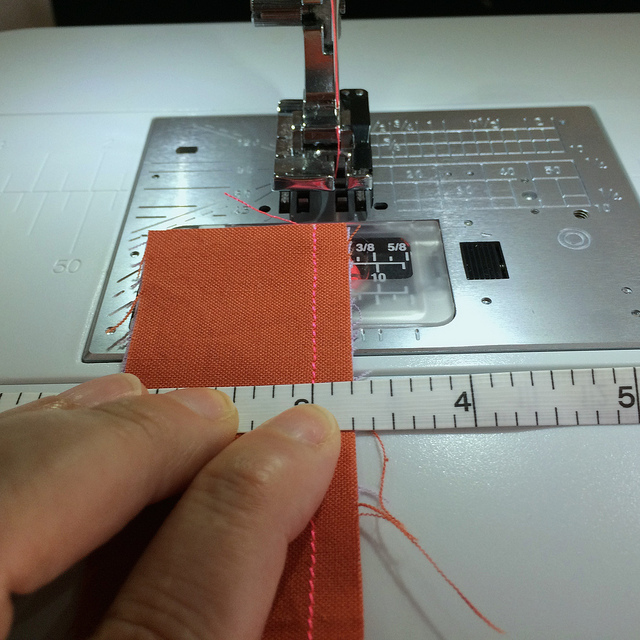
Seeing this lead me to question how the log cabin blocks I made with the A foot might measure up against blocks made using the 1/4 inch foot. When I got home I made a block using the 1/4 inch foot with my neon pink thread no less.
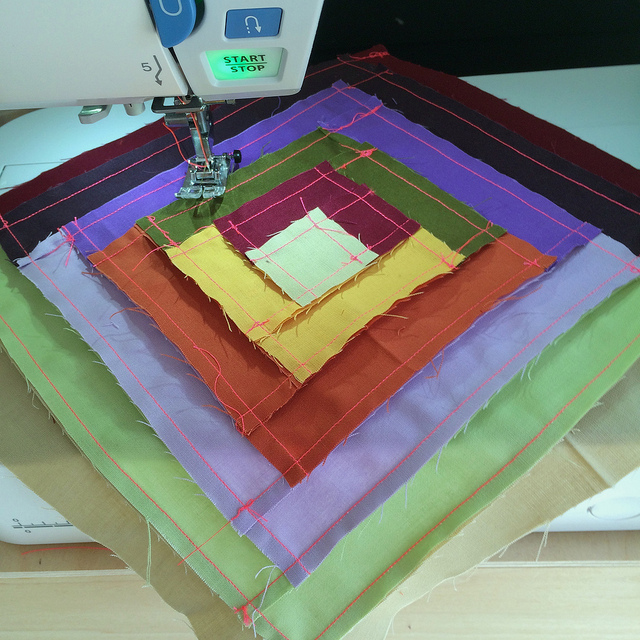
When I hold it up against one of my preciously stitched log cabin blocks you can see that the block made with the 1/4 inch foot is larger than one made with the A foot by more than 1/2 inch in at least one dimension.
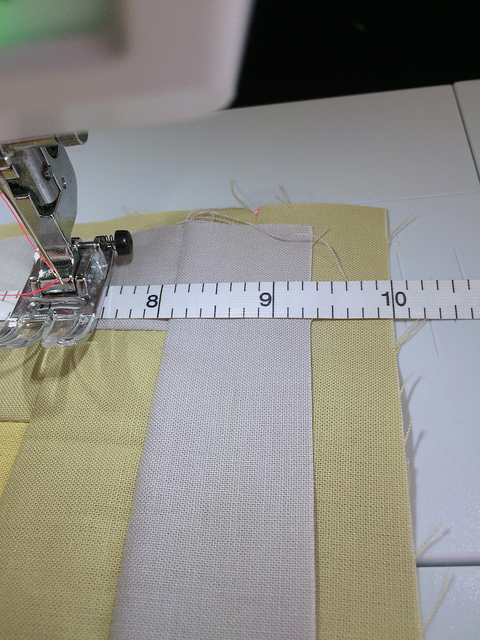
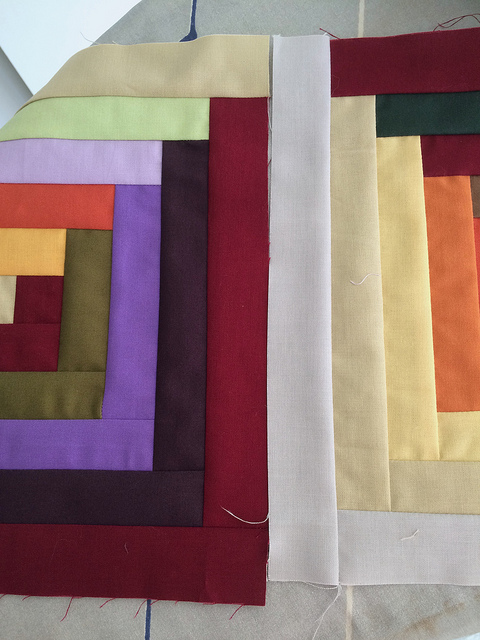
I had obviously been making seams larger than 1/4 inch with my A foot. That error was compounding over the course of adding five rounds of light strips and five rounds of dark strips to each block. Because I want to be consistent I will finish the log cabin work on the current project using the A foot, but moving forward I will be using the 1/4 inch foot for piecing of future projects.

But let’s get back to what happened in the class. In the last hour of the class we got to the things I was most interested in learning. I wanted to know how to attach and use the Walking Foot and the Darning Foot. I had read the manual, but I was confused. Heather made it easy.

We used the Walking foot with the regular plate in place. Heather even showed me how to attach the guide to the walking foot. The guide can only be attached to the right side of the foot, which is a shame because I can see how it might be nice to use it on the left side sometimes.
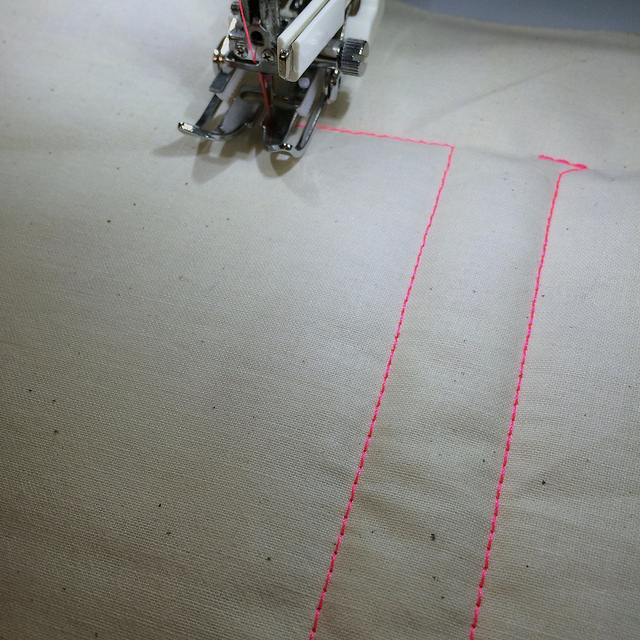
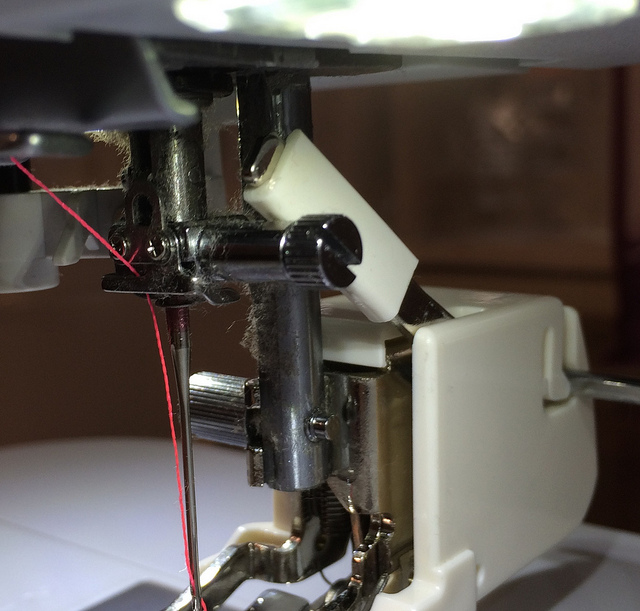
I took this photograph to remind me that the little lever on the right side of the foot has to be pushed up when you attach the foot.
After we were done with the walking foot we changed to the straight plate and attached the darning foot for free motion quilting.
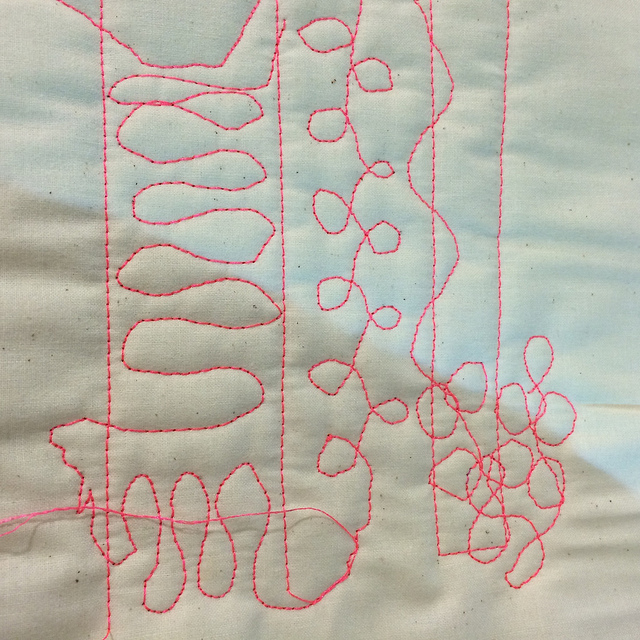
The straight lines were from the Walking Foot. Everything else is done with the darning foot with the feed dogs lowered.

I decided to leave the Straight Plate in place because I can use the 1/4 inch foot with it, and I think I can use the Walking Foot too. The photo below shows the stitches available with the Straight Plate in the upper left of the picture.
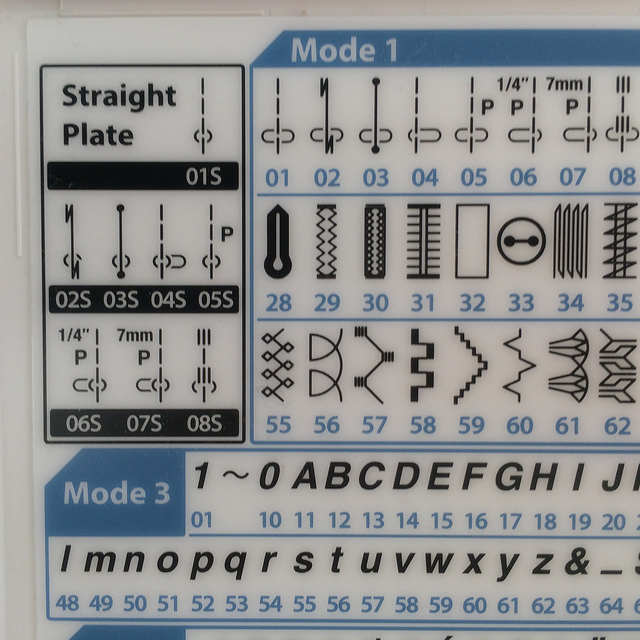
The quarter inch stitch is 06S. I think I can use 01S with the Walking Foot.

Before leaving I made sure that I gave Heather my business card and told her that I would be doing a blog post about the class. I hope she stops by to see it.

It was a fantastic class. I highly recommend Pocono Sew and Vac to anyone looking to purchase a new machine.
Share this:

  • Email
  • Facebook
  • Twitter
  • Pocket

My Standing Sewing Station

16 Thursday Jul 2015

Posted by Terri Schurter in Uncategorized

≈ 4 Comments

I’ve mentioned standing to sew a few times recently, and one of my readers has asked me to elaborate on my standing sewing station. For a few years I have been aware that I should be sitting less. The Huffington Post had an article from September of last year in which they said that, “Sitting is the new smoking.” The article points out that our sedentary lifestyle is killing us. To help cut down on the time we spend sitting Michael Hyatt, and others, have promoted the use of stand up desks.  I thought why not sew standing up? I think that quilters are especially likely to spend a great deal of time sitting, especially those of us who do English Paper Piecing. Shortly after I started to stand to sew with my machine, Michael Hyatt put out a podcast on The Dangers of Sitting. He summarizes things very well, so I urge you to have a listen to that podcast. 

So how did I decide to try sewing standing up? When I purchased my new Janome Skyline S5 I became aware that it was possible to disconnect the foot pedal and control the machine instead using a combination of the start/stop button and the speed setting. It was odd at first, but in the end I have found it to be more comfortable than controlling the speed with my foot. I might mention that one of the things you sacrifice when you stitch standing up is the ability to use the knee lift, but it is a small sacrifice. I am much more addicted to the automatic thread cutting feature than I am to the knee lift, which always felt a big odd to me.

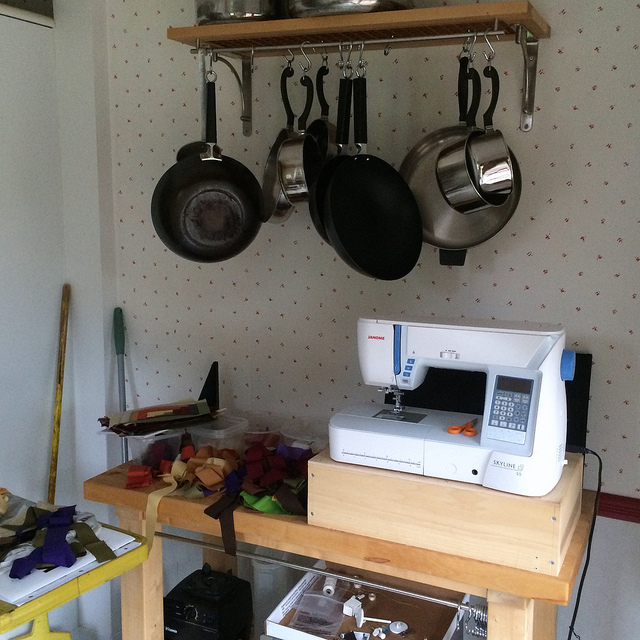
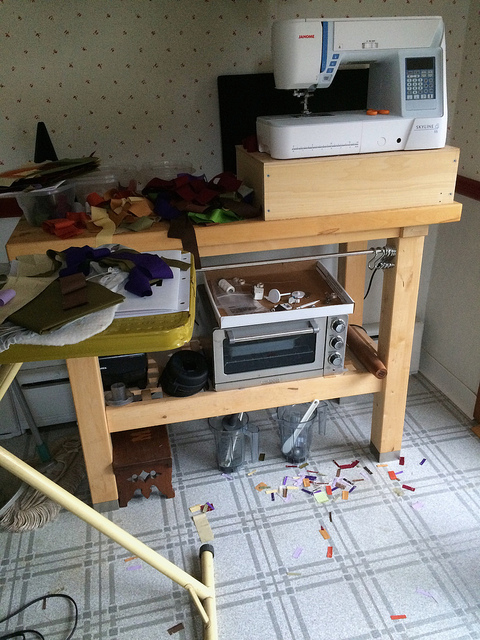
The photograph above shows my machine positioned on top of a wooden box placed on top of a counter height kitchen table purchased from Ikea. The height of the top of the box is 41 inches, which creates just about the perfect viewing angle for sewing. At first I tried the machine on the table top without the box, but I found that the angle was wrong for me.

When I bought the table I had intended to use it to roll out freshly made pasta. I did use it in that way a few times. The table surface is a food grade cutting board. While it did enjoy a brief heyday as a food prep surface, the table had recently become a place to store my pizza stone and Vitamix containers. You will see two of the containers peeking out under the table.

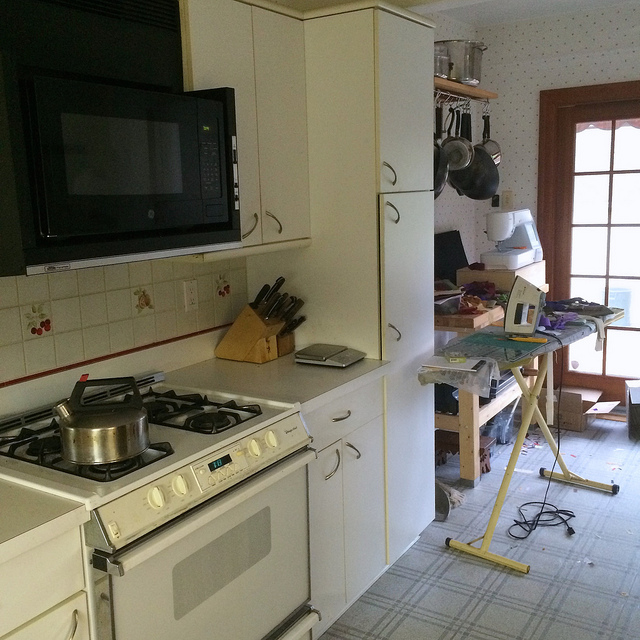
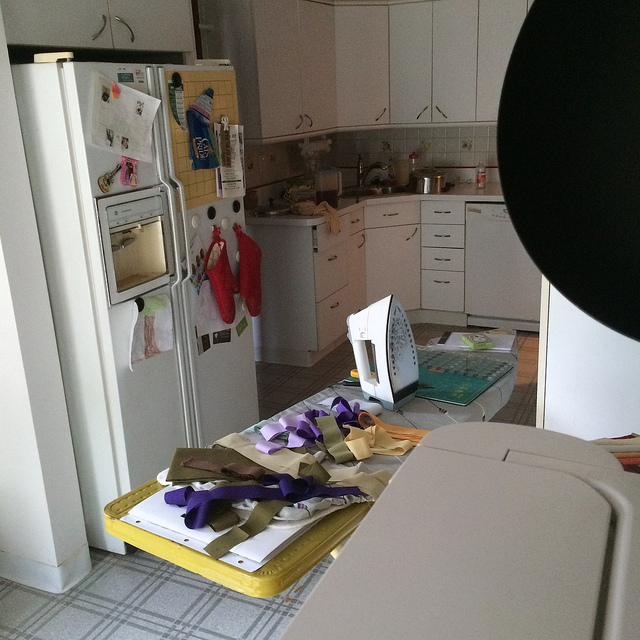
Let me give you an idea of how this sewing station fits in with the kitchen as a whole. Here is a view of the kitchen from the vantage point of the top of the sewing machine. Notice the magnetic 9×9 go board and go stones on the refrigerator. The object in the upper right corner is a wok hanging from a rack above the table. The sink area is in the far corner of the kitchen. The tip of the iron is pointing toward it.

Here is a view of the sewing station from the sink area.

The sewing station occupies an area of the kitchen that was designed to house a kitchen table just in front of the sliding double doors that lead to the deck. We never put a kitchen table there because I prefer eating in the dining room away from the mess of food production. I can never keep on top of cleaning up as I go, so the kitchen is always a disaster area when we sit down to eat. Up until I put in the Ikea table that area was totally wasted space.

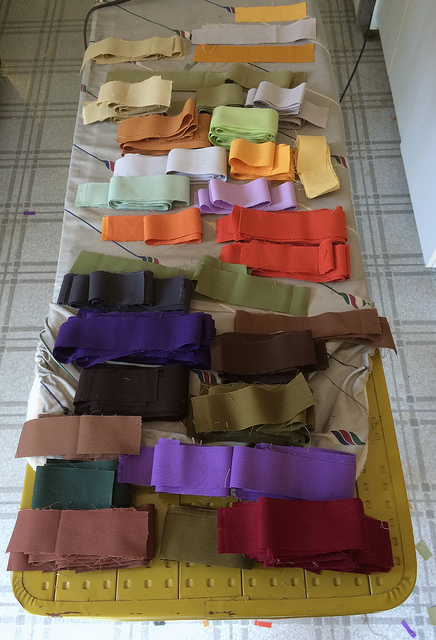
Setting up the ironing board near the sewing station makes it possible to have lots of strips available to me as I work on my current Log Cabin Quilt project. It is also quite convenient to not have to stand up when it comes time to press something. All I need to do is walk a few steps to the ironing board.

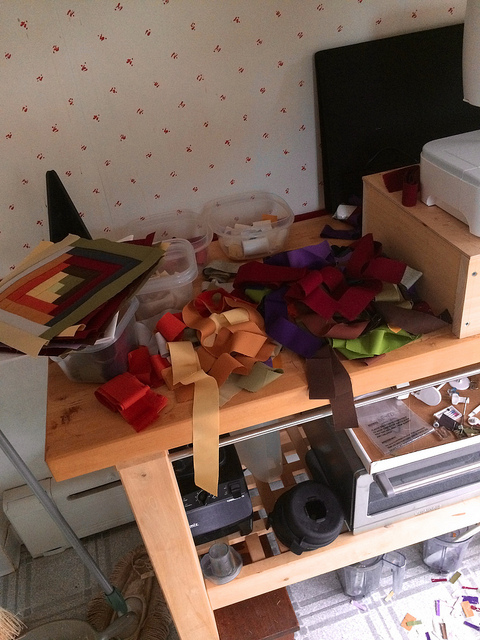
Keeping the sewing machine as far to the right on the Ikea table as possible allows me room for more strips.

I keep my machine accessories handy in a cardboard file box cover on top of the toaster oven. I don’t know what most of these are for yet, but I will learn. I even have a few bobbins pre wound in that box.

Even with the sewing machine in place I am able to reach the hanging kitchen utensils I need when it is time to prepare dinner.

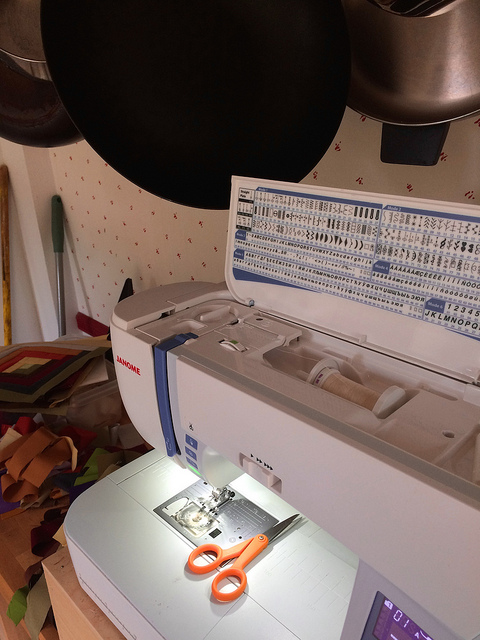
Here you can see that the pots and pans hang low enough that I need to keep my wok pushed to the side in order to be able to open the top of the machine. I have not started to select special stitches yet, but I am sure I will learn about that at my class this coming weekend at Pocono Sew and Vac.

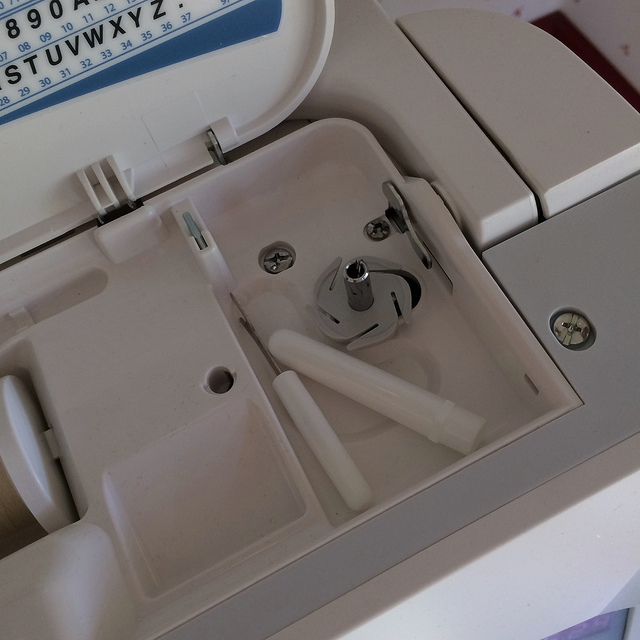
While it is not meant as an accessory storage area, I find that it is convenient to keep my seam ripper within handy reach by storing it in the bobbin winding area under the lid of the machine.

Sewing standing up may not be for everyone, and it is certainly not for every type of sewing. I think it is best suited to chain piecing, and block construction. If I were to start joining blocks above a certain width I would want to move the machine to a table to do that kind of piecing. However, I would probably still not use the foot pedal since I have gotten quite used to doing without it.

I would most likely not want to quilt standing up, unless I was doing small units with the Quilt As You Go method, and joining them with strips. When it came time to join the units the machine would be off to a table again so I would have a greater area for the work to occupy.

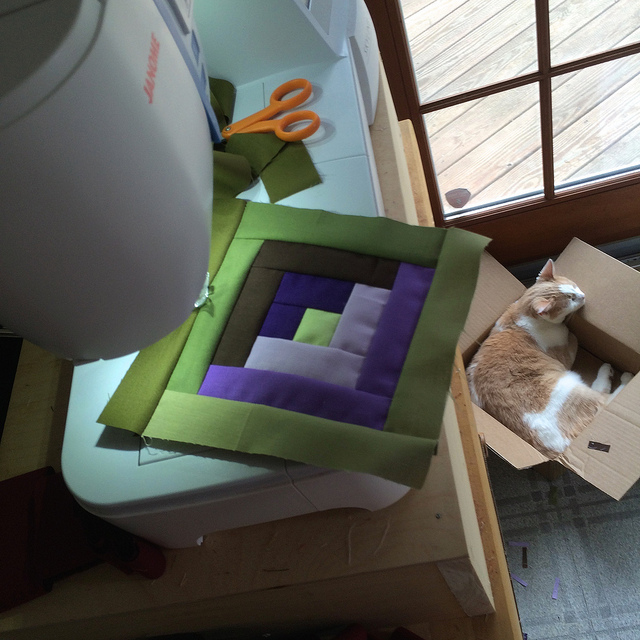
Perhaps one of the best things about sewing standing up in my kitchen is that my cat Lori is usually close by, and sometimes actually under foot.


Share this:

  • Email
  • Facebook
  • Twitter
  • Pocket

Low Volume Quilt Progress: Post Six

13 Monday Jul 2015

Posted by Terri Schurter in Uncategorized

≈ 3 Comments

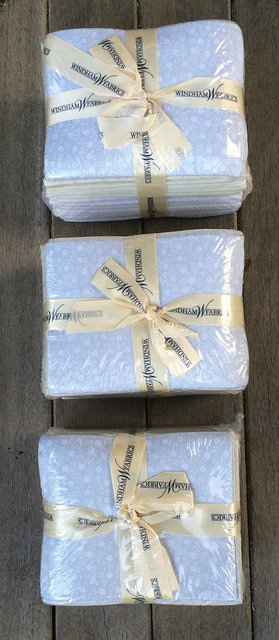
This week I completed five flowers for the Low Volume Quilt. This makes a total of 47 flowers so far. I have been doing a great deal more though than assembling existing basted hexagons. In order to make the lowest three flowers above I cut up one of the fat quarters from the three low volume fat quarter bundles I had recently purchased.

Cutting the entire fat quarter yielded 56 squares. That will be enough to make nine flowers and have two basted low volume hexagons left over.

I now have 25 basted hexagons from that fat quarter ready to make into more flowers.

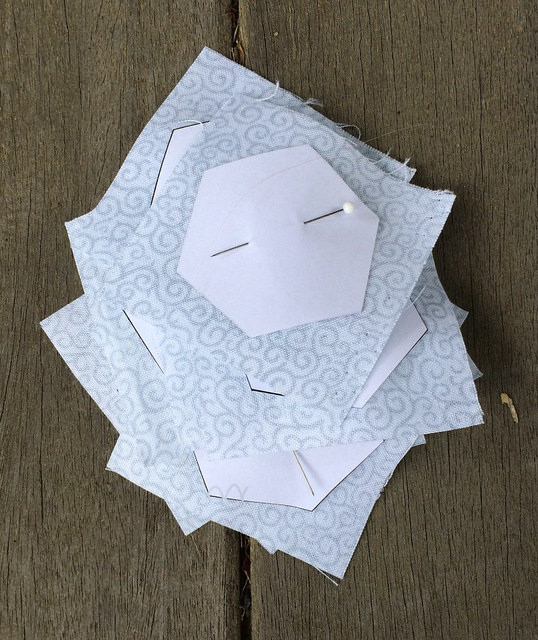
And I have 13 squares pinned and ready to baste.


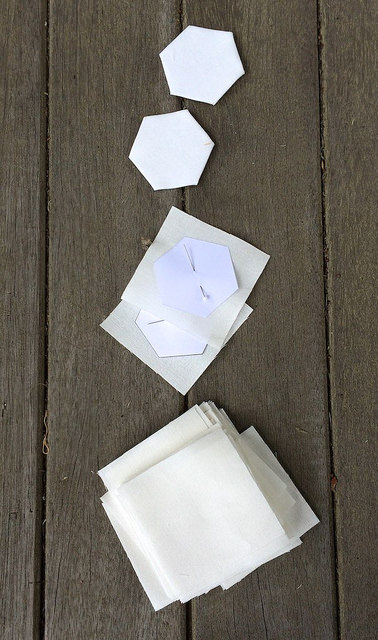
I’ve also cut four strips of Kona Snow selvedge to selvedge. Those strips have been cut into squares, and I am now in the process of basting them so I can proceed with more flower production.

Those of you coming to this post from Jessica’s Monday Morning Star Count may enjoy seeing my recent progress on the Log Cabin Quilt.

Share this:

  • Email
  • Facebook
  • Twitter
  • Pocket

Kona Log Cabin Quilt Progress: Post Four

08 Wednesday Jul 2015

Posted by Terri Schurter in Uncategorized

≈ 2 Comments

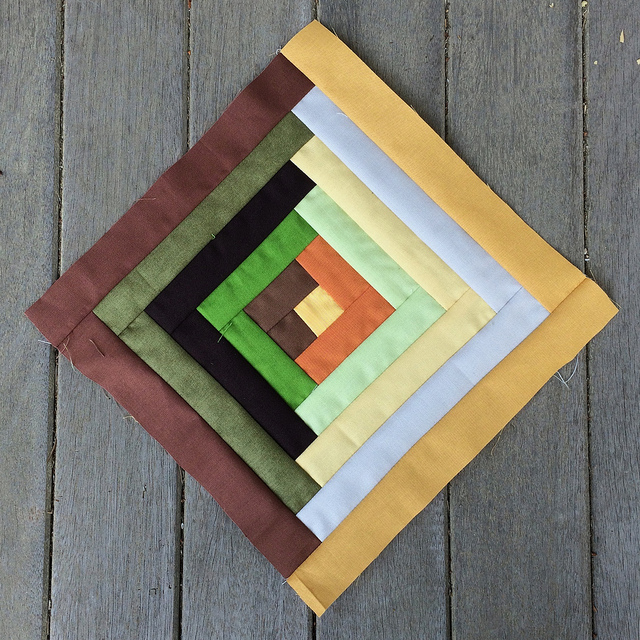
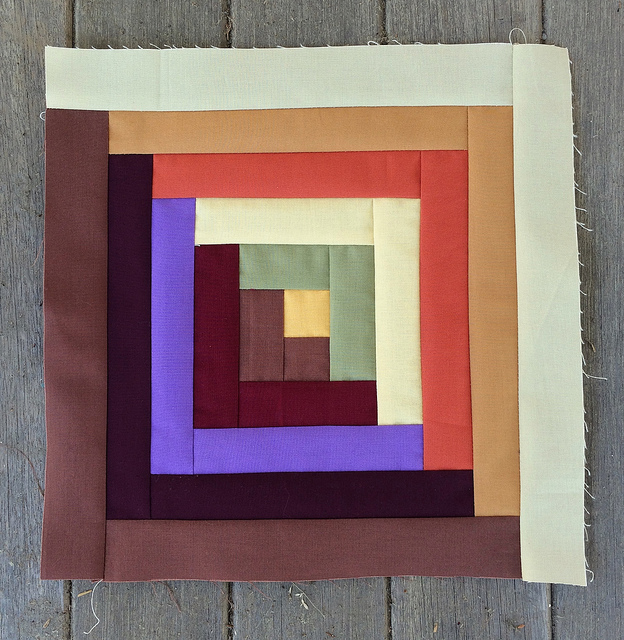
I have spent most of my time this week making blocks like the one above for my Kona Log Cabin Quilt. I have 32 blocks completed at this time.

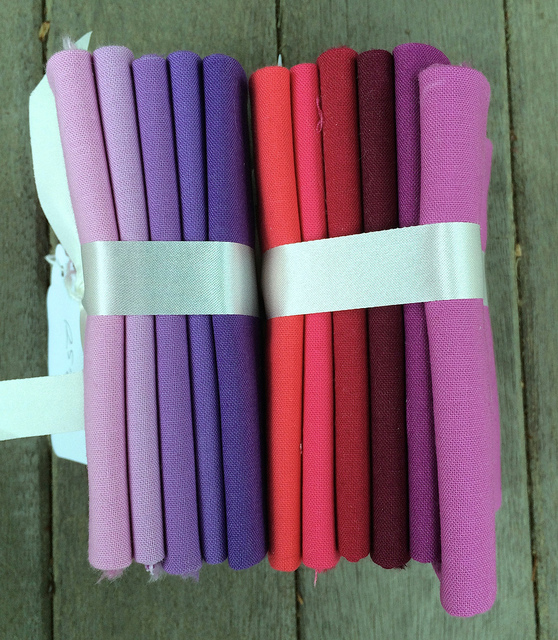
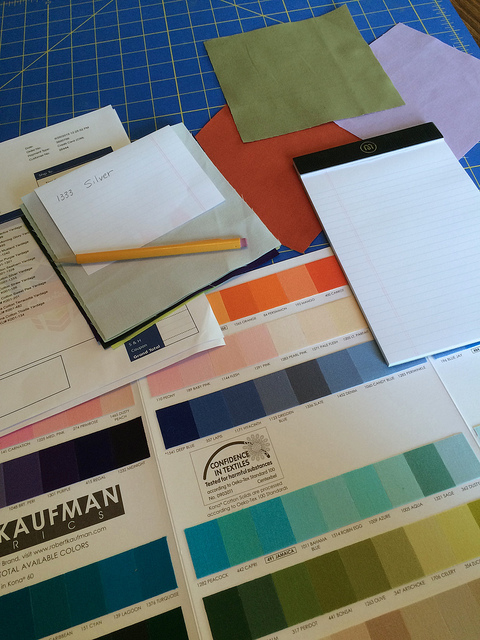
In addition to making blocks I have been cutting 6″ x 6″ sample pieces from the eleven fabrics that I recently ordered from the Fat Quarter shop. While making those sample pieces I remembered that I had bought two small fat quarter bundles of Kona Solids from the Pennington Quilt Works on my way back from the Slow Stitching retreat.

These bundles were sub divisions of a much larger bundle that was put together by Kona to show the 30 new colors being offered this year. The shop still had one large bundle with the complete collection on hand, but it was over a hundred dollars. Since I wasn’t sure I wanted all of the colors I snatched up the these two smaller bundles instead.

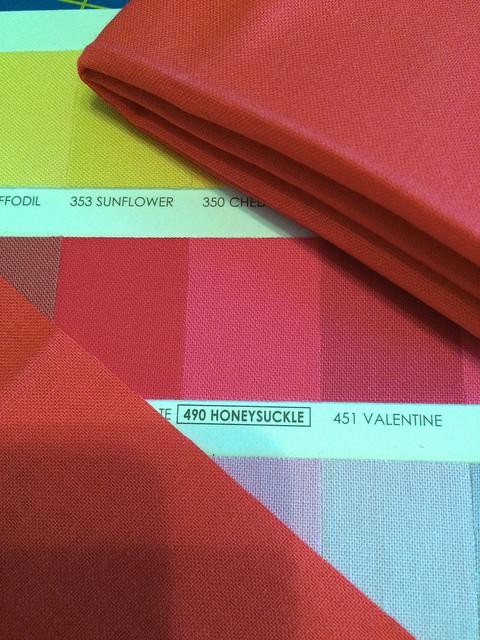
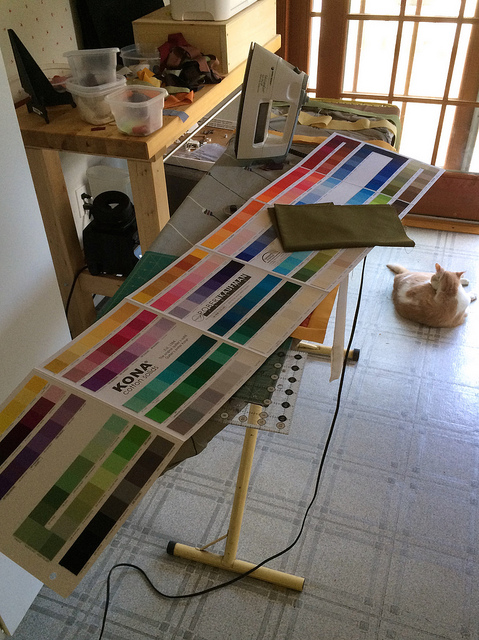
Lucky for me, my Kona sample card is current. I upgraded it this year after making do with one from 2013 for two years.

Matching the colors to the sample chips was fairly easy because Kona draws attention to the new colors on the card by enclosing the name in a box.

Here you can see a pile of sample pieces already labeled. I simply took a piece of paper, folded it in half, and marked it with the code and name of fabric and wrapped it around the piece. I’ll decide later how I want to organize these samples. For now, they will sit in a pile.

As I am cutting more strips I am making six inch sample pieces of some of the existing colors in my stash. Some of these are considerably harder to find on the sample card. A look back at my previous Fat Quarter Shop orders will help me narrow down the choices.


This is how I cut the samples from the fat quarters. I pressed just enough of the fabric so I could cut a piece off the short end. I cut off a six inch strip from which I cut a six inch square sample. I then cut the remainder of the strip into 1.5 inch wide pieces. That left me with a good sized piece larger than a fat eighth.

These fat quarter colors are too bright for the current project, but they will come in handy for a future log cabin project. I have a feeling it is going to take me quite awhile to exhaust the log cabin possibilities.

For now I have plenty of strips cut to proceed with my work on the current project.  I also have more pieces of fabric I can add to the mix as I need to cut additional strips. I am not worrying too much about which colors I am using in each block. Below you can see my lights at the top and my darks at the bottom.

Interestingly, the relatively light violet at the bottom of the picture was originally slated to be on the lighter side of the blocks. I actually have a couple blocks in which it is used that way. The darker orange near the middle of the photo is used in the light area even though it is probably as dark as that violet, but it seems to work well there.


Share this:

  • Email
  • Facebook
  • Twitter
  • Pocket

Low Volume Quilt Progress: Post Five

07 Tuesday Jul 2015

Posted by Terri Schurter in Uncategorized

≈ 1 Comment

Not much has happened in the past week with my Low Volume Quilt.

I completed three flowers.

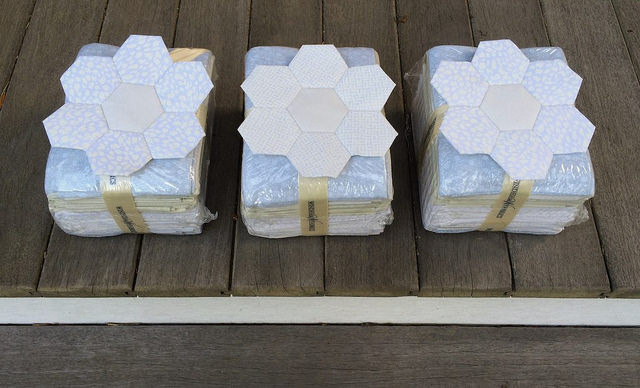
And my three low volume fat quarter bundles arrived.

So I managed to complete one flower for each bundle.

My total flower count is now 42.

I spent most of my week working on my Log Cabin quilt project. So if you are visiting via Jessica’s  Monday Morning Star Count you may find this post interesting.

Share this:

  • Email
  • Facebook
  • Twitter
  • Pocket

Kona Log Cabin Quilt Progress: Post Three

01 Wednesday Jul 2015

Posted by Terri Schurter in Uncategorized

≈ 4 Comments

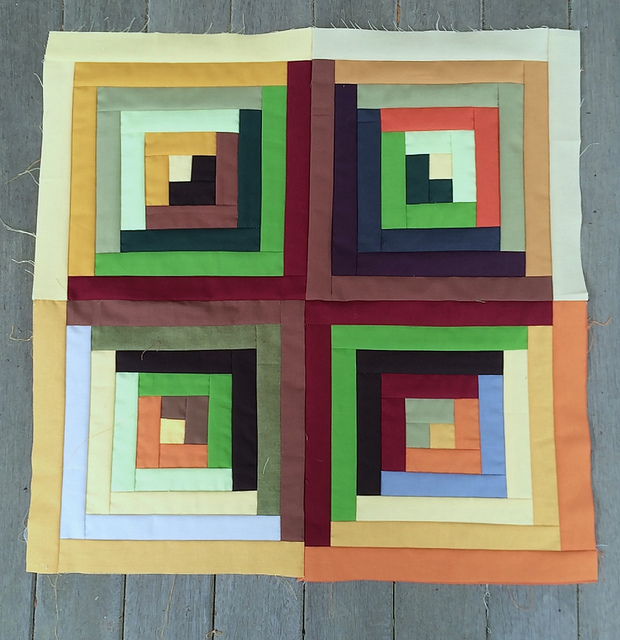
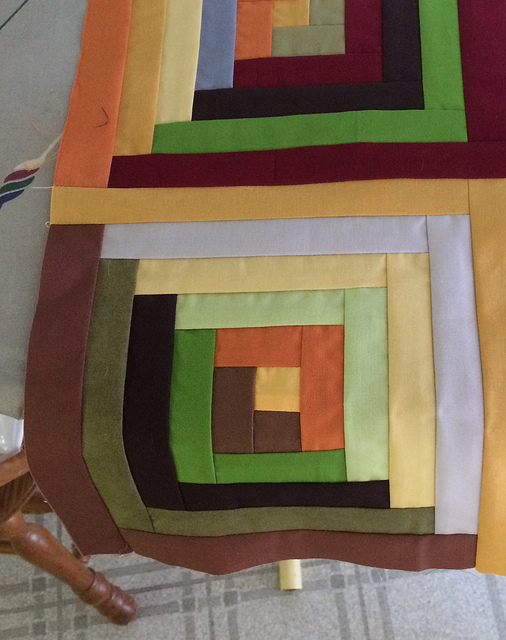
I finished assembling the night stand cover for my husband’s side of the bed. I have not yet decided what color I will use around the edge, for the binding, and for the backing fabric. I may use the same Kona Sweet Pea as I used for my own nightstand cover.

When I finished the first seam on his night stand cover I realized that I was assembling the piece differently than I had intended. I was putting together the dark and light sides. This would have resulted in an interesting piece, but it was not what I had done for the nightstand cover for my own side of the bed. There I had pointed the dark portions toward the center.  My error gave me an opportunity to get to know the seam ripper that came with my Janome Skyline S5.

Speaking of the Skyline, I was forced to learn how to fill a bobbin this week. I was also forced to learn how to thread the machine. I had not needed to learn either of those skills previously because my demo unit came with a spool of thread pre threaded, and two filled bobbins.

My beloved cat, Lori, has kept me company a good deal of the time that I have been working on these log cabin units. I have been sewing standing up in my kitchen while I am using my machine. Lori likes to hang out near the back door in the kitchen.

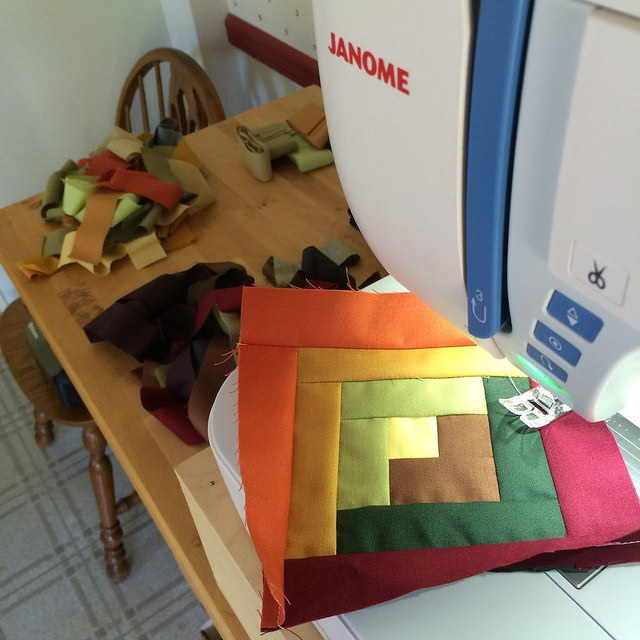
Here is a bit of perspective on the height at which I am working with my machine boosted with a wooden unit on top of a counter height table. I’m not using the foot pedal when I sew. While I found it odd at first to be sewing at a consistent speed all the time, I got used to it quickly. I like it now. I keep the speed fairly slow.
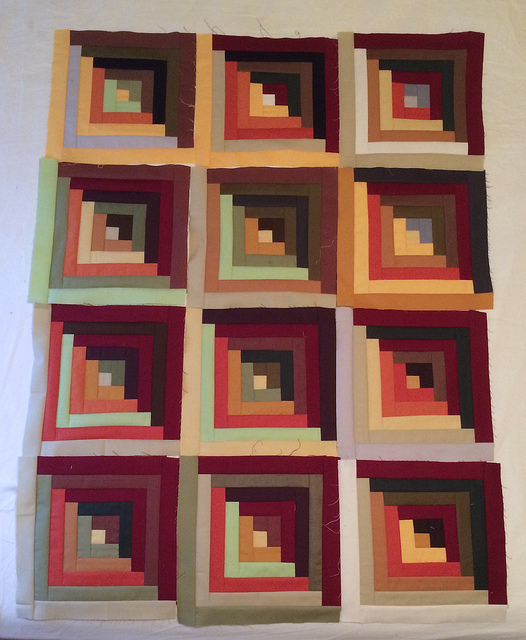
I’ve accumulated twelve units for the Kona Log Cabin Quilt at this point and am beginning to think of how I might like to arrange them.

I will be trying some other arrangements before I settle in on the final layout.

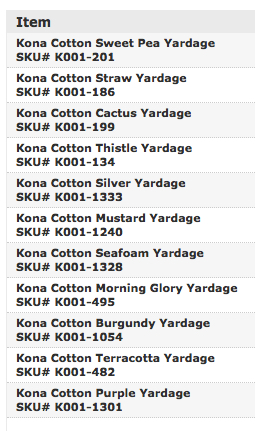
I decided to purchase some additional kona solids to continue my work on this quilt.

The least amount of yardage you can order from The Fat Quarter Shop is a half yard, so I ordered half yard pieces of each of these except for the burgundy I need for my Batik Flower Garden Quilt. I ordered three yards of that.

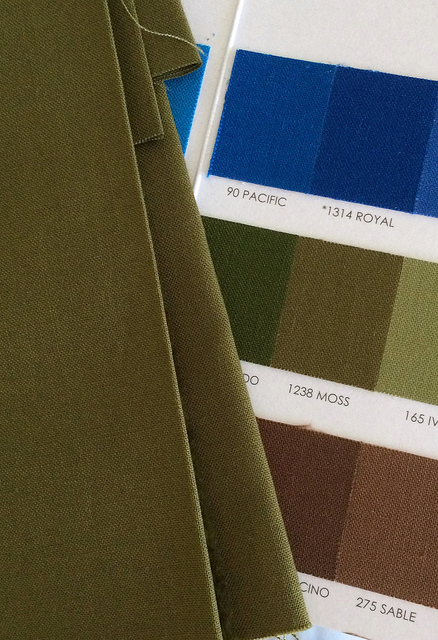
I am looking forward to the arrival of these fabrics. When I get them I am thinking it might be a good idea to cut sample pieces of each fabric and to label them with the name of the fabric. That way it will be easier to identify the names when I want to order more of something in the future. It has been my experience that it is not that easy to match up a fabric with the tiny samples on the Kona Sample Card.

Maybe this is Kona Moss. Maybe it isn’t. It’s hard to tell. It would be nice if I had a sizable piece of labeled fabric  to compare it to instead of a dinky little postage stamp sized piece of fabric on a sample card.

I am enjoying very much doing my log cabin work, and I anticipate needing between 72 and 90 blocks depending on how I choose to trim them, and how large I want the quilt to be. That is math I will save for a future post.

Share this:

  • Email
  • Facebook
  • Twitter
  • Pocket

Subscribe to Blog via Email

Enter your email address to subscribe to this blog and receive notifications of new posts by email.

Join 41 other subscribers

Recent Posts

  • Not Sure if I Want To Blog Anymore
  • Annoyed With Bluehost
  • Pandemic Still Life
  • Staying with Bluehost
  • Farmer’s Wife Friday: Week 20

Recent Comments

  • AmandaEcobiab on Not Sure if I Want To Blog Anymore
  • Wynne.price, nz on Not Sure if I Want To Blog Anymore
  • Visionhuq on CJMQG Fall Retreat
  • Deidre Jenkins on Annoyed With Bluehost
  • Wynne on Annoyed With Bluehost

Archives

  • December 2024
  • June 2023
  • June 2020
  • January 2019
  • December 2018
  • November 2018
  • October 2018
  • September 2018
  • August 2018
  • August 2017
  • May 2017
  • April 2017
  • March 2017
  • January 2017
  • November 2016
  • October 2016
  • September 2016
  • August 2016
  • July 2016
  • June 2016
  • May 2016
  • April 2016
  • March 2016
  • February 2016
  • January 2016
  • December 2015
  • November 2015
  • October 2015
  • September 2015
  • August 2015
  • July 2015
  • June 2015
  • May 2015
  • April 2015
  • March 2015
  • February 2015
  • January 2015
  • December 2014
  • November 2014
  • October 2014
  • September 2014
  • August 2014
  • July 2014
  • June 2014
  • May 2014
  • April 2014
  • March 2014
  • February 2014
  • January 2014
  • December 2013
  • September 2013
  • August 2013

Categories

  • UFO
  • Uncategorized

Proudly powered by WordPress Theme: Chateau by Ignacio Ricci.