
When I bought my Janome Skyline S5 at the Slow Stitching Movement Retreat it came with a free class at Pocono Sew and Vac. Today I went for my class to learn how to use my Janome Skyline S5. I have been doing very simple sewing with it for about three months now. I’ve learned how to thread the machine, fill bobbins, and use the A foot. But that is it. I was assuming that using the A foot was giving me a 1/4 inch seam. I was wrong about that, but more on that later.
It also turns out that I wasn’t filling the bobbins properly, but I kind of suspected that all along. Sometimes it takes more than reading the fine manual to learn how to operate an advanced piece of equipment. That’s where Heather comes in. Heather was my instructor today at Pocono Sew and Vac, and she was fantastic. She had four students with four different machines. There was a woman with a Janome 3600, and there were two women with rather advanced Elna machines. Heather made sure that everyone was taken care of, and she covered all of the basics including quilting with the walking foot. She also covered free motion quilting with the darning foot. Those were the two things I was most interested in learning, and they came at the end of the class.
I arrived early and set up my machine. The other three ladies arrived shortly after that, and we chatted a bit before Heather got there. I gave out my business cards because I am always looking to build traffic to my blog, so I hope they find there way here. Before Heather got us started I remembered that I was supposed to have a bright color of thread for the class. I have no bright thread, so I searched the store and found a neon pink. Bright enough for you?
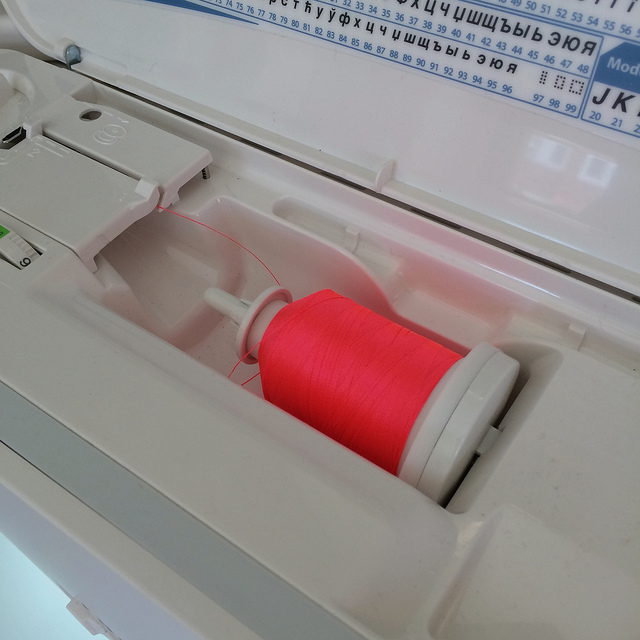
I had no idea that the fabric we were going to be using in the class would be a pink print. It was just lucky I guess that my thread coordinated with it.
I started off by explaining to Heather that I thought there was something wrong with my bobbin filling technique. I described my results as having the thread kind of “bunch up”. She watched me thread the machine to fill the bobbin and pointed out that I was missing going around one little metal part. It made all the difference. I would not have figured that out on my own.
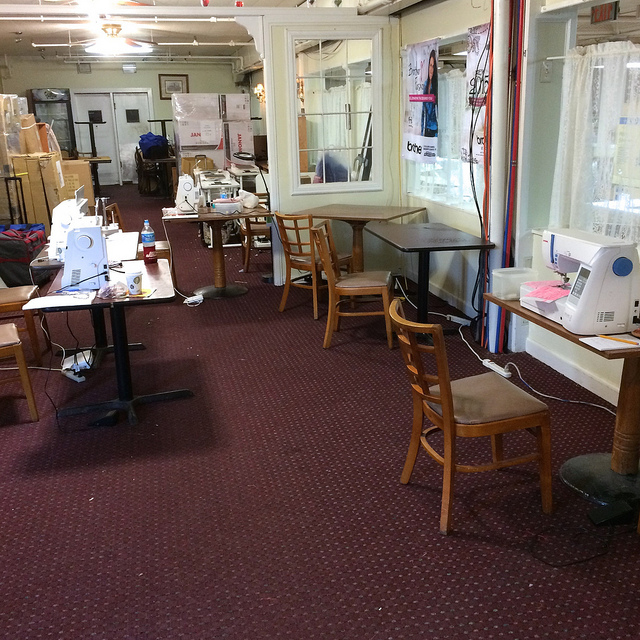
Pocono Sew and Vac is temporarily located across the street from their usual location due to renovations. They will be returning soon to their regular location. Here is a photograph of our four machines set up for the class. I took this photo during the break. My machine is located on the right.
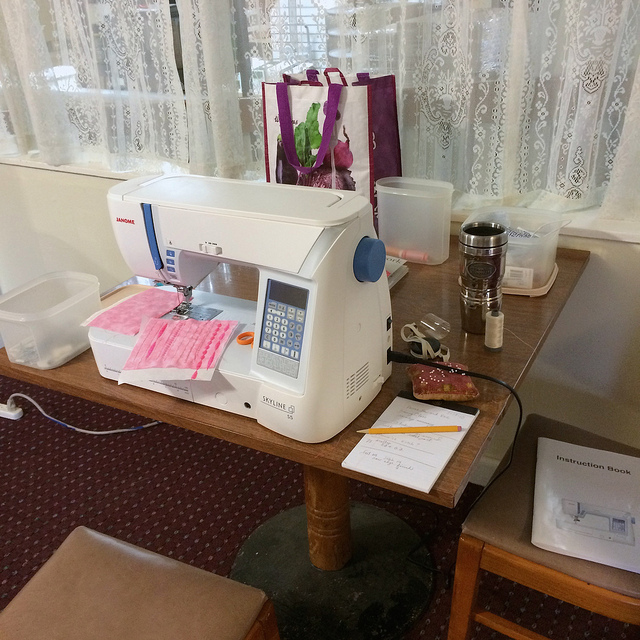
Here is a closeup of my work area. You can see that I was very busy during the first half of the class.
We started off by talking about the importance of using the right bobbins, and good thread. We also talked about some of the settings we could change. I learned that it is a good idea to start off a row of stitches with a medium speed to avoid tangling of the corners. This was something good to know, so I changed that basic setting.
After looking at settings we got started with basic stitches. We learned how to change modes and choose stitches. Heather went from machine to machine to be sure that each person knew how to accomplish every step on their machine. Here is a close up of some of my work from the first half of class.
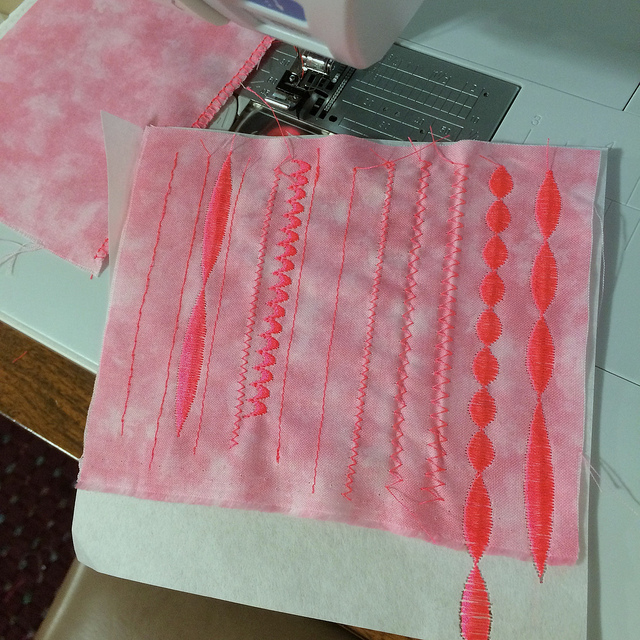
We learned how to modify existing stitches. I was particularly pleased with how I customized the standard scallop stitch, and even wrote down the details so I could reproduce it later. It is the 6th row from the left.
I learned how to make a button hole. I doubt that I will ever make one on a garment, but it was nice to try.
I also learned how to work with text. This may come in handy for quilt labels, but it seems rather laborious to produce them this way since each letter has to be coded, and my machine can’t save the line of text in memory. The women with the Elna machines could save things to memory.
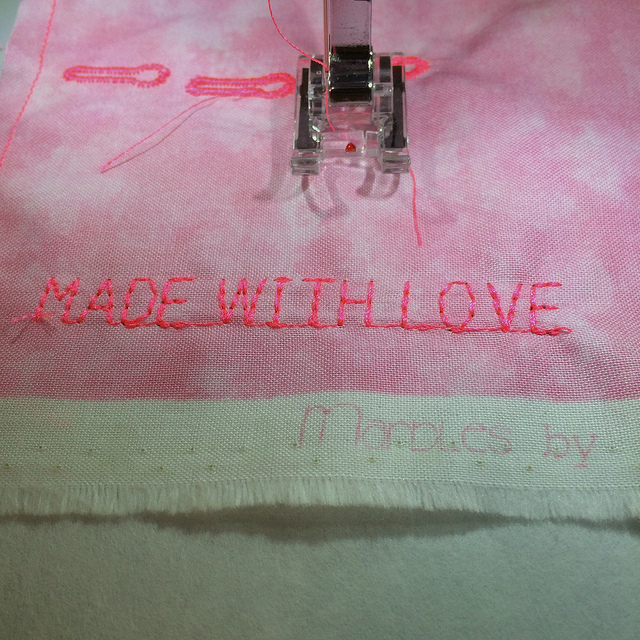
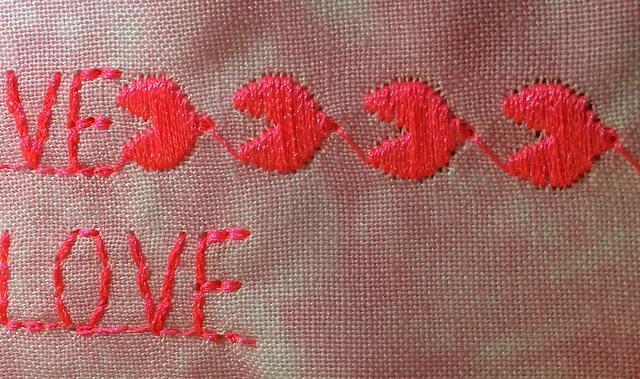
Heather showed us how to add decorative touches along with our text, and I chose to add some hearts. However, given the direction of the hearts they ended up looking more like Pac Men.
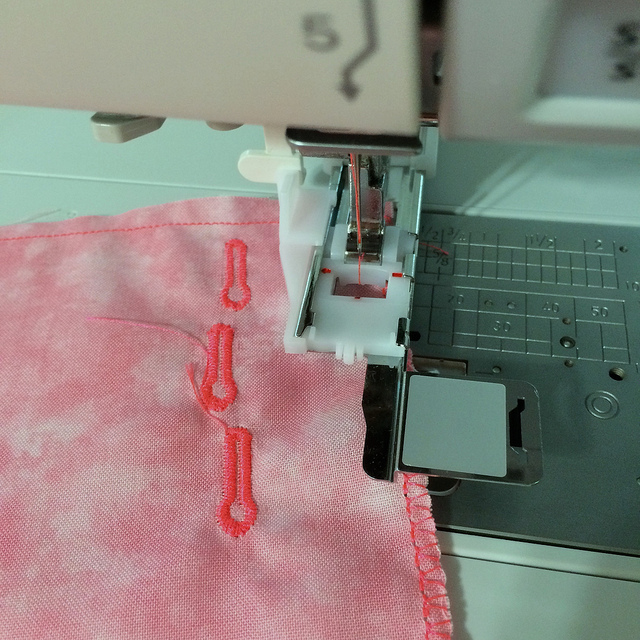
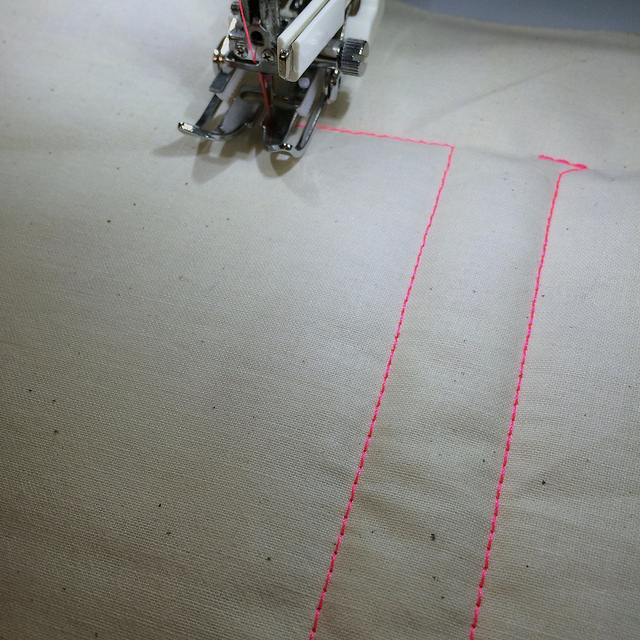
One of the things I was very pleased to learn was how to use the foot designed for piecing 1/4 inch seams. It has a little metal plate along the right side of the foot. You rest the edge of the fabric against that little plate when you stitch your seam, and it keeps the seam at a consistent distance from the edge of the fabric.
It does make a perfect 1/4 inch seam.
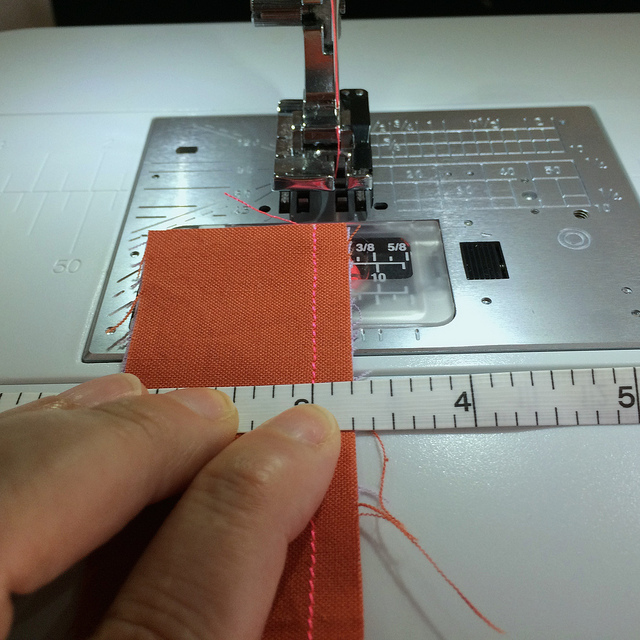
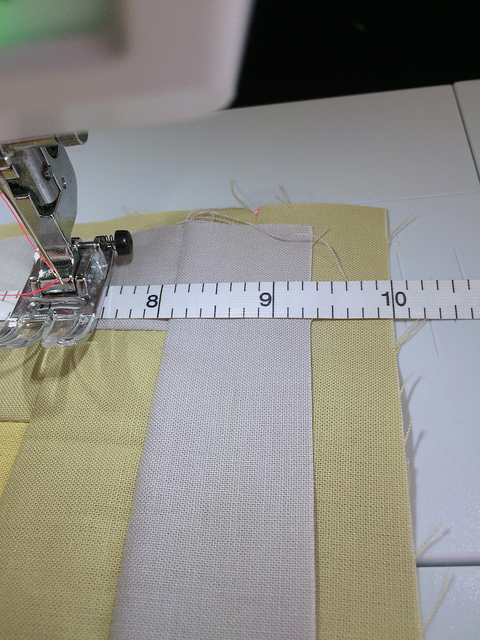
Seeing this lead me to question how the log cabin blocks I made with the A foot might measure up against blocks made using the 1/4 inch foot. When I got home I made a block using the 1/4 inch foot with my neon pink thread no less.
When I hold it up against one of my preciously stitched log cabin blocks you can see that the block made with the 1/4 inch foot is larger than one made with the A foot by more than 1/2 inch in at least one dimension.
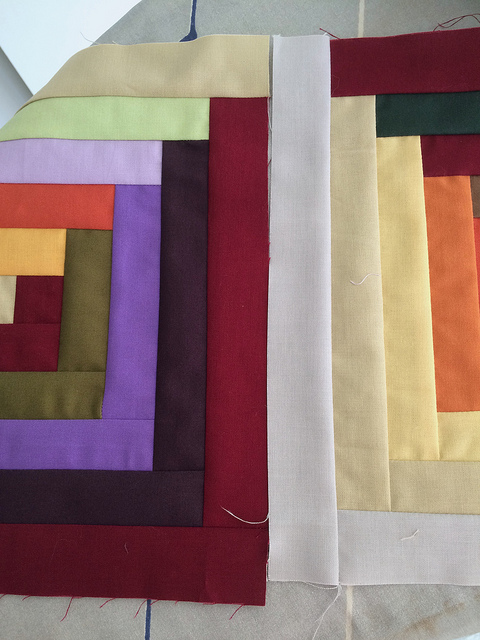
I had obviously been making seams larger than 1/4 inch with my A foot. That error was compounding over the course of adding five rounds of light strips and five rounds of dark strips to each block. Because I want to be consistent I will finish the log cabin work on the current project using the A foot, but moving forward I will be using the 1/4 inch foot for piecing of future projects.
But let’s get back to what happened in the class. In the last hour of the class we got to the things I was most interested in learning. I wanted to know how to attach and use the Walking Foot and the Darning Foot. I had read the manual, but I was confused. Heather made it easy.
We used the Walking foot with the regular plate in place. Heather even showed me how to attach the guide to the walking foot. The guide can only be attached to the right side of the foot, which is a shame because I can see how it might be nice to use it on the left side sometimes.
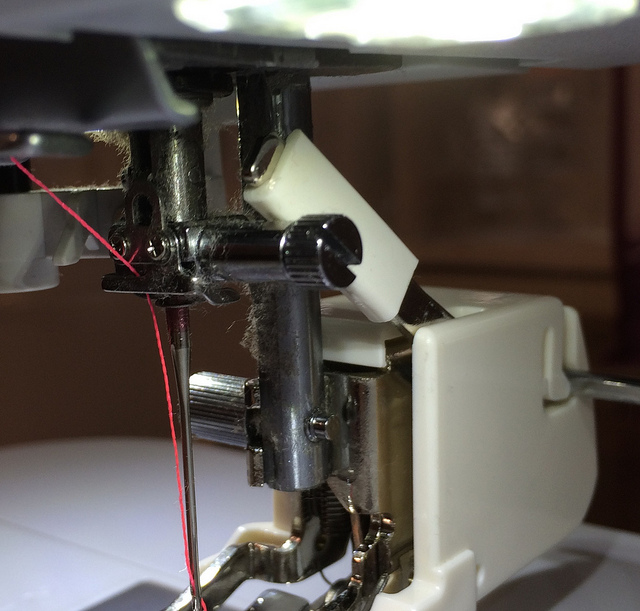
I took this photograph to remind me that the little lever on the right side of the foot has to be pushed up when you attach the foot.
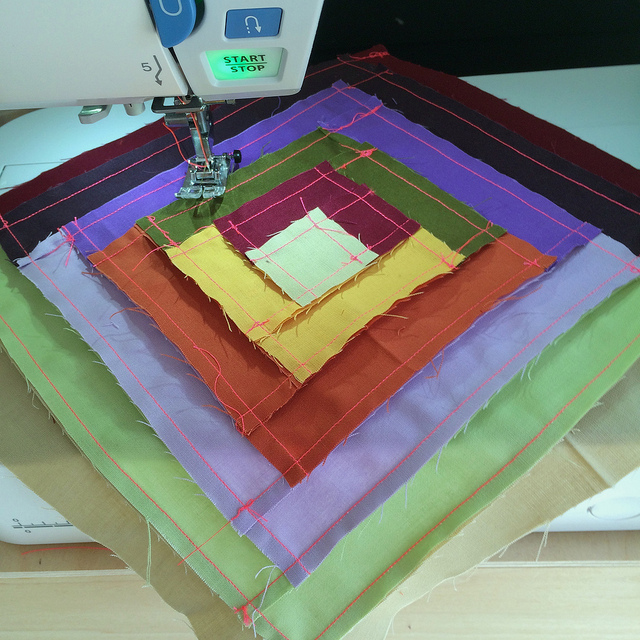
After we were done with the walking foot we changed to the straight plate and attached the darning foot for free motion quilting.
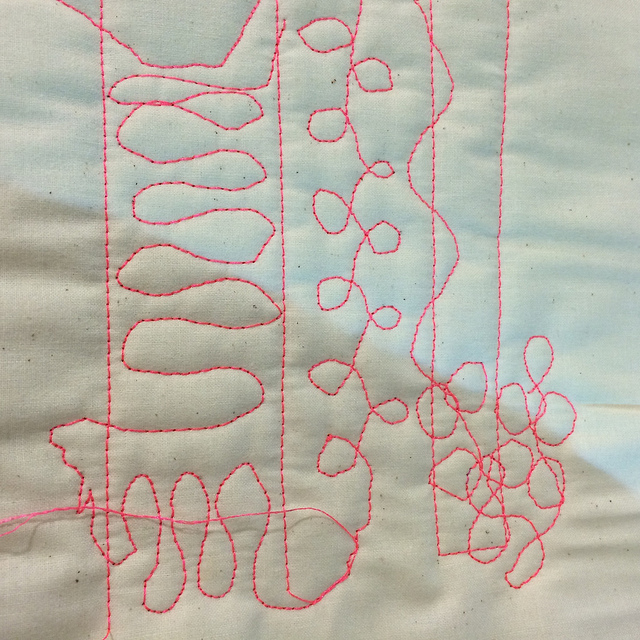
The straight lines were from the Walking Foot. Everything else is done with the darning foot with the feed dogs lowered.
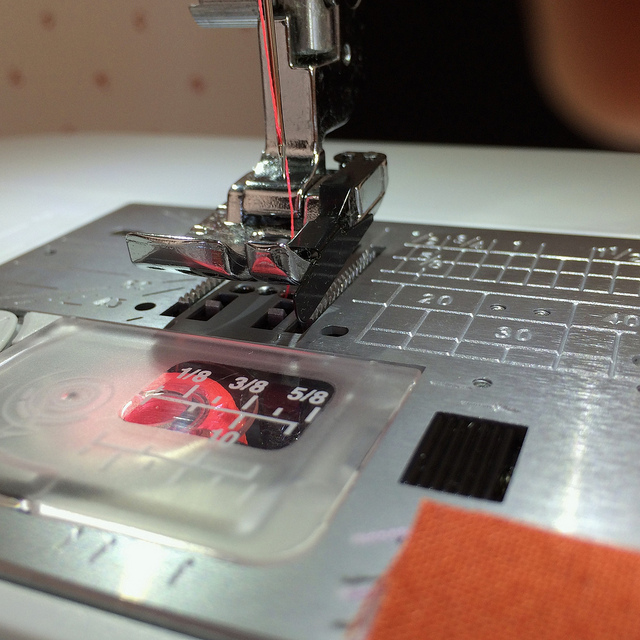
I decided to leave the Straight Plate in place because I can use the 1/4 inch foot with it, and I think I can use the Walking Foot too. The photo below shows the stitches available with the Straight Plate in the upper left of the picture.
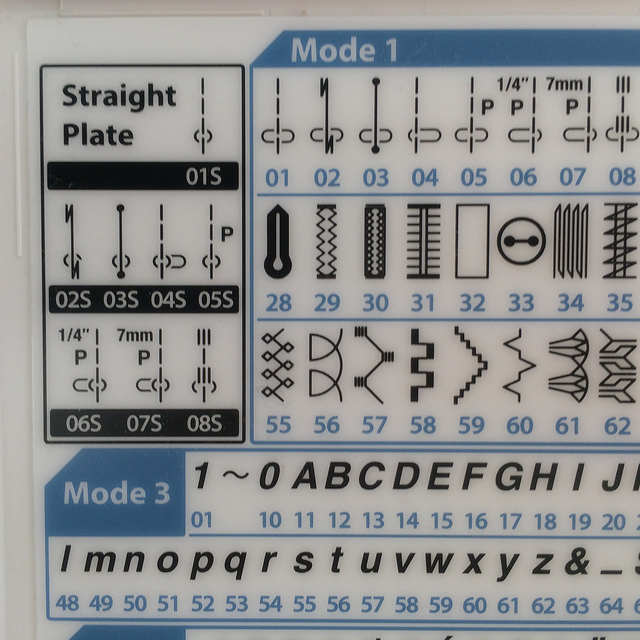
The quarter inch stitch is 06S. I think I can use 01S with the Walking Foot.
Before leaving I made sure that I gave Heather my business card and told her that I would be doing a blog post about the class. I hope she stops by to see it.
It was a fantastic class. I highly recommend Pocono Sew and Vac to anyone looking to purchase a new machine.
Pingback: Low Volume Quilt Progress: Post Seven | Hexy Lady
Hi. It’s Heather from Pocono Sew &Vac. I just read your nice blog about your experience at class.
Thank you for your compliments. I hope to see you again in the future. Happy sewing/quilting!
Thank you for stopping by the blog. I am hoping to get to the store again soon. It is an hour and three quarters away from where our house so it is a bit far to travel. My husband was good natured about taking me, but said he didn’t want to have to do it too often.
I just wanted to let you know that I had a little excitement with the machine today. It made some terrible noises and stopped working properly. I kept a level head and decided to clean it before I assumed the worst. I had been sewing with it for about three months and had not cleaned it yet. You saw how much lint there was on the outside, so I guess there was even more on the inside. I followed the instructions in the manual to disassemble and clean it. After cleaning it and putting it back together it worked just fine.
Hi Terri. I just read your blog post. They are all great people aren’t they. I’m from Jersey and when I moved to PA, they rekindled my love of sewing and embroidery. I’ve been sewing like crazy ever since. I have days where I can’t decide whether to quilt or to embroider.
I saw your comment about your walking foot. Did you try to move the walking foot and you not being able to move the guide to the other side. You should be able to slide it back and forth for various widths. If you can do that, I’ll be that if you slide it out all the way from the one side, you could insert it from the other side. This is how mine works on my old Brother machine.
Where in New Jersey did you live? I am right outside of Trenton near TCNJ.
About the walking foot guide… We did try attaching it from the other side. You can do that, but the problem is with the way the guide is constructed. If you have it on the right side where it belongs the guide floats a few inches in front of the needle. However, if you attach it on the left it will float a few inches behind the needle where it won’t be of much use in terms of navigating the piece in anticipation of stitching the area.
What is needed is a foot that goes off to the side and extends equally above and below the needle so it would be of use regardless of what side it is on.