More Solids

My second order of solids has arrived from the Fat Quarter Shop. I never fail to be in awe of how they package these so beautifully in the exact order as the pieces appear on the invoice.

For fear of disturbing this order I photographed the pieces in the bags in which they came. Then I photographed the piles without trying to fan them out for fear I would drop them and create chaos.

In anticipation of the receipt of this order I bought two bags of large clips to hold the labels in place on the yardage as I worked on the Farmer’s Wife Quilt. I also bought index cards to make short work of the labeling.

I’ve organized my new fabrics into groups representative of the color areas in the color wash plan. Here they are:

The fabrics above are just the new acquisitions. I’ll be combining them with the solids from the first set I purchased to form the complete groups for each color area. I might need to do some additional supplementation for some of the color areas. However, as I did last time, I will want to take a bit of time to gain aesthetic distance before purchasing more fabric.

I started a thread over in the 1920s Facebook Group to see if I could get others who are using solids to come forward. A few did. I came up with a cool hashtag which I will be using when I post there to make it easy to find my work and the work of others who might be inspired to use the hashtag. It is #SOLIDarity .

#SOLIDarity

Farmer’s Wife Friday: Week Two

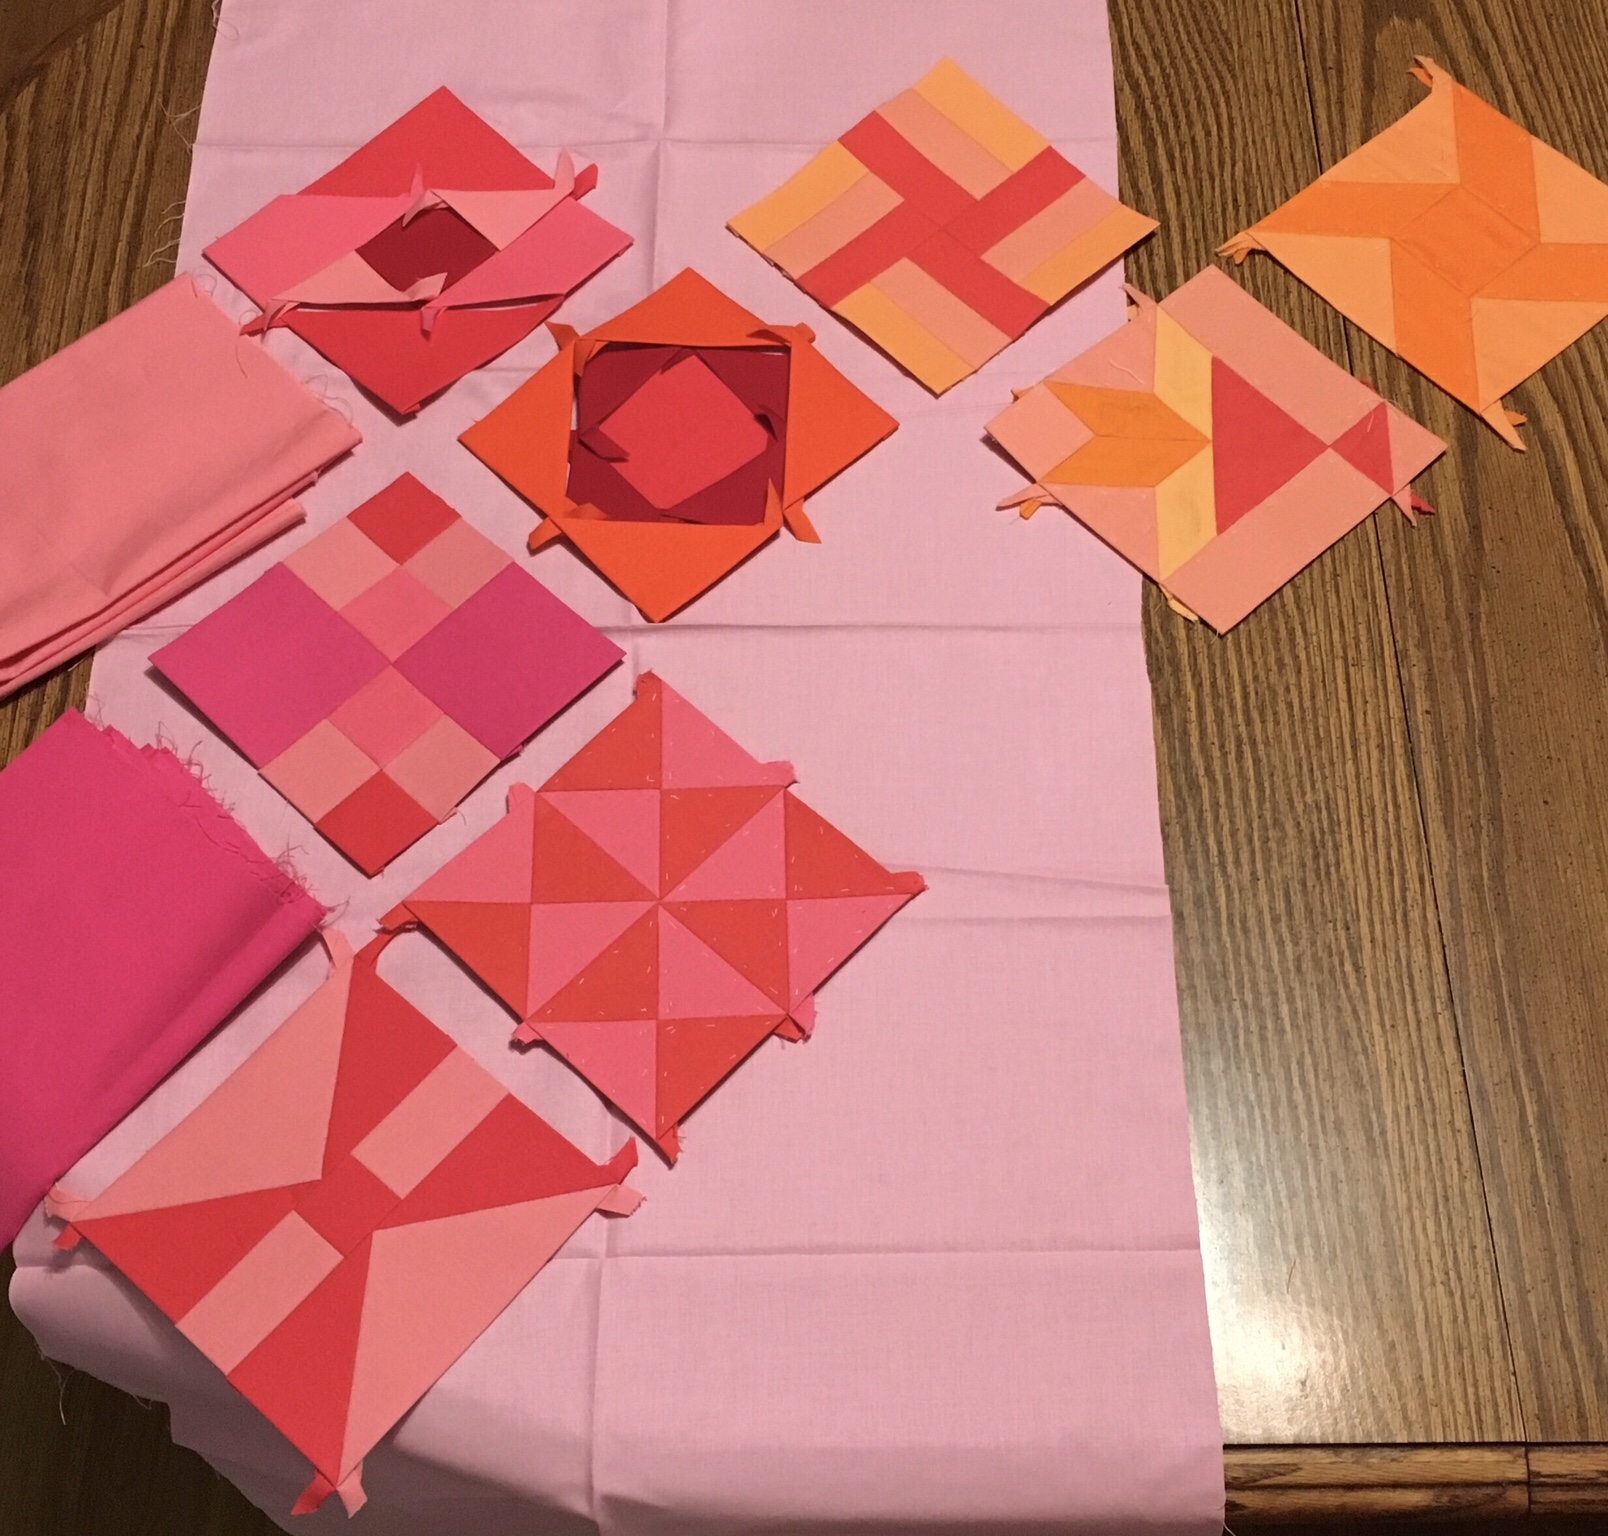
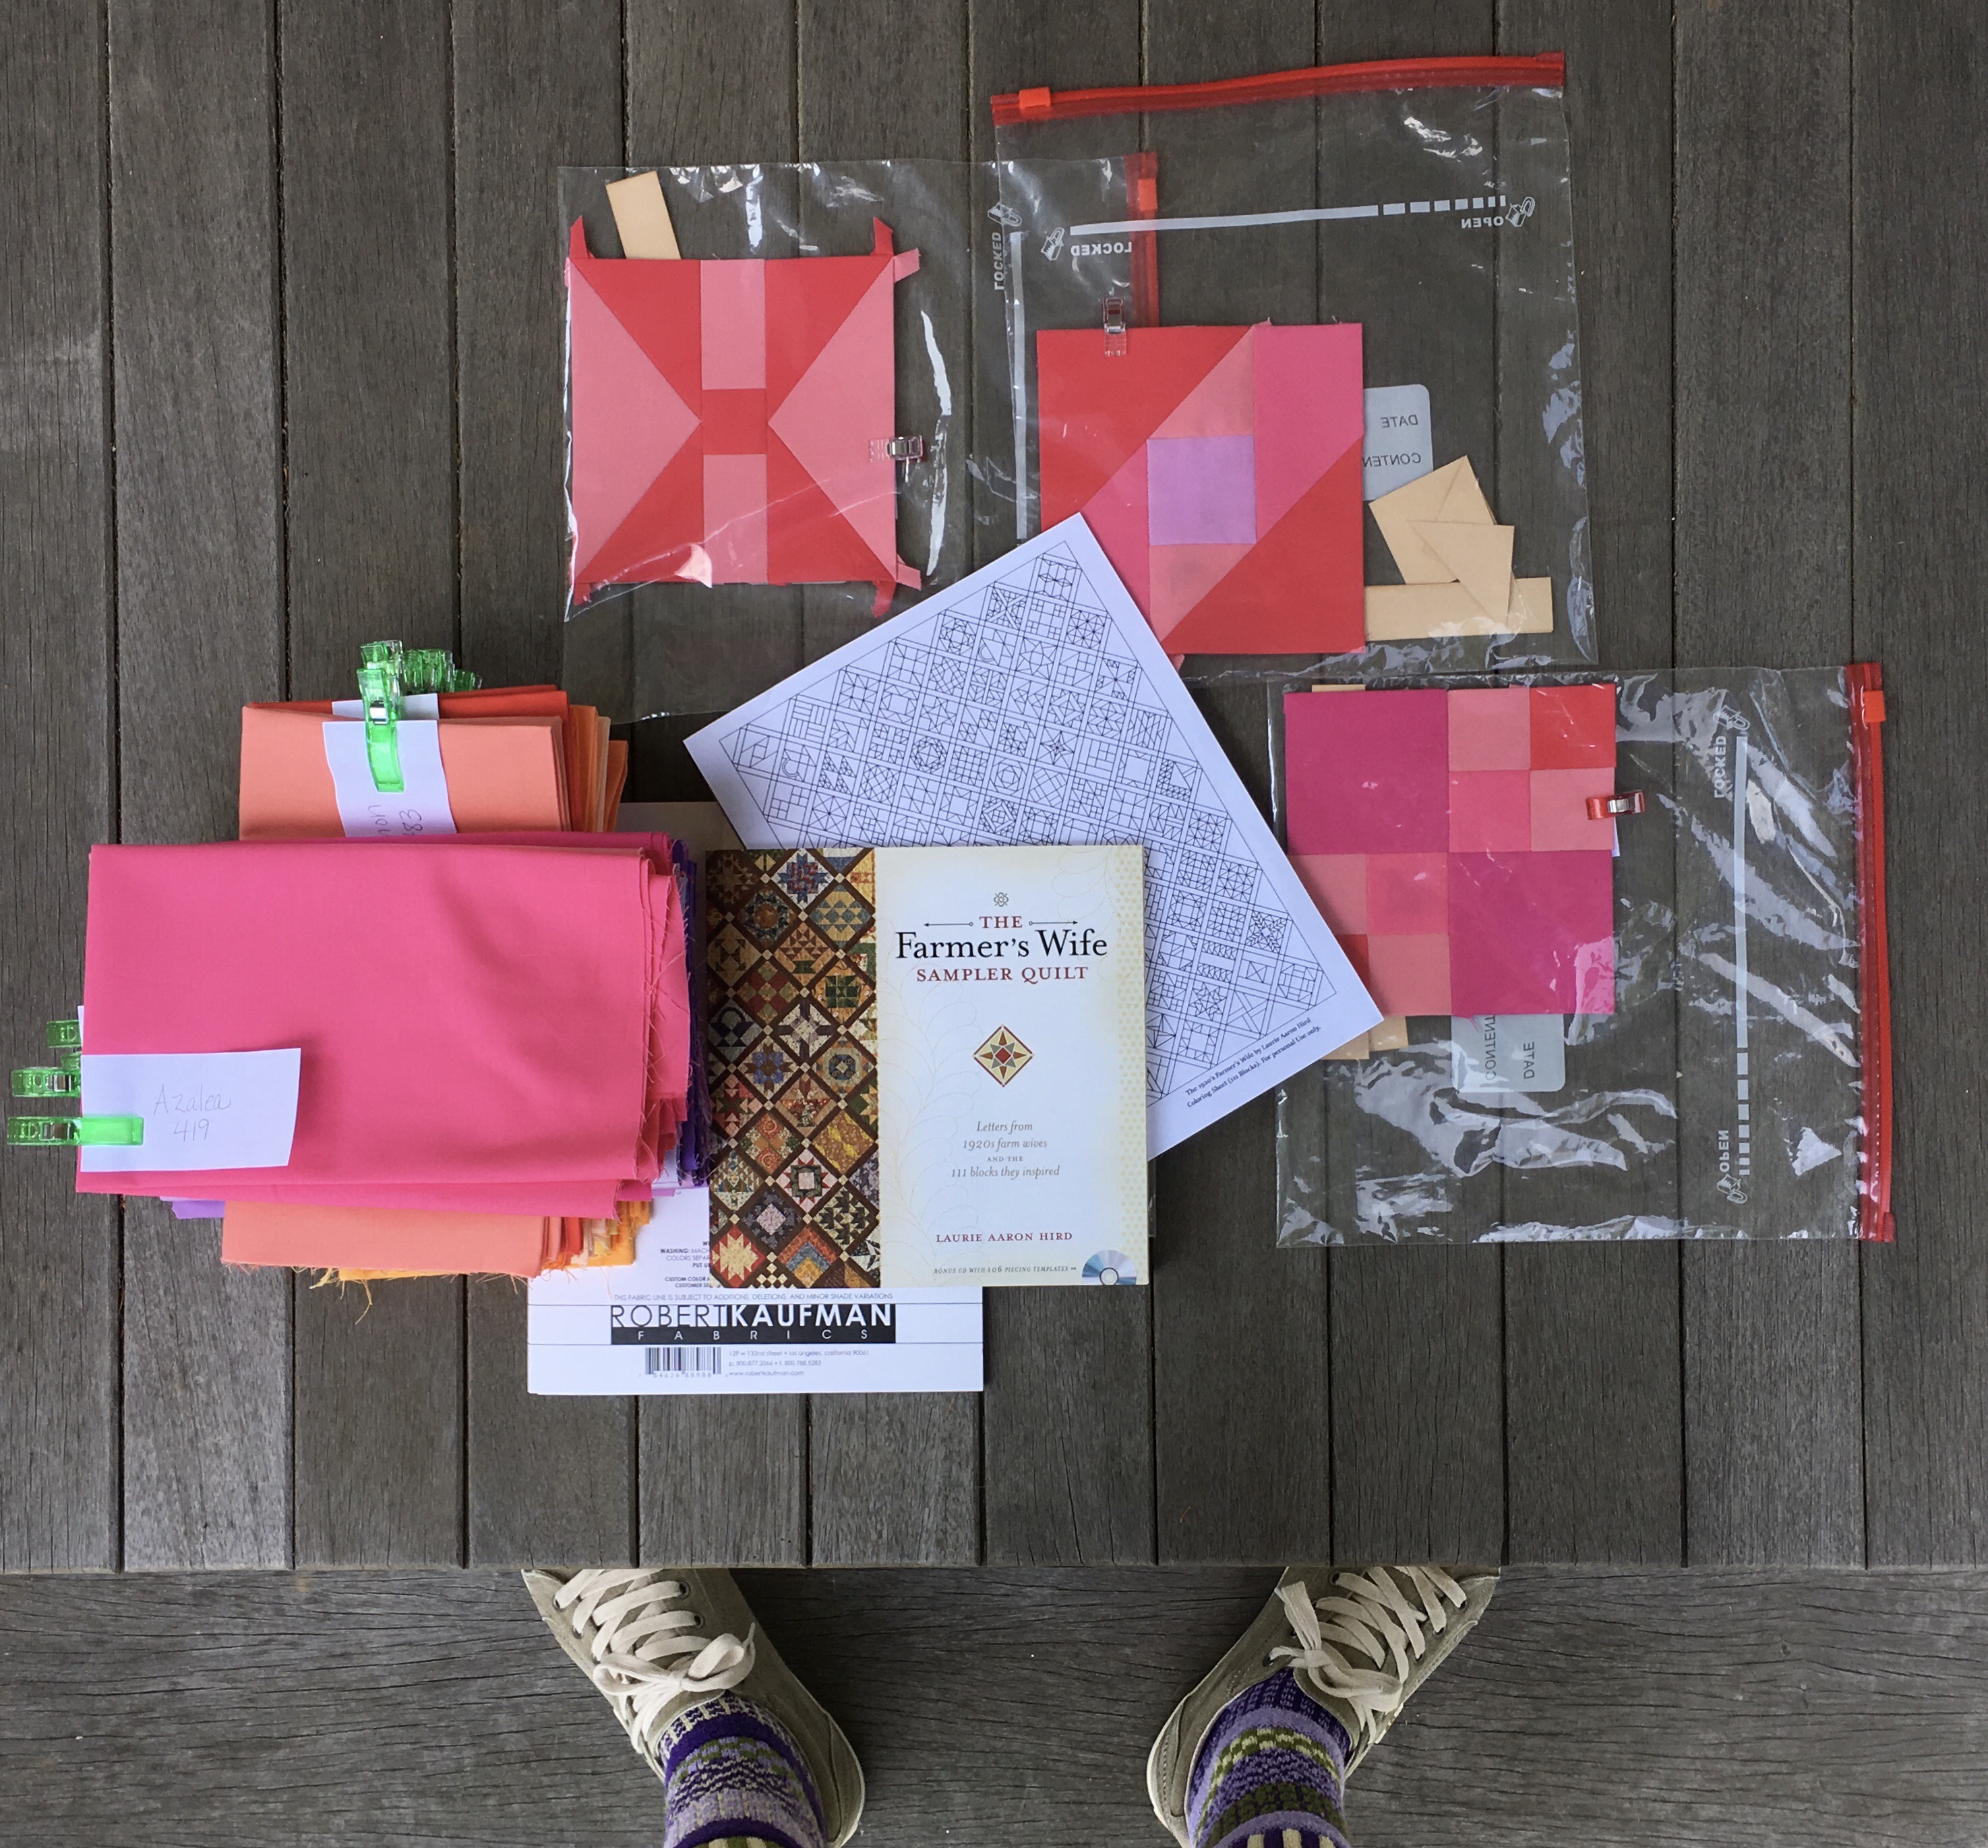
It is the end of the second week of work on the EPP version of the Farmer’s Wife Quilt. I have five new blocks to display along with a couple of remade blocks. This puts me six blocks ahead of schedule.

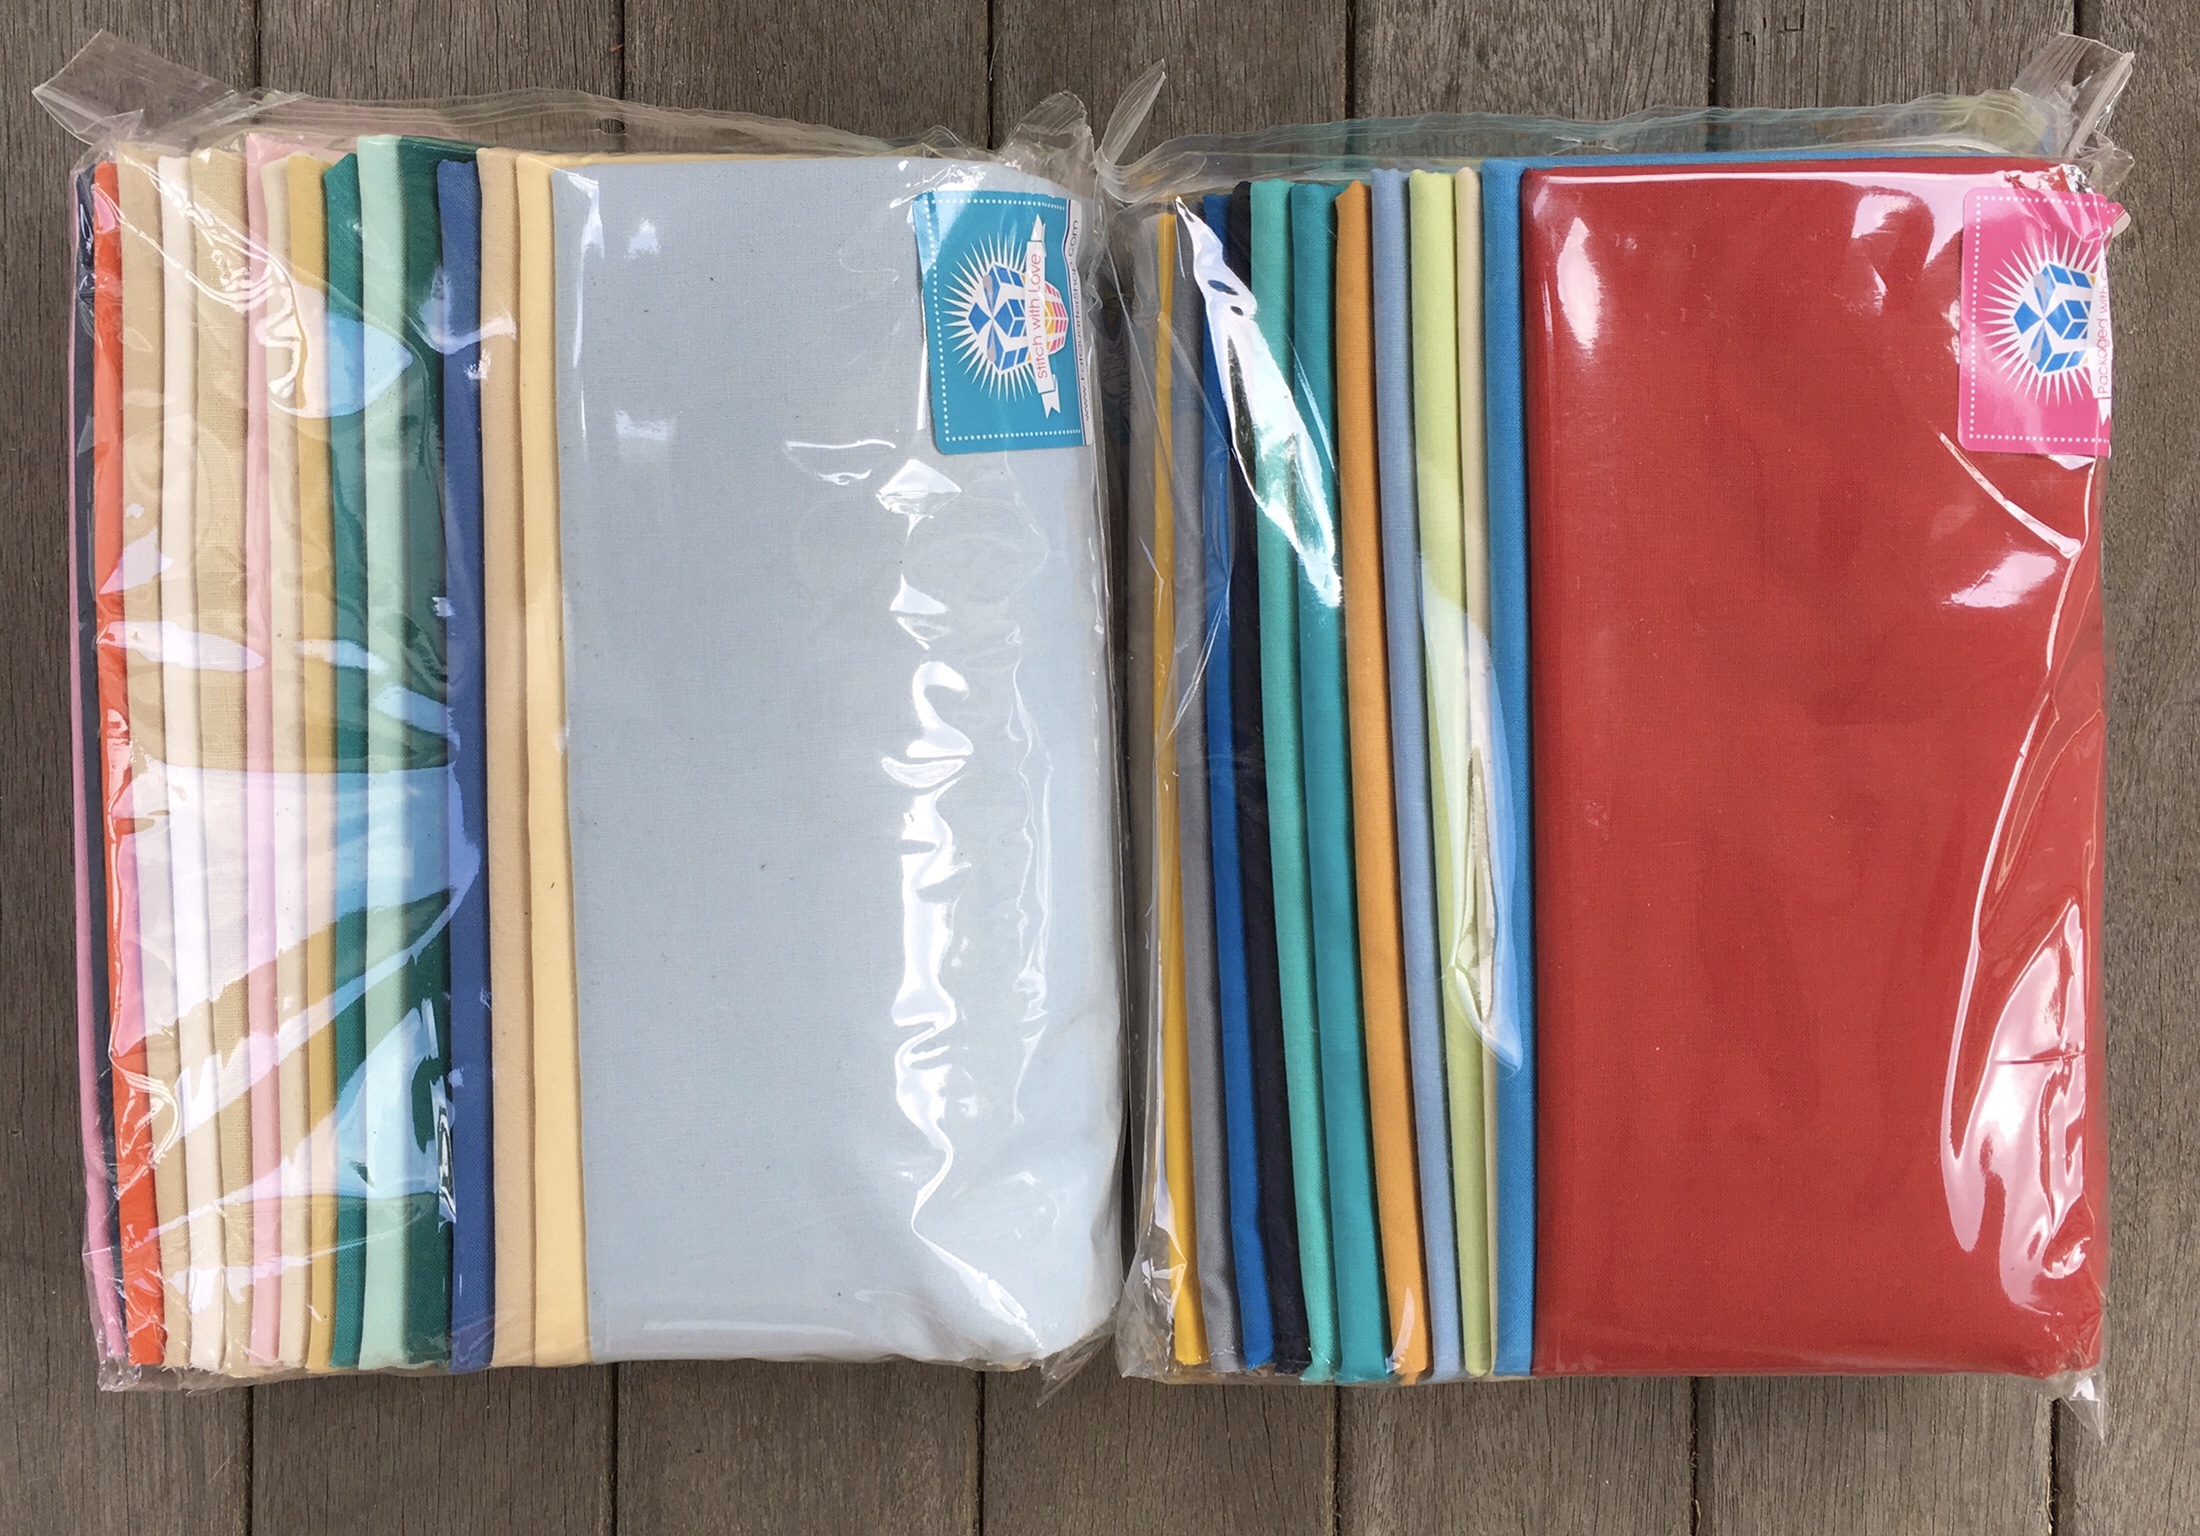
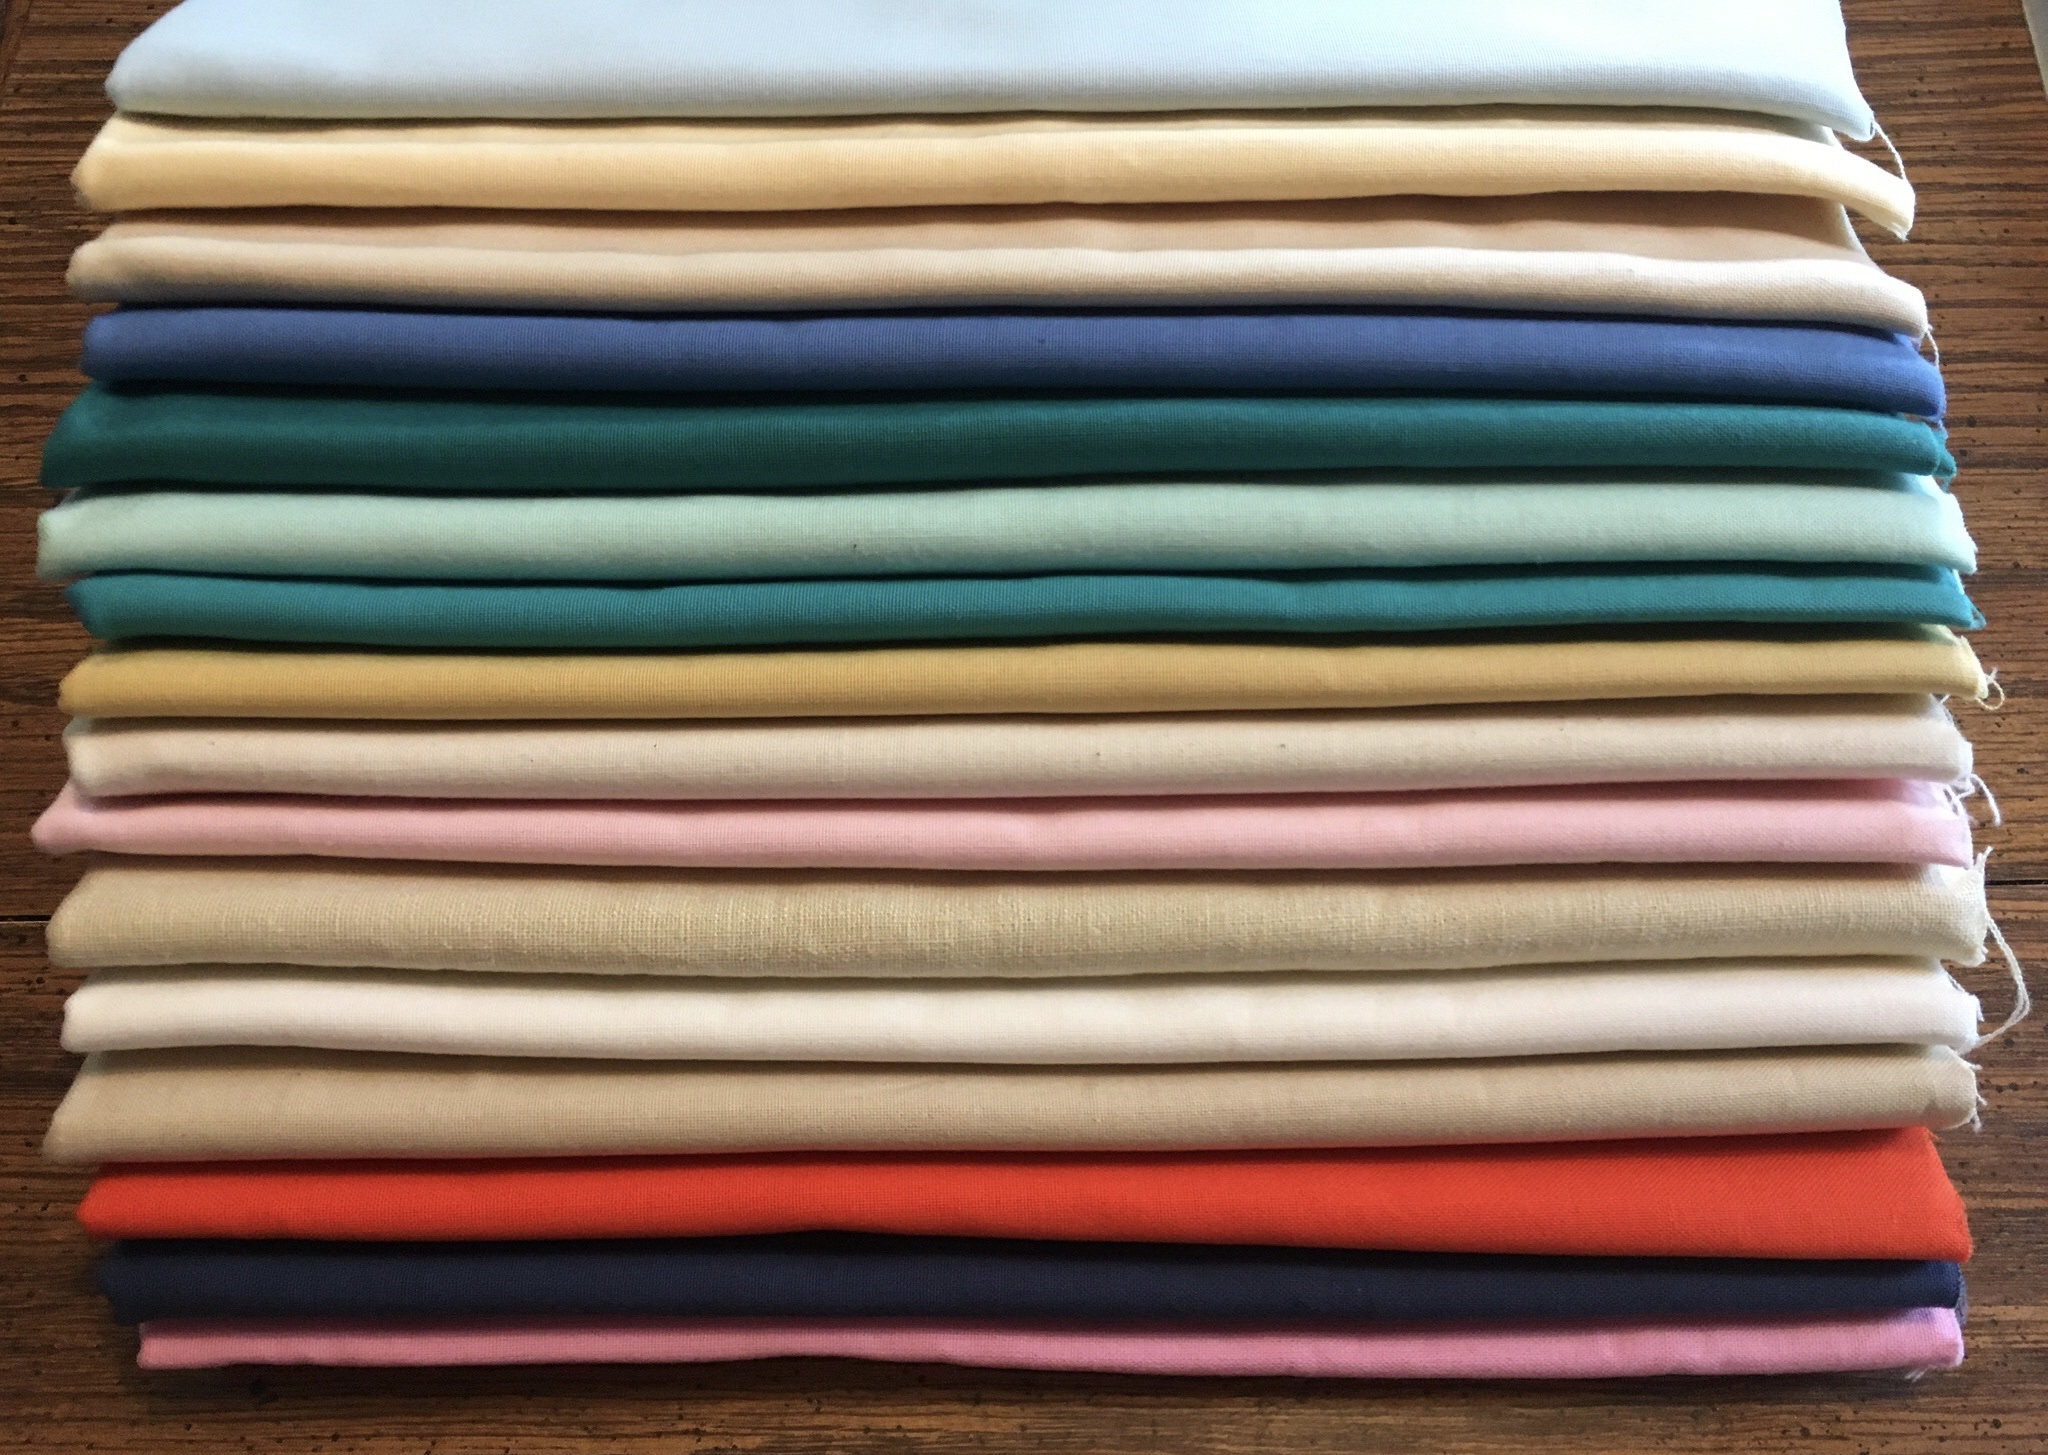
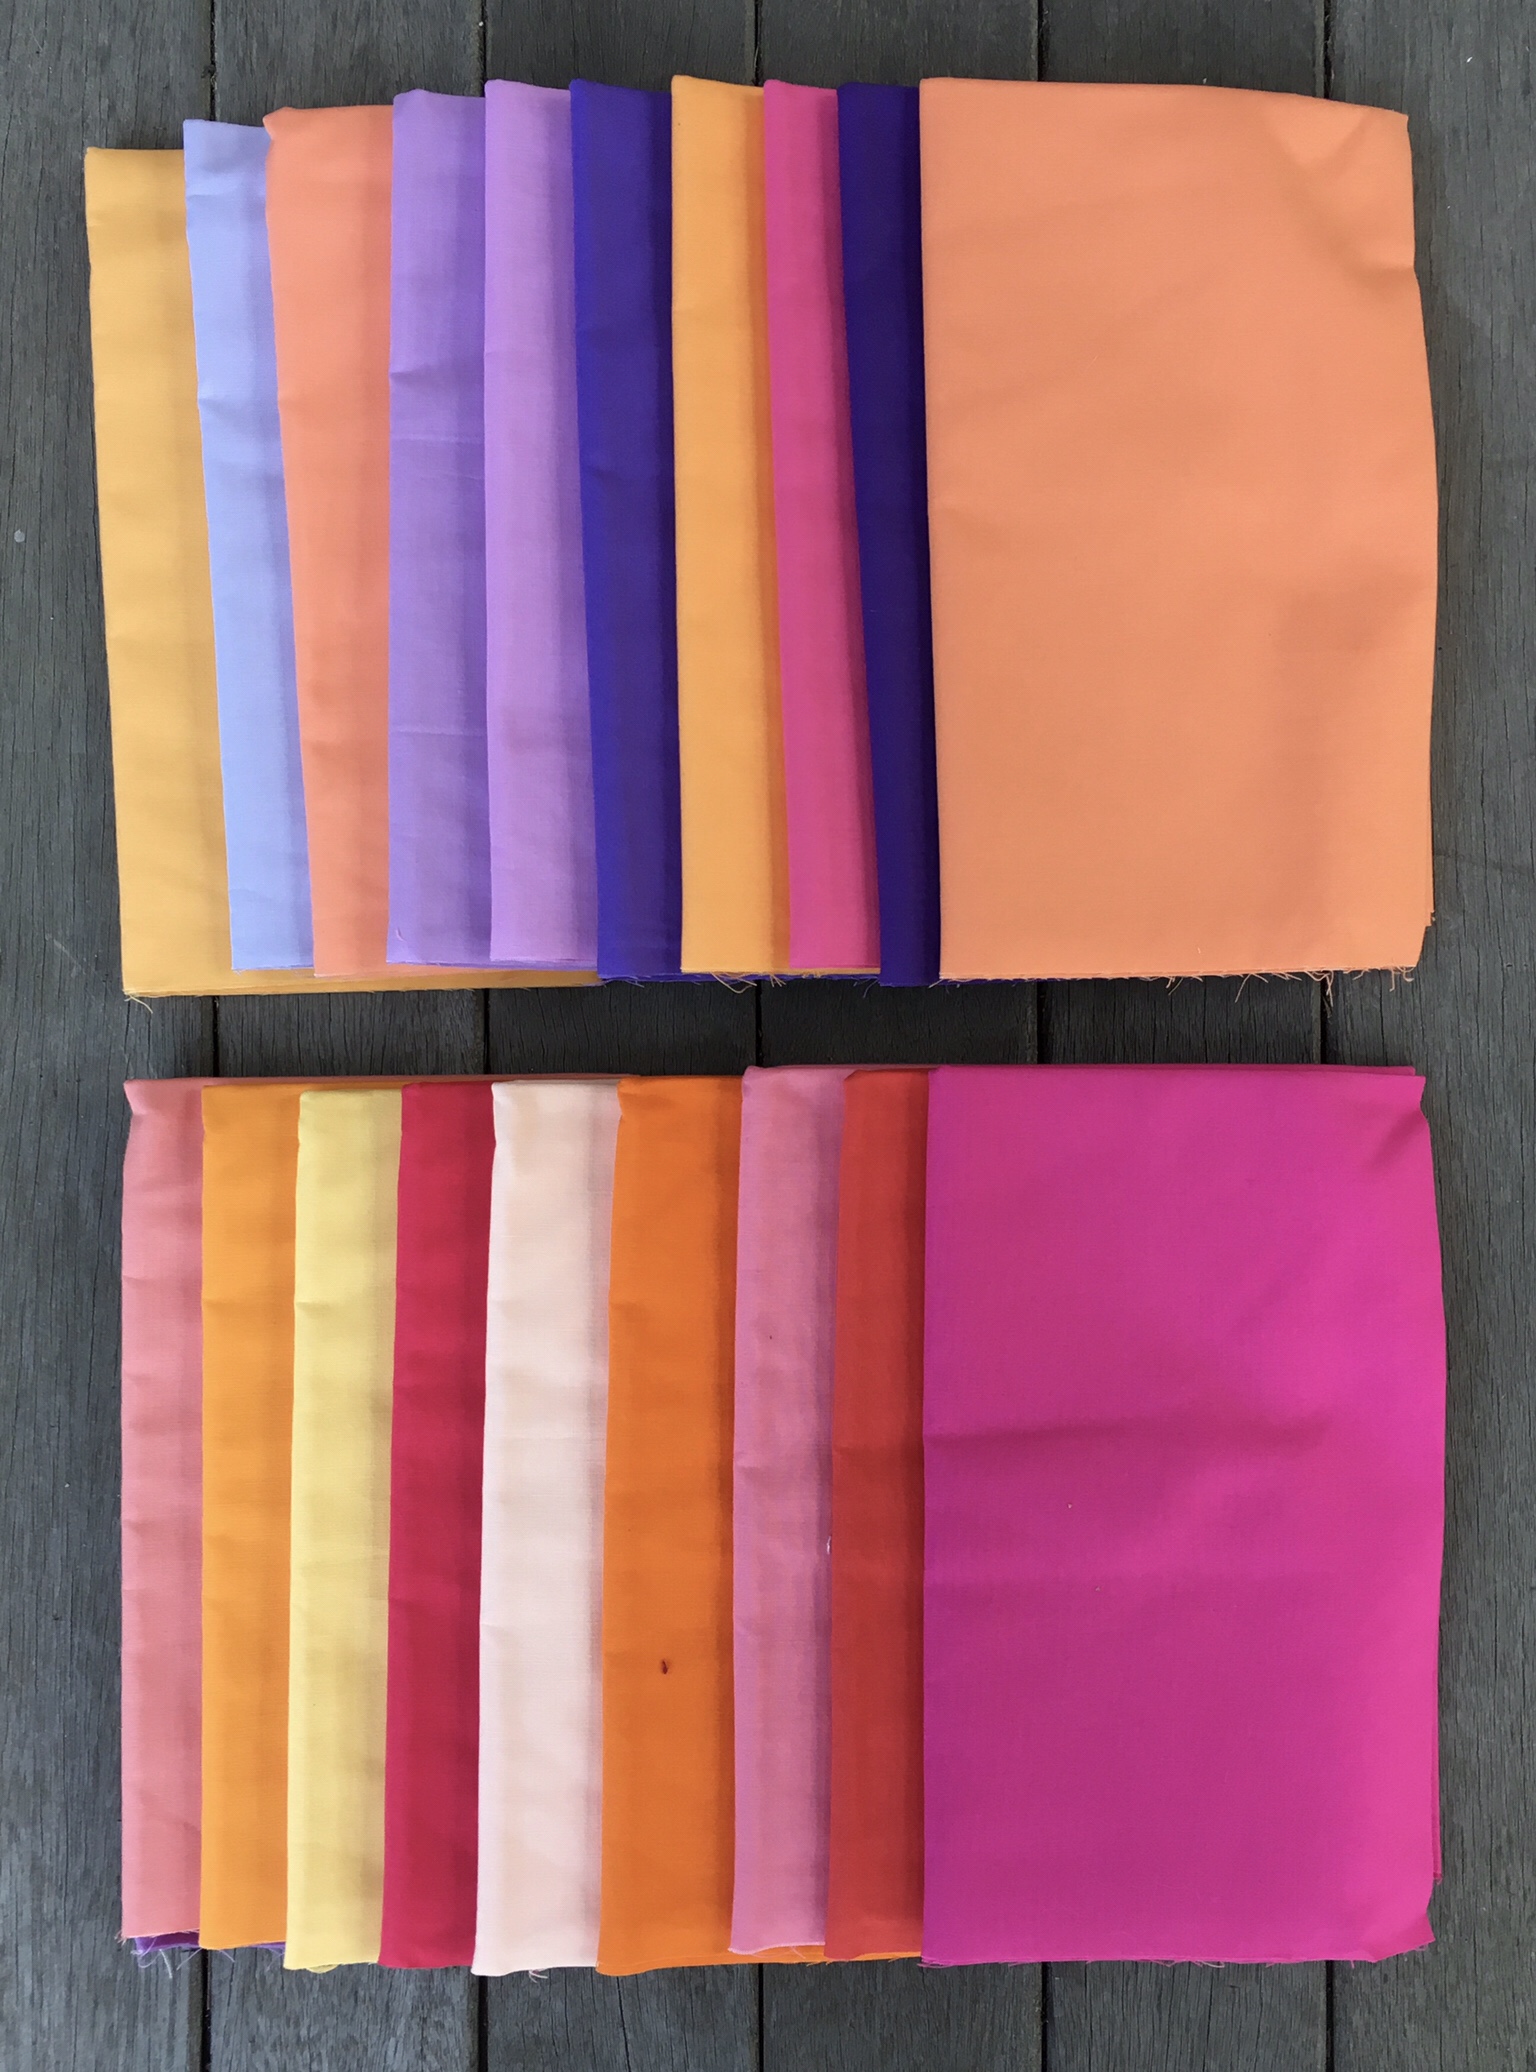
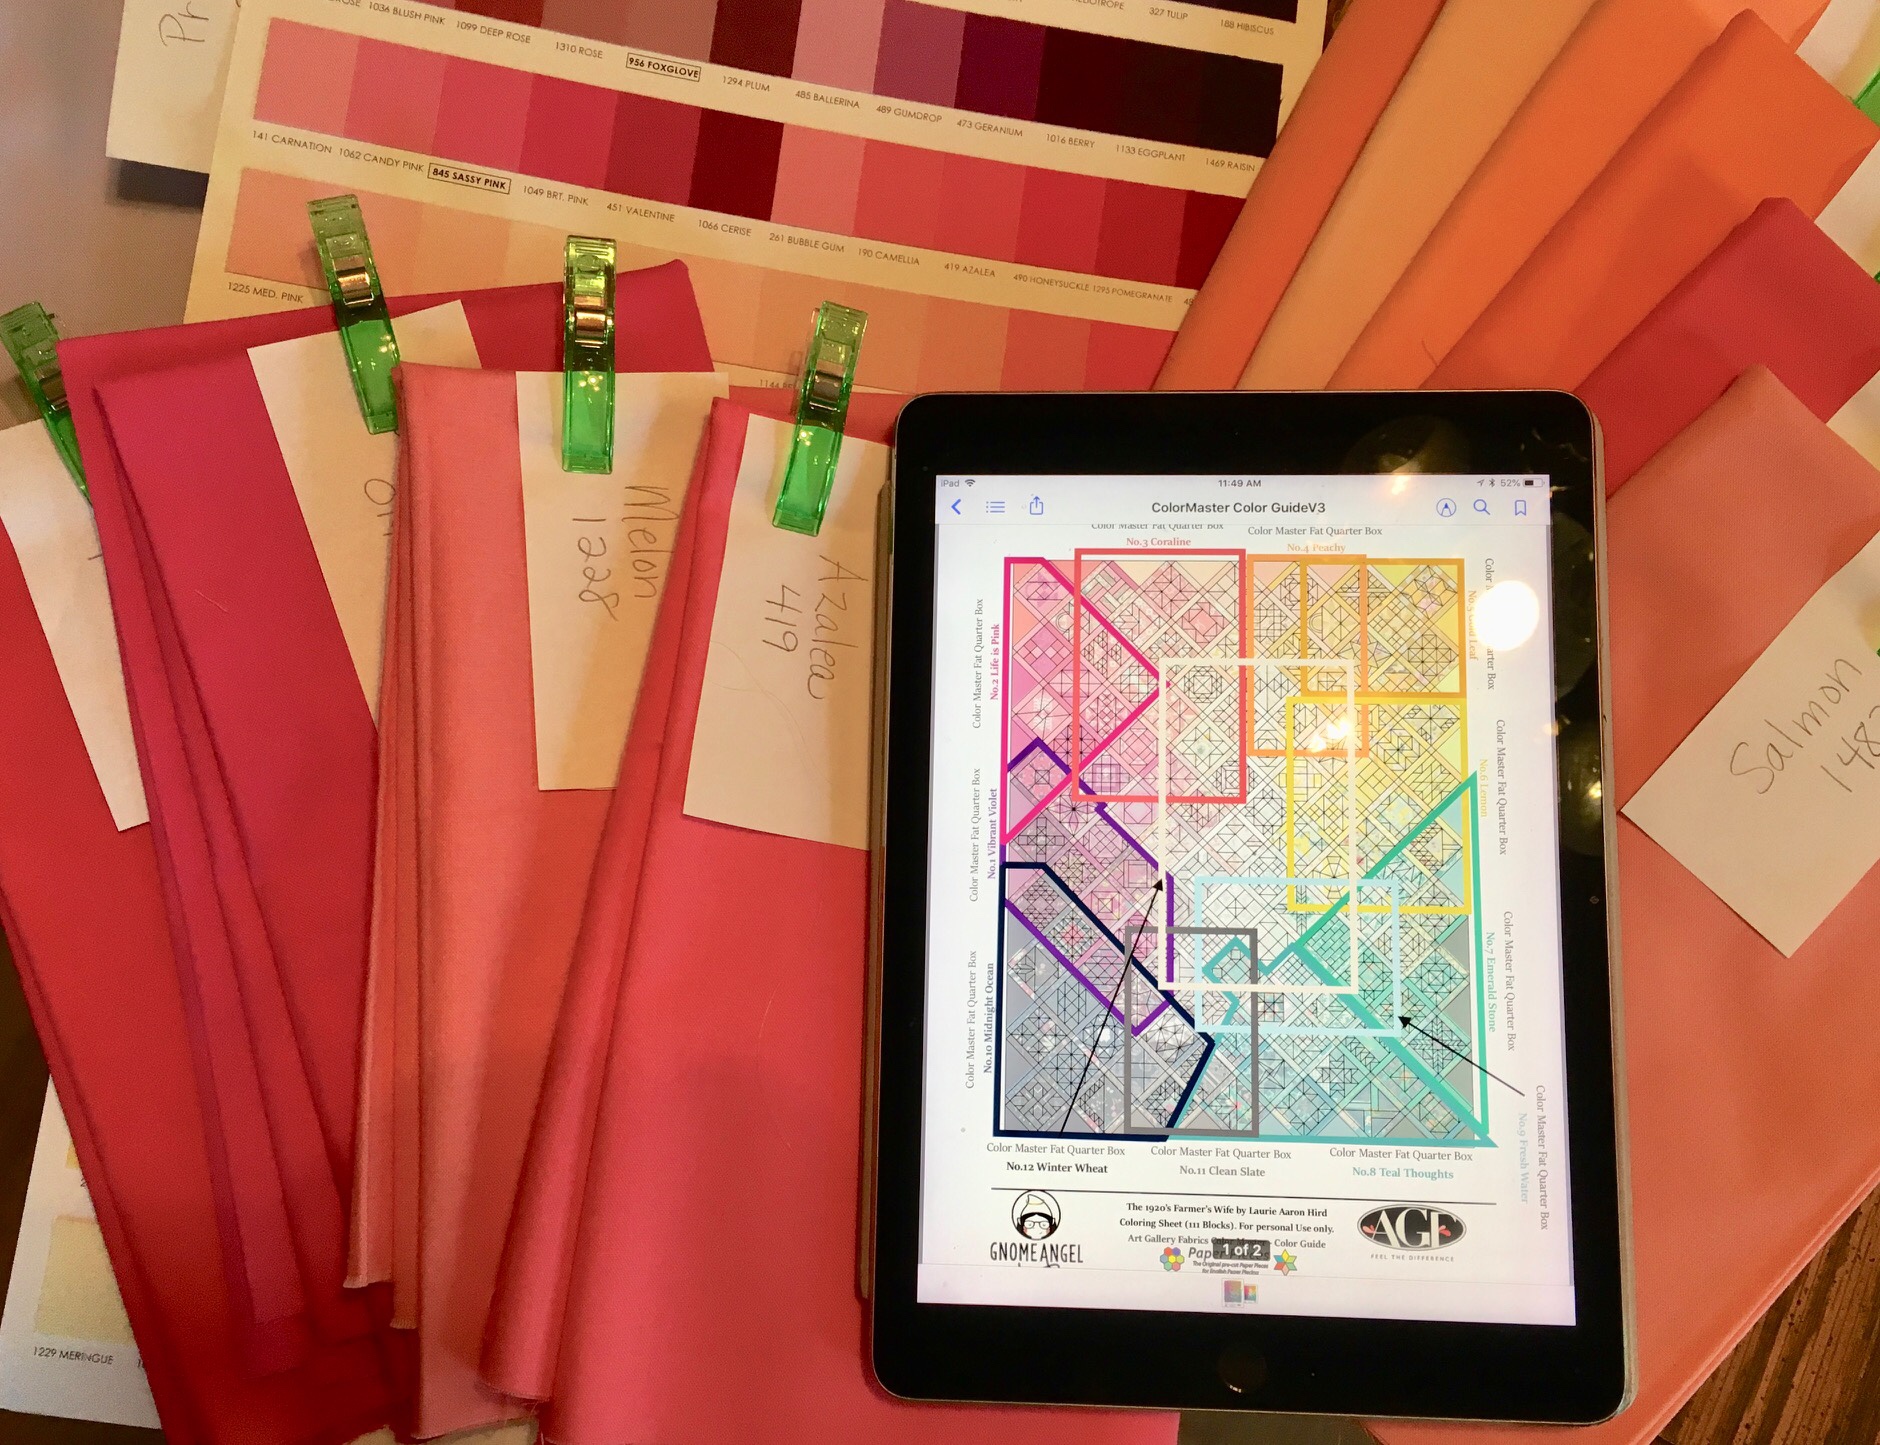
I’ve been working out of sequence this week because I have been waiting for my new shipment of Kona solids to arrive. They should be here today. I kind of jumped around the sequence of things as I made these blocks. I will display them here, however, in the order of the number of the block in the book even though I made some blocks earlier in the sequence.

#3 Basket

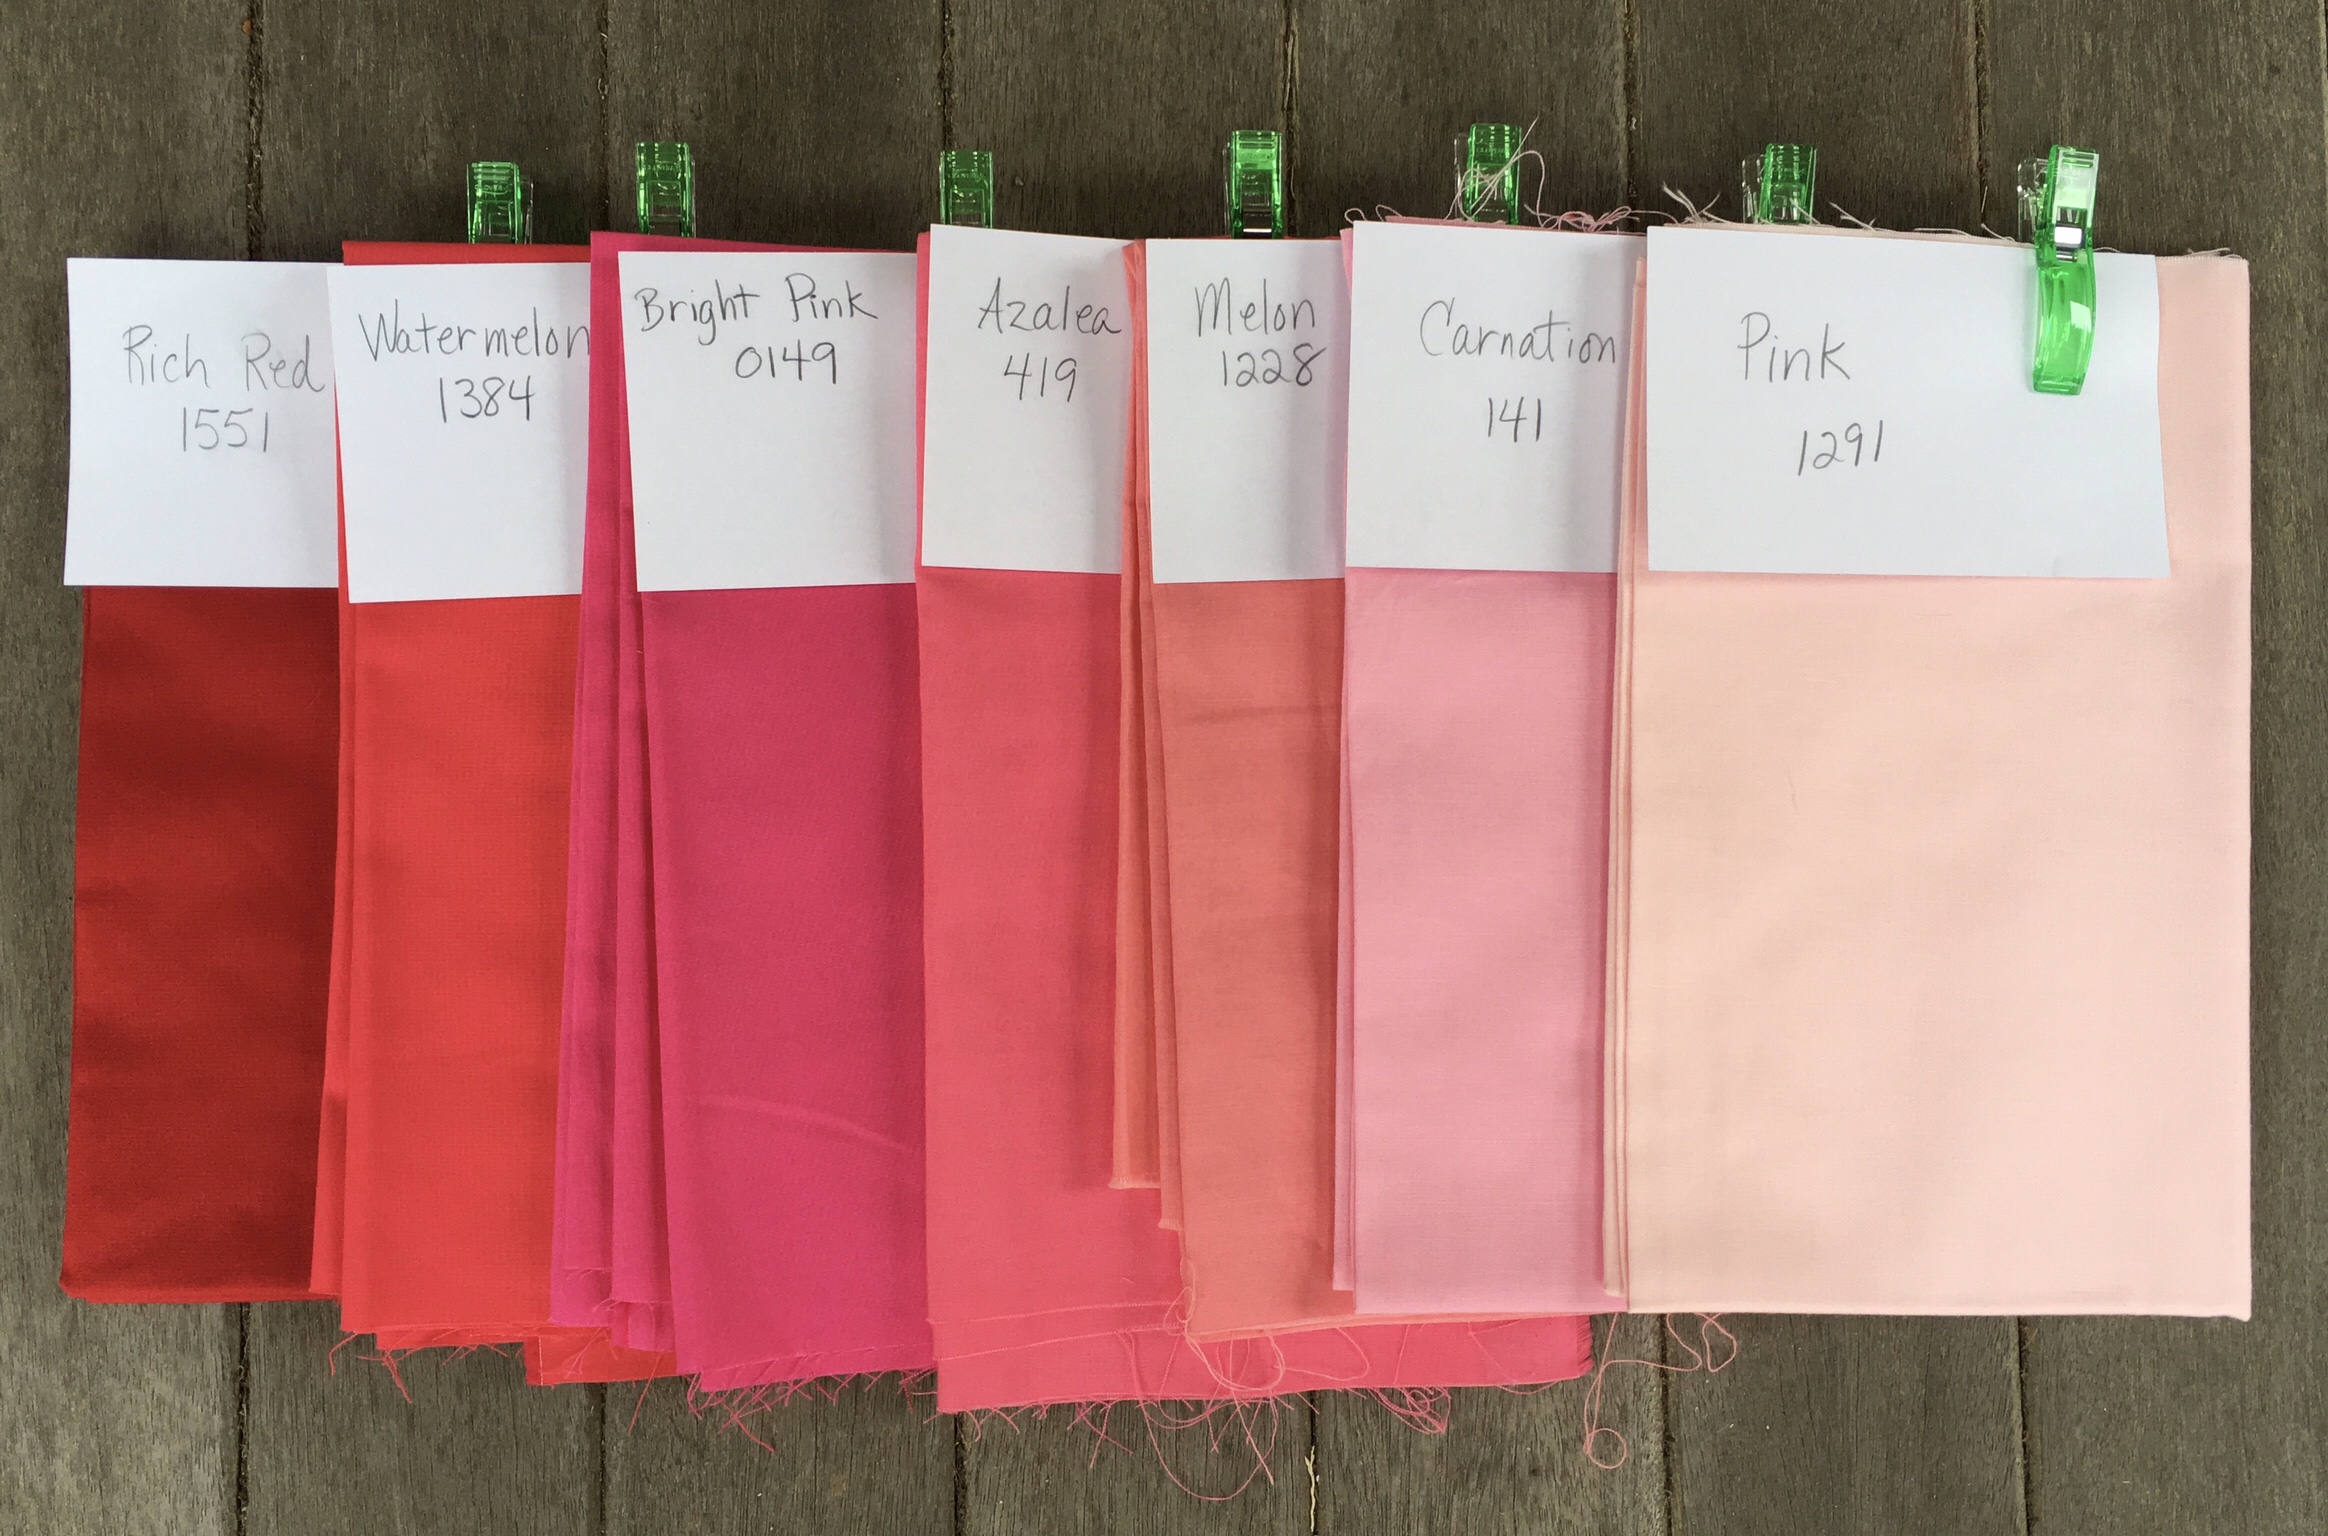
Kona solids from light to dark are Salmon and Azalea.

I put off making this block until I had seen the video that Angie Wilson posted about completing the handle. She showed a method for making it and suggested waiting until the block is joined to the sashing and the papers come out before sewing it into place. I’ll be following that advice.

Truthfully I am not altogether sure I want the basket blocks in my quilt, so I might be substituting something else for this block when it comes time to begin assembly.
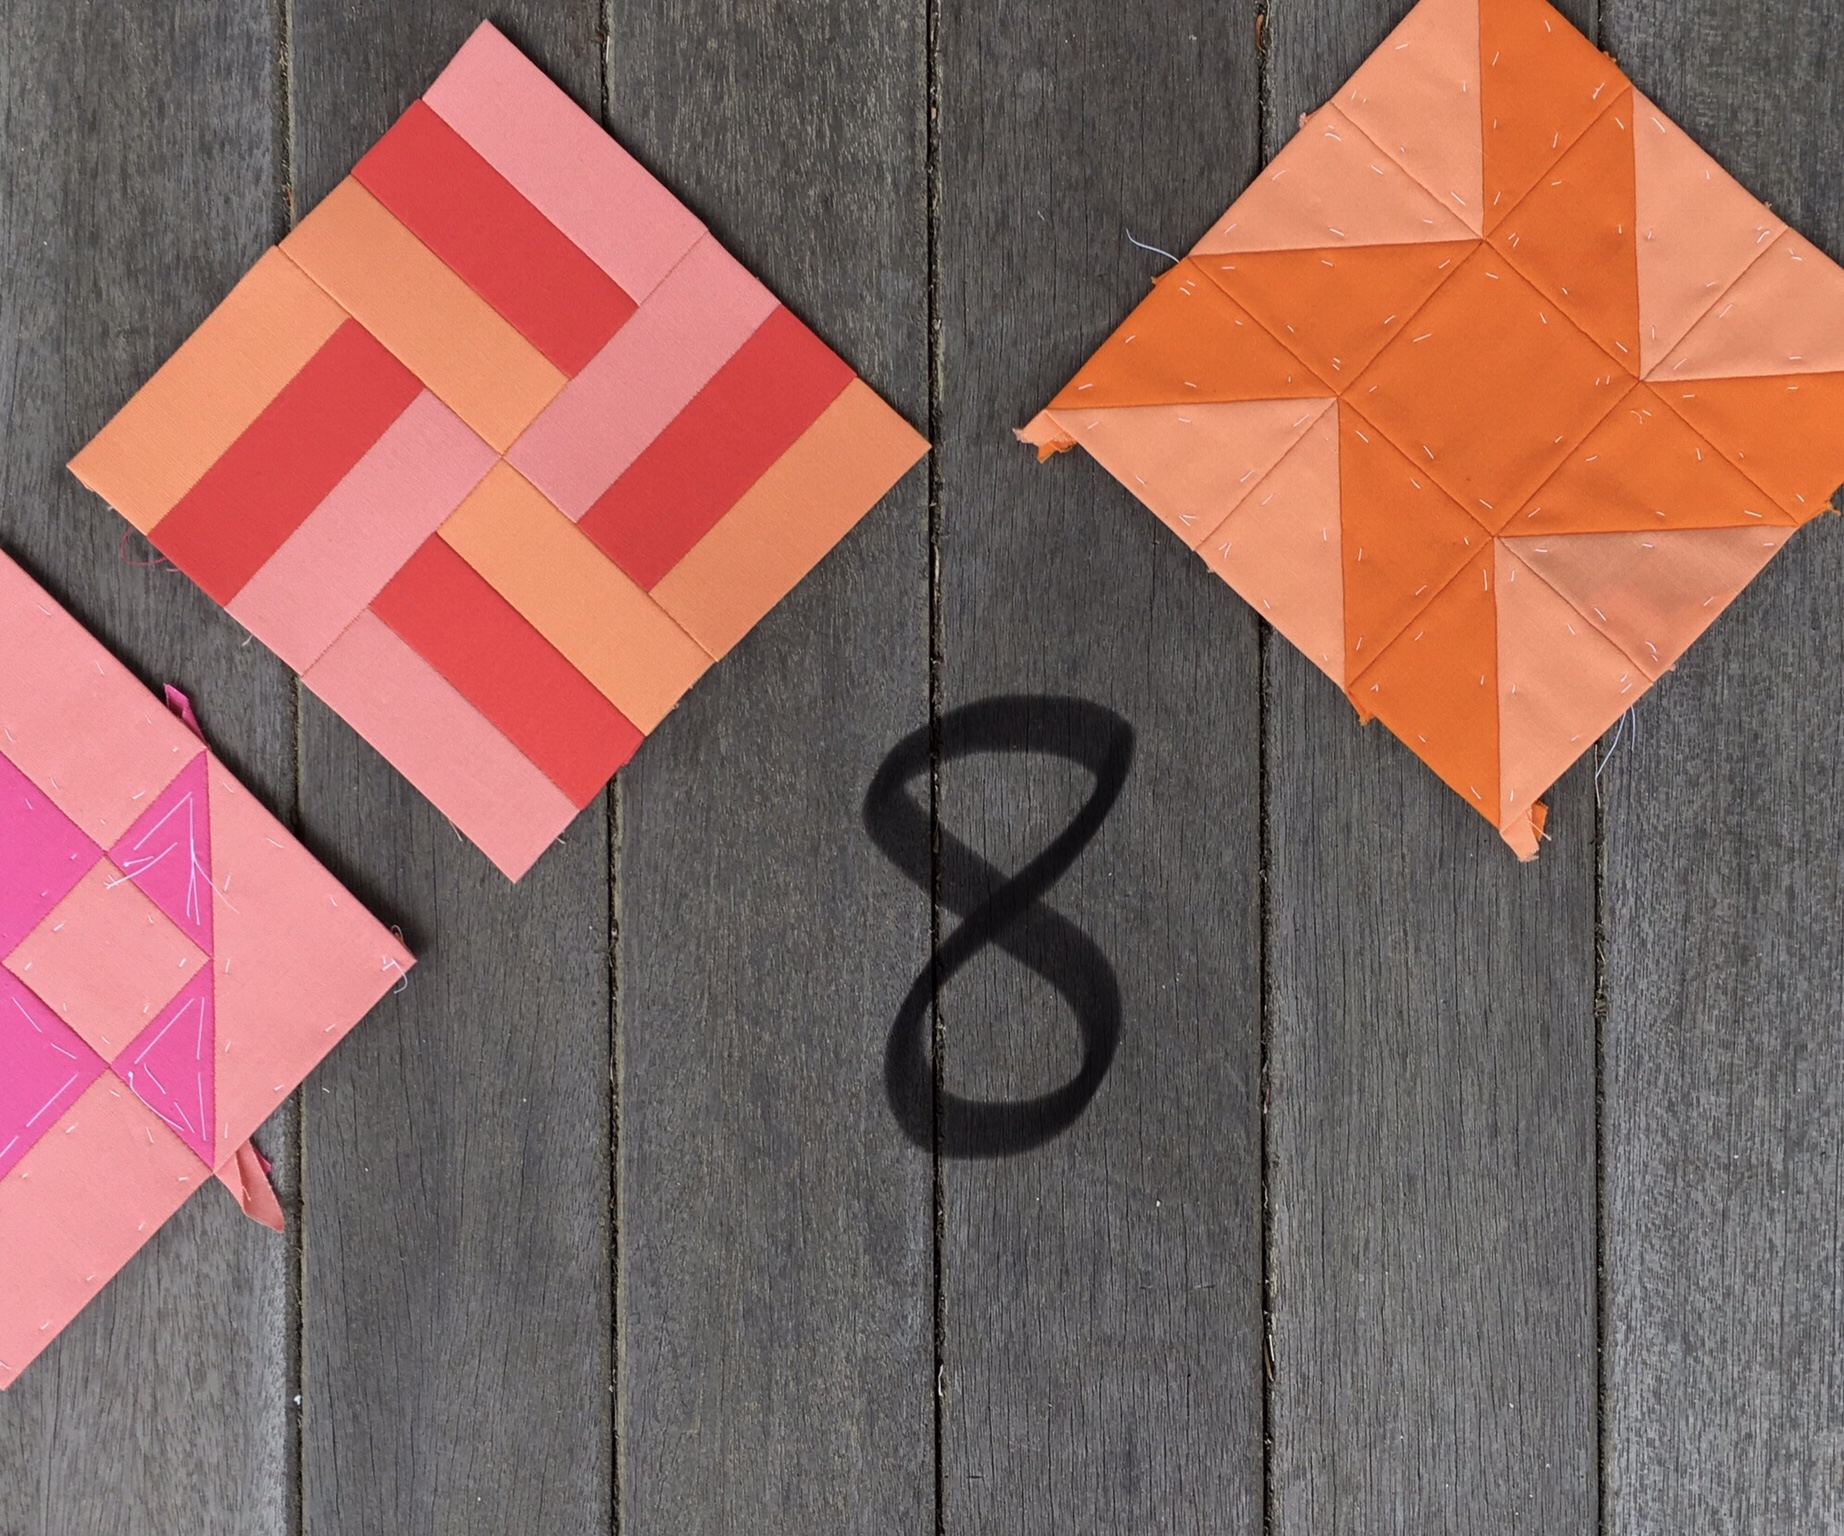
#8 Bouquet

Kona solids from light to dark are Salmon, Cantaloupe, Orange, and Coral.

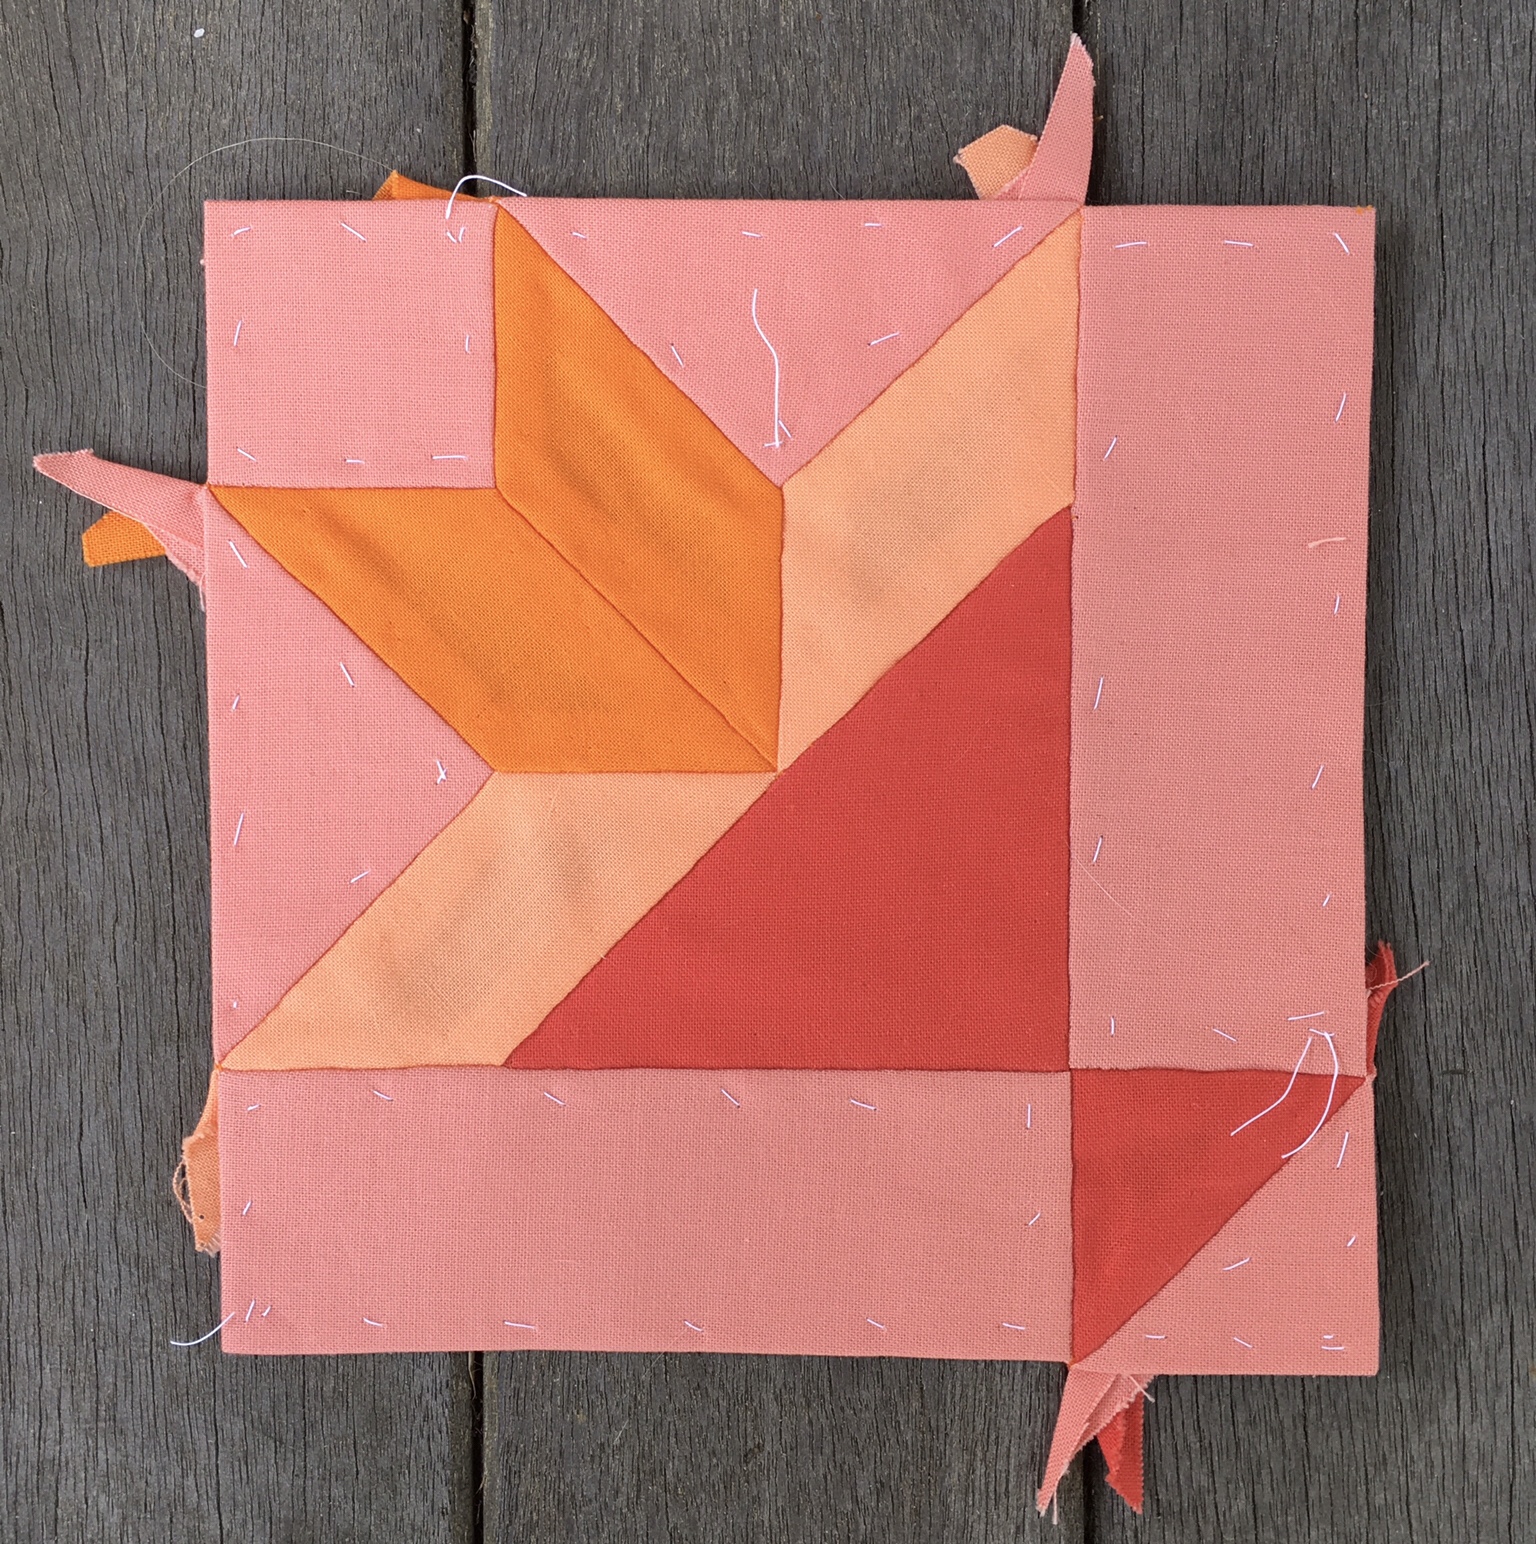
I’m not really happy with the way the colors work in this block. It seems unbalanced. The Orange doesn’t seem to belong, and the Coral isn’t balanced. I might remake this block.

I used the flat back stitch on this block. I wanted to give that stitch a try because those who use it swear by it. I’m not sure how I feel. I love the way the stitches don’t show on the front. I love the way the points come out perfectly. I dislike the fact that it takes twice as long to sew a seam. Also in this block I found that the Orange pieces, in particular, seemed to be a bit loose. I took out the papers I could remove, and that did not help the situation. If anything it made things worse. I’m thinking that this would not have happened with my whip stitch.

I am thinking of doing this again and switching out the Orange for Coral. I will also whip stitch it.

This block does not follow the seams in the book. I managed to eliminate three unnecessary seams.
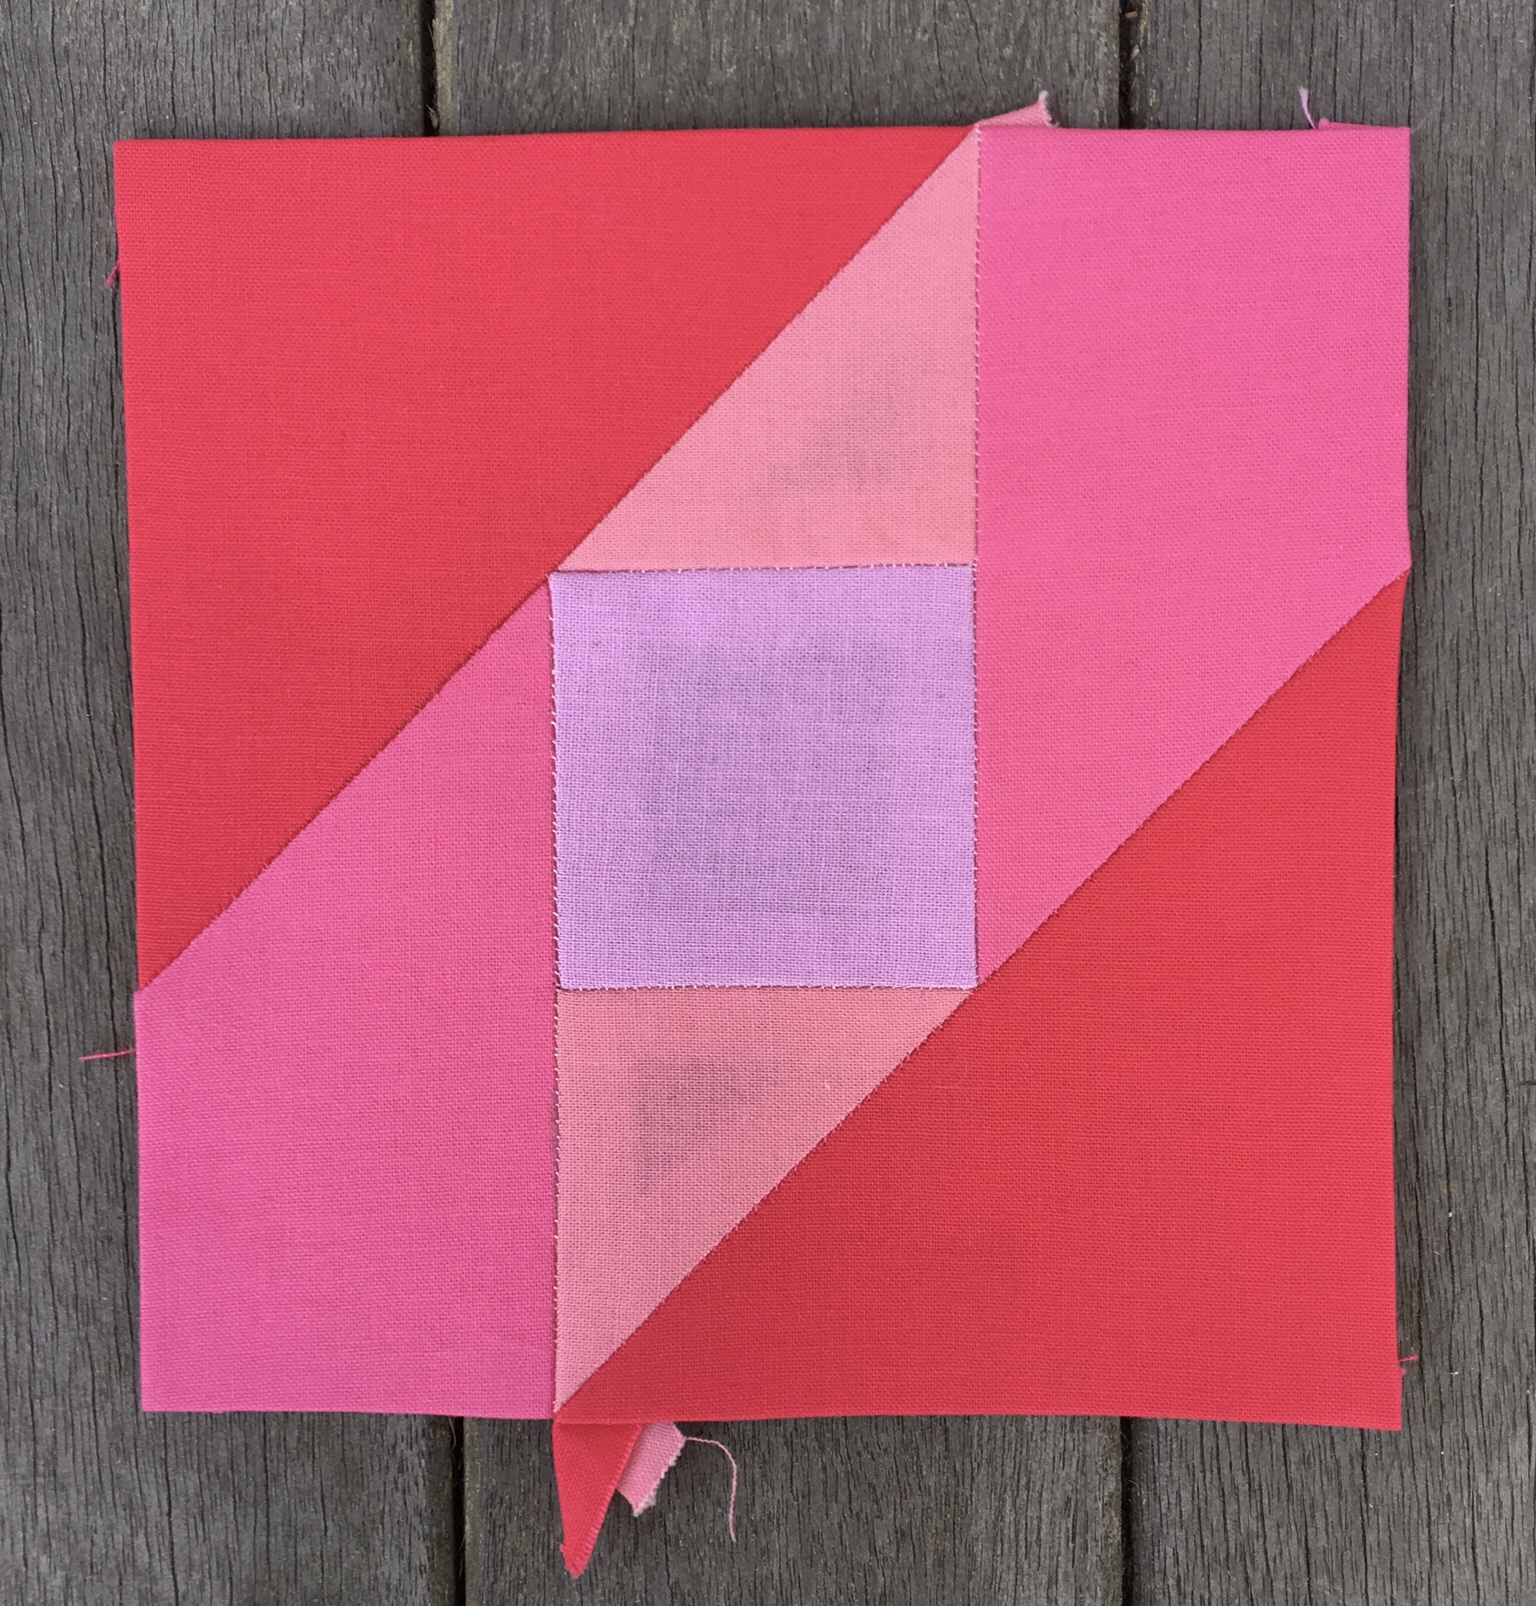
#9 Box

Kona solids from light to dark are Melon and Orange.

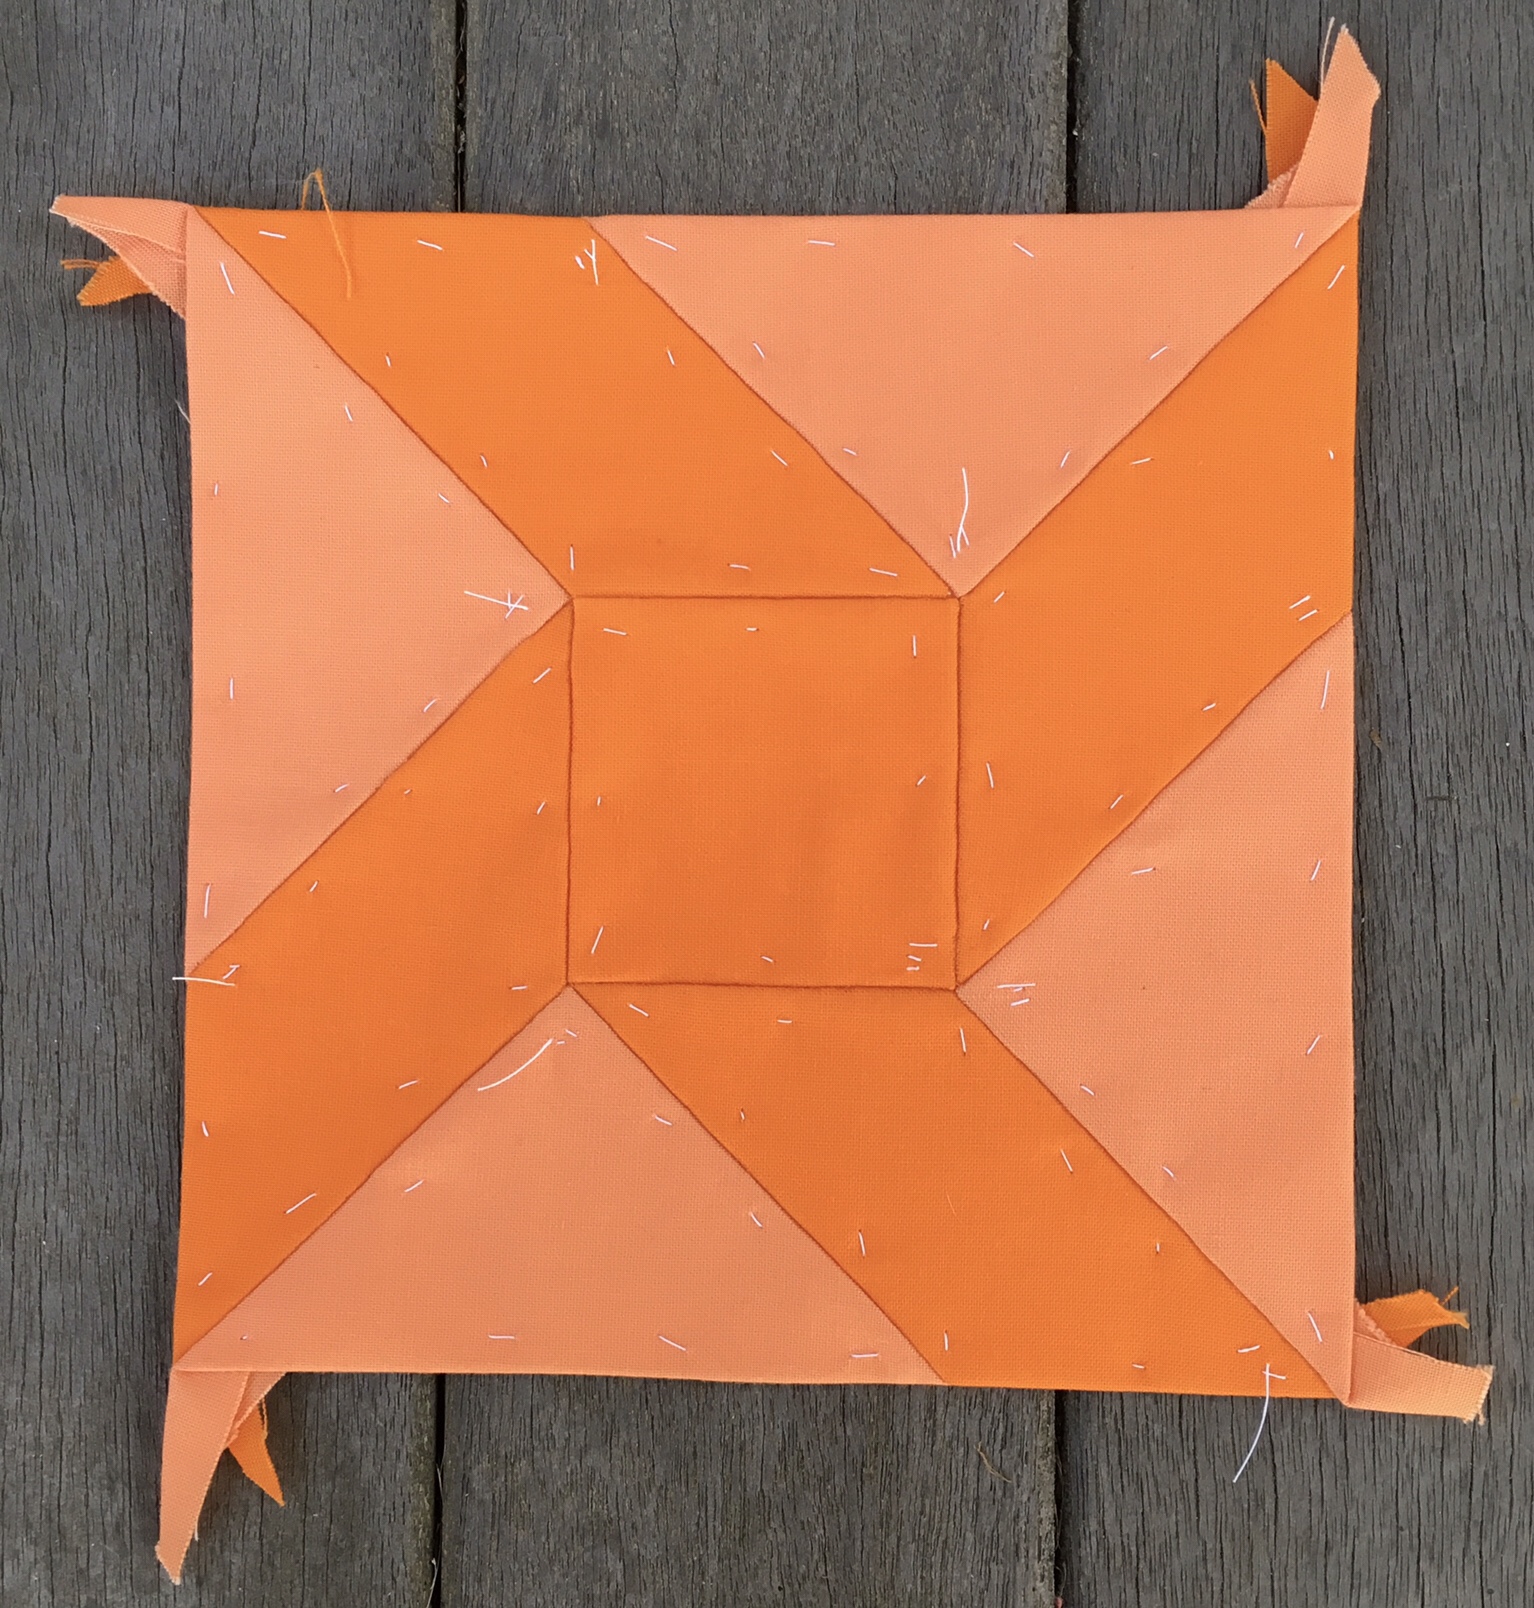
This is actually the second version of #9 Box. The first version used Cantaloupe and Orange. It also had many more seams and pieces. I decided to redo it by hand drawing the block with drafting tools, and erasing unnecessary lines.

Here is the first version with so many unnecessary seams and pieces.

Both of these blocks were constructed using the flat back stitch. This was the first block on which I tried the fat back stitch.

Here is a photo showing both blocks for comparison.

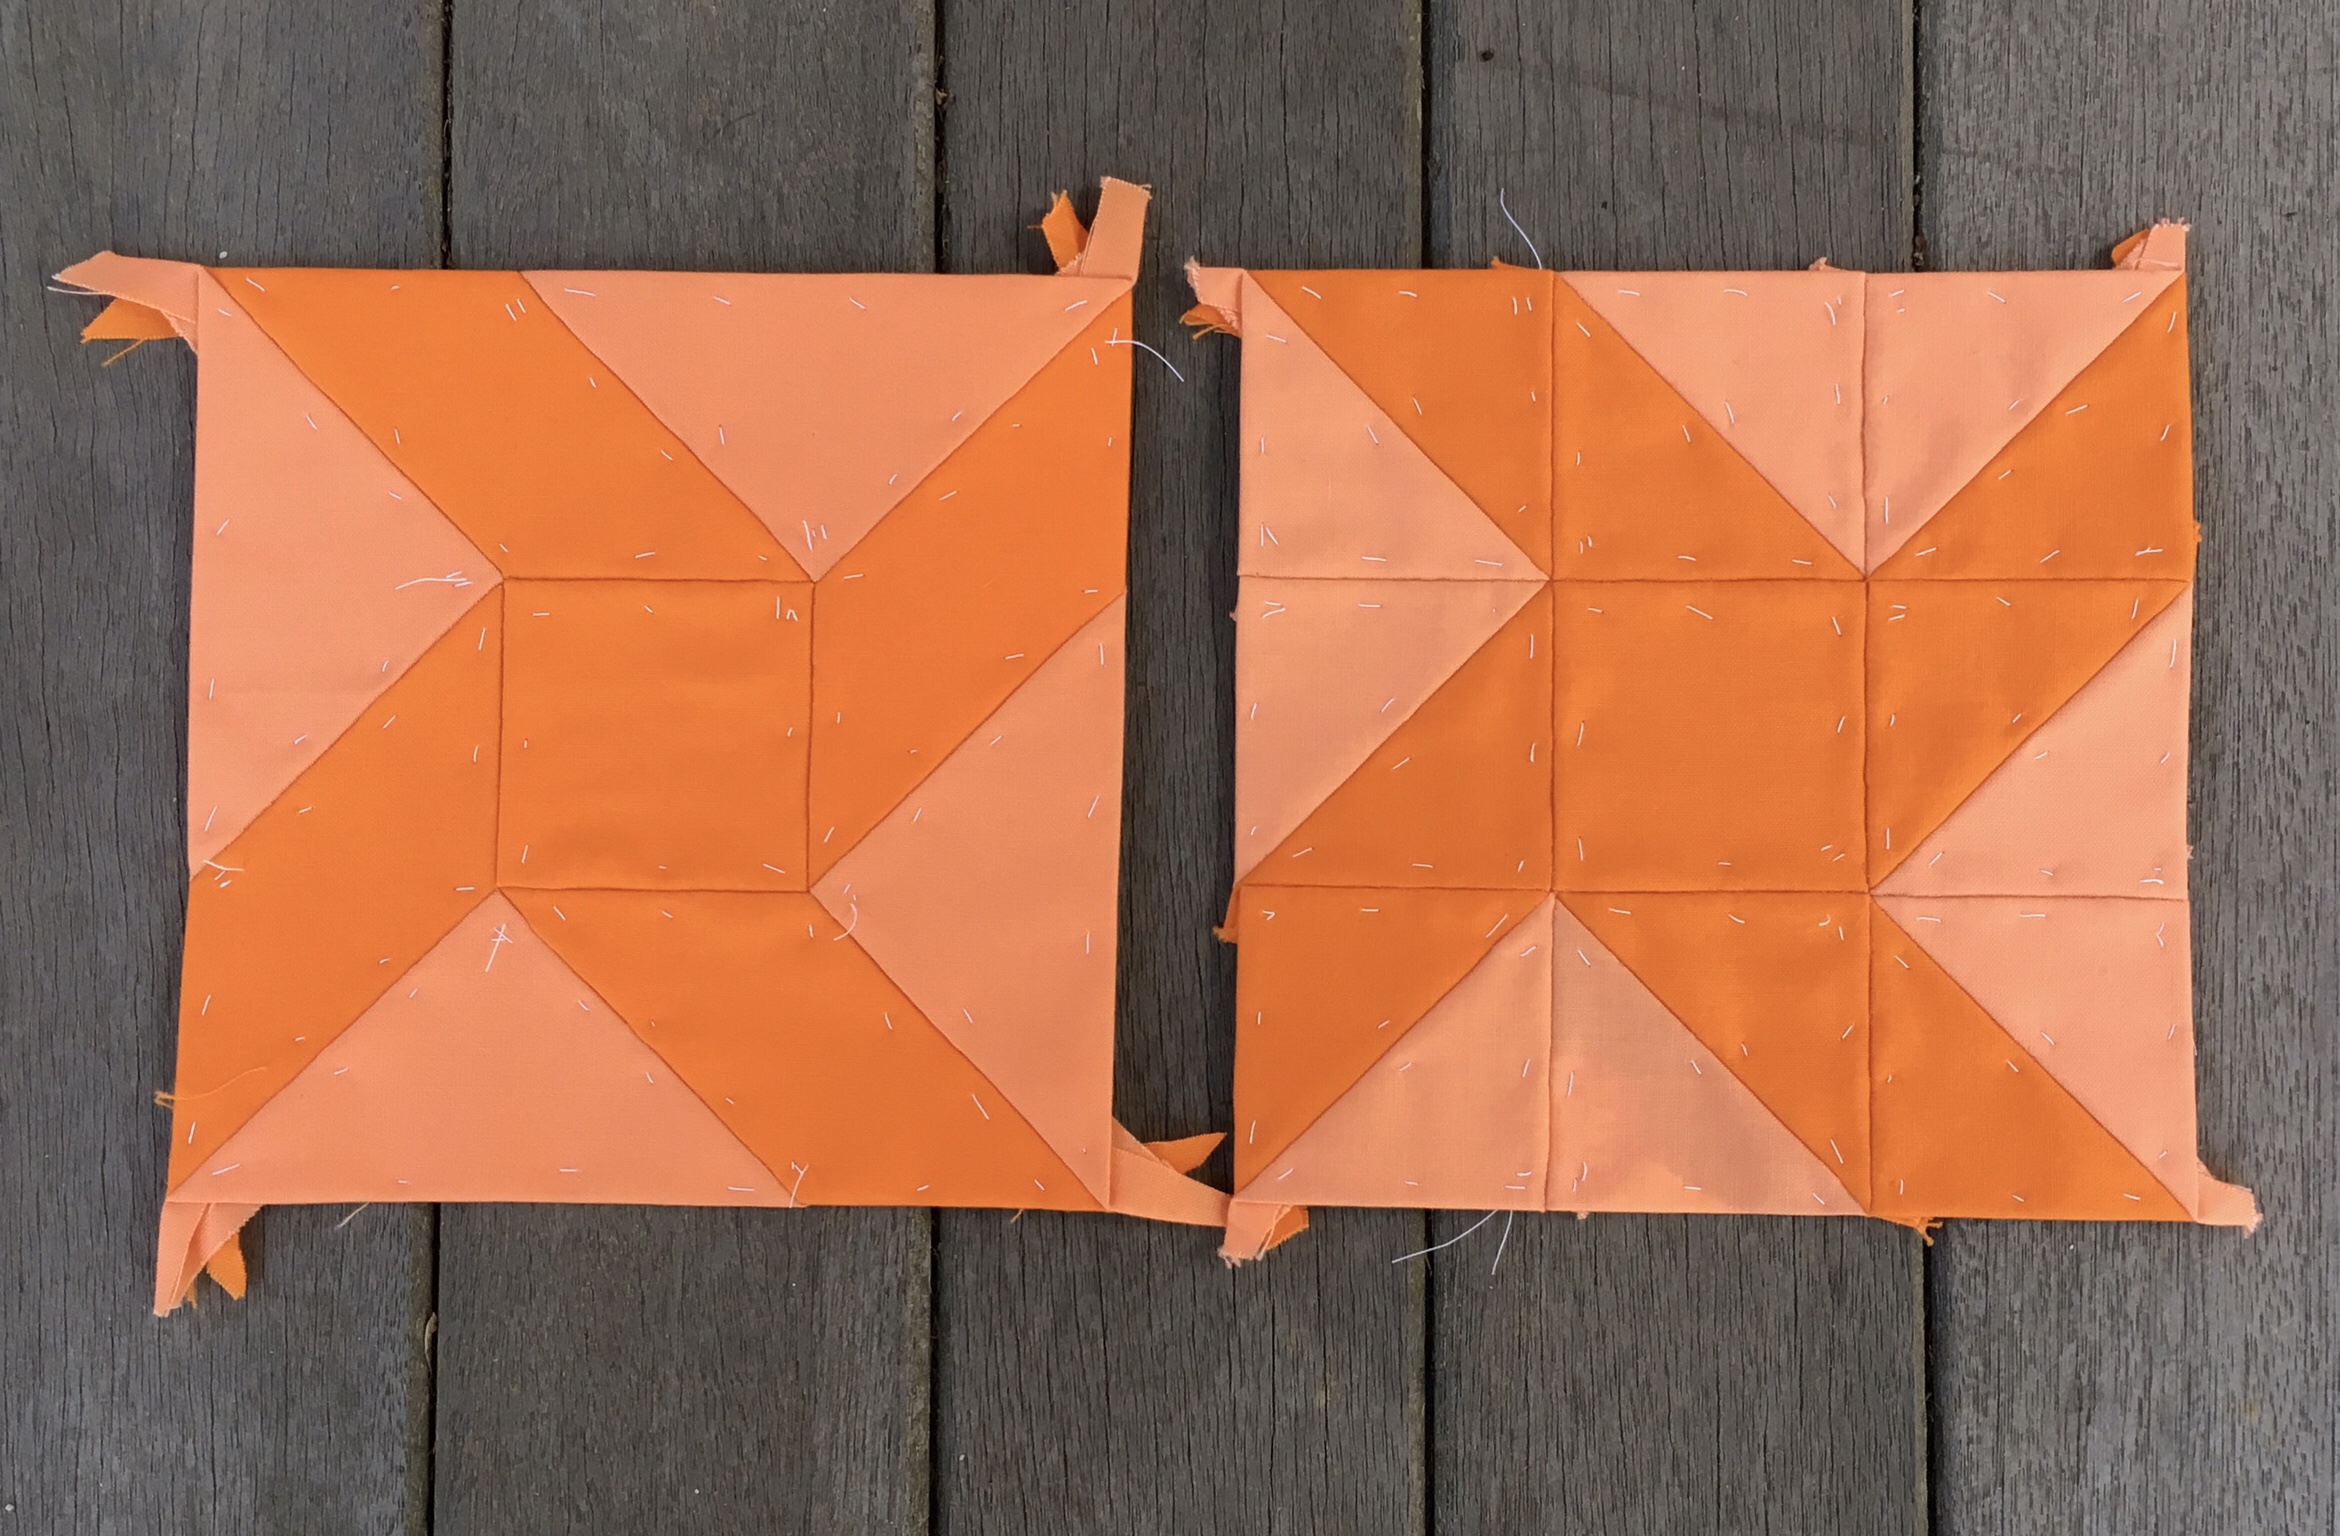
I like the lower contrast on the block to the left.
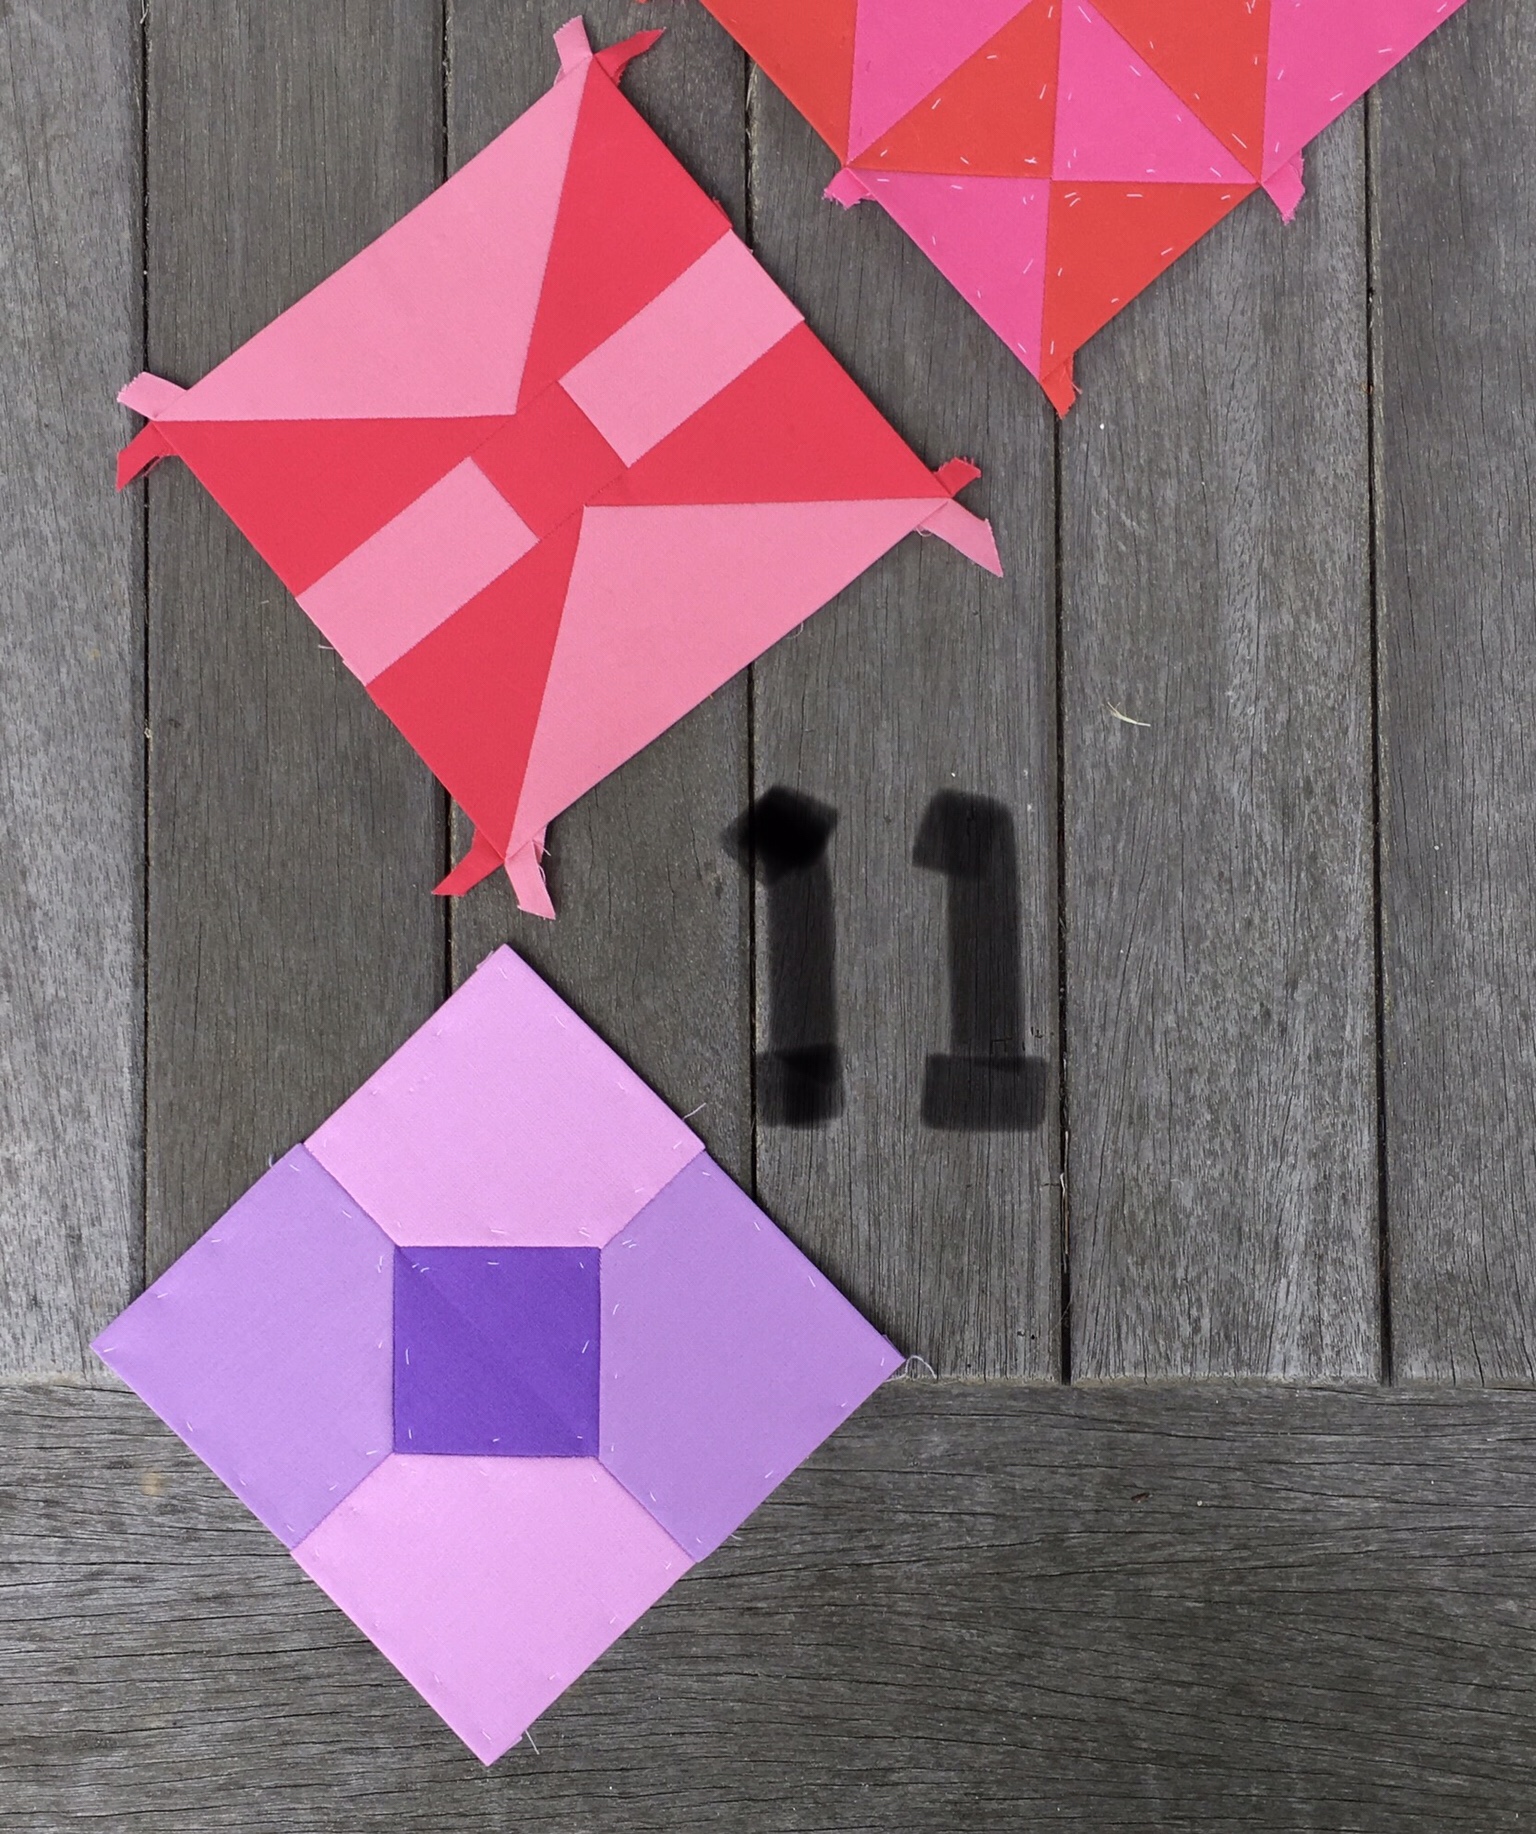
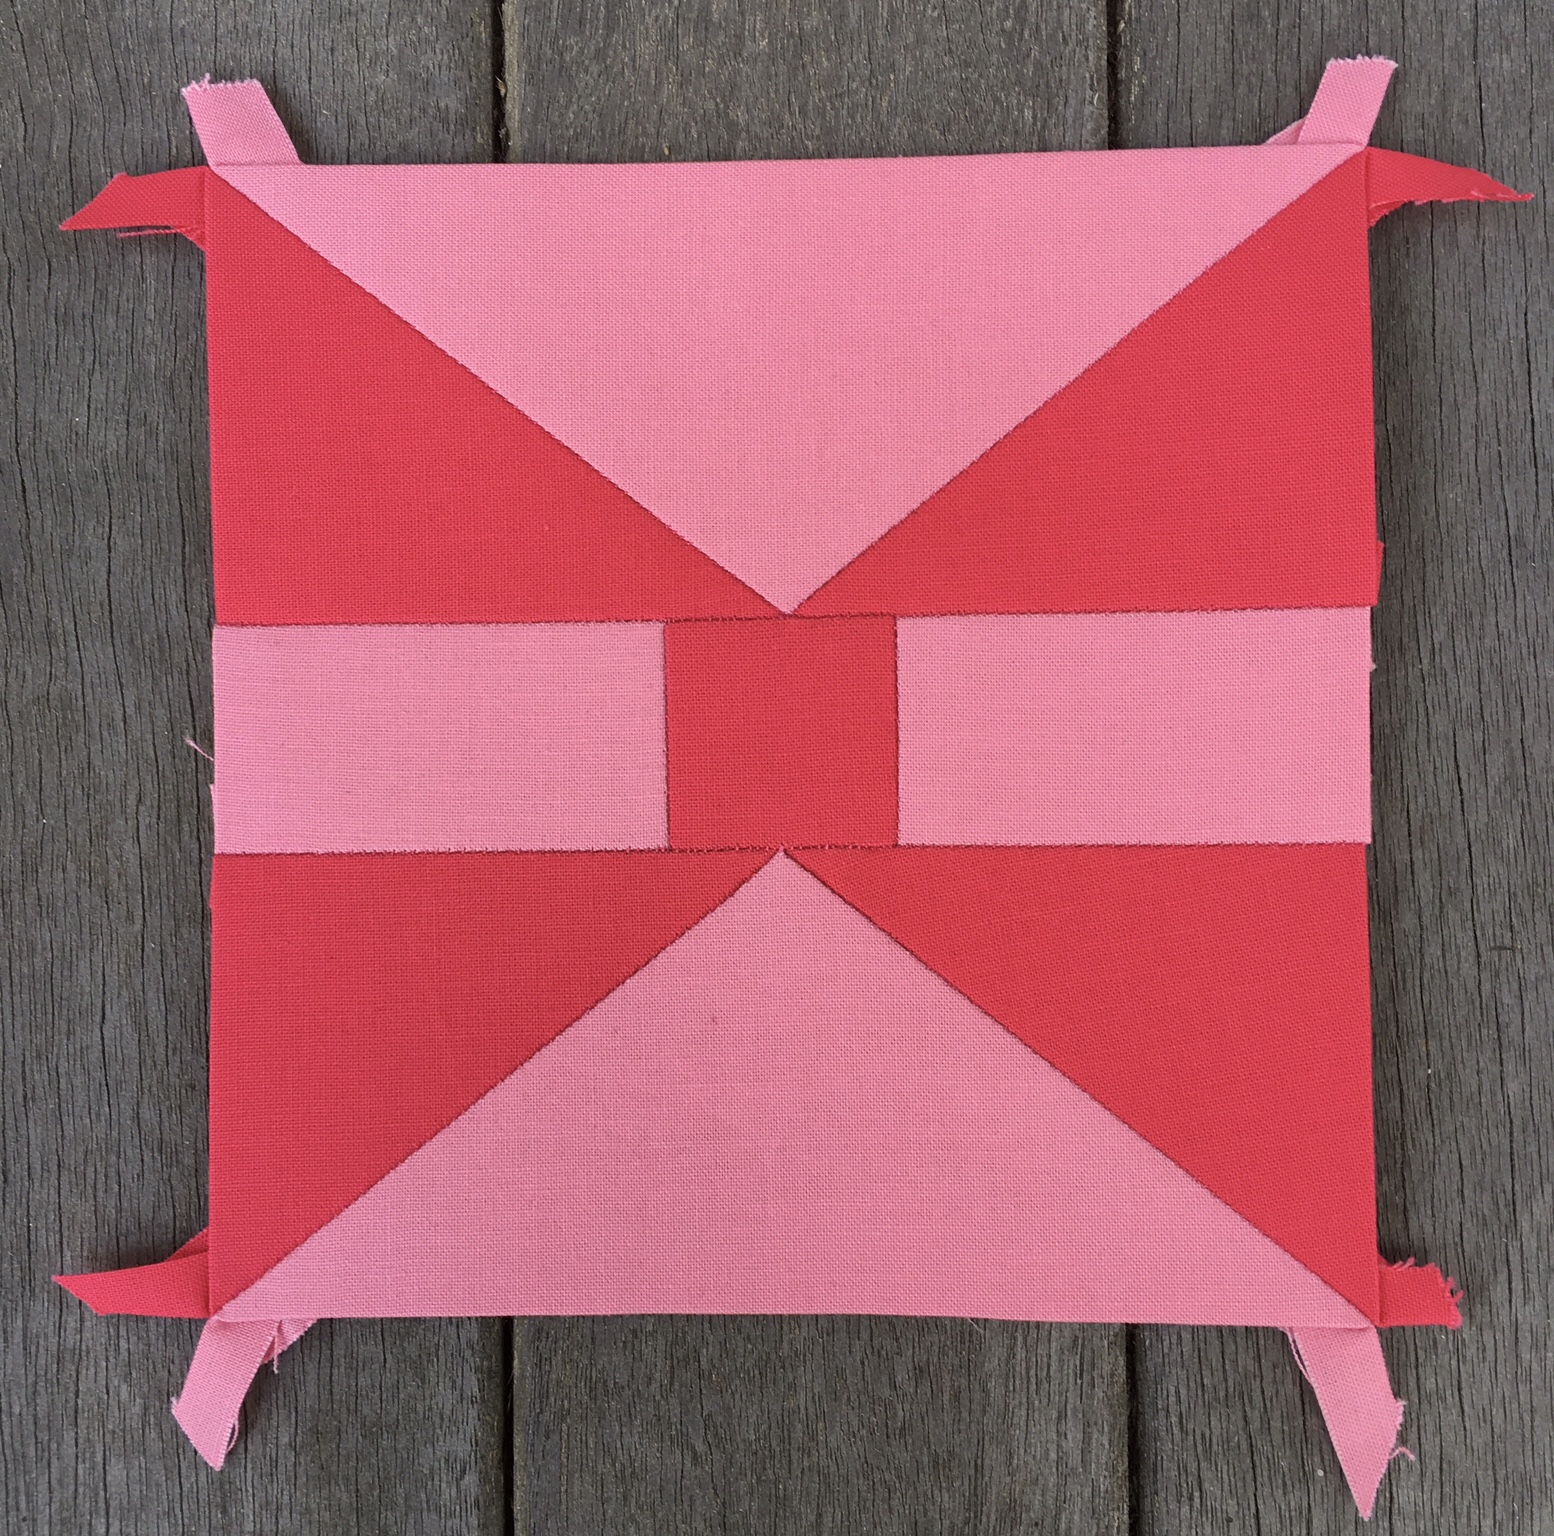
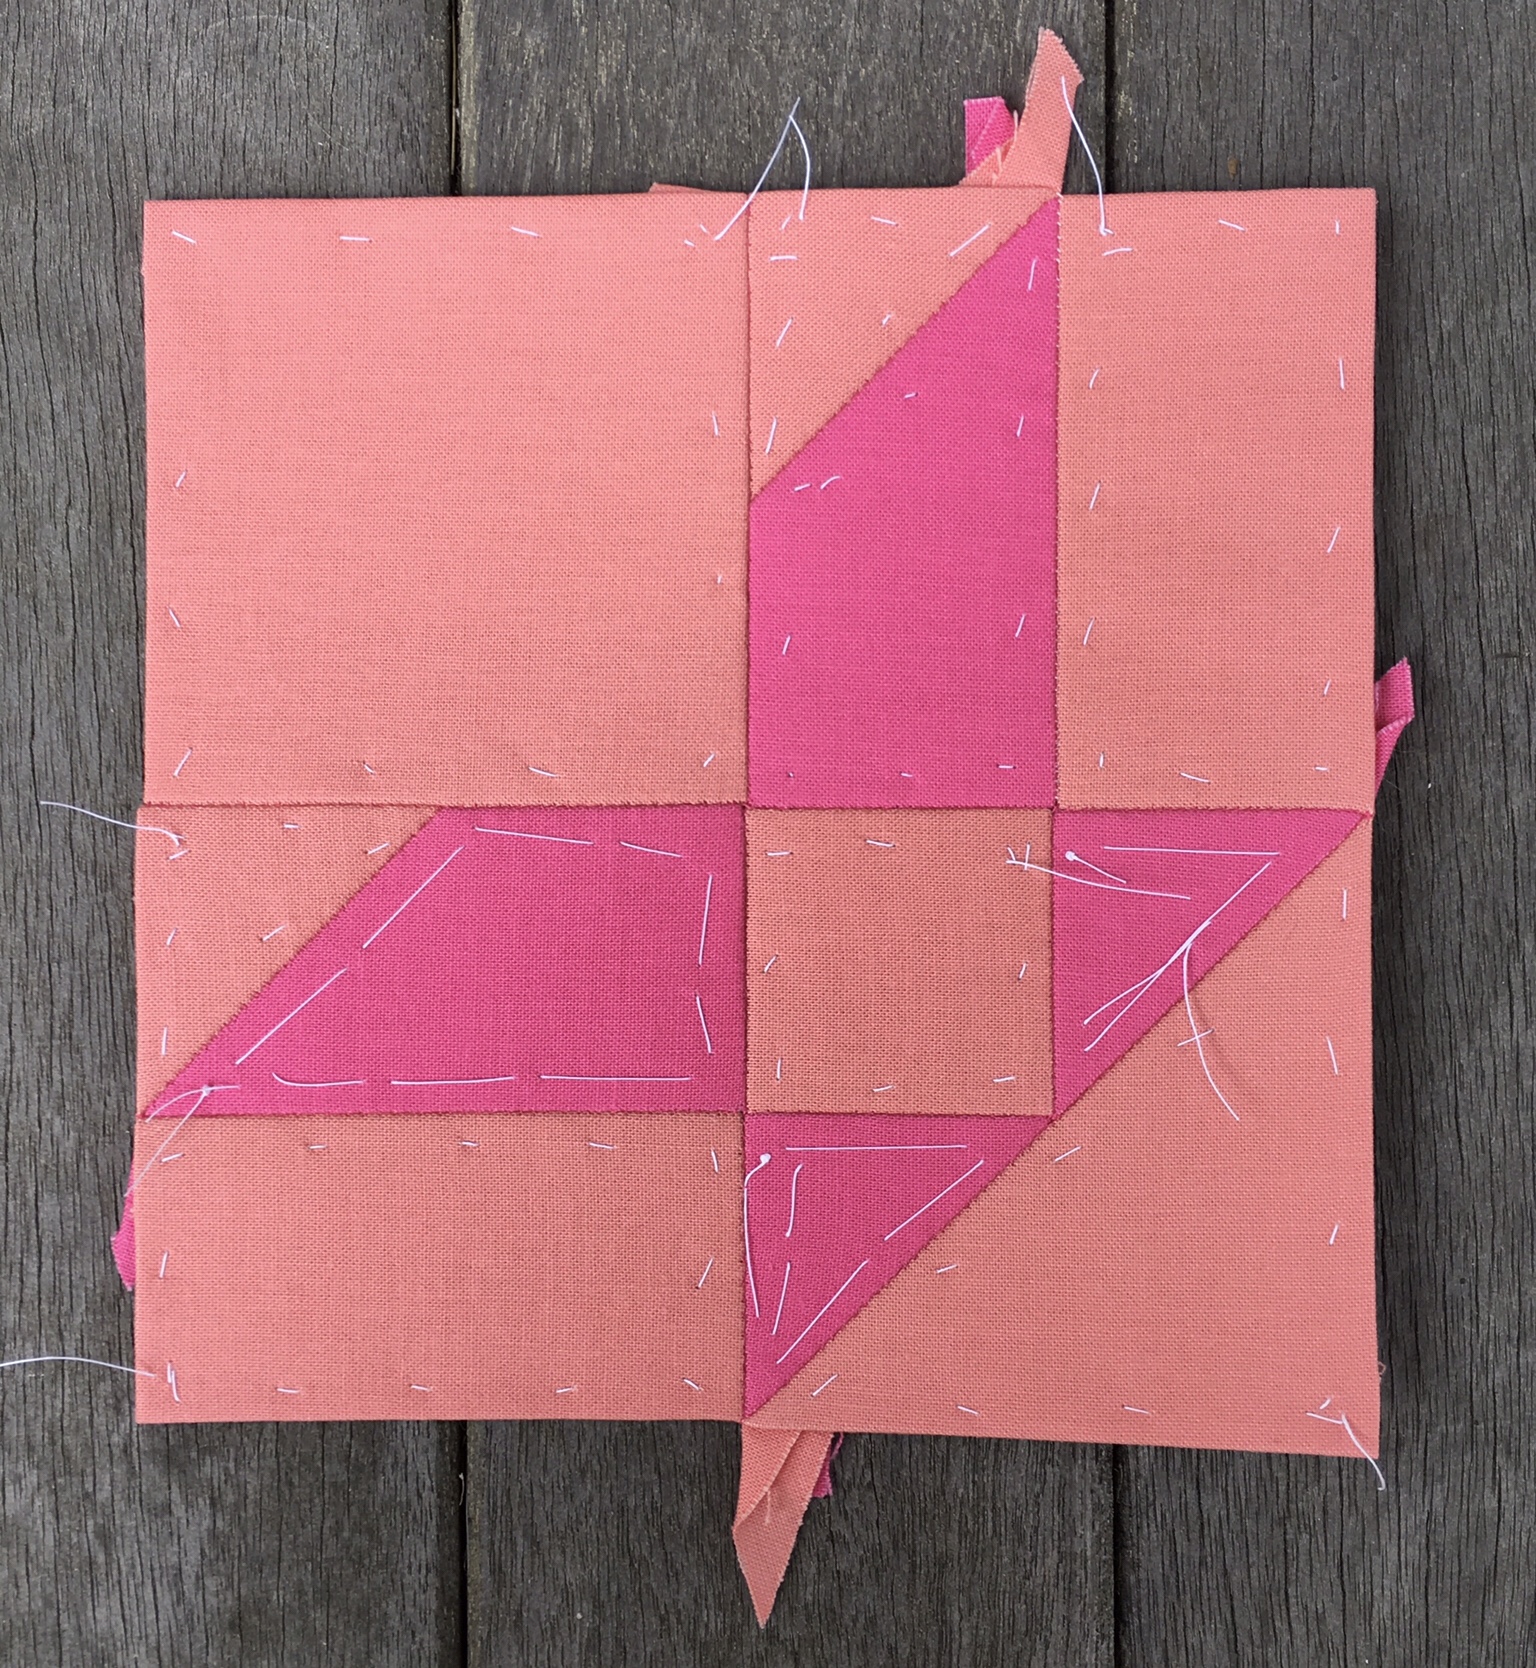
#10 Bowtie

Kona solids from light to dark are Ballerina, Pansy, and Morning Glory.

This was actually the first block in which I deviated from the prescribed pieces and seams in the book. It was such an obvious choice. The prescribed Piecing was so obviously anti EPP.

The central square in this block is supposed to be composed of four triangles. This allows the individual triangles to be joined to the adjacent pieces before joining the four quadrants of the block, thus avoiding Y seams. That is great for machine piecing, but is downright stupid for EPP, a method that laughs at the Y seam, or at least embraces it.

I had completed #9 Box using the prescribed method before I caught on that I could cut down on pieces and seams.
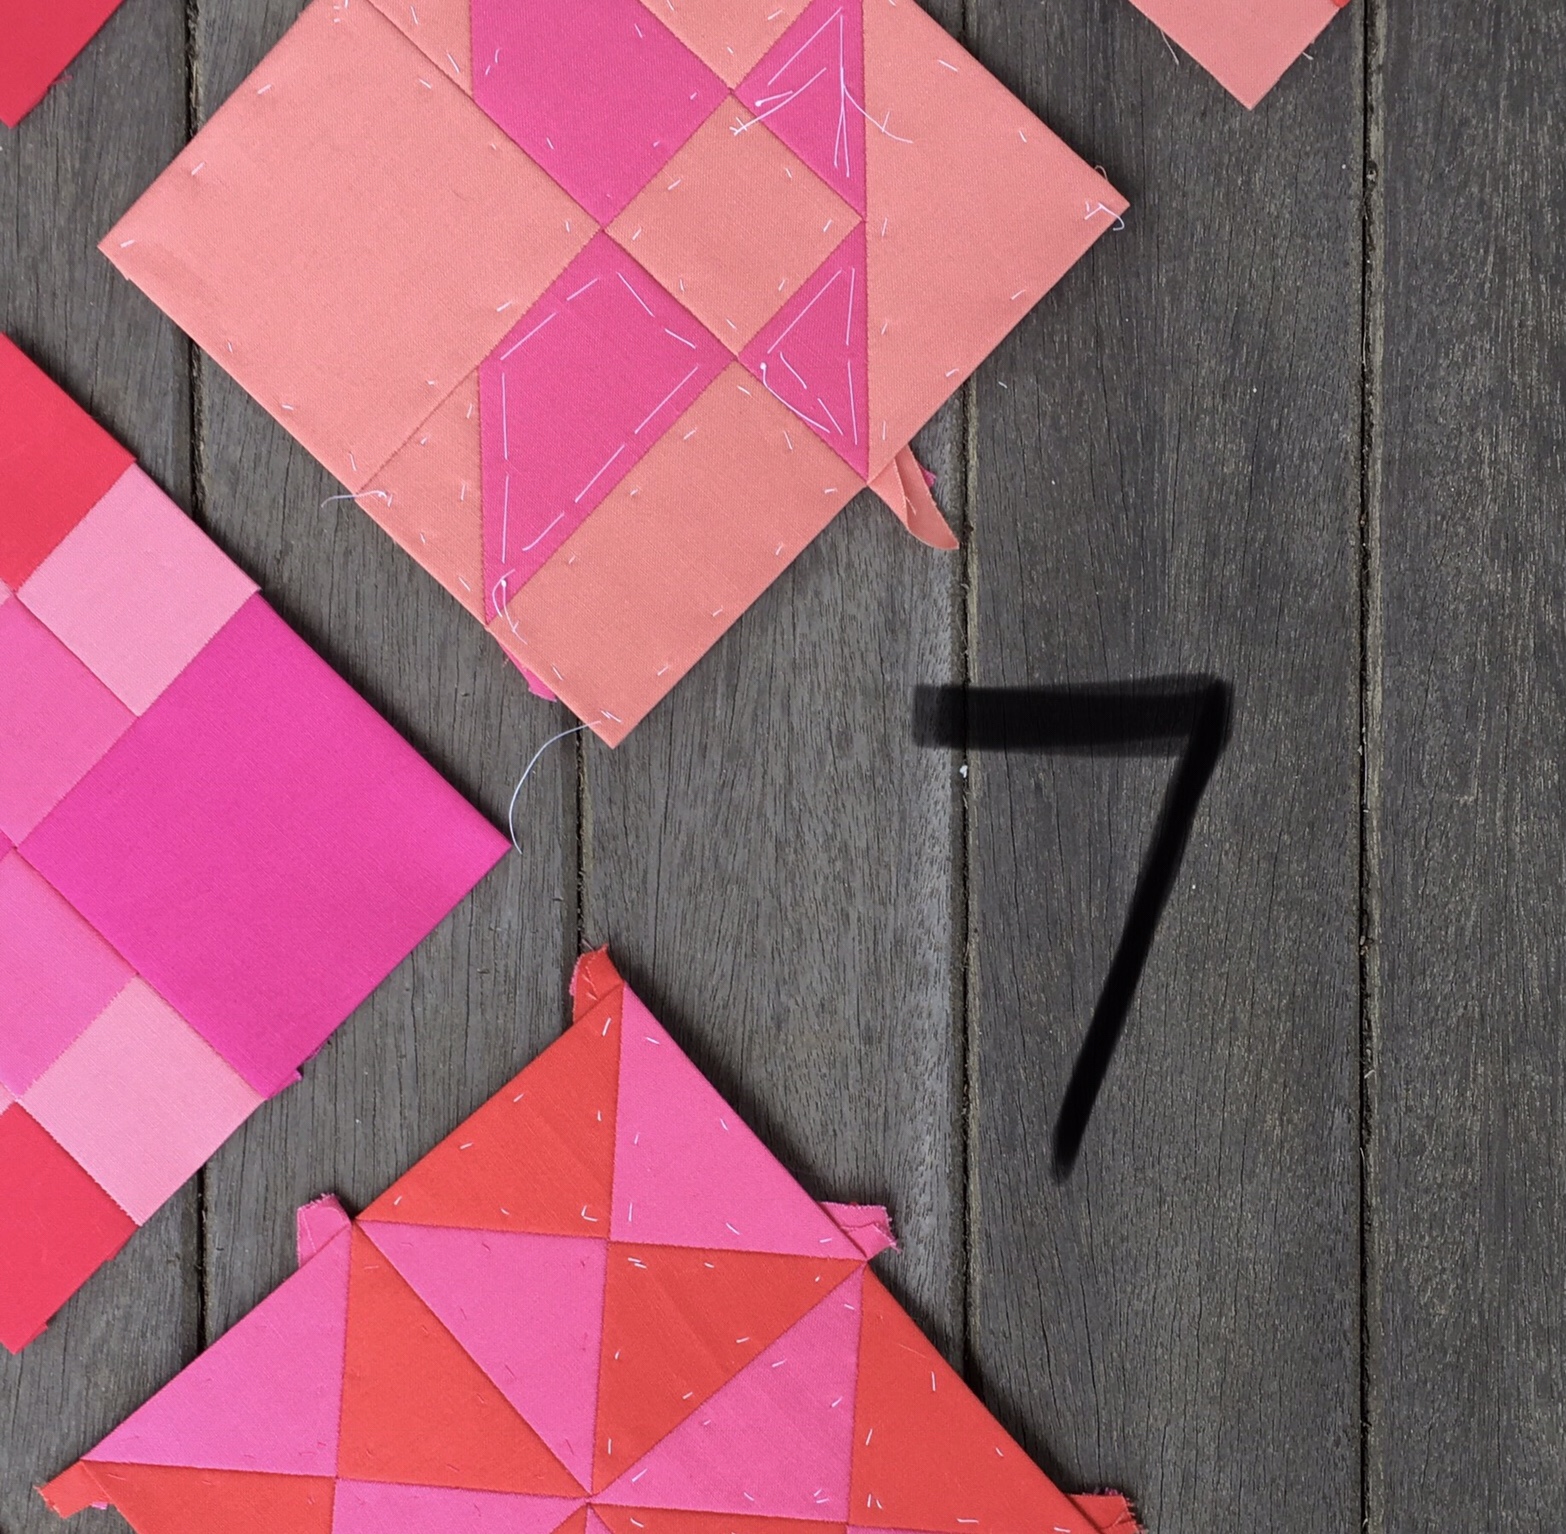
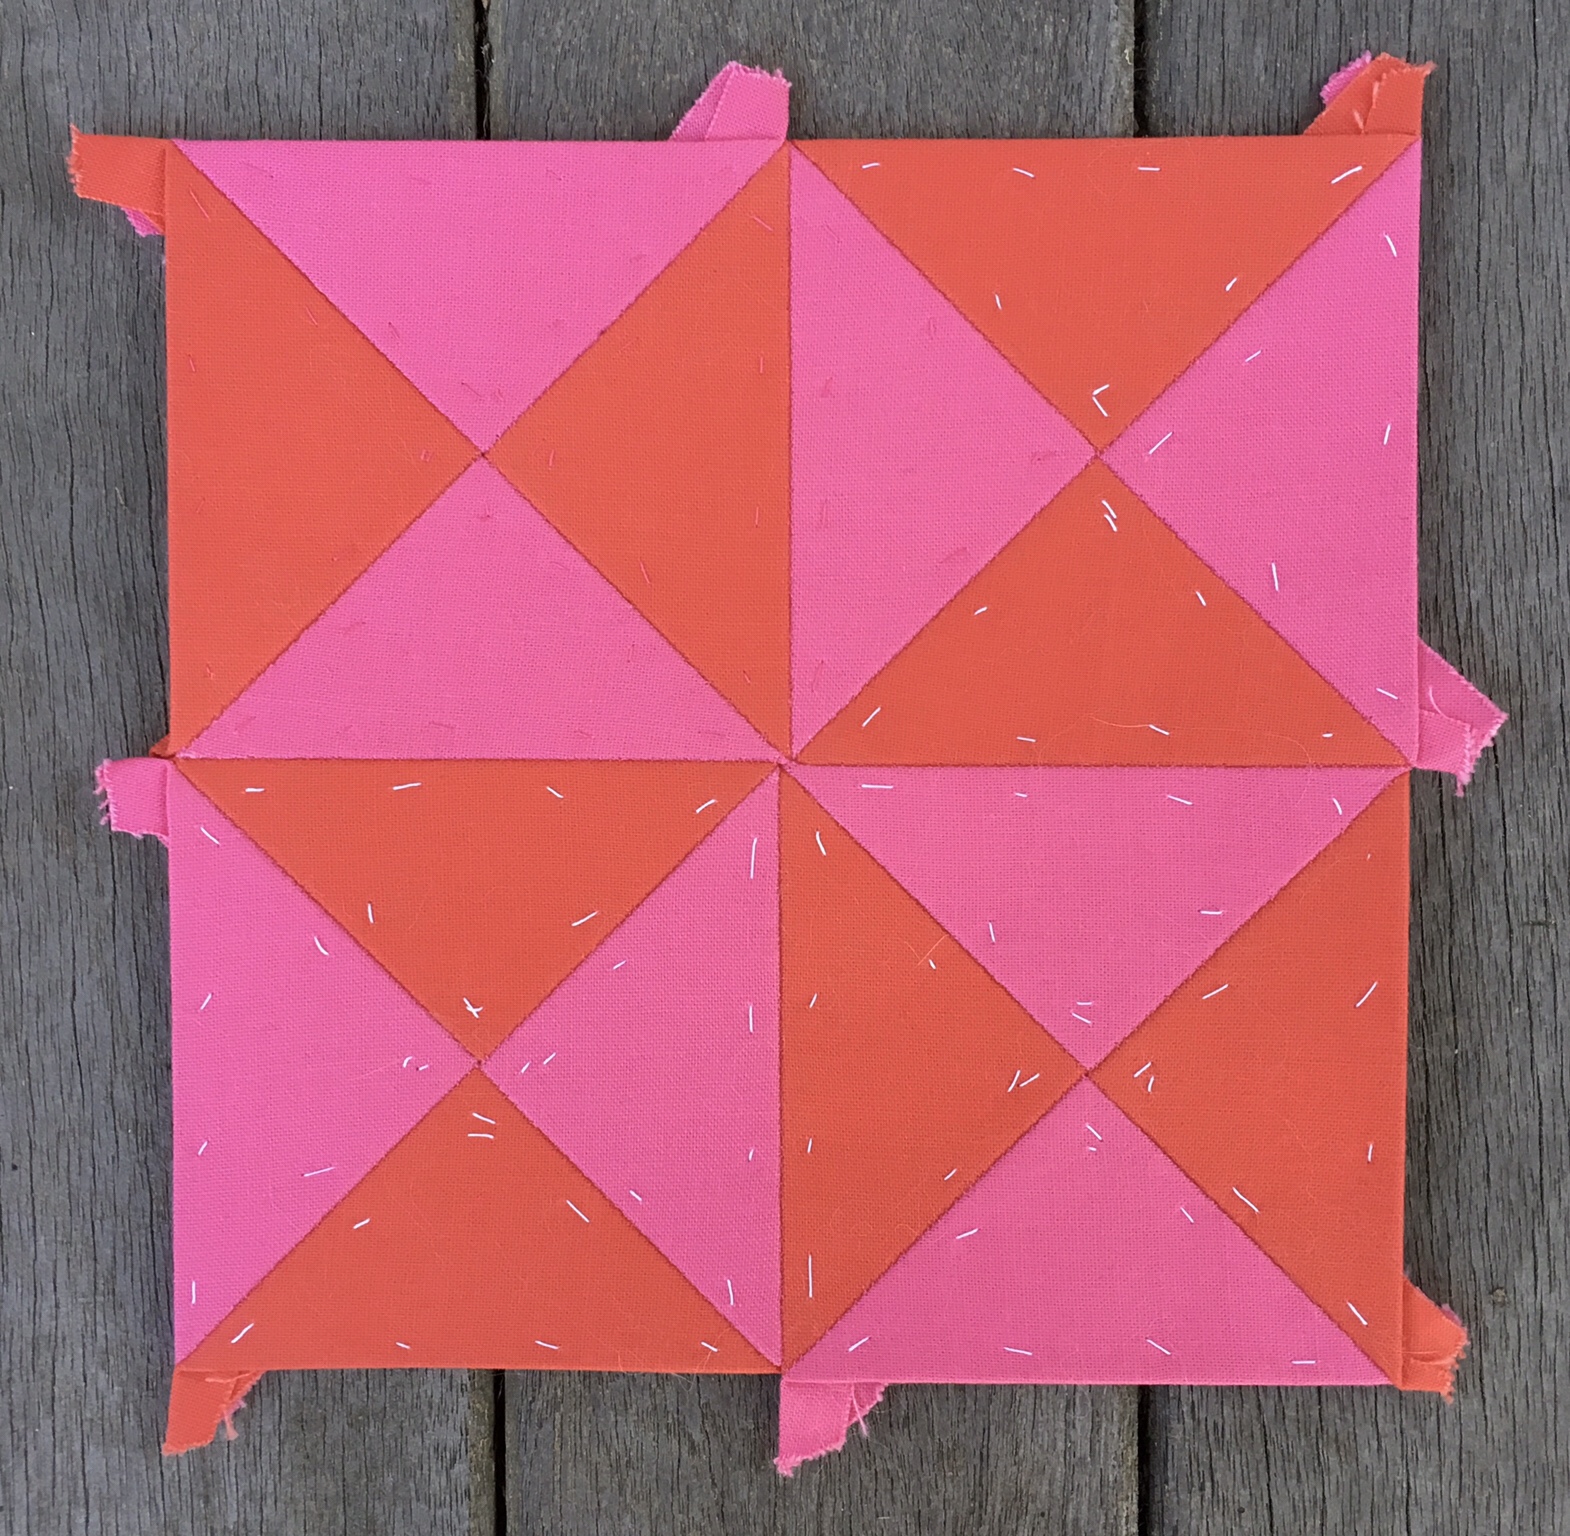
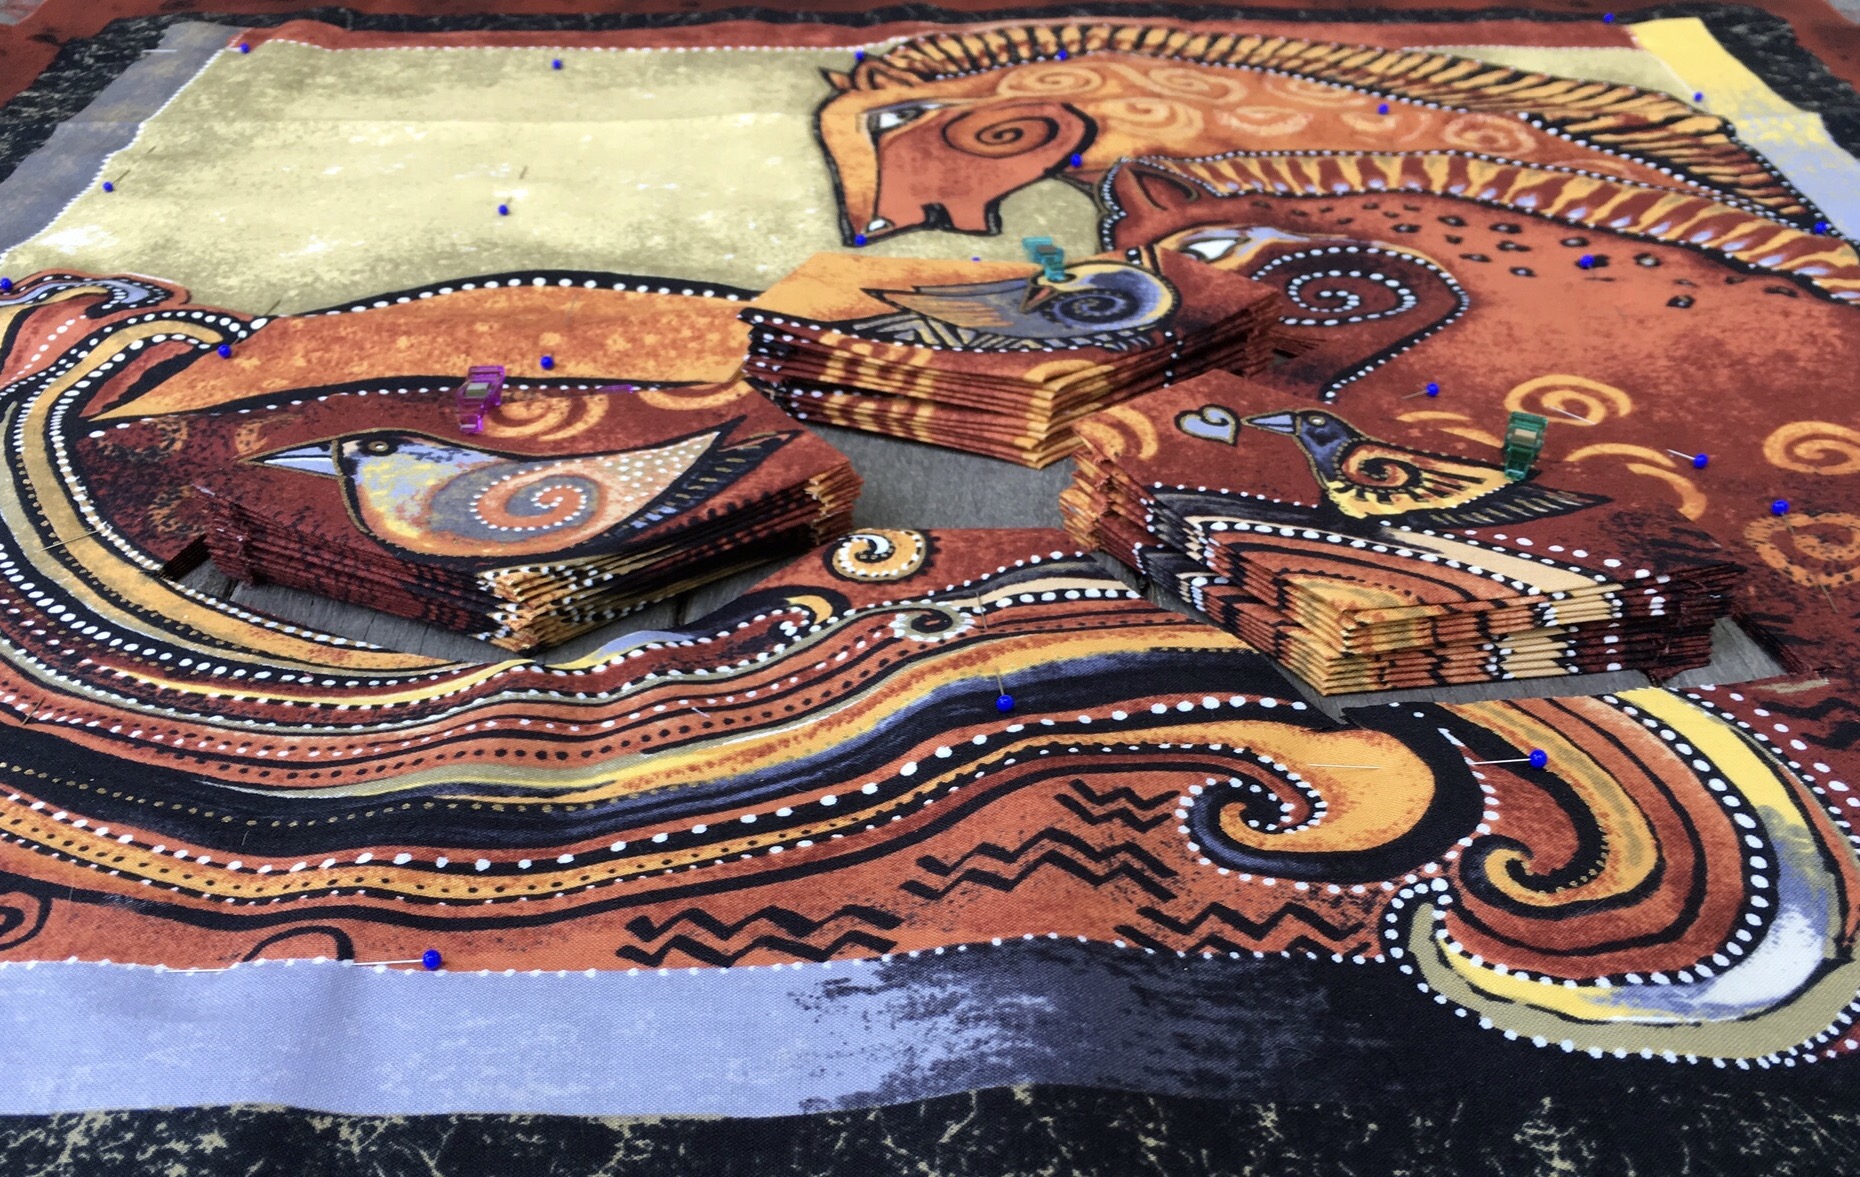
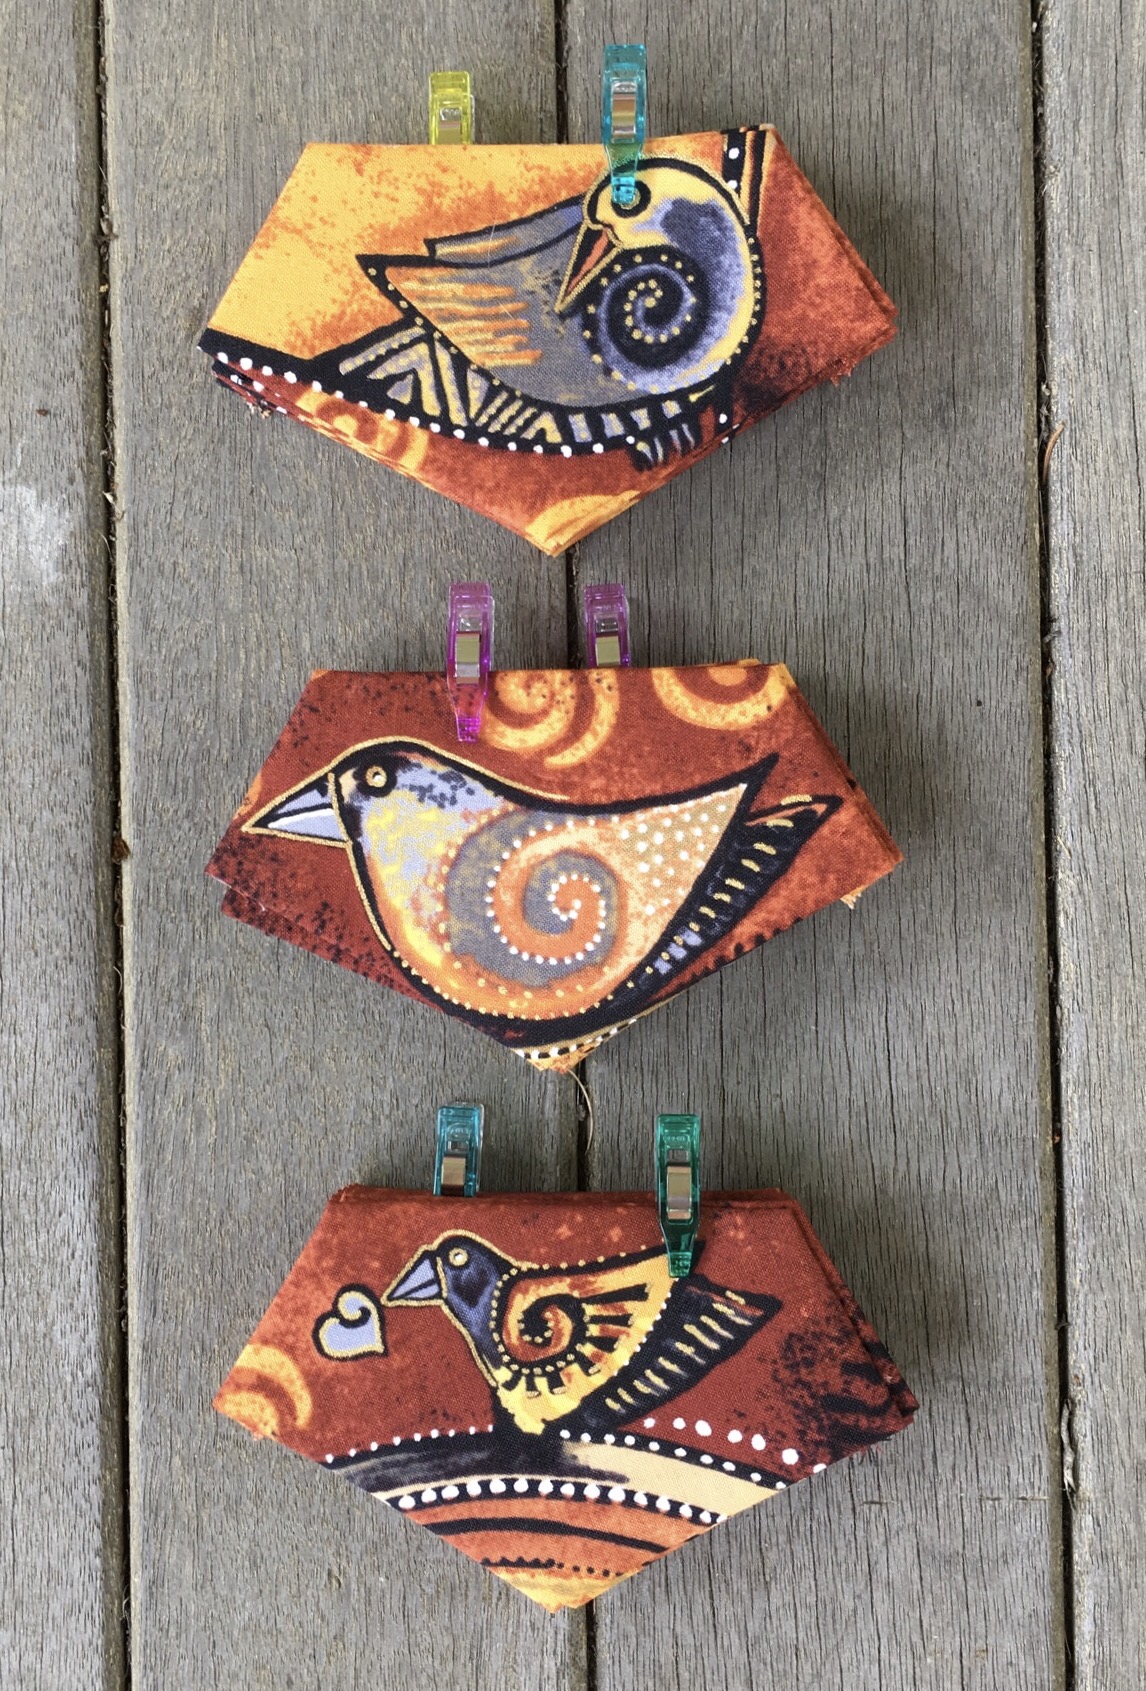
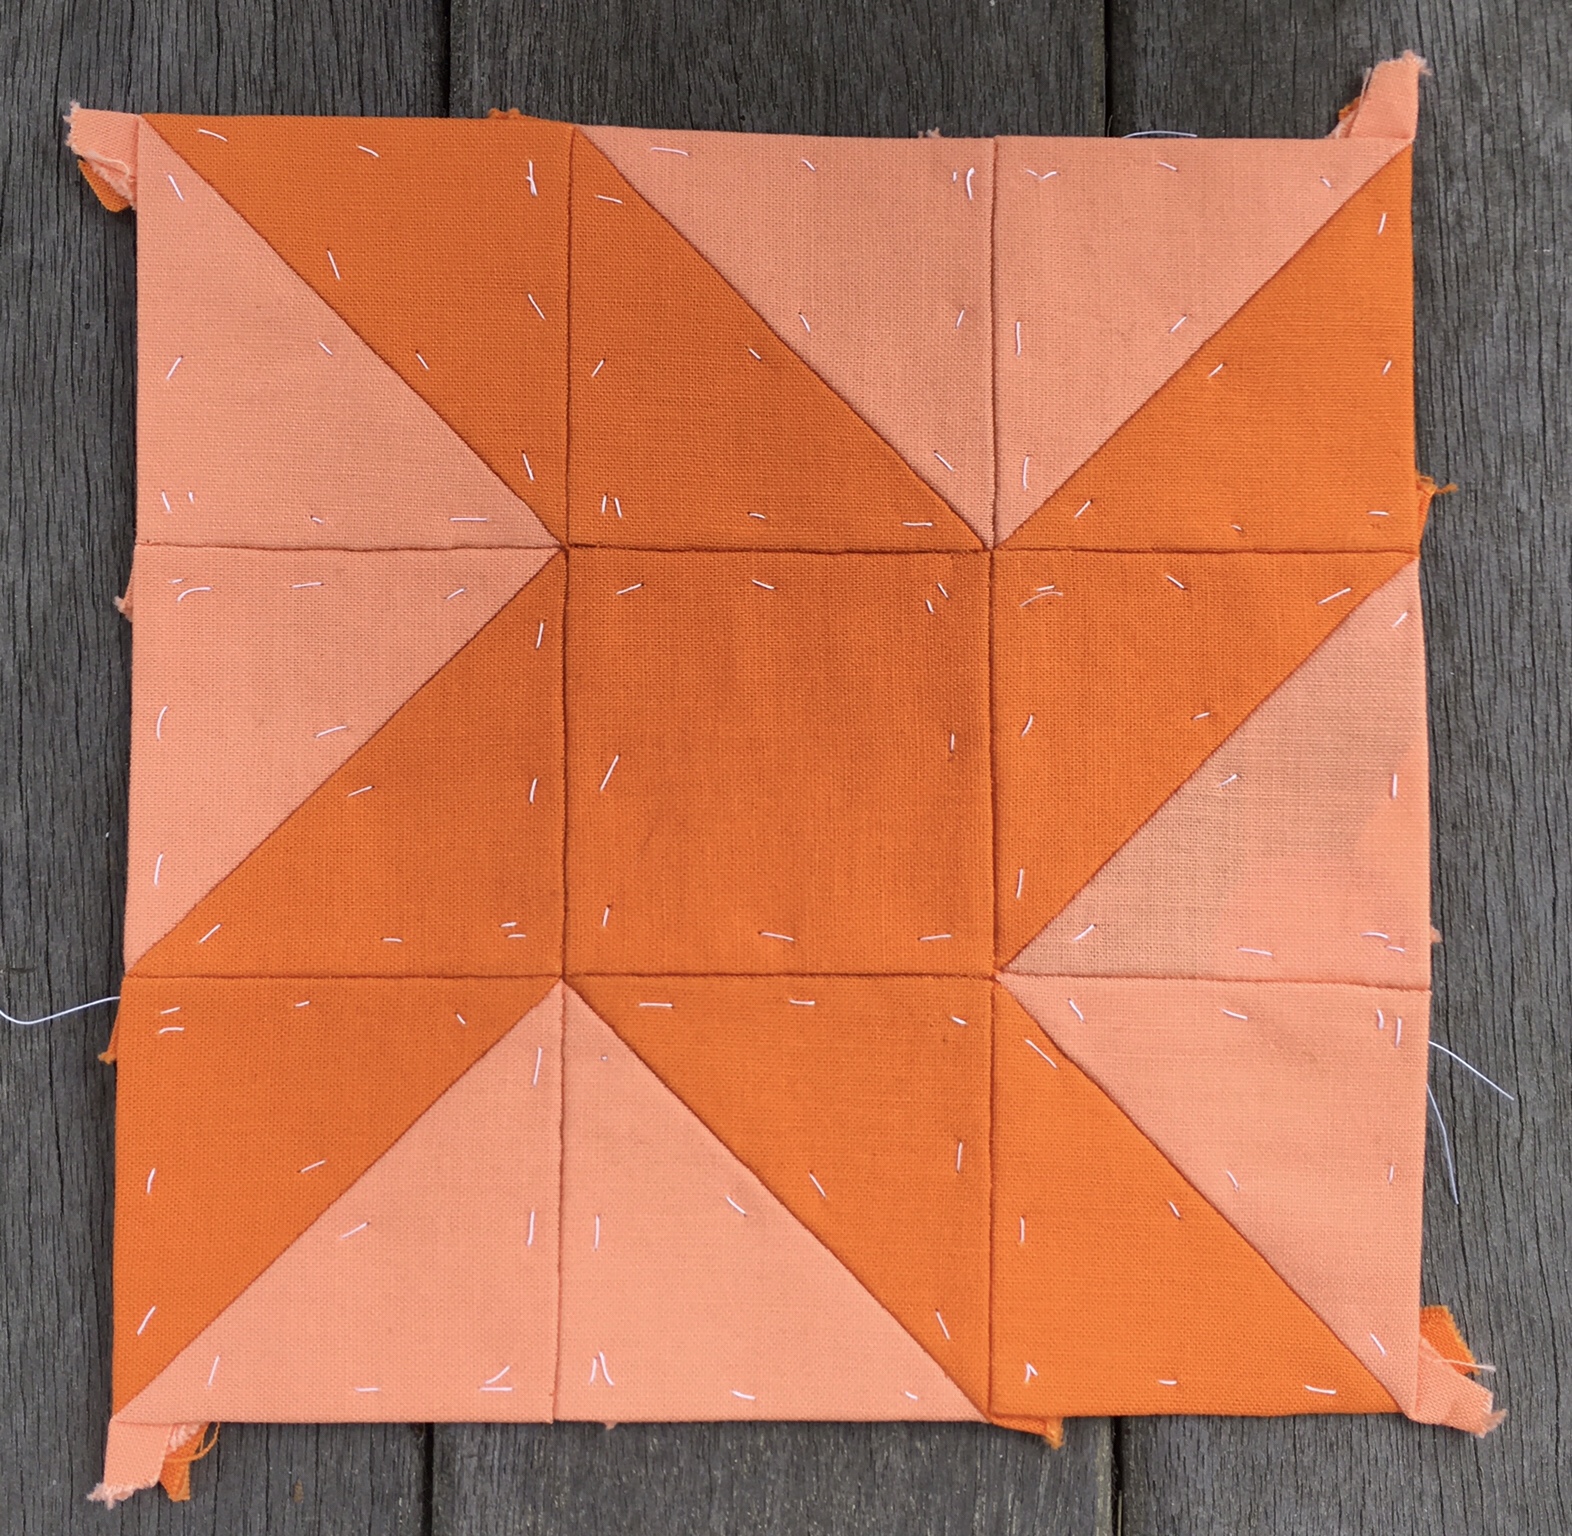
#15 Buzzard’s Roost

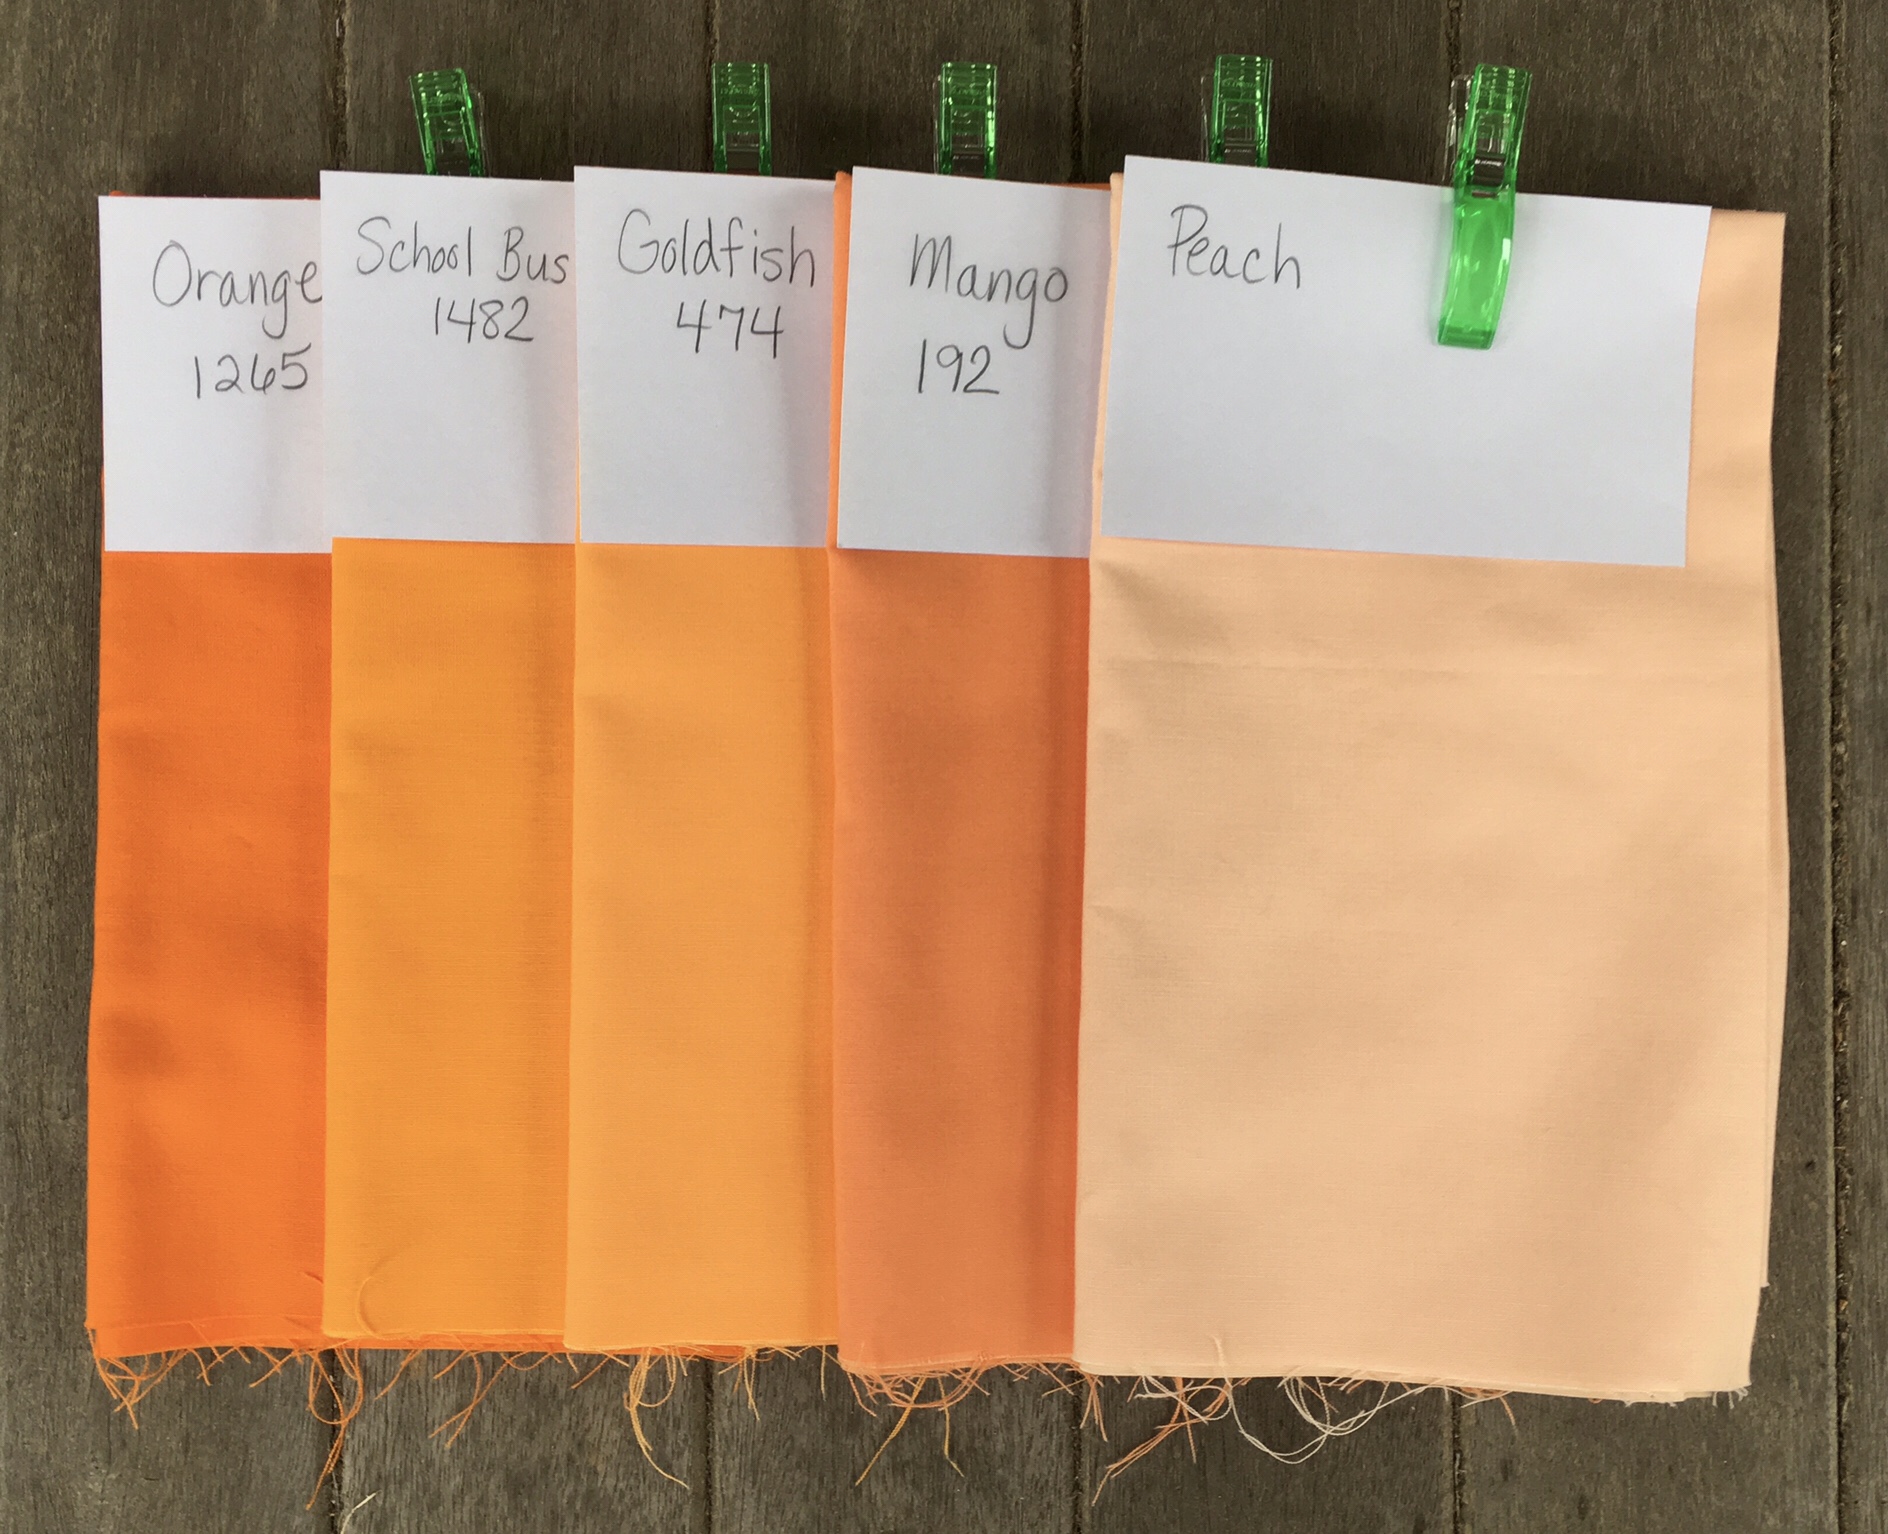
Kona solids from light to dark are Peach and Mango.

This is a high contrast block, but not nearly as high in contrast as it appears to be here. The Peach fabric looks darker in person. Peach is the lightest value fabric I have in my collection of oranges. I am considering using it for sashing in the peachy color area.

This week’s work has prompted me to look carefully at the construction of the blocks in the book. I wonder how many can be simplified for EPP.

Interestingly, blocks that do not follow the seams in the book are not eligible to be entered for prizes for the sew along. That is fine by me. I’m more interested in living up to the spirit of EPP than I am in winning prizes.

I have one more block to share this week. It is a remake of a block from last week.

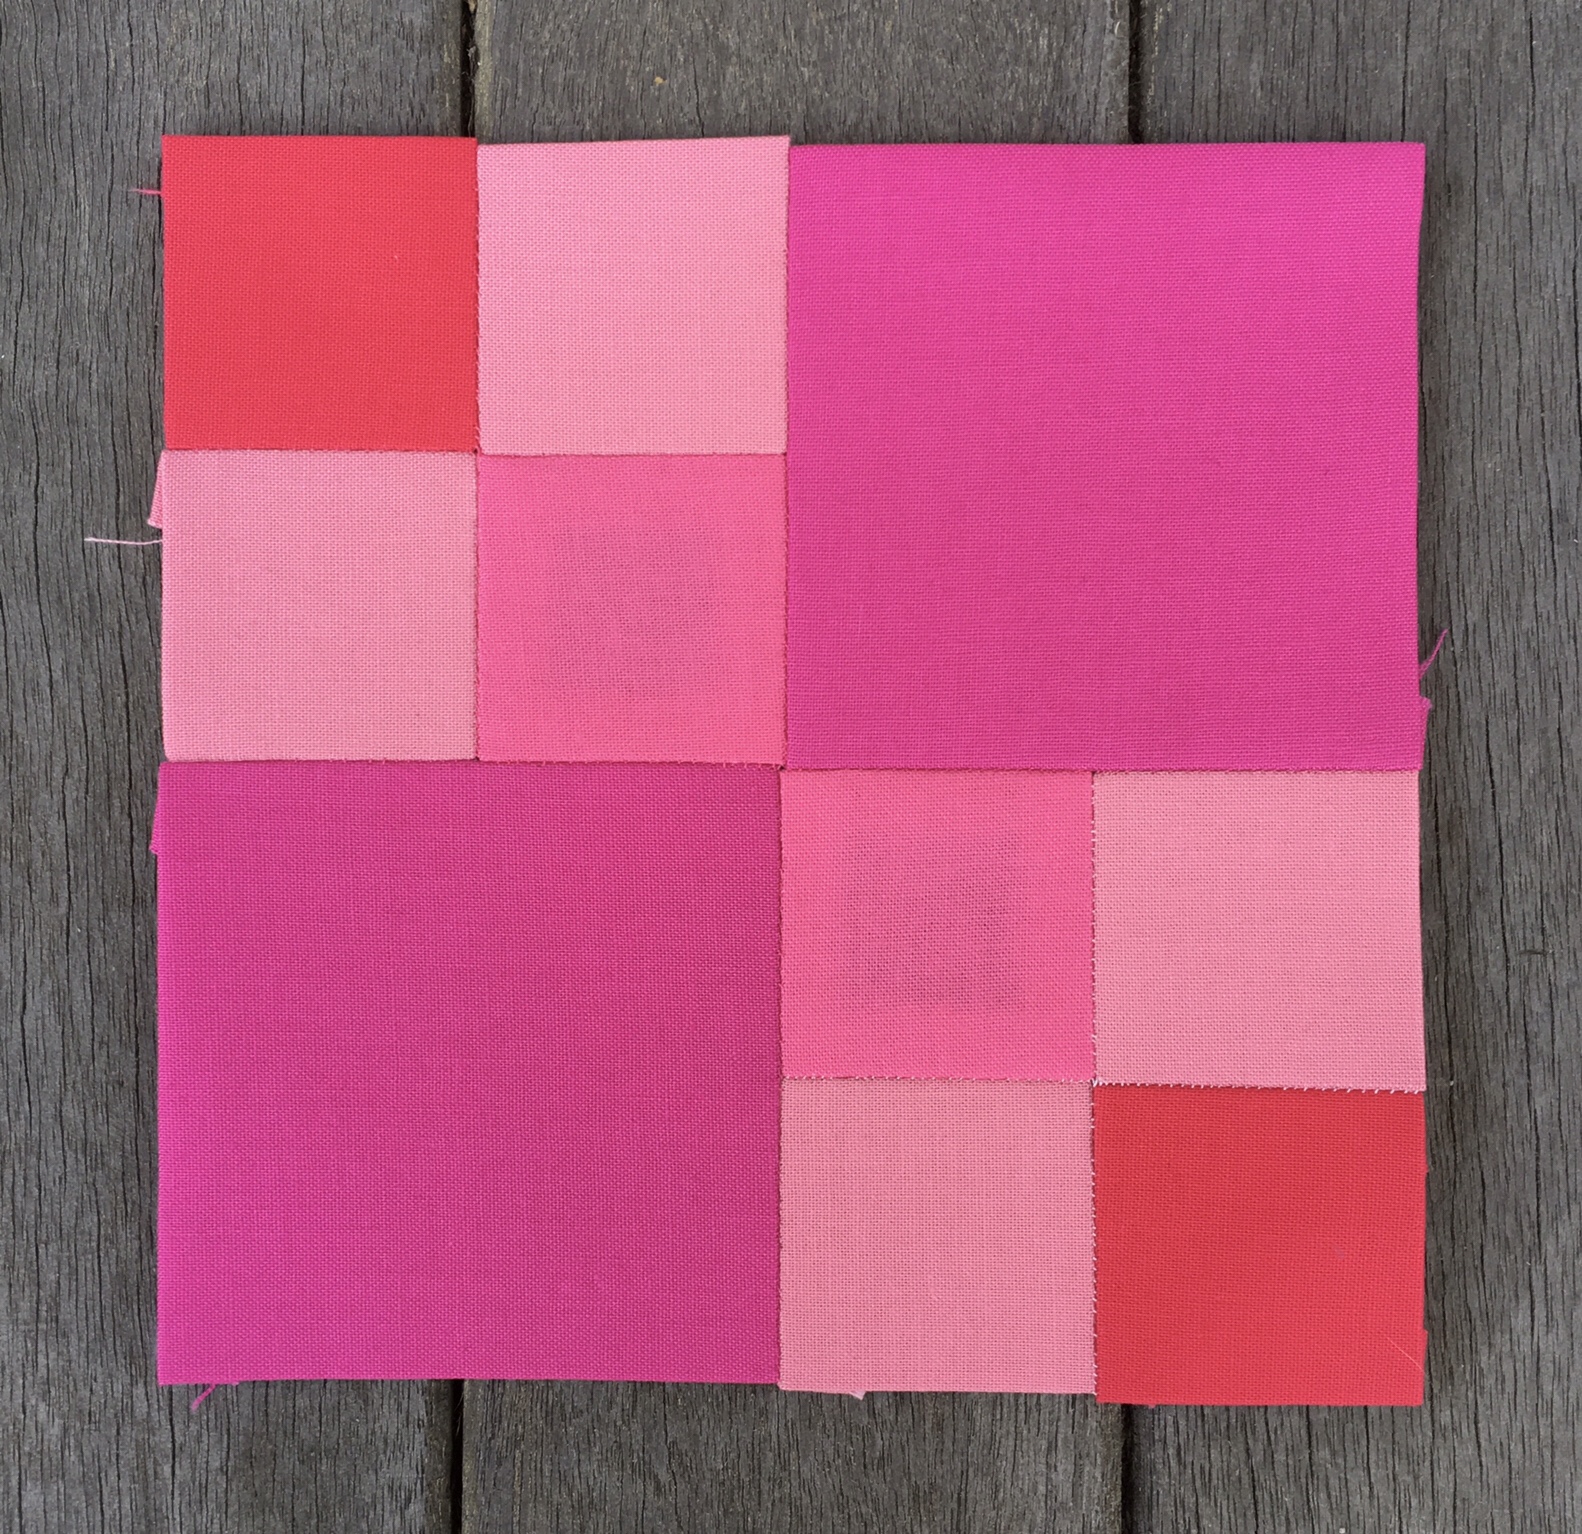
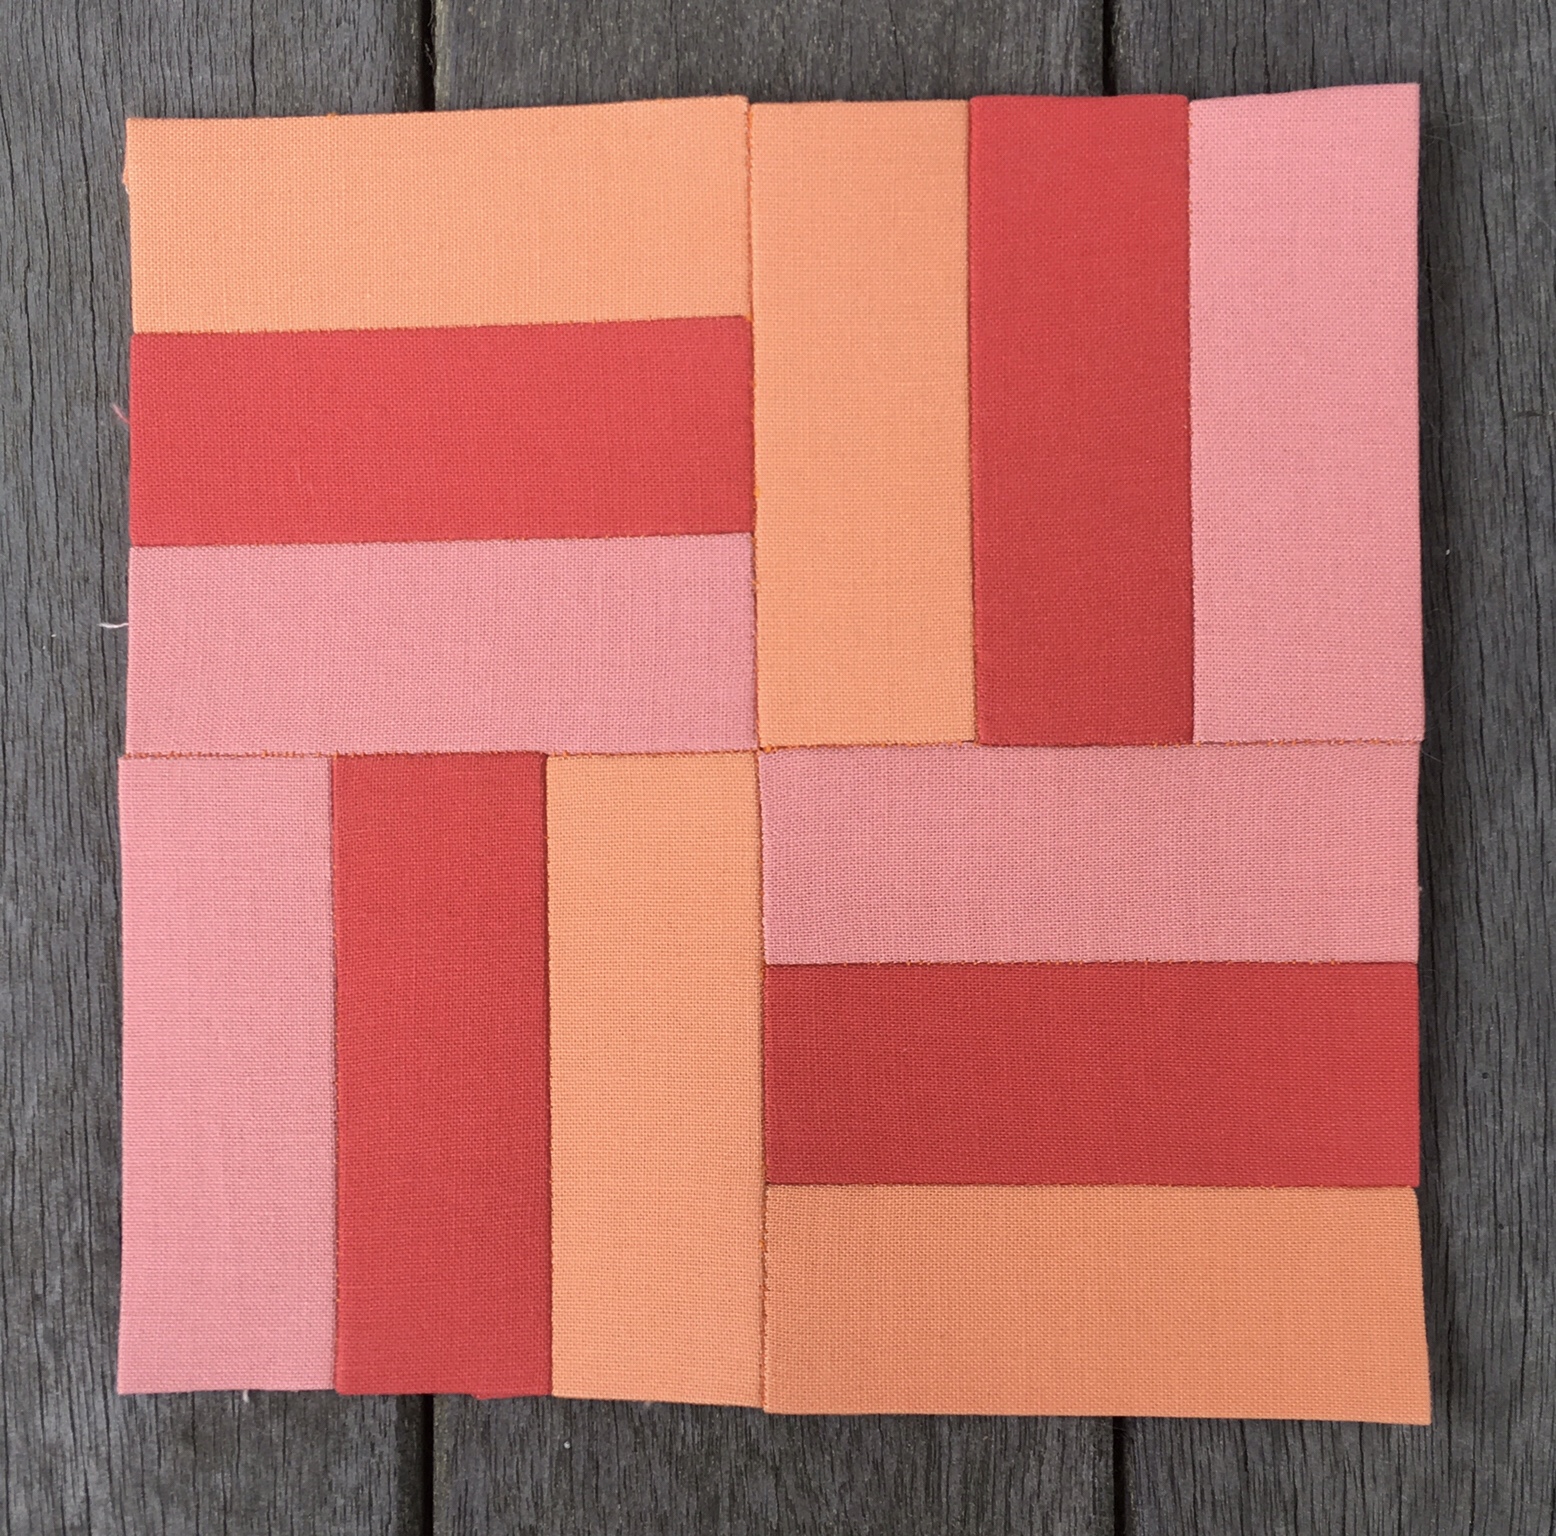
#4 Basket Weave (revisited)

Kona solids from light to dark are Salmon, Mango, and Coral.

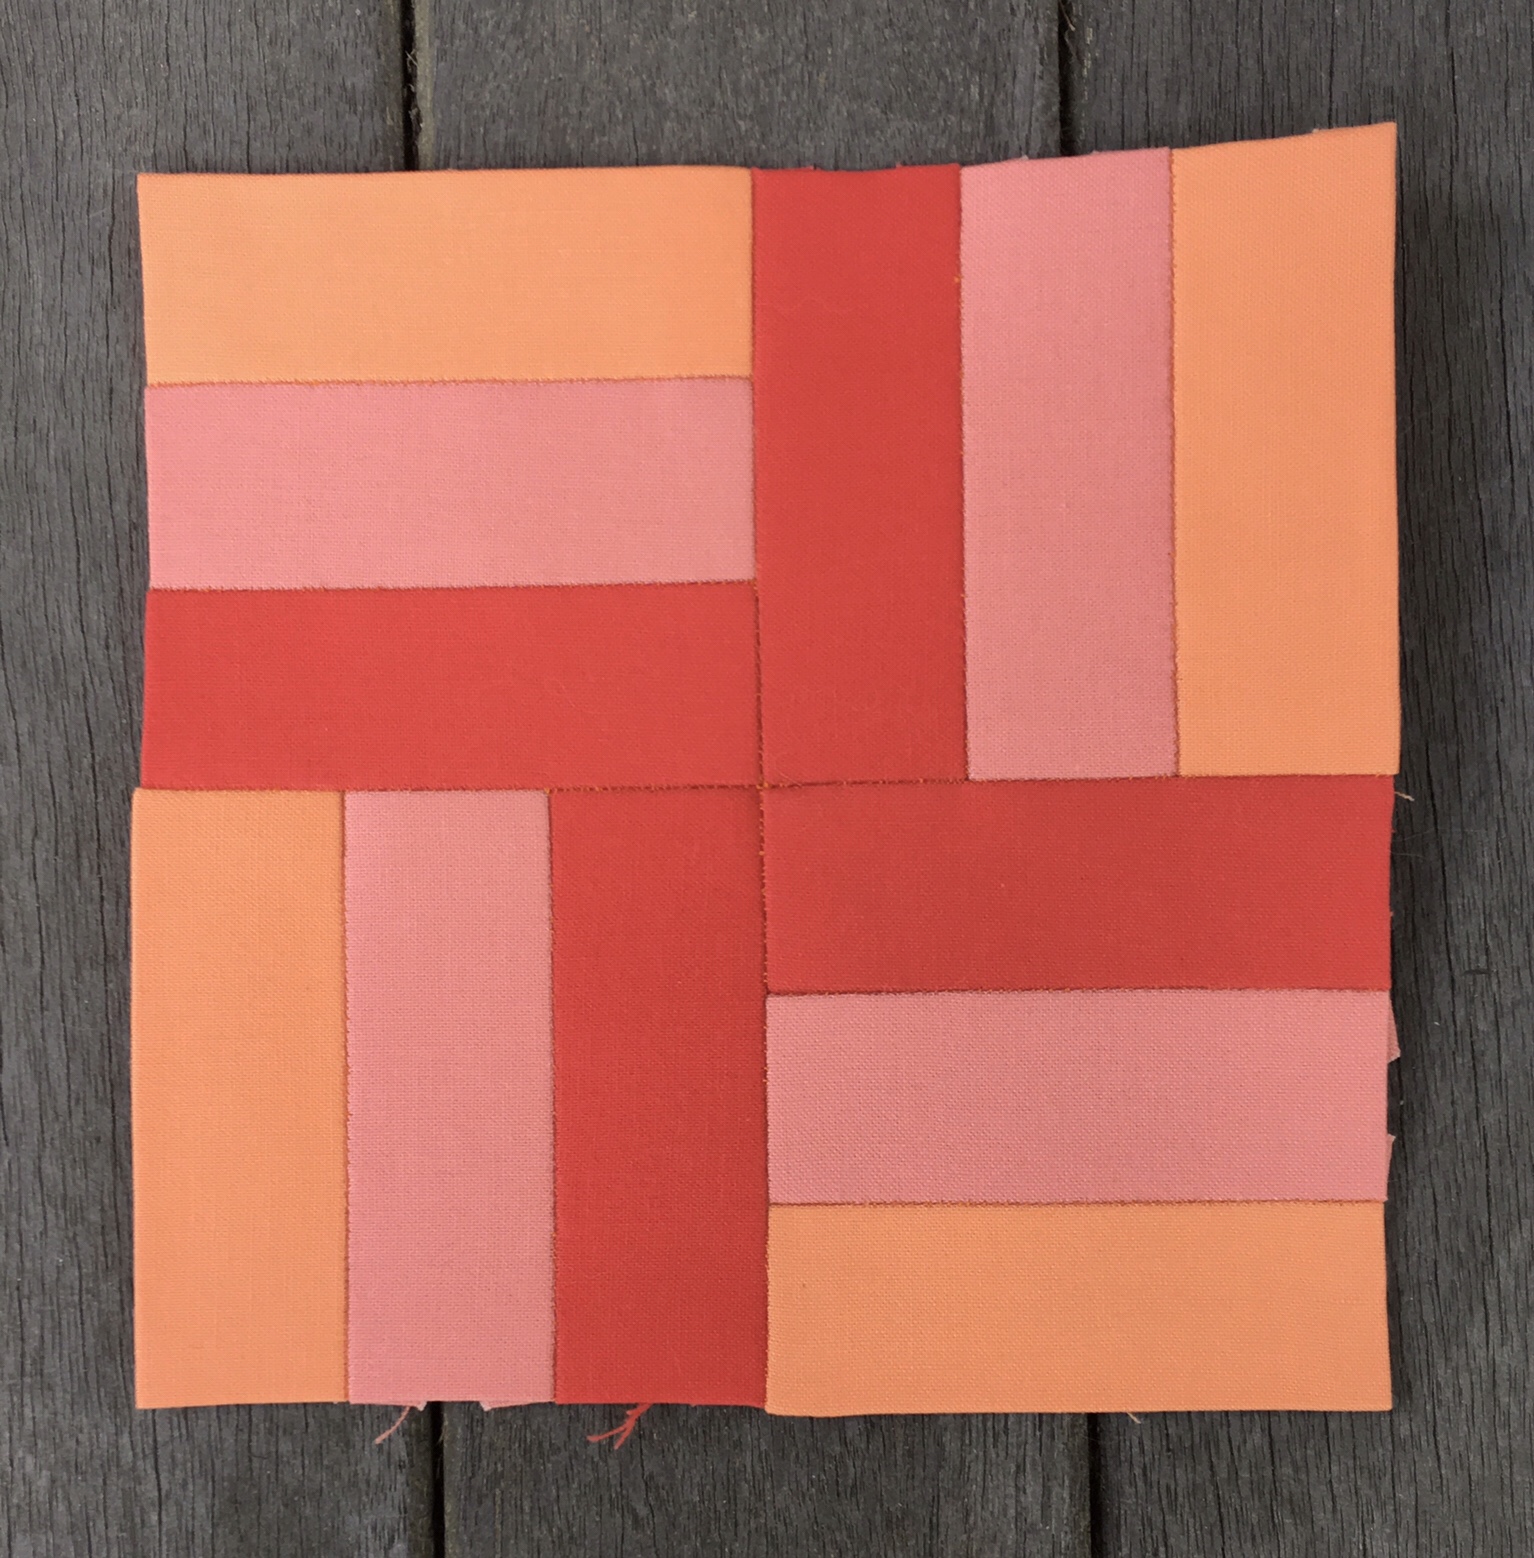
After viewing Angie’s version of this block I decided to redo mine in a similar configuration. It is much more like a windmill, and less like a Swastika this way.

My Process for Choosing Fabrics

At the beginning of this journey it was enough to look at the color wash plan and choose from among the fabrics I had purchased for that color area.

However, as my blocks accumulated I decided that it would be necessary to take into account the hues and values of fabrics in adjacent blocks. To do this I arranged my finished blocks so I could take a picture for a visual reference when selecting fabrics for the next few blocks.

I also took close up photos of the location of unfinished blocks and labeled them for easy reference to the book. I’ve been following the relative values of colors in the book.

Let the Stitching Begin

It is the end of the first week on the Farmer’s Wife sew along, #fw1920eppsal. The pace of the event is two blocks per week, so I am decidedly ahead of the game already. I have five finished blocks to show today.

#1 Attic Windows

With this block I learned not to remove internal papers before photographing the work.

#2 Autumn Tints

This was a very straightforward block.

I skipped over #3 Basket because I wanted to see how Gnome Angel would deal with the handle. I watched a live video feed last night where she talked about the handle, and demonstrated a way to deal with it. Her suggestion was to wait until the end when all the papers come out to finish the block. So I will be making it without the handle, and presenting it that way for the time being.

#4 Basket Weave

I had trouble with the edges of this block and actually needed to rip the joining seams out into the block to ease them. I documented that process with photos and might do a post about it later.

This block dramatically demonstrated to me the problem of blocks expanding in size when pieces are added together. This is a potential issue when it comes to adding sashing.

#5 Bat Wing

This block was really easy to assemble.

#6 Big Dipper

Up until this block I had been glue basting my pieces. I decided to go old school and thread baste this one. I started out using 50 weight cotton Sewing thread to baste so it would not show as much in the blog photos. See the upper left. I thought that this thread was more slippery than the thread I had previously used when basting, so I switched to a white cotton quilting thread that offered more tooth thus gripping the fabric more. I was happy with the results.

To glue or to thread baste, that is the question. Gluing is faster. Thread basting seems to offer me more control. It takes a lot more time, but it is meditative, and in keeping with traditions of EPP.

Another thing noteworthy about this block is that I was careful to baste my triangles so my tails are all pointing clockwise. This is necessary in order to achieve proper nesting, which is especially important when eight tails meet at one point as they do in the center of this block.

I gently clipped the tails of these triangles before basting. I don’t think I will be doing that anymore.

I said I had five blocks, but the truth is that I have seven, but the last two have not been documented in the Farmer’s Wife Facebook Group yet, so I will leave them for the next weekly roundup.

Farmer’s Wife Color Selection

I’ve decided to do my version of The Farmer’s Wife using Kona Solid Fabrics. I made my initial selection of fabrics, which you can see above, from my newly acquired Kona Color Card. It was really difficult trying to get a good variety of colors and values just working with small chips and trying to keep a memory of the colors I wanted while ignoring the colors I didn’t want. I did my best, however, to get started knowing I could fill in any gaps later.

Kudos, by the way, to The Fat Quarter Shop for packaging their yardage in exactly the same order as they are listed on the packing list. This is no small convenience when it comes to labeling yardage that is very close in color.

These colors were chosen to work with the first few areas that I will encounter in my color wash quilt. I’ve chosen to use the plan created by the fine people at Paper Pieces, the best source of pre cut papers for English Paper Piecing.

Here is the full plan as executed with patterned fabrics by Art Gallery Fabrics.

Here is a closeup of the area I’ll be starting with using Paper Pack #1 from Paper Pieces.

And here is a super useful chart showing how to overlap colors for a smooth wash effect. This chart happens to illustrate that the placement of blocks in the quilt sometimes differs from the placement plan, but I do not find that an issue.

I got the brilliant idea to choose additional fabrics by using a digital version of the color guide, my recently purchased and meticulously labeled fabrics, and my Kona Color Card. I came up with an extensive list of fabrics to order from The Fat Quarter Shop, but I’m holding off because I want to get moving with block construction. While I work on blocks I will let my thoughts about value and contrast jell. After all I’ve got sashing, cornerstones, and borders to consider.

The color guide line drawing is going to be helpful as I navigate my way through this daunting project. I’m psyched! Who is with me?

Back to the Farmer’s Wife

A couple years ago I started doing the 1930s version of the Farmer’s Wife quilt using the English Paper Piecing technique, EPP. I joined the Facebook group for the sew along. Only a few of us were doing the project with EPP. I was doing great, but I got distracted by my work with the Glorious Hexagons project, and my FW quilt officially became a UFO.

Starting August 24th Gnome Angel is once again doing a Farmer’s Wife sew along. This time she is doing it using the original 1920s book and she is doing it using the EPP method. I’m wrapping up my first Glorious Hexagons quilt, and want to stay the course, but how could I resist this new adventure?

To clinch the deal I realized that it was exactly a year to the day on August 24th when I posted my last blog post. This was a sign. It also seemed like a good opportunity to document a new journey. I had gotten distracted by cataract surgery last year, and by the time I felt ready to blog again catching up with GH progress seemed like an impossible task.

So here is hoping that I can get back into the blogging swing.

Cataract Surgery: Second Eye Done

It is now two days after my second cataract surgery was performed. Now that things have begun to settle with my second eye I am happy with the results. Above you can see me stitching with an arrangement I devised. No, you are not seeing double. I am wearing two sets of glasses, and channeling my inner Ben Franklin. The bottom glasses are a set of drug store reading glasses that my husband bought a while back. He does not remember the strength of these glasses. Though I am holding the work at a distance for the sake of the photo, I actually stitch with my work about six inches from my eyes. The reading glasses allow me to thread a needle, and to do fine hand stitches because I can bring the work close enough to see detail. Unfortunately, my corrected near vision focuses much farther away than my preferred sewing distance. It is a distance appropriate for reading, but not sewing.

The fact that I am going to need glasses for stitching made me initially question my choice to correct for near vision. I’m going to need to have a pair of progressive glasses made with a strong reading prescription along with my distance prescription just so I can stitch and watch TV. If I had corrected for far vision I could simply look over a standard set of drugstore readers while stitching and watching TV.

I do, however, really enjoy being able to read and use my iPad without glasses, so I guess I will just work around the stitching problem. It is important for me to be thankful for the good things that came out of my surgery. My color perception is improved. I can read comfortably. I have more light coming into enlarged pupils of both eyes. My whole world is brighter. While I had little interest in seeing at a blurry distance I now put my glasses on more often because they help me see even though they are not really the right prescription yet.

Reading glasses are helping for now with stitching. However, even with the reading glasses threading a needle requires real effort, and is a bit hit or miss. It takes me three or four times as long to thread a needle now than when I had cataracts in both eyes because then both eyes were focusing very close to my eyes. My needle threading skill might improve as my left eye catches up with my right eye, however. I certainly hope so.

I am considering purchasing a special set of glasses from Craft Optics. I observed a friend using a set of these telescopic glasses at a quilt retreat, but she was using them for machine sewing. These glasses are like those worn by surgeons. If you have watched Grey’s Anatomy you’ve seen them used, especially by the brain surgeons. I wonder if my doctor was using them during my cataract surgery.

I’ll do a follow up post in a couple months after I have all of my sewing solutions in place.

Cutting Into My Last Twelve Panels

I have twelve panels remaining from my Embracing Horses collection of fabric created by Laurel Burch. I decided that I needed to cut into these last twelve panels to create more large hexagons for my Blue Star Quilt. Notice how nicely the individual panels were packaged by PM Quilting. I bought every panel that they had, and have been hoarding them for a long time.

I pressed my panels on my work table, then cut them into sections. I made two layer stacks of the large horse section of the panel. I then cut into those panels to extract the birds from the design. I used the three inch hexagon template for this extraction process.

Below is a viewpoint that makes it clear that I was able to obtain twelve of each bird. These pieces are already glue basted to paper pieces. The pieces will be joined to make three inch hexagons. I had created blocks previously using these cuts, so they are not new designs. I will end up with four hexagons using each bird. Three of them will be combined into a single Large Hexagon using three other complementary blocks. The remaining three diverse bird hexagons will be combined into another Large Hexagon. This strategy is in keeping with the way I have occasionally used three matching hexagons along with three other complementary hexagons.

Here are all the little birdies.


Cataract Surgery: Halfway Done

I noticed a couple weeks ago that I had not posted in two solid months. That’s not like me, but I attribute my lapse to one thing. I’d been quite consumed with worry about my upcoming cataract surgery. Now that one eye is finished, and the second eye is a week away from being done, I’m ready to write about this adventure.

This topic is definitely quilt related because there is nothing more important to a quilter, especially a hand stitcher, than her vision. My vision has been severely compromised for a few years; more so than I would care to admit even to myself. So if you have been admiring the glory of my hand sewn Glorious Hexagons, you can be even more in awe of my work than you already were.

For the past three or more years my world has been getting increasingly smaller. I have depended more and more on my close vision in recent years because I felt that I could at least see things within three feet of my face. Distance vision was another thing altogether. I could see about as well without my glasses as with my glasses, which was not very good at all. My cataracts had gotten bad enough that adjustments in my prescription did nothing to improve my vision. My last new set of glasses was purchased over a decade ago. I stopped wearing my glasses except to see my computer screen or to drive, which I had little business doing. Around the house I mostly didn’t bother with glasses at all. I read on my iPad without my glasses. I never turned on the TV. Instead I watched all my video on my iPad. Needle threading and sewing took place about six inches away from my face. That’s where things were almost sharp.

I continued to drive because although I could not read road signs I could see well enough to get around locally during the day. I knew where I was going. I had given up on driving at night altogether. The cataracts prevented it, but it was made even more impossible because my irises were stuck in the shape of tiny little pin holes. My pupils could no longer dilate because they had been glued to the lenses of my eyes as a result of over 20 years of severe inflammation caused by a condition called iritis.

I think most people are a little afraid of cataract surgery, but I was absolutely terrified. It is bad enough to know that your eyes will be cut into when you are awake and aware, but I had the added burden of knowing that my irises were going to have to be scraped from my lenses before they could be removed.

In May I ended up choosing dates for my surgery. I chose August 1st and August 22nd. I wanted to give myself time to prepare myself mentally for the ordeal, and I also wanted time to make the decision of whether to focus my new lenses for near vision or far vision. I had to chose because I was not a candidate for lenses that could change focus, nor could I chose one eye near and one eye far because my surgeon would only do that for someone who had proven their ability to adjust by wearing contact lenses.

My first instinct was to choose near vision because I am a hand stitcher. My surgeon told me that people who have been nearsighted from an early age, such as myself, sometimes choose to maintain the status quo and focus for near vision while accepting the fact that they will need glasses for driving, TV viewing, and far vision in general. I ended up second guessing myself, however. I asked the opinion of members of the Glorious Hexagons group on Facebook if any of them had chosen near vision and were happy with their choice. I wanted to hear that it was a good choice. After getting a great deal of conflicting input I decided to go with my first impression for the simple reason that no one who corrected for near vision reported being sorry for doing so, while some who corrected for far vision wished that they had not done so.

Here are the glasses that were doing me very little good while I still had cataracts obstructing my view. After my first surgery, on my right eye, I find myself using them more often because even with only one eye corrected I am getting some use out of them. I can read road signs again at least.

Here are the eye drops that I am required to use. I had to start them in the right eye a week before the first surgery, and I will taper off the last drop through November. I have to use it for a lot longer than most people would due to my propensity for inflammation.

Ted had gotten a calendar from a gas station that he takes our vehicles to. Neither of us had used it, but it proved to be the perfect size for me to document the use of my eyedrops. Today it is especially useful because it is the first day that I have had to use drops in both eyes.

These are the sunglasses I was required to wear outdoors for the first week following my first surgery. They fit over my regular glasses.

This angle makes it more clear that the glasses can fit over regular glasses. I will probably continue to use them even after I don’t need to.

This lovely piece of plastic gets taped over my eye for the first week after surgery any time I take a nap or go to bed at night. This prevents me from rubbing my eye in my sleep. It is hard enough to keep from rubbing my eye while I am awake.

I am at a bit of an awkward stage right now with my close vision. My left eye is focusing about six inches from my face, and my right eye is focusing about twelve inches from my face. This is about as annoying as you might imagine. I can barely thread a needle. My best eye is my right eye, but holding my work that far away from my face while doing hand stitching feels awkward. The interference from the left eye is annoying, and if I close it I have no depth perception. I am hoping that the addition of depth perception from the second eye will help with needle threading, and close stitching, once the second eye has been corrected.

In the mean time a good friend from my local quilt guild has sent me a special pair of glasses on loan, the sides of which can be focused independently. I tried them briefly, but don’t think they are going to help much with the needle threading or stitching, though I certainly did appreciate the gesture.

In a little over a week I should have a better idea of what kind of special lenses I might need for stitching. If I am lucky I’ll get used to holding my work farther away and I won’t need any special corrective lenses for close work.

Reading will be a dream, and using my iPad will be fantastic.

We have an old tube type TV that is probably about 22 inches in size. I turned it on for the first time in years, and exclaimed to my husband, “Honey, I can see the TV!”

Alternate Blue Star Quilt Arrangement

I had been planning to arrange the large hexagons of the blue star quilt with chocolate triangles to set off the shapes. I think I am leaning more now towards a more compressed setting of just the large hexagons next to each other.

I laid out the large hexagons with blue stars that I currently have finished on my front porch. Below I show a few views of this random configuration.

After seeing how nice this configuration looked I decided to lay out what I have so far on my queen sized bed.

The final configuration is going to yield areas along all four sides that will need to be dealt with in terms of design.

Along the left and right sides I will have a zig zag shape that will need to be filled. I might throw in a hexagon and then edge the area with chocolate or a subtle brown print.

Here is a close up of that idea. I’d be inclined to add chocolate triangles on both sides of the added hexagon to finish things off before adding the border.

The border of the top and bottom is actually more troublesome and will take more thought.

I don’t really have a well formed idea of how I will deal with this space yet.

I am inclined to piece something subtle with brown solids in the area down until the halfway point of the bottom two hexagons. Then I’d add a border fabric.

It is a long time before I will need to make this final decision. In the mean time I intend to make a few more large hexagons with blue star centers so I have many to choose from in creating the final configuration. I’m at a very awkward stage now with my vision, however, since I am halfway through cataract surgery. I have one eye finished and one eye yet to be done. This makes stitching very difficult, so I will be setting it aside for a couple of weeks.