Batik Flower Garden Quilting Sample

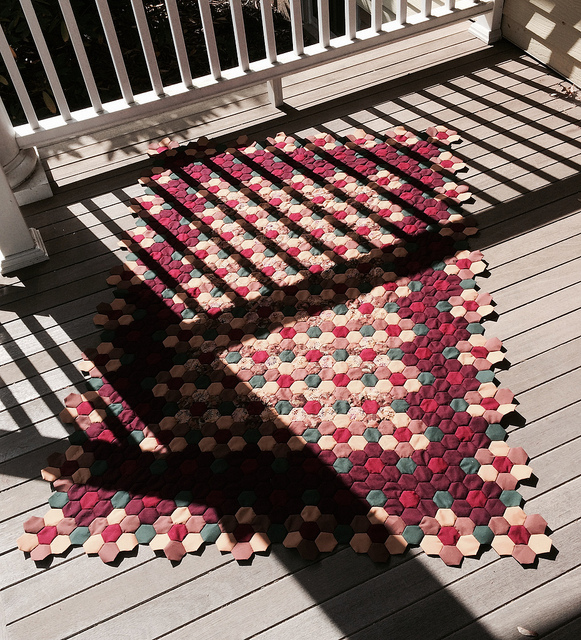
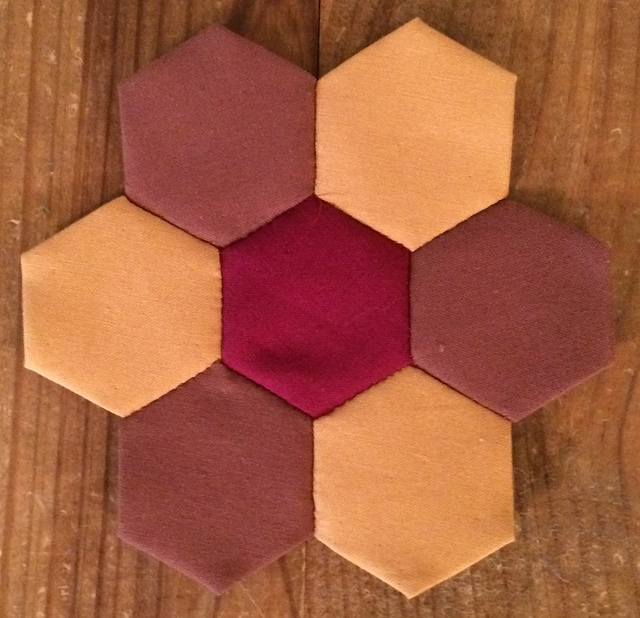
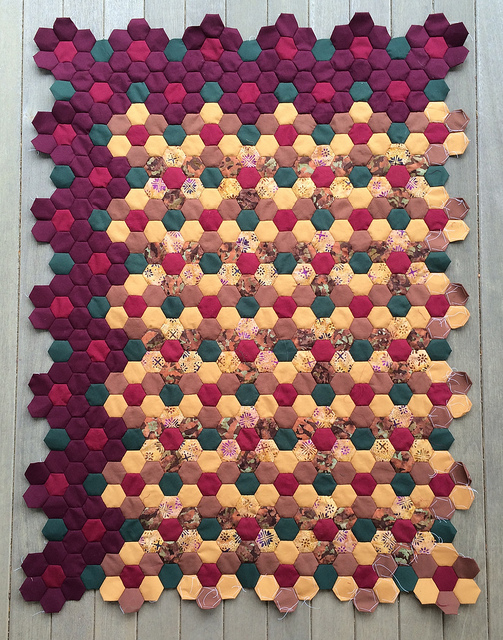
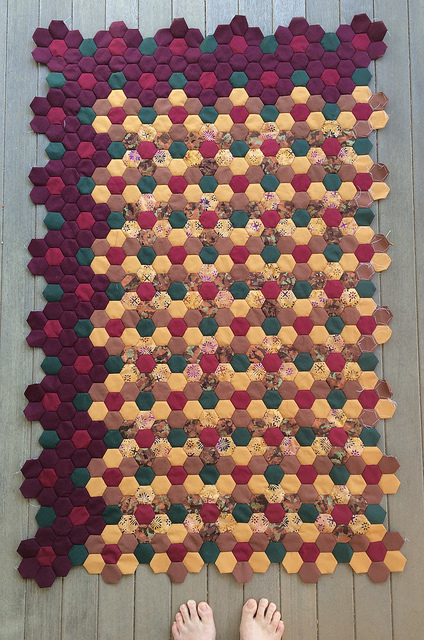
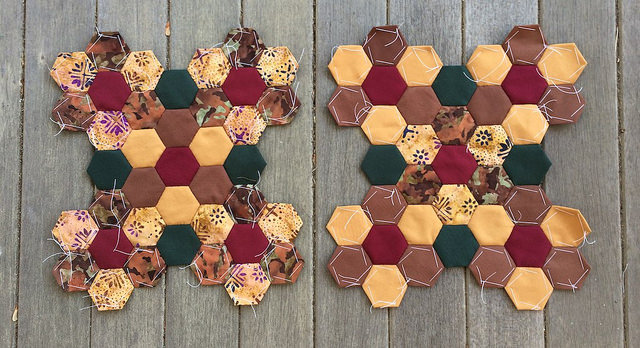
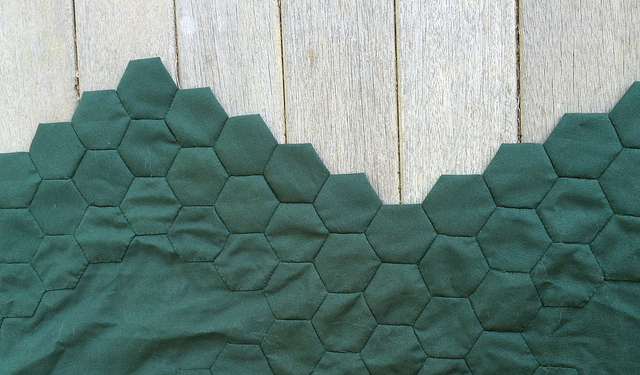
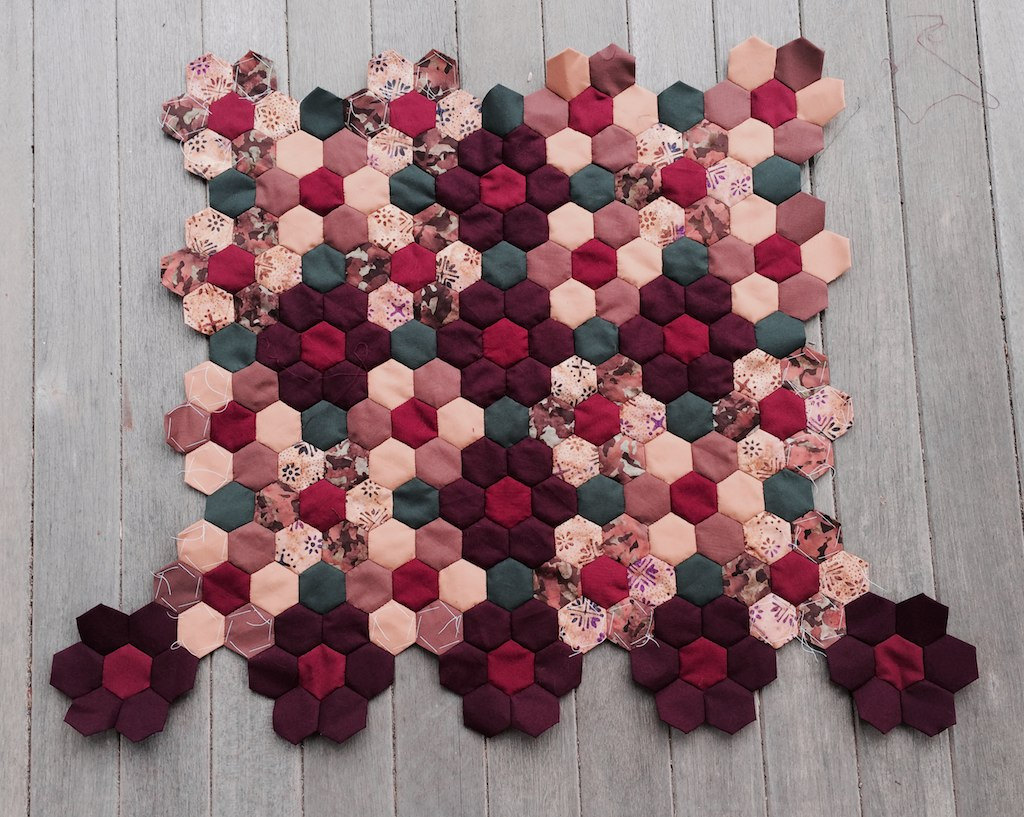
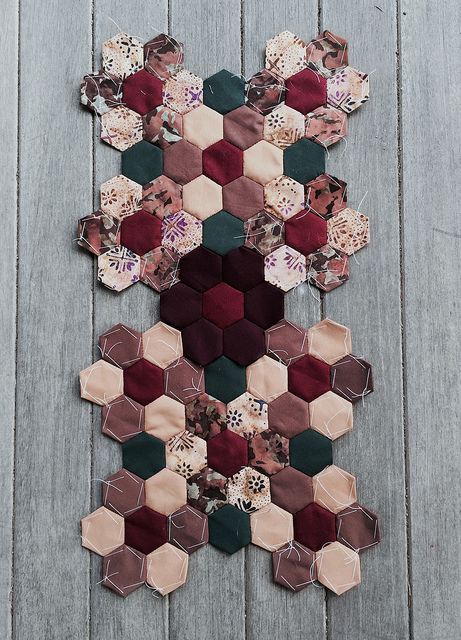
I Joined the two square units as pictured below.

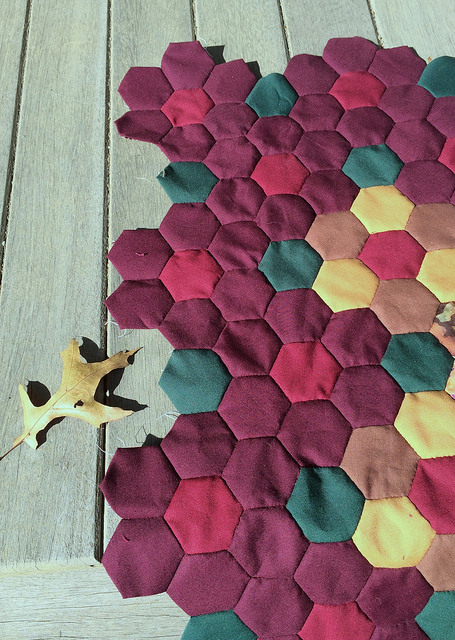
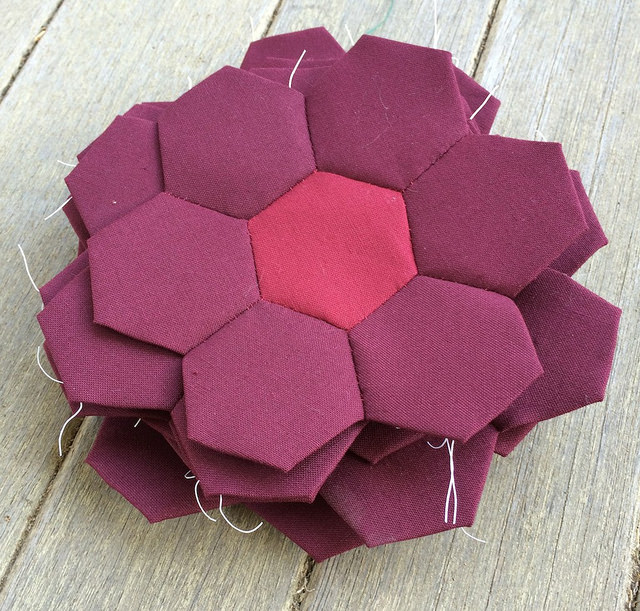
I had planned to create two additional units of the same type, but then I realized that it would be easier to just add the individual flowers in rows to flesh out the intended design. That is what I did.

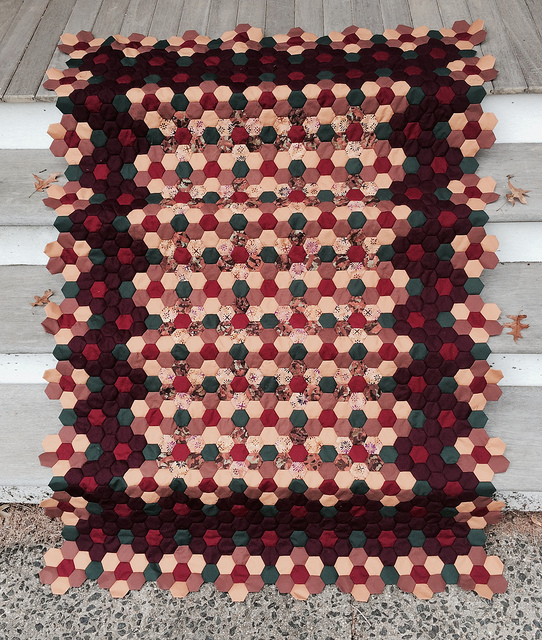
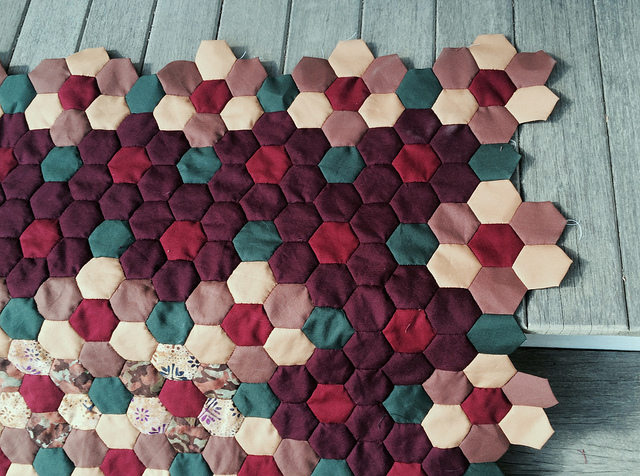
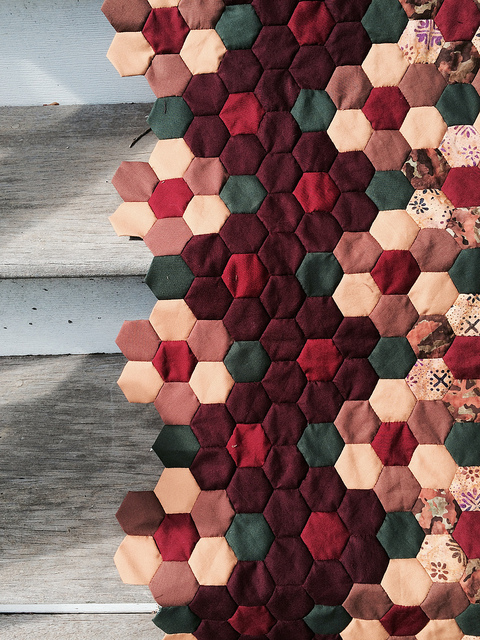
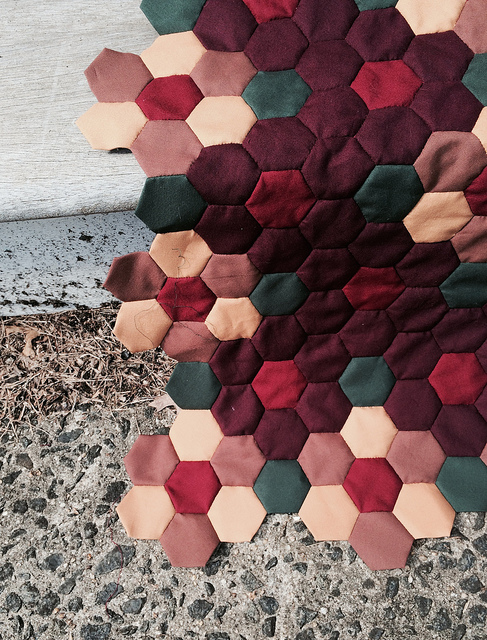
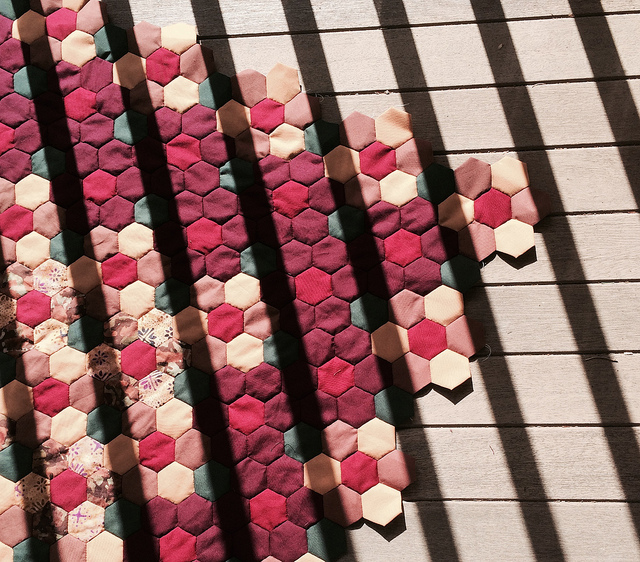
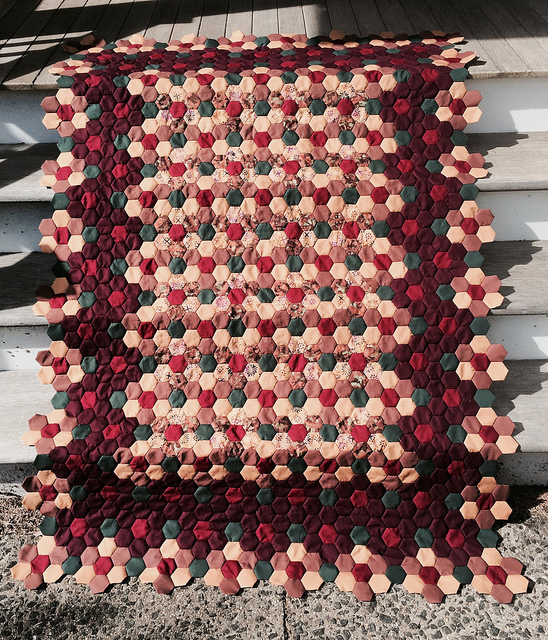
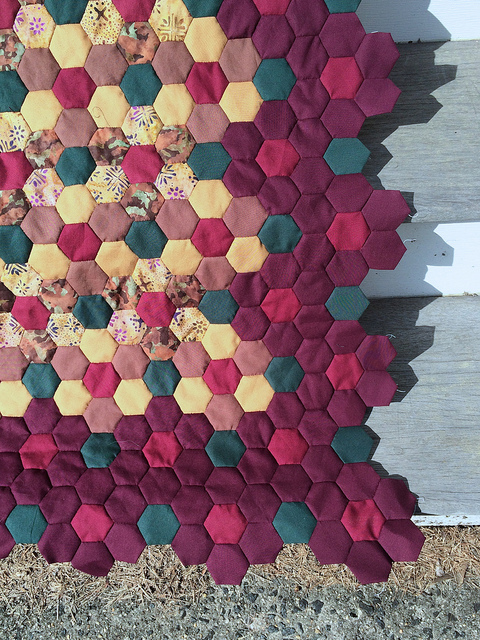
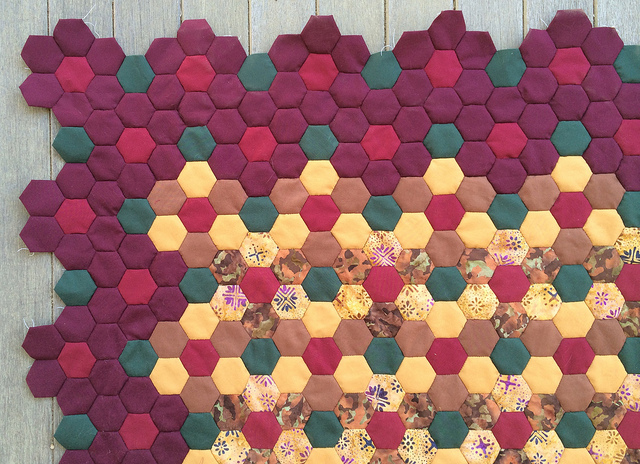
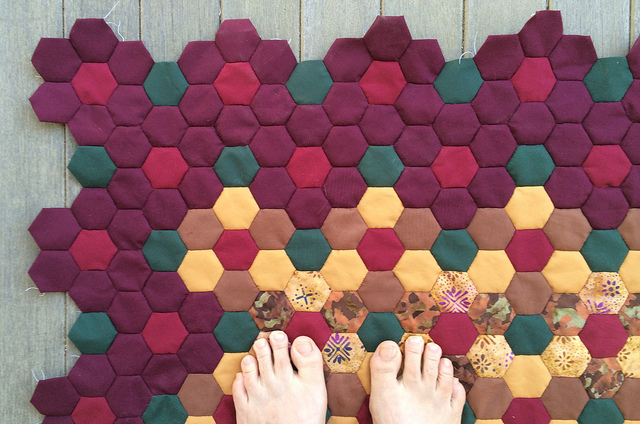
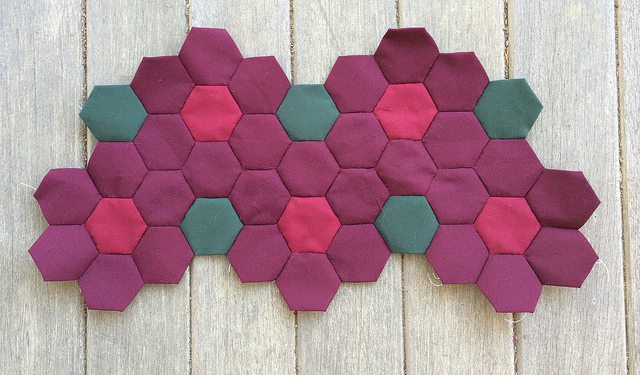
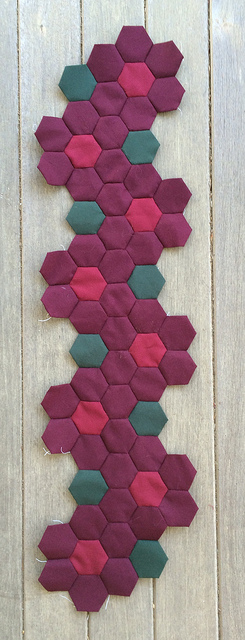
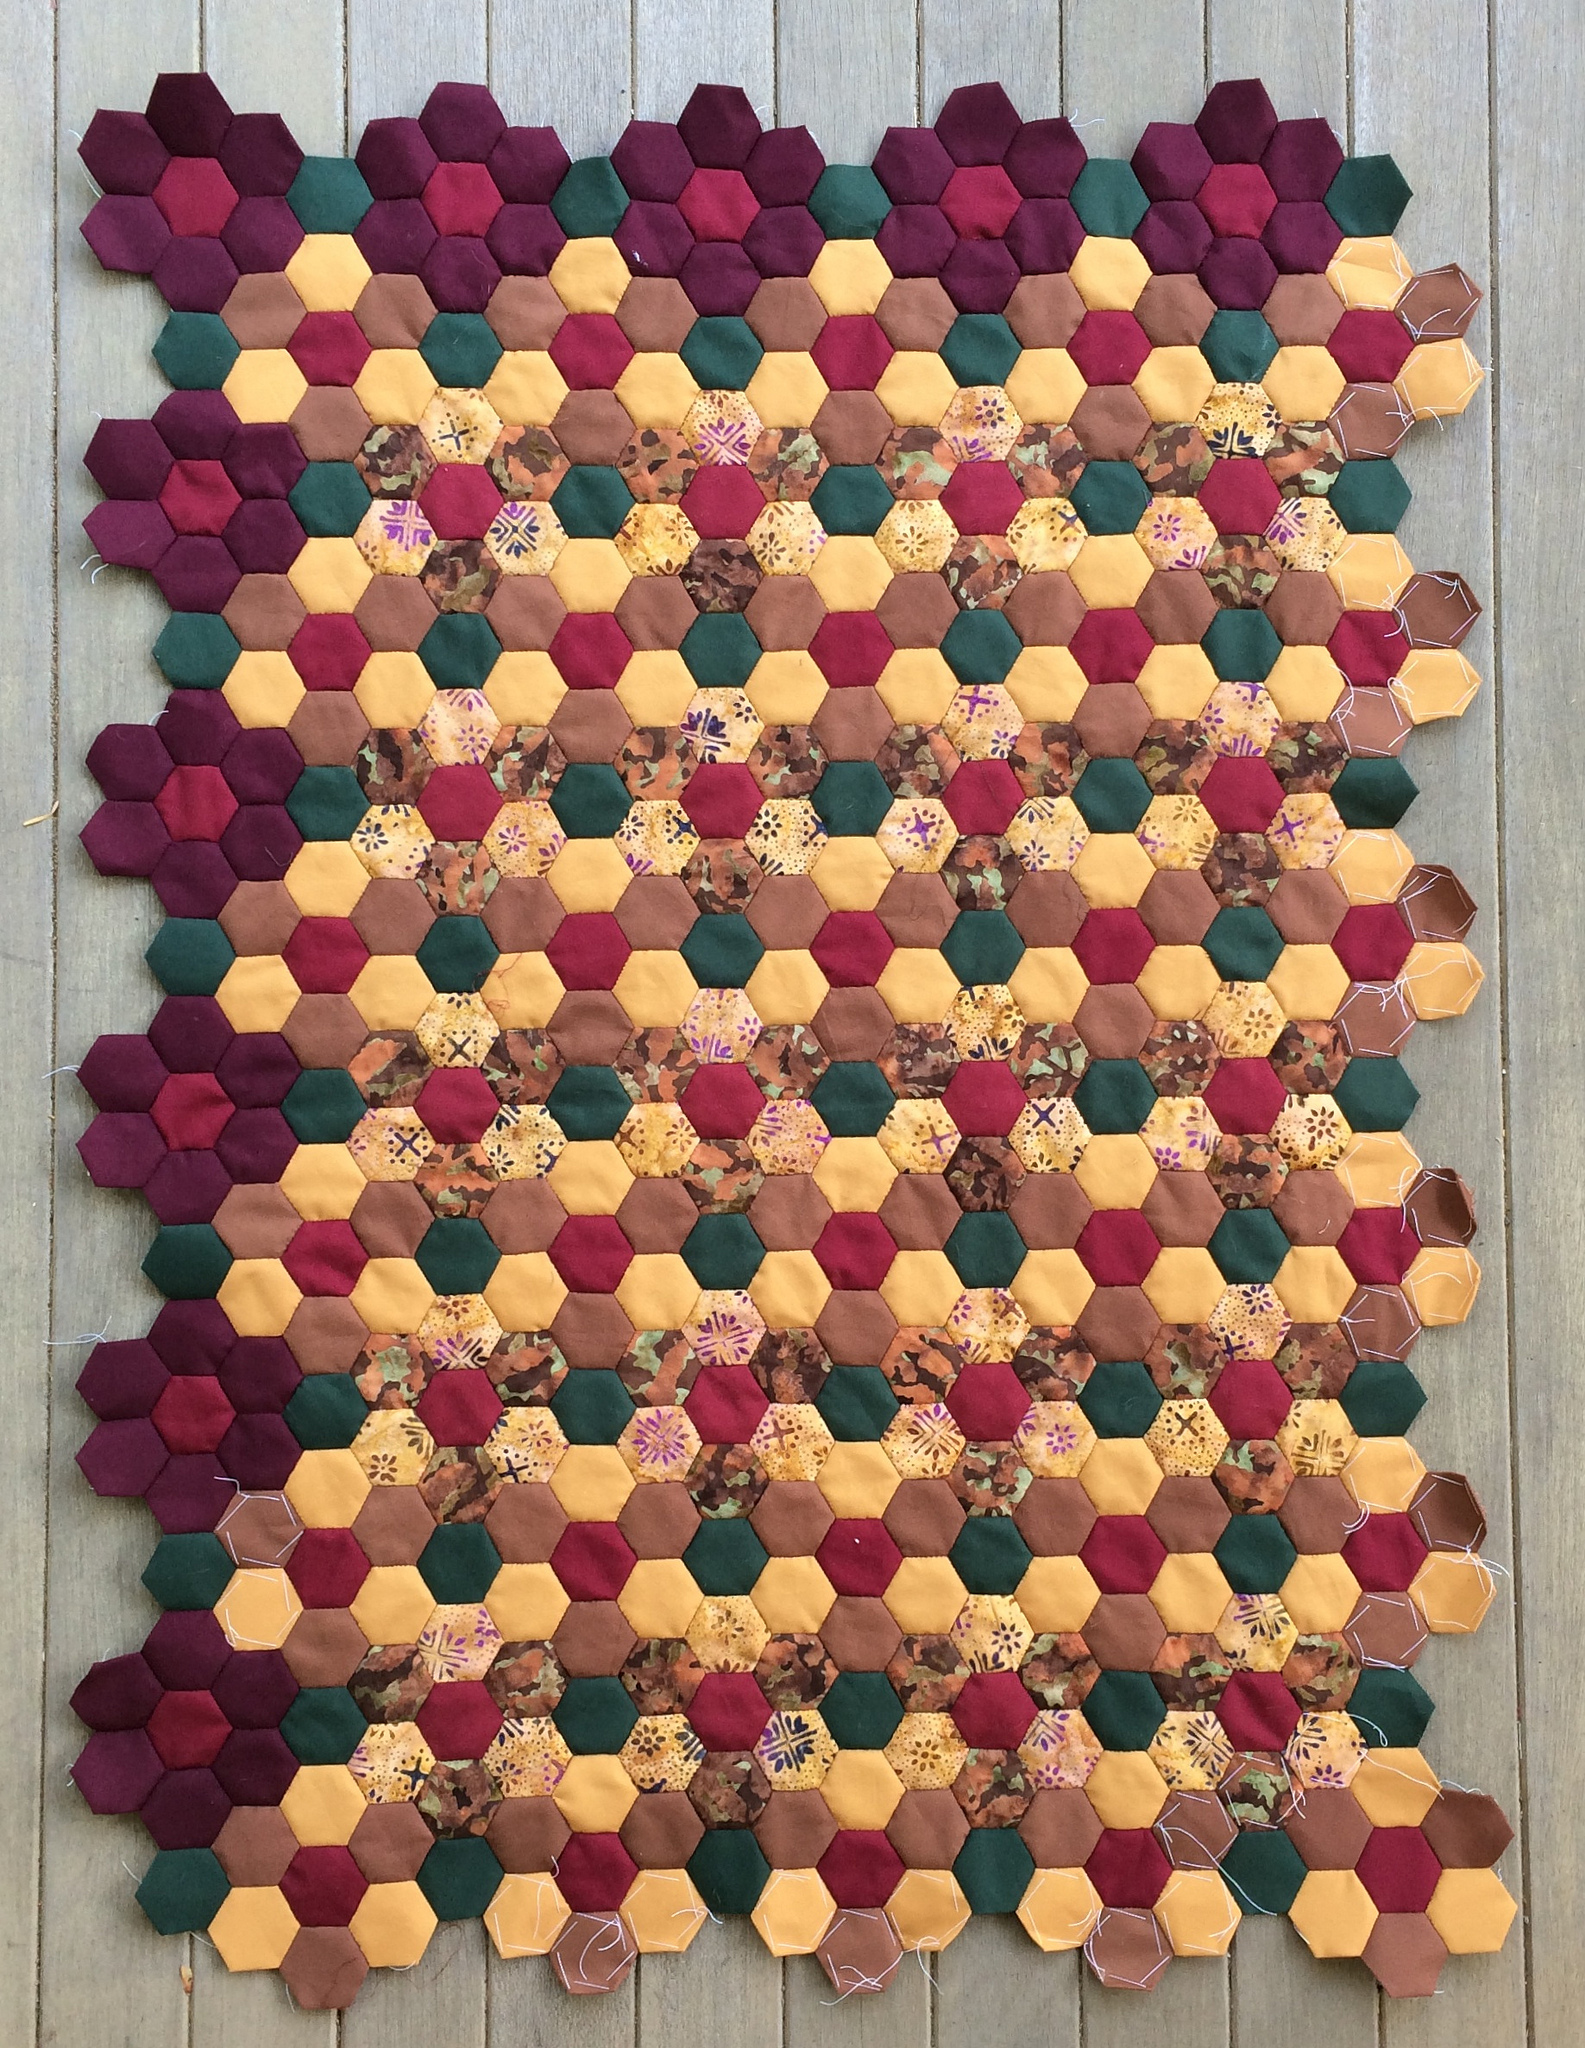
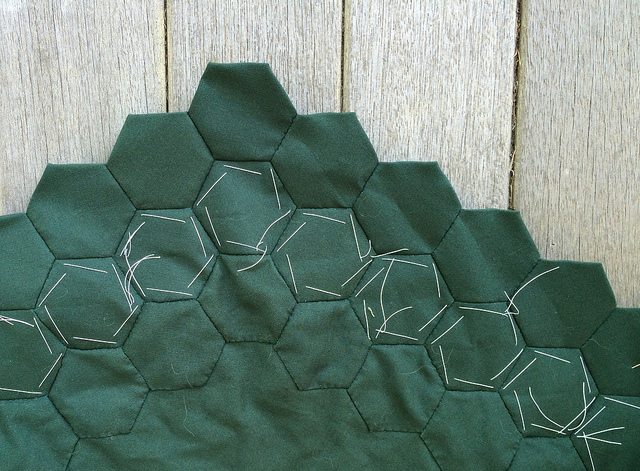
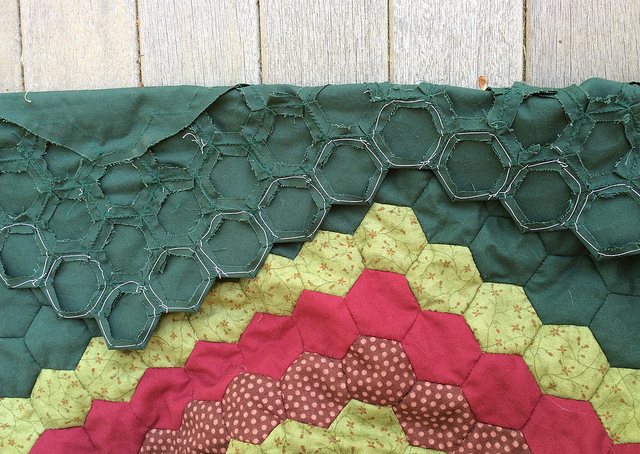
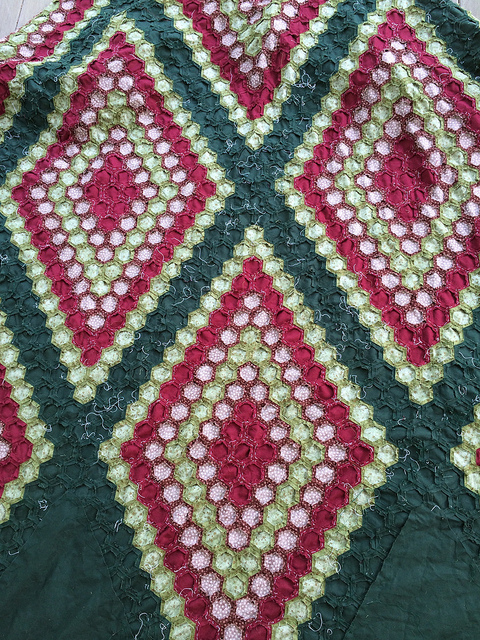
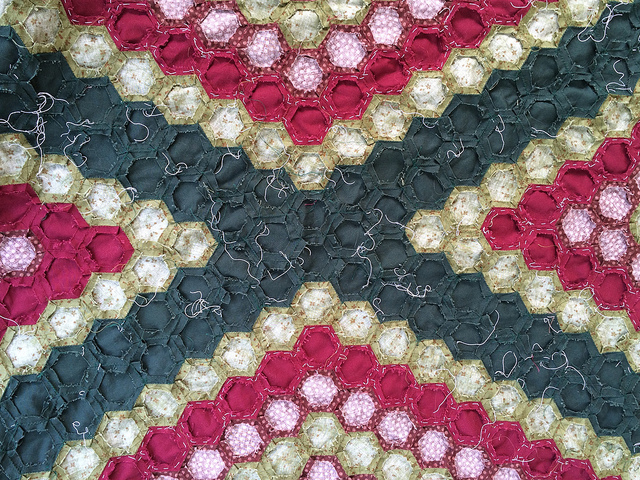
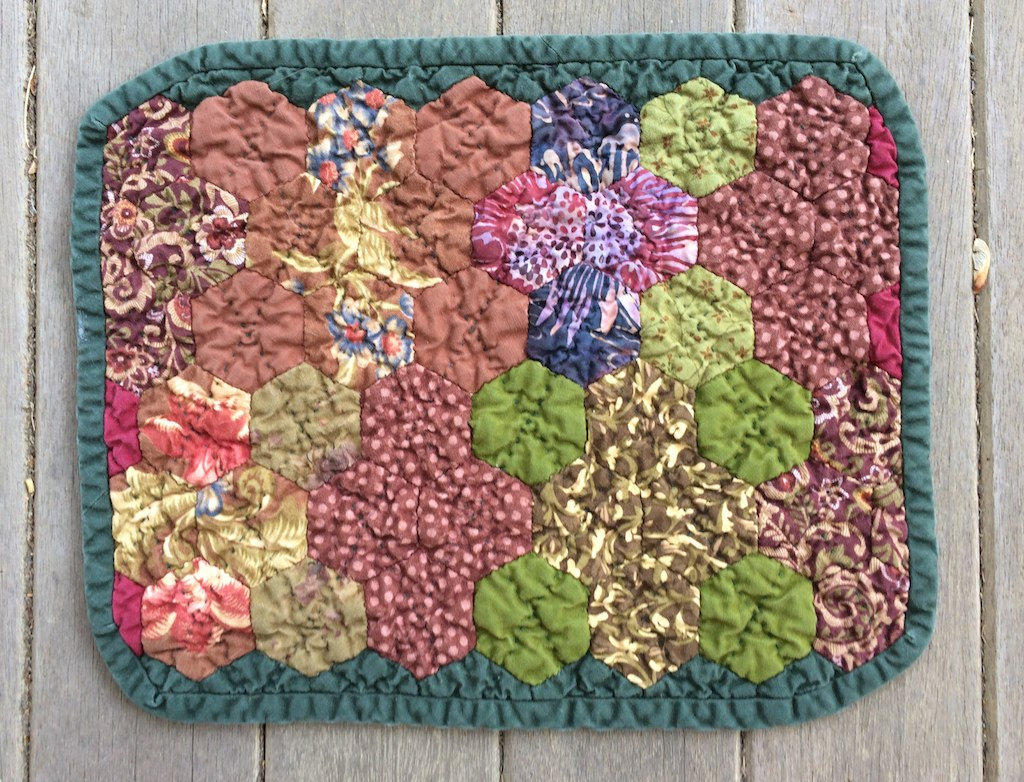
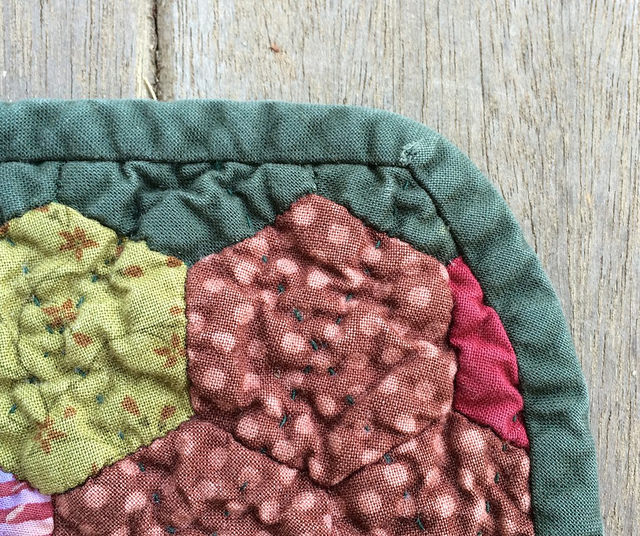
The central design is complete and all that remains is to finish the outer border of burgundy flowers, with single hunter green hexagons between the flowers. I’ll then need to finish off the edge from there. Currently the plan is to use the crimson fabric to fill in with the single hexagons necessary to finish off the border. I am planning to bind this piece using a bias binding. I will cut away half of the hexagons along the borders before binding. I plan to document that process well to create a binding tutorial for the half hexagon finish technique which I intend to use for the Diamond Quilt, and also the Large Batik Flower Garden Quilt.

I need eleven additional burgundy flowers to flesh out the edge. It is my goal to have the edge finished this week and be prepared to begin basting this sample piece the next week. I am currently estimating the finished size of this piece at 35 inches by 32 inches. If I want to make it larger I could end up adding additional rows of crimson hexagons to the border. I need to research baby quilt sizes in order to come up with an appropriate finished size.

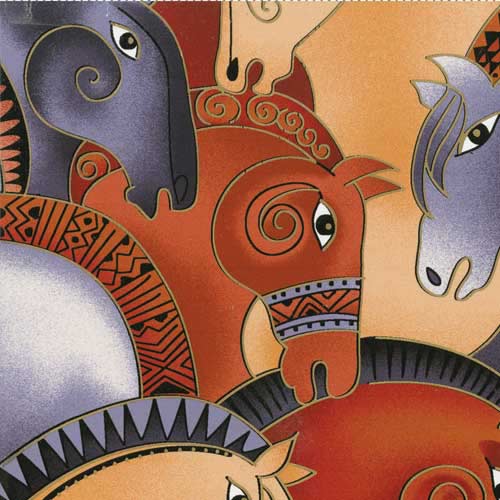
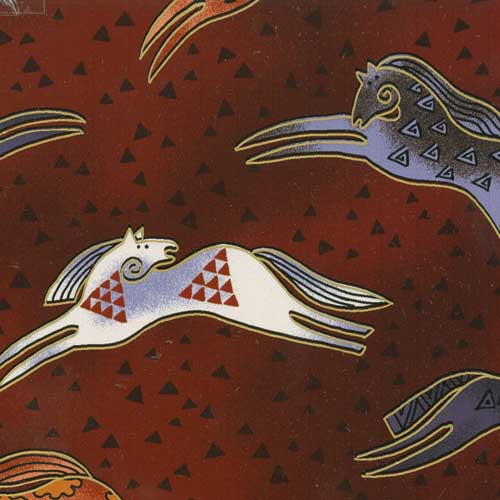
Recently I got a catalogue in the mail from a company called Keepsake Quilting. Most of the catalogue was full of kits. I don’t use kits, and these were not particularly to my liking anyway. I wasn’t particularly impressed with the fabric selections until I came across a collection of fabrics that really spoke to me. It is the “Embracing Horses Quilt Fabric Medley“.  I ordered the fat quarter collection to get a good look at all six of the fabrics, but I particularly like the large print pictured above, and I think it would make a really nice backing for this sample piece. After I have had a chance to look at the fabric up close I will probably order a few yards of it.

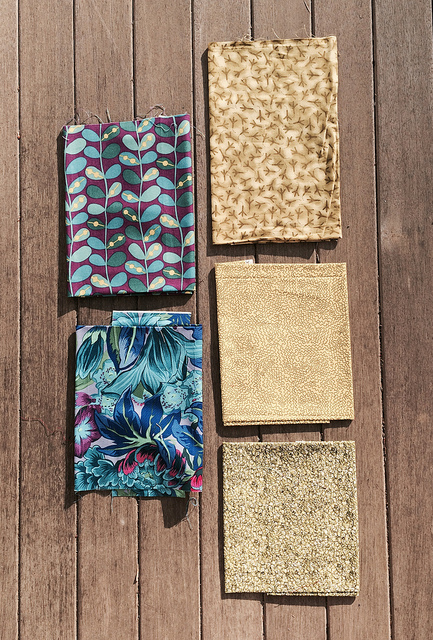
Pictured below are the other fabrics in the medley.

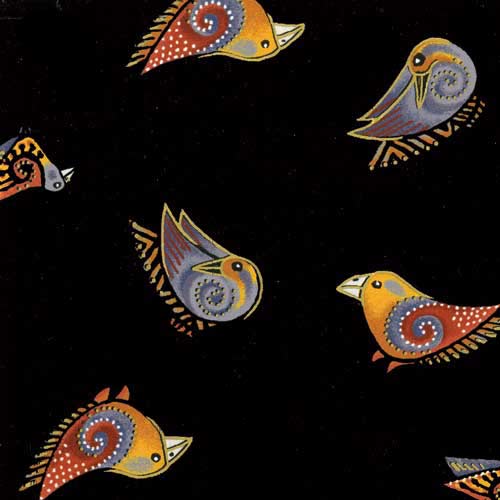
Will these birds be small enough to fussy cut?

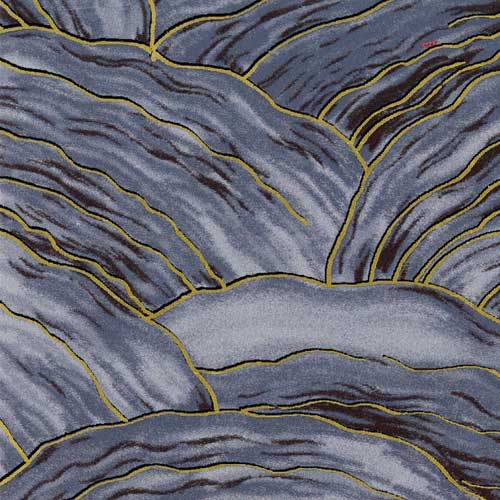
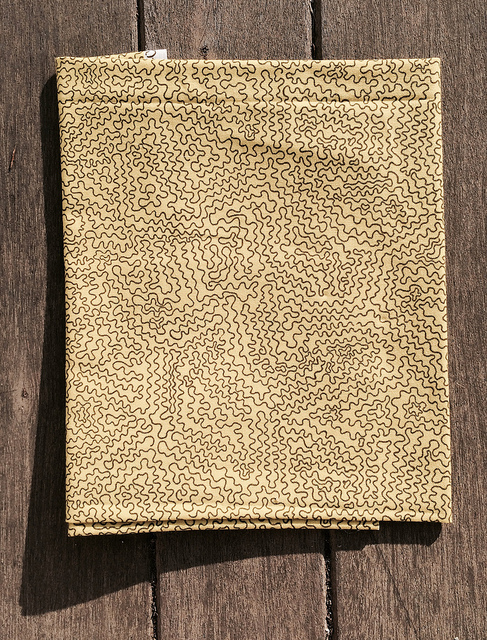
What a nice texture.

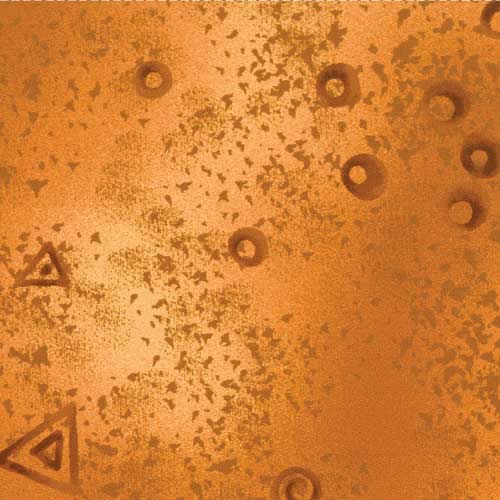
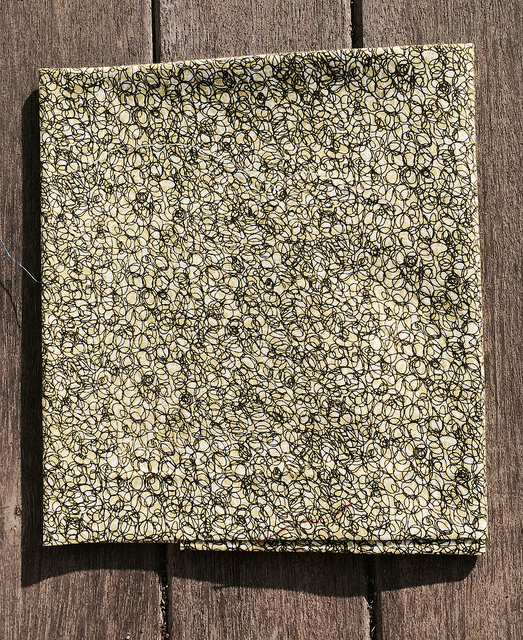
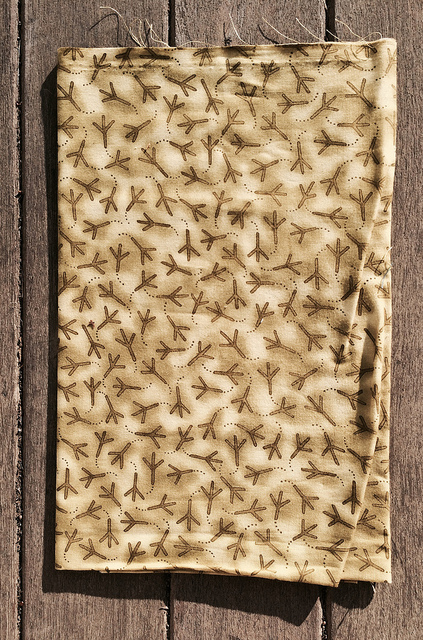
Here is another great texture.

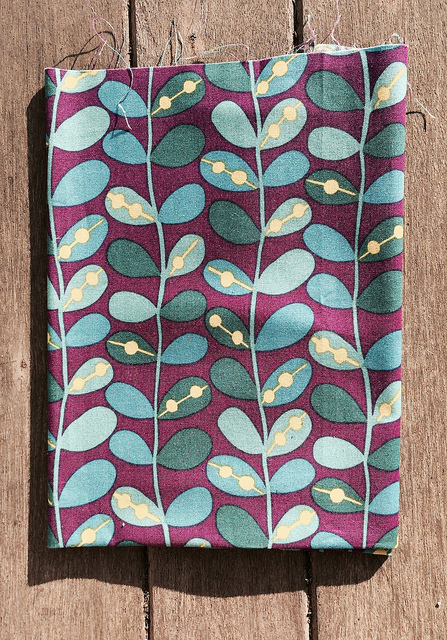
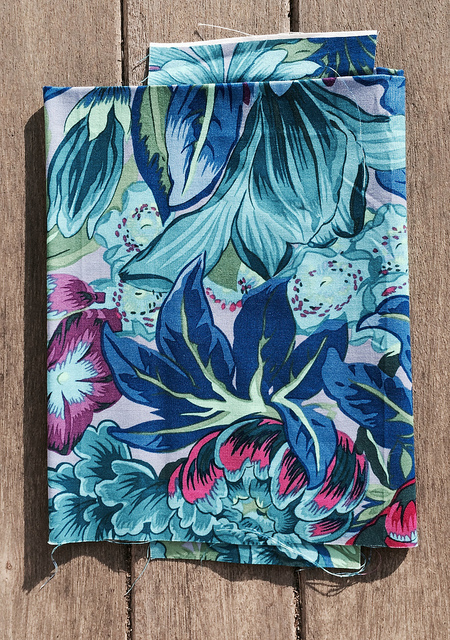
This fabric is a nice complement to the larger horse print, as is the fabric below.

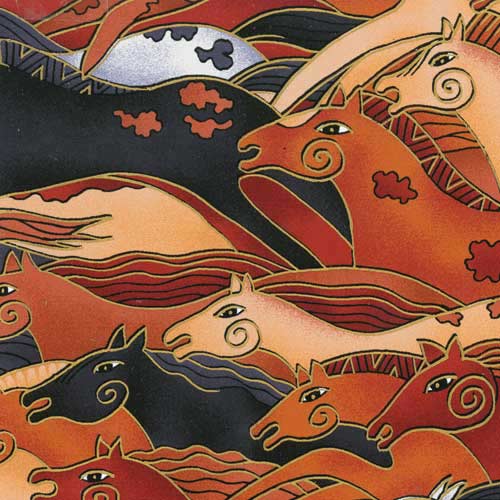
These images and colors really speak to me. The colors fit in with my current color pallet and will expand it slightly. I’m not sure what I will end up doing with all of these fabrics, but once I get my hands on them I think I am going to have to order yards of each of them. Sometimes you see something that you know you have to have. I think I will need to have these.

I may even end up piecing something from this collection in a modern fashion for the back of the large Batik Flower Garden Quilt to make that quilt an interesting reversible piece.

Fabric Exchange at the CJMQG Monthly Meeting

Tuesday night was the monthly meeting of the Central Jersey Modern Quilt Guild. I have been a member now since January. I really enjoy the meetings. At the CJMQG they do more than just “Show and Tell”. There’s something interesting each month. This month they showed us the many baby quilts that had been created as a charitable endeavor by the CJMQG members. Many members gave of their time to make this a success. I wish I had taken a photograph of the pile of quilts that were on the table after they had all been displayed. The quilts were being tossed onto the table one after the other so we could see then, and by the time they were all out, the pile was huge.

At the end of the meeting on Tuesday there was a fabric exchange. Members were encouraged to bring fabrics that they would like to either exchange or sell outright. One of the members came prepared with her fat quarters wrapped around sheets of cardboard for easy viewing by flipping through the display in the box she brought with her. She had her sales pitch ready too, and I got an opportunity to be the first to view her wares, and hear her pitch, even before the meeting started. She was offering her fat quarters for a dollar a piece. To stimulate sales she was giving away a free chocolate bar with every five dollar purchase.

I initially thought I would forgo the chocolate and get just three fabrics, but then I decided to look more closely and found two more items. I would have photographed the chocolate bar, but it is now long gone, having been shared with my husband who is kind enough to drive me to and from my guild meetings because I no longer drive at night.

I bought five pieces of approximately fat quarter size, so I got these fabrics at the price of $4.00 a yard. I’ll post close ups of the individual fabrics with comments below.

This fabric doesn’t look as if it will lend itself to being cut into one inch hexagon shapes, which is what I like to do, but it might surprise me. I may have to find other plans for it. I will eventually break free of my hexagonal box. It is only a matter of time. Maybe I will save it for then. When I was looking at the fabrics in the box I mentioned to the woman offering them that some of them might prompt me to invest in a collection of solids to coordinate with them. That would be false economy. This might be just such a print.

I’m pretty excited about this print because it will coordinate perfectly with the collection of scraps that I bought at the Pennington Quilt Works sale during the summer. At that time I bought a five dollar bag crammed full of scraps. Since then I have basted those scraps into hexagons and have a nice sized bowl that I am going to plan a project around. This fabric could easily be a unifying element in that project, especially if I get some solids to coordinate with it.

The next three fabrics are actually much more green than they appear below. They are on the yellow side of green for sure, but here they look much more yellow here than they really are. I may plan something that will involve all three of these fabrics. I may even combine them with some other greenish hexagons I have already basted.

The fabric directly above is the first one I focused on when I flipped through the sale box. I had to have the chicken tracks if nothing else. Then I found two fabrics that looked as if they would coordinate with it. Then my lust for chocolate took over.

I Purchased My First Quilt Pattern Download Today

There was a quilt challenge going on recently called “The Modern Solids Challenge”. A number of fantastic and well known quilters were selected to participate in the challenge.  I enjoyed seeing the quilts that these talented individuals made using the same box of Modern Solids. Today I cast my vote in the challenge for the quilt created by Lee from Freshly Pieced.

(photograph from the Freshly Pieced web site)

 You can see her blog entry about her quilt here where you will find more pictures including a nice photograph of the Modern Solids box, which is no longer available. I want one!

All of the quilts were incredibly fantastic. They all deserved to win. I almost voted for the quilt from Fresh Lemons. I loved that one too. It might come down to who has the most exposure and the most fans who are willing to draw attention to their work.

I really do love this quilt from Fresh Lemons too. I think that the reason I voted for the one from Freshly Pieced is that it didn’t have negative space. I am not opposed to negative space, mind you, and I think it is very well used here. There is just a tiny part of me that prefers and overall symmetrical design. It is very subjective.

After looking at all of the quilts again before voting, and voting for the Freshly Pieced quilt, I moseyed on over to Lee’s web site and noticed that the pattern for her quilt entry to the challenge is on sale as a pattern for the low price of $4.99. I had never bought a downloadable pattern. I’ve downloaded relatively few free patterns, actually. And I think that I have bought all of ONE quilt pattern in hard copy format from a quilt store.

I like to buy books, and I am more of a do-it-yourselfer than a follower. it is very unlike me to want to make someone else’s quilt. But I liked this one so much, and the price was right, so I thought, “Why not?” And I bought it.

Besides, if I am ever going to create patterns myself for sale, and I probably will, it makes some sense to see what they look like.


New Border on Batik Flower Garden Quilt

I worked like crazy to do this new border in one week. A few burgundy borders will follow this border. At this point the quilt top occupies the center of the queen sized mattress with about six to eight inches on each of the four sides.

I took my photographs today at at time when shadows were being cast on the front porch, which is my staging area for photographs. I decided to stretch out the quilt top on the porch at an angle and go for some artsy effects.

We’ll call this one “Prisoner of Paper Piecing”.

I’ve been thinking a lot about how I want to quilt this piece. I’ve decided to use the two units that I found recently, which I thought had been lost, and create a small baby sized quilt using them. I can try out my quilting method on the new piece because it will have the hunter green and crimson hexagons dancing across the surface just as they do on the larger quilt top. The quilting I have in mind is going to emphasize the hunter green and crimson hexagons.

I am going to have to make two more units like the ones I already have. I will be joining the units with burgundy flowers, and making a burgundy flower border on all four sides. The piece will probably come out to  be about 36″ x 36″ making it large enough for a baby buggy quilt. I anticipate that this quilting sample will take me a few weeks. You can see the batik flower unit at the top of the image below, and the solid flower unit at the bottom. I will make one more of each of those units and place them diagonally in the design of the baby quilt.

Something I really like about doing this sample is that it is going to allow me to join those large square units with rows of flowers of a different color. That was my initial thought for the larger quilt, so now i get to see that idea realized even if on a small scale. At the time I considered this design I did not yet have the burgundy fabric. Things might have taken a different turn if I had already owned that fabric at the time that I etched my piecing strategy in stone.

I am even starting to get some ideas for a hexagon quilt done in a quilt-as-you-go method using units like the ones above appliquéd to a solid fabric and joined with rows of hexagon flowers appliquéd onto narrower strips.

I love it when the ideas flow from one project to the next. That’s the way I like to work.

Burgundy Border Finished

The burgundy border is finished on the Batik Flower Garden Quilt. I’m not even going to try to count the number of flowers I had to add this week to finish the border.

Last night I was feverishly stitching together flowers and adding them to the border. At one point I placed the quilt top on a chair in the living room and Lori jumped up immediately to take her rightful place and started to groom herself. I caught her attention for a photograph and wished her away before she could do any damage.

If I were to finish off this piece now it would make a fine baby quilt, but there is another border on the way.

Burgundy Borders Take Shape

I’ve devoted all of my energy this week to the Batik Flower Garden Quilt. I finished a second row of burgundy flowers on two sides of the central medallion.

I went to the trouble of placing the piece pictured above on my queen sized bed to get an idea of how large I want the central medallion to grow. It was easy to see that I could add at least two more rows, and so i did.

While I am certain that it was right to add those two rows of flowers to the central medallion, I am not sure if I should add two more columns of flowers also, and I don’t know whether or not I should add another two rows while I’m at it. I have to take into consideration how many batik flowers I have left to use. I also need to take into account how close I want the next design element to be to the edge of the bed. I am planning to add a border of solid flowers like the ones below to outline the burgundy border. I don’t want that outline to butt up exactly to the edge of the bed.

The good news is that I have a little more design flexibility because I found the pieces that I thought I had left behind in New York City. I noticed them in my studio the other day. This gives me five more batik flowers I can use. Here are the pieces I thought were lost forever.

The pieces above will free up five batik flowers if I disassemble them. There is also a small piece that I had put together when I was trying out a possible layout of flowers. I can cannibalize that to free up another three batik flowers. Add those eight flowers to the 19 that I have in a pile and that makes 27 batik flowers I can add into this design if I choose to do so.

In order to come to a final decision about how I am going to flesh out this design I think it would be helpful to piece together the remaining two borders of burgundy hexagons. That is what I have been working on these past few days. I don’t have those borders finished yet, but here you can see the progress on these borders.

Above is the border to go along the bottom. Below is the border to go along the right side.

After I finish these two borders I will place all of the pieces on the queen sized bed to get an idea of what more I would like to add.

Batik Flower Garden Quilt Gets A New Color Added to the Mix

When I last reported on the Batik Flower Garden Quilt there were 50 flowers on the quilt top, Since then I have added ten new flowers along the edge, and I have a pile of ten more flowers pieced and ready to be added.

You can probably see that there is a new color in the mix. I decided that I wanted to do a dark border around a center medallion. I wanted to make this border using flowers having the same crimson center as all of the other flowers. I wanted the petals of the flowers to be one color only, not two like the others because I wanted to create the impression of a background fabric. I also wanted the color to be dark enough to provide sufficient contrast with the crimson center so the center hexagon would continue to pop out from the surface. I consulted my Kona Solids sample card and decided on burgundy. I could not be happier with my choice.  I love this color. It is such a pleasure to work with. In fact, this is a new favorite color of mine, right up there with hunter green. It is actually a tie between those two colors for my favorite at this point.

I am planning on a double or triple border of the burgundy flowers before I decide what else to add. The single hunter green hexagons will continue to hold the piece together as I add the burgundy flowers. Those single green and crimson hexagons will dance across the surface of the quilt top all the way to the border, or close to it. I may finish the edge with just burgundy so none of the green hexagons touch the binding.

I’ve got a nice pile of burgundy flowers ready to add to the border. Below you can see how a double border of burgundy flowers will look. I am currently adding these burgundy flowers to only two of the borders. It remains to be seen whether I will be adding more rows to the central medallion or not. I’ll be auditioning the quilt top on my queen sized bed to see how I will be proceeding after I have two double borders of burgundy flowers completed.

Diamond Quilt Progress Post Thirteen

The Diamond Quilt has become too large to carry around with me. Therefore, everything has to be done at home now. After completing my binding torture experiment I decided to to add one last row of hunter green hexagons along the edge of the quilt top. All along the way during the construction of this quilt top I have kept track of my time. Sometimes I estimated my time by seeing how long a specific section would take, and then I simply completed the other corresponding sections at my leisure, and did the math to come up with a total for the time spent. All that remains now is the last border of hexagons on the quilt top. I’ve decided to time that step with the stop watch.  I’ll do the same for the basting, quilting, and binding. When it is all said and done I will be interested to calculate the number of hours spent per square foot of finished product.

I’ve worked nearly seven hours so far on the last row of hexagons. I’ve added 66 hexagons so far, and I’m not even halfway done. My time spent comes to a little over six minutes per hexagon for three seams. That feels slow, but I don’t like to rush.

Following are photographs of the last row of hexagons being added. The first two photographs show the quilt top from the front and the back with the paper pieces still in place.

The next two photographs show the quilt top from the front and the back after the paper pieces have been removed.

You may notice that the last row of hexagons was basted so that the basting stitches do not show at all from the front. These basting stitches do not need to be removed. The row just before the last is basted so the stitches show from the front, and those stitches must be removed. The “invisible” basting method takes more time, but I decided to use it for the final row because it would stabilize the seams when I removed the papers. I also thought that this method of basting would add to my stitching pleasure as I completed the final row of hexagons. I was right. I am really enjoying adding the final row of hexagons. It is such a peaceful activity.

I’m listening to an audio book as I add this final row of hexagons. The book will probably be finished before I compete the final row of hexagons. Interestingly enough, the book is titled “The Seamstress”. It is a fictional account of a Hungarian Jew who lived through the Holocaust.

A look at the back of the quilt top shows that I used the method of basting that requires removal of basting threads for the majority of the quilt top. The trimmed seams devoid of basting stitches have a certain simplistic beauty to them. When I showed my paper piecing work at an artist’s meet up group a few months ago the attendees focused on the beauty of the back of the work as well as the beauty of the front. I hadn’t thought about it until they drew my attention to how beautiful the back was. I then started to appreciate the beauty of what would eventually be hidden from view.

While that method of basting has it’s aesthetic merits, it also presents the need to trim basting stitches that don’t quite work their way free, but do manage to get pulled to the back side when the paper pieces are removed.

I think there are definite advantages to both methods of basting. That might be a good subject for a future blog post.

What method do you use to baste your hexagons? Why do you use it? Have you tried both methods?

Binding Torture Experiment Concludes

It is September already, so my two month binding torture experiment has come to an end. I kept my ugly little binding sample on the dryer along with a tally sheet. I threw the sample in with every wash and dry for two months. My husband also washes clothes occasionally, and he chose not to take part in the data collection, so there are fewer washes and dries than there would have been if I did all the wash myself. This binding was sent through 22 regular wash and dry cycles. It was also sent through 19 gentle wash and dry cycles for a total of 41 cycles. This is much more wear and tear than any binding could expect to experience in the lifetime of a quilt since I would never send a quilt through even one regular cycle, much less 22 of them. The idea was to torture the piece, however, and torture it I did.

The piece is extra crinkly, but the binding has held up well. There is one place along one of the corners of the binding that has frayed a bit. I’m not concerned with that, however, because that could have happened with any binding.

I was only interested in seeing if any of the tiny seams near the edge came undone because of the excessive washing.  None of the seams have come lose, so I feel confident in using this binding method on my diamond heirloom quilt.

I will begin adding the final row of hunter green hexagons around the diamond quilt this week.

I’ve made progress on the batik flower garden quilt, but I will save that report for a future week. As I move forward working on more than one project at a time I will probably report on one or another of those projects each week, but not all of them. I will sum up the activity that has taken place since that project was last featured. I think that will be more interesting than reporting bits and pieces of progress on multiple projects each week.

Now that this binding method has proven to be viable, I am considering writing a pdf tutorial for it and making it available.


My One Year of Blogging Anniversary Passes with Lack of Fanfare

Whoops.

I didn’t even notice that it had been a year.

On August 23rd the one year anniversary of my first blog post passed without notice on my part. I kind of knew it was coming up, but I didn’t think about it much, and it passed unnoticed even by me.

So, what’s happened in the last year?

Since August of last year I’ve started to blog once a week consistently, largely due to my participation in the link back to the Monday Morning Star Count over at Life Under Quilts.

I’ve gone from being a WordPress.com site to self hosting with Blue Host.

I’ve joined the Modern Quilt Guild.

For months I blogged in a vacuum with no comments on my site, but that changed once I started linking back, and now I usually get at least one comment a week.

I’ve completed quite a few projects for such a short period of time given the fact that the only machine work in any of them is the occasional application of binding via machine to the front of the piece. In addition to my interest in quilting I have also renewed my interest in blogging with WordPress, and also with Blogger. My once active blog Enriching My Love of the Game may soon see some activity. This will give me an opportunity to compare the two blogging platforms.

It’s been a good year.