First Act Friday: My First Quilt

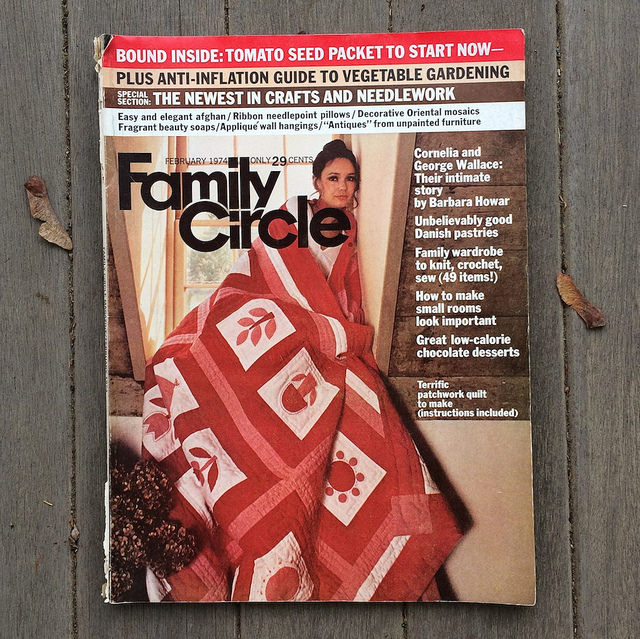
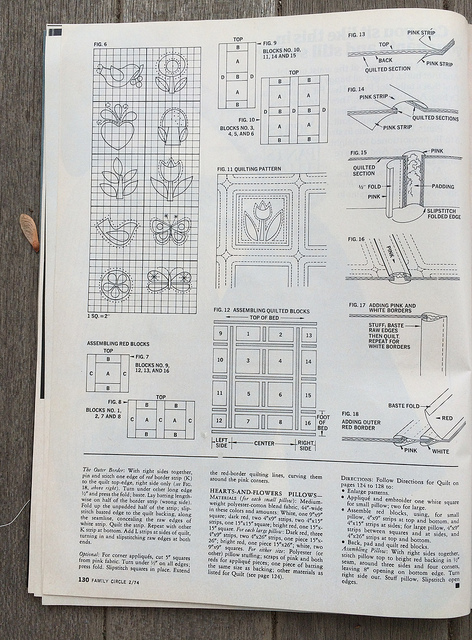
First Act Friday is a feature whereby I will show the quilts that I produced starting forty years ago in 1974 when I made my very first quilt based on the instructions I found in the February issue of Family Circle magazine pictured below:

The quilt is featured on the cover of the magazine wrapped around a model. She has a bit of an Angelina Jolie look.

In 1974 I was taking a year off between my sophomore and junior years of college. I was wrapping meat for a living, and I was looking for a creative outlet. I’d never quilted, though I had seen my paternal grandmother do so. She used a quilting frame, but I didn’t have access to one. I liked the fact that this project did not require a frame. It seemed like an easy way to get started. I liked what I saw on the magazine cover and decided to give this project a try. At the end of this post I will show you, by way of scans of the magazine pages, what the instructions looked like for this project. I think that today if I had to work from those instructions I might be intimidated, but I was too inexperienced at the time to be fearful, so I forged ahead.

I decided to use a warm color palette for my quilt. I used only solids, which now I realize was actually quite modern, and this was before the term Modern Quilting had even been coined. I was creating this quilt for the king sized bed of my then boyfriend. When we broke up about a year later I put the unfinished quilt on hold. I’d completed everything but the extra wide brown borders I was going to add to make it large enough for a king sized bed. About 25 years after shoving this unfinished piece in a closet I dragged it out and finished off the edges with pre made bias binding. I now use the quilt on a queen sized bed, but it’s really is too small for that bed. I think I may end up patching it up and perhaps adding on another border to make it bigger in all four directions.

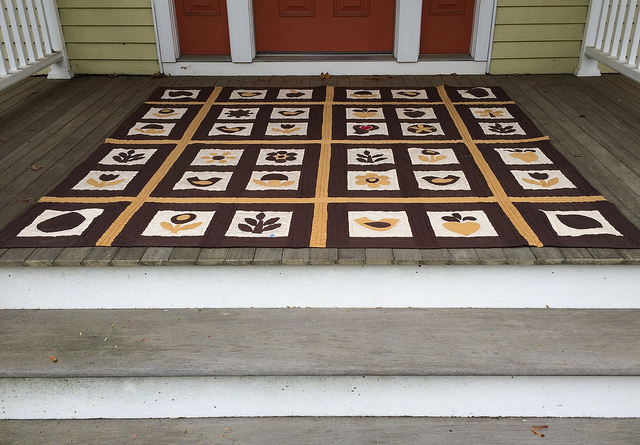
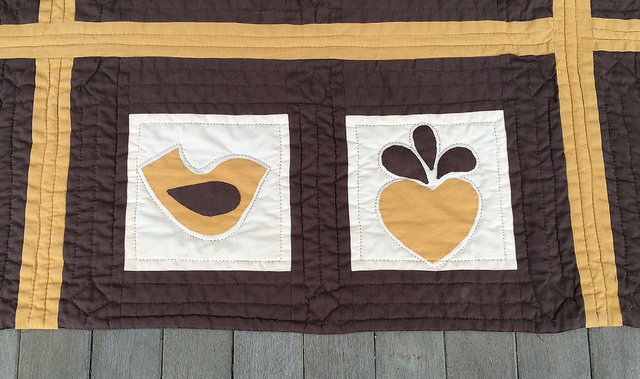
Here it is:

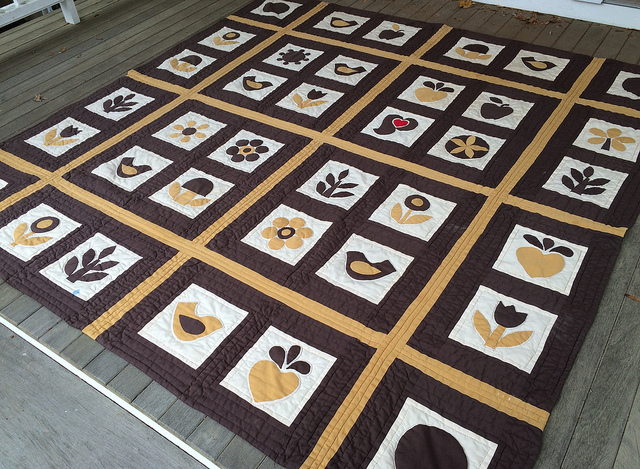
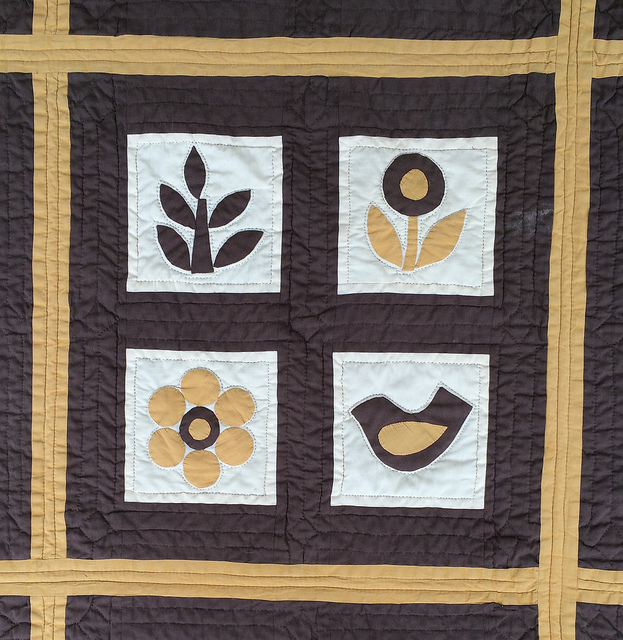
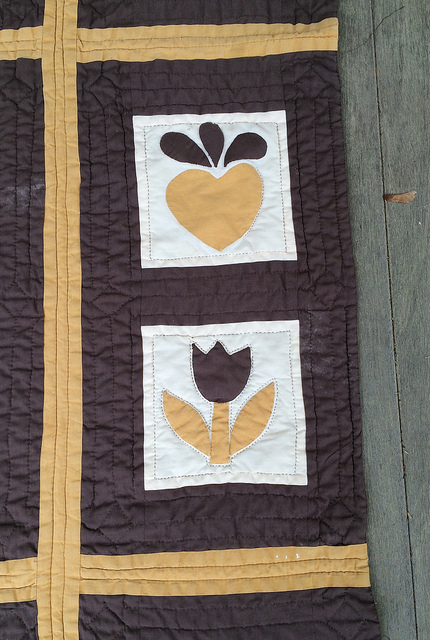
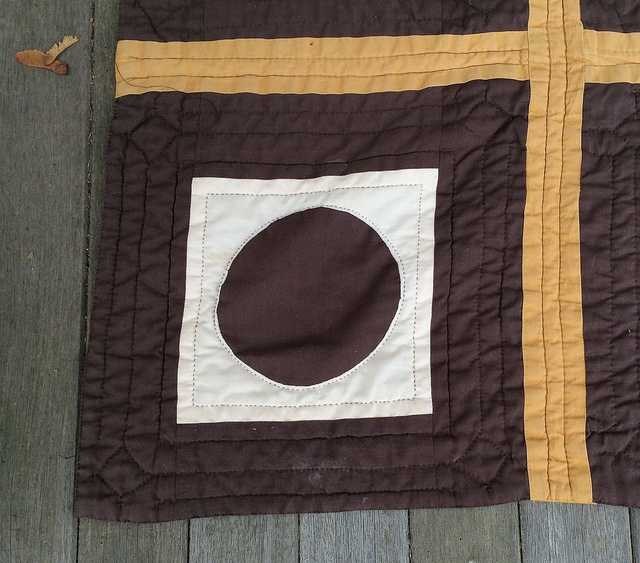
This quilt was done using a quilt-as-you-go method involving hand quilting. There were units of four, two, and one squares, each with brown sashing. Those units were individually lap quilted by hand before being joined with more sashing in a contrasting color. That sashing was was wide enough to have batting and the sashing was also quilted by hand.

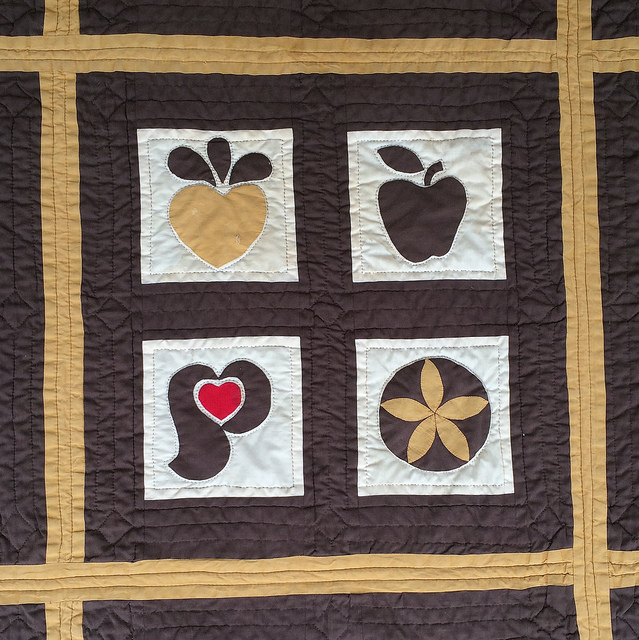
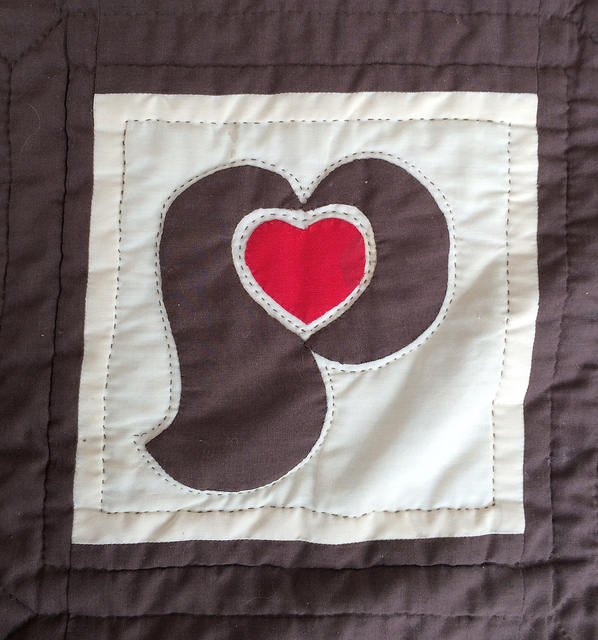
My one touch of vibrant color in this quilt was the red heart on one of the squares. I am Pennsylvania Dutch so this block speaks to me with its subtle reference to egg noodle packaging. The square appears to have been lifted directly from the Pennsylvania Dutch brand logo. Whoops. I may have actually been the logo thief, since I’m having a hard time finding the distelfink block anywhere in the quilt directions. My goodness, I stole from a noodle company. Well, actually, I took inspiration from a noodle company logo.

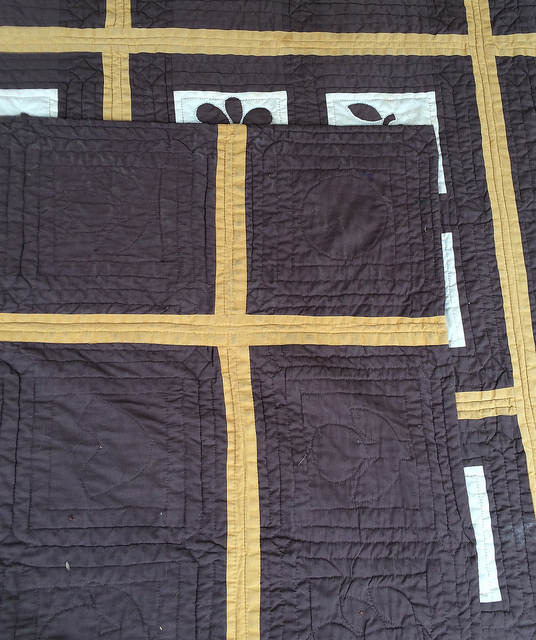
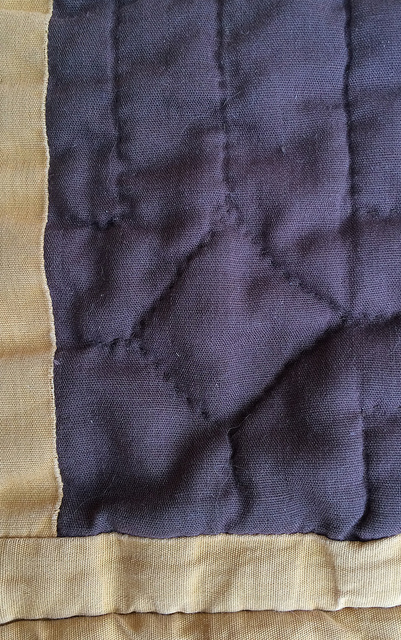
You can see below how the large brown blocks were joined with the gold sashing. Here we see this from the back of the quilt as well.

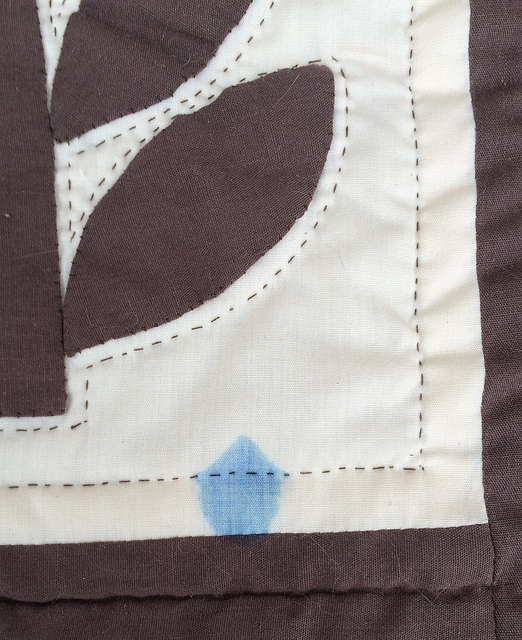
This piece has been well used, and is definitely worse for wear. I made my husband give up using those blue pens that he liked so much after this happened. They ruined a few things before they were banished from the house.

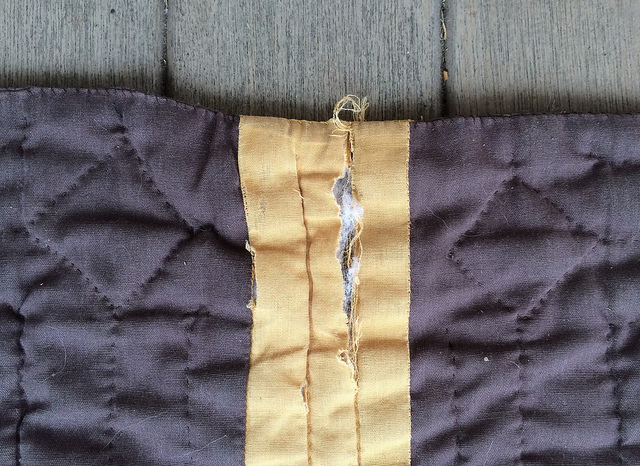
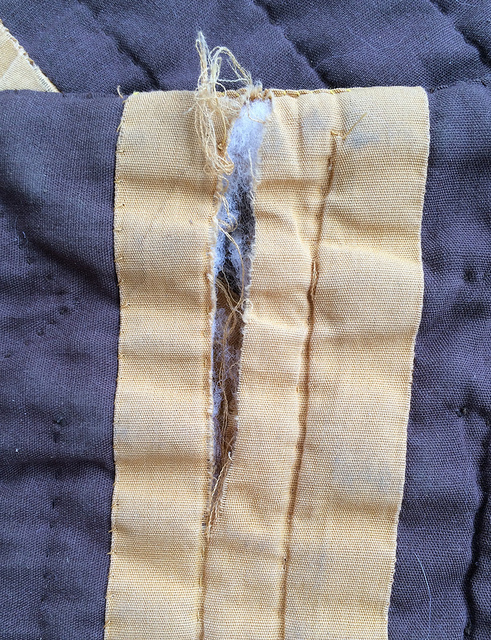
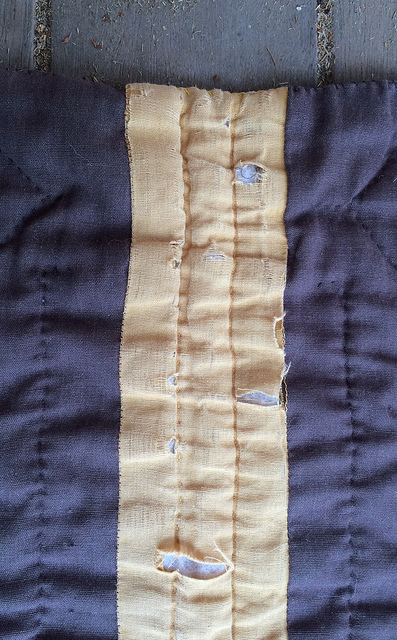
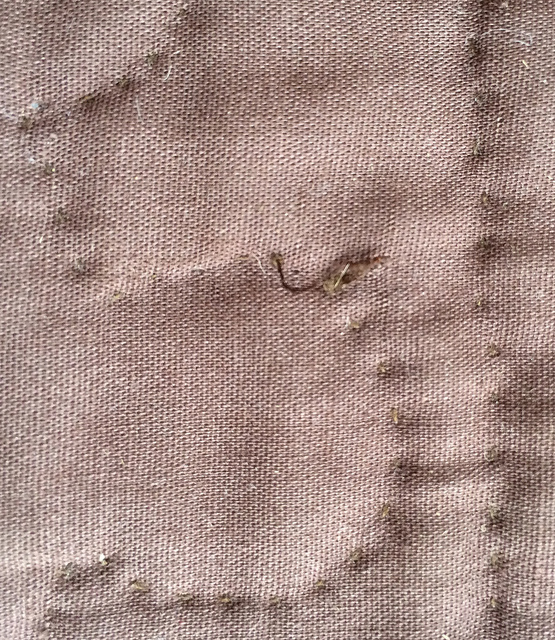
Grabbing the edge of the quilt to pull it up in a cold Winter’s night has taken its toll as well. Here we see the worst damage from the front of the quilt, and then from the back. I guess I’ll have to be looking for some Kona solids for repair work, or perhaps a print that would coordinate well.


I have no idea of the content of these fabrics. I imagine that they were not 100% cotton. I know that the thread was regular polyester sewing thread, not quilting thread. I just didn’t know any better. Plus I wanted to match the thread to the fabric as was done in the magazine directions.

The quilting on this piece has actually held up fairly well. In spite of the few examples of wear to the fabric I am showing here, most of the quilt is in very good condition for having been used a great deal in the past fifteen years, and having been laundered many time.

Can you believe I had no idea that you were supposed to hide your quilting knots? They are all over the back of the quilt. I had not yet read “The Perfect Patchwork Primer“.

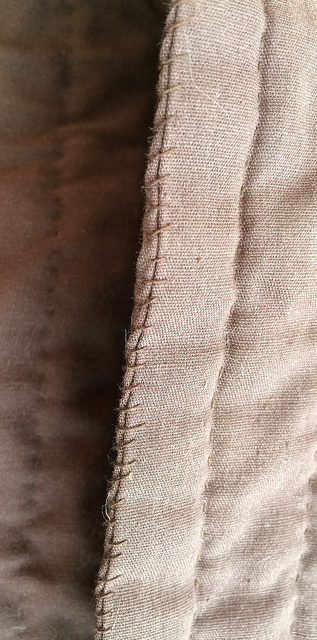
After what little border I had added to the edge got torn because it wasn’t quilted densely enough, I ended up picking out the machine stitches that joined it to the rest of the quilt. I turned in the seams, and whipping them shut. I think I should probably give this quilt a proper binding some day which I could add right to the edge that currently exists.

I did do some interesting quilting on this piece, I must say, with the diamond shapes.

Here is my favorite block (that I shamelessly stole) all by itself.

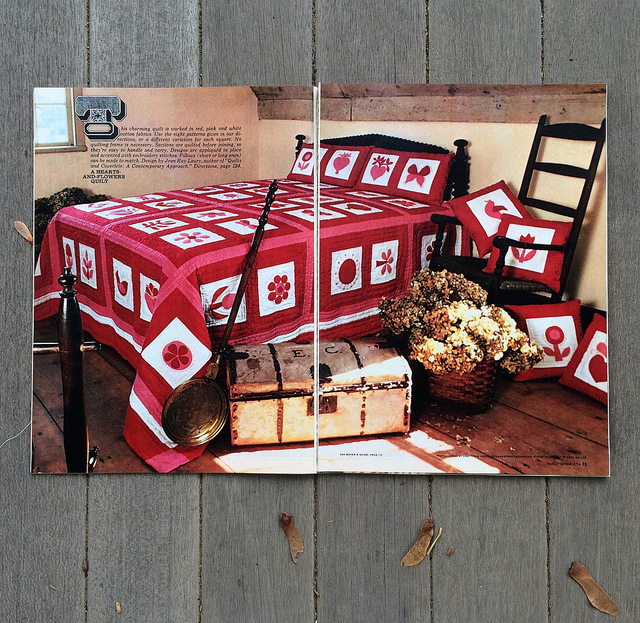
The project has a nice double page spread in the magazine.

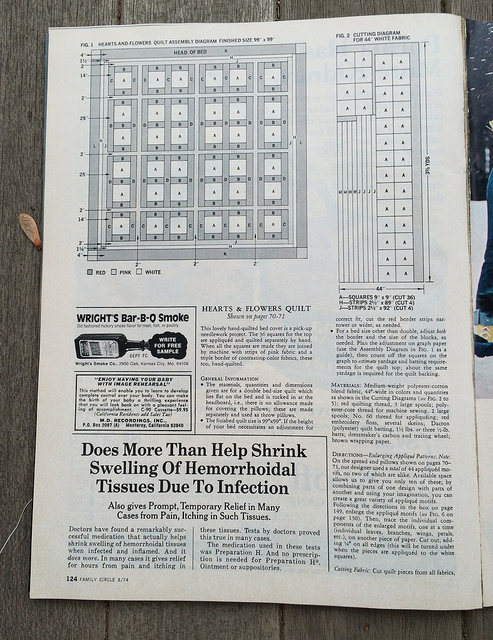
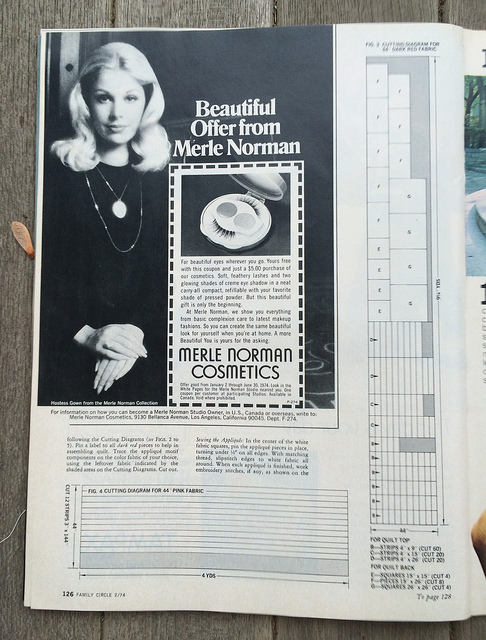
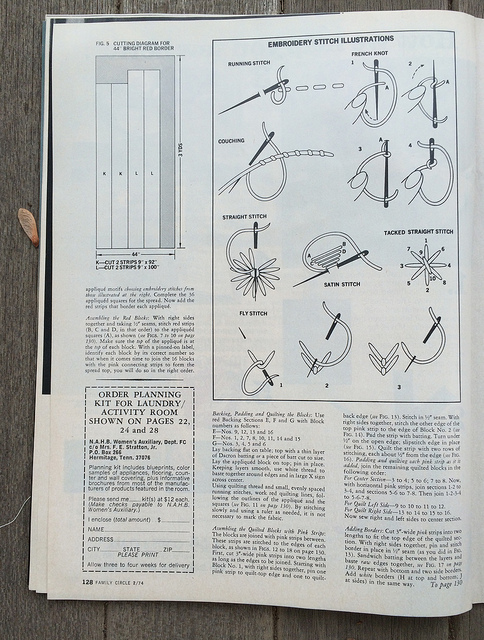
Then there were four pages of densely packed instructions. Just ignore the hemorrhoid cream advertisement.


I did not add any embroidery to my quilt.

In the upper right of the above page you can see the instructions for adding the joining sashing, which has its own batting.

You had to hand draw the patterns for the individual appliqué units from looking at the samples in the upper left of the page above. You were supposed to draw out a grid and then copy the shapes by hand drawing onto the grid. While only eight units were provided, I ended up free handing many more than that for my quilt. Everything was cut with scissors, since rotary cutters did not yet exist.

I learned a lot from doing this quilt. The most important thing I gained from this experience was a sense of confidence in hand quilting without a frame. I went on to baste and hand quilt full sized quilts after finishing this piece. “The Perfect Patchwork Primer” provided me with all I needed to know to go on to finish four more quilts during my First Act In Fiber Arts. I’ll have a First Act Friday for each of those four quilts at some point in the future.

It’s fun to look back on the past, and some day I may design something to pay homage to these first quilt of mine.

Edit: At a later date I went on to add a nice bias binding to this quilt.

The Batik Flower Garden Quilting Sample is Finished

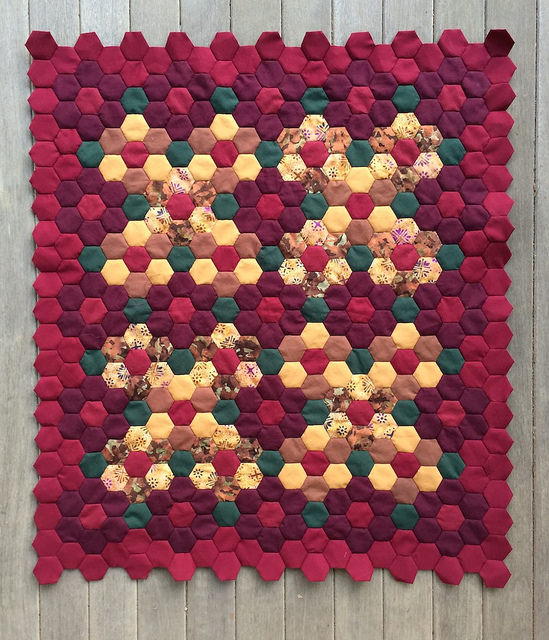
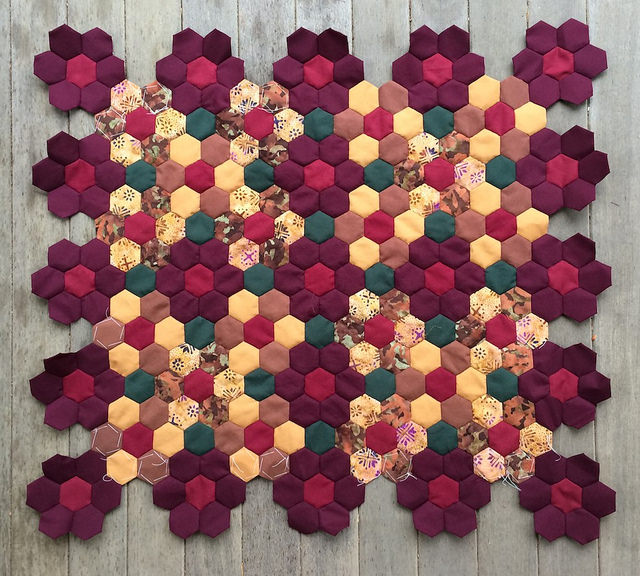
The Batik Flower Garden quilting sample piece is totally finished. I finished the quilting this week, and I did the binding yesterday.
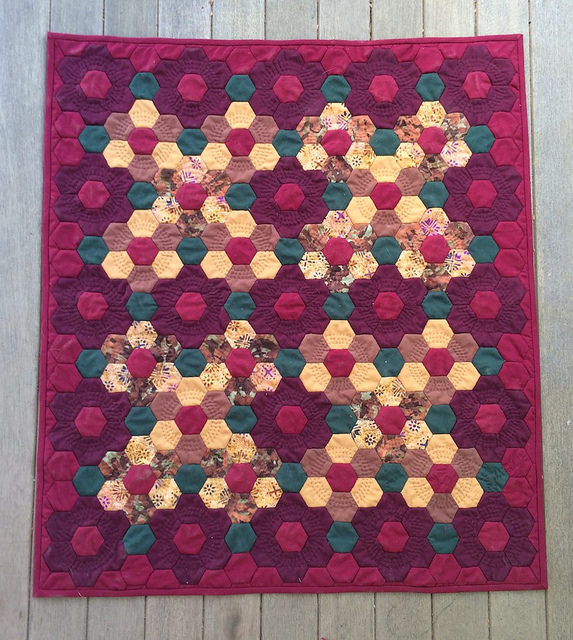
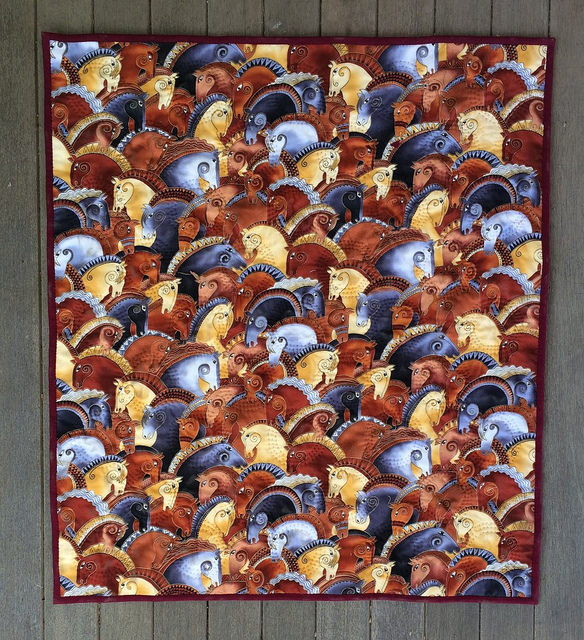
The size turned out to be 28.5 inches by 32.25 inches, which is a little small for a baby quilt, but could conceivably work well as a carriage cover.

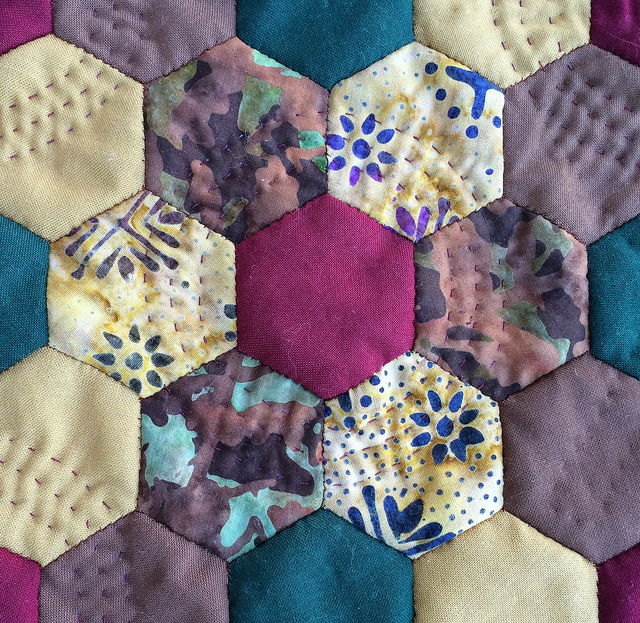
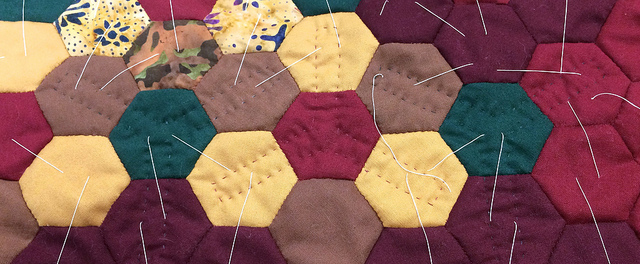
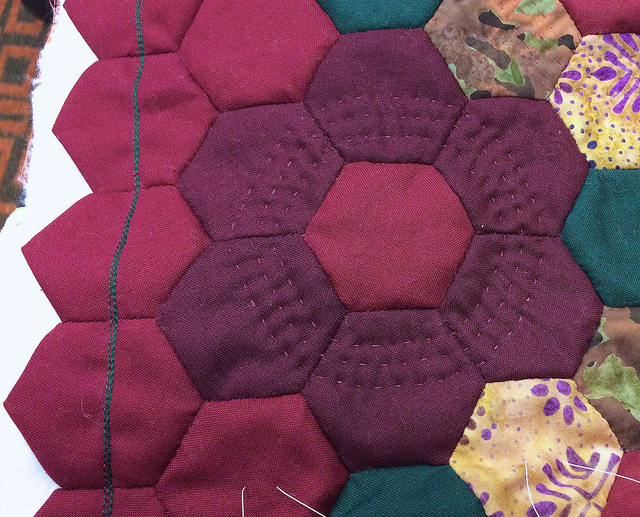
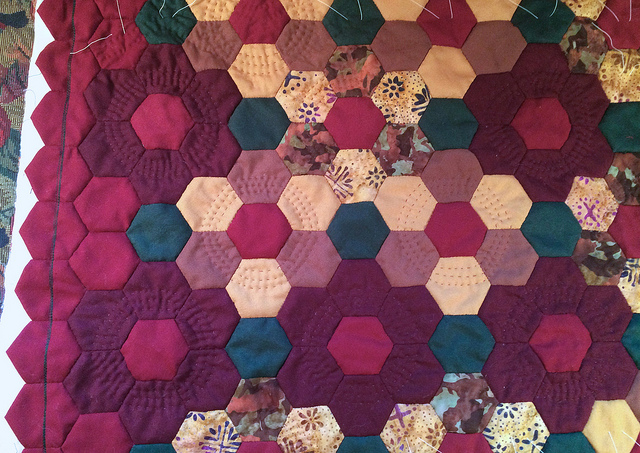
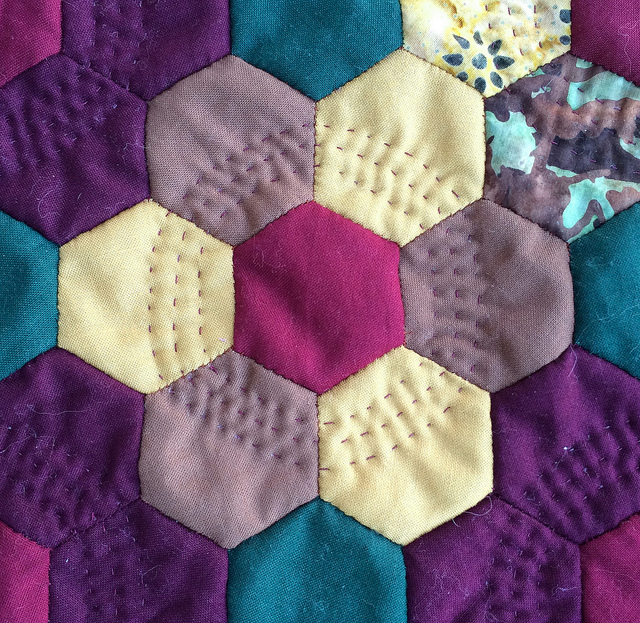
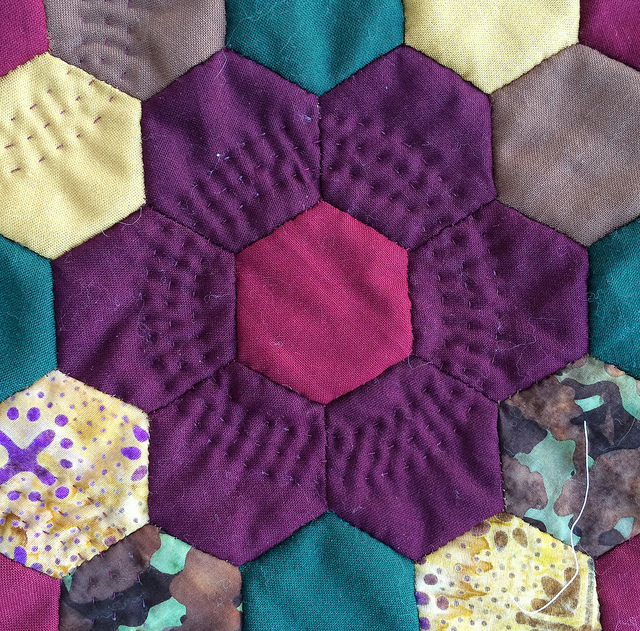
I absolutely love the circular concentric quilting. Three concentric circles gives a nice density to the quilting, and the circles emphasize the flowers, while leaving the green joining hexagons in a space that is not quilted at all. The quilting shows up best on the solid caramel and brown flowers. It shows up second best on the burgundy flowers, and it nearly disappears on the batik patterned flowers, as the photographs below show:
Since I may be giving this quilt away, and if I do it will be the first quilted piece I have ever given  away, I thought it might be worthwhile to know how many hours of my life are in it before I decide to give it a new loving home.

Each flower took 12.5 minutes to quilt. I timed one of them, so I know.

There are 41 flowers in the quilt, which brings the hand quilting time for this quilt to a total of 8 hours and 32.5 minutes. we will round that down to 8 hours and 30 minutes.

I decided to keep track of the time on the binding. It broke down like this:

15 minutes – Sewing around the edge of the last border of hexagons multiple times to reinforce the seams and to mark the cutting line which I would follow after the quilting was finished
12 minutes – Cutting off partial hexagons, excess batting, and excess backing fabric
30 minutes – Preparation of binding: cutting, joining, and pressing of binding
43 minutes – Application of binding to the front of the piece by machine
140 minutes – Hand sewing the binding to the back of the piece

The total time spent on binding came to 4 hours.

Here are some photographs of the binding process:
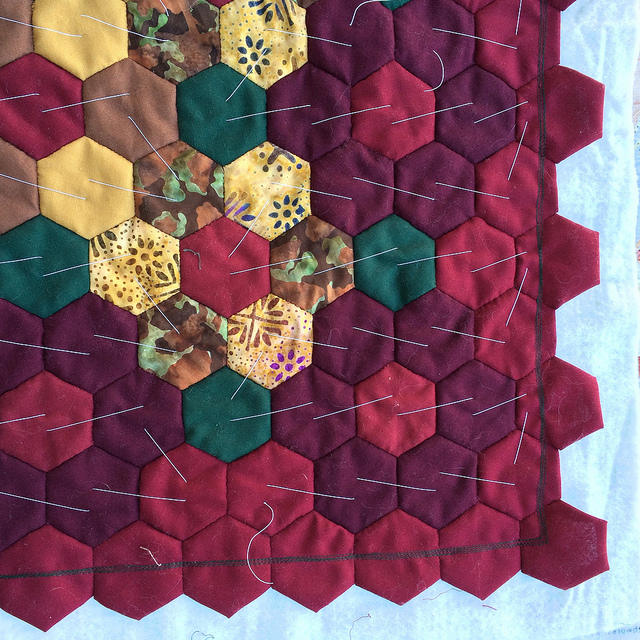
I sew around the final edge of hexagons multiple times to reinforce the seams and to indicate where to cut when it is time to apply the binding.
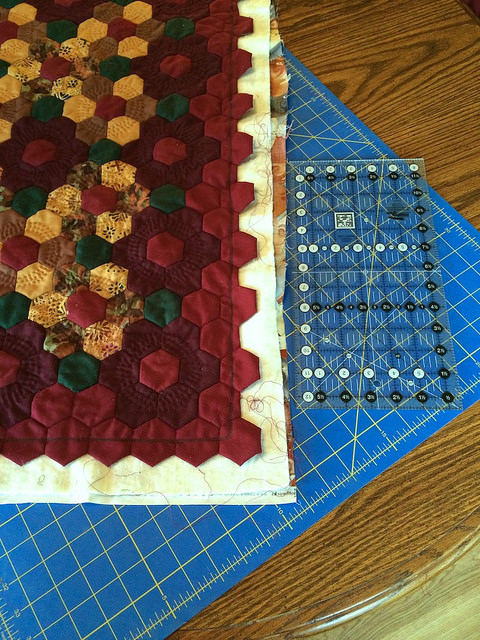
Initially I tried cutting away the excess border with a rotary cutter. I only tried about six inches that way. I found that using the ruler and rotary cuter did not give me the feeling of control that I needed.
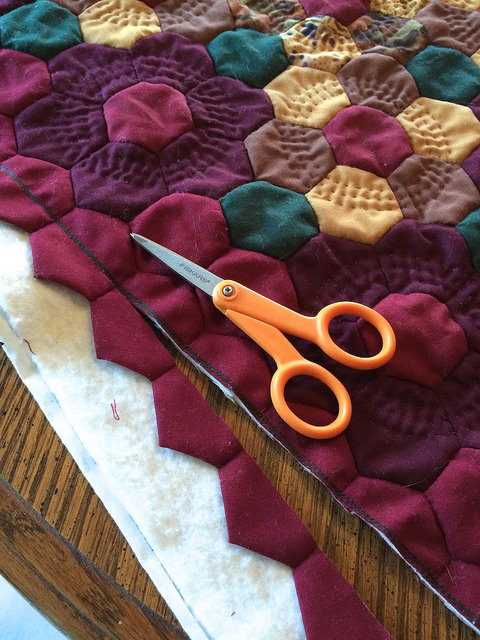
I ended up cutting away some of my stitching, so I switched to using a pair of scissors, which I found to be a much more satisfactory solution.
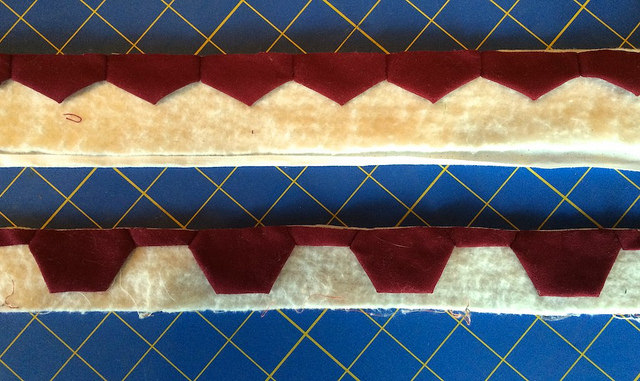
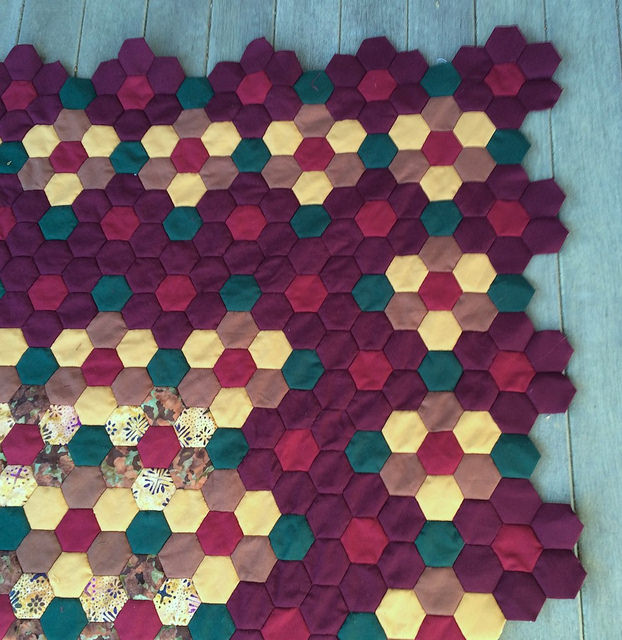
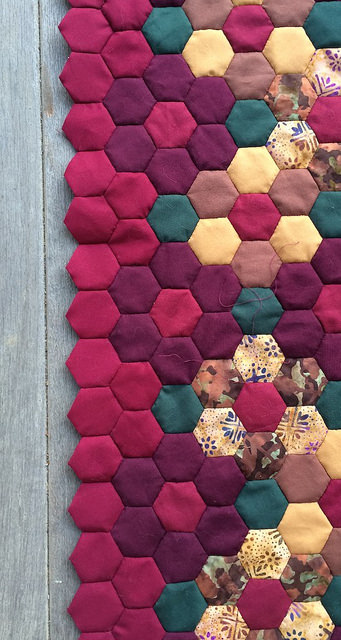
These are the portions of the hexagons that I ended up cutting off. I cut away half of the hexagons on the vertical borders. I cut away a portion on the horizontal borders that would give me the same size border as I had with the vertical hexagons. How much to take away and leave behind is a personal decision and may change depending on the piece.
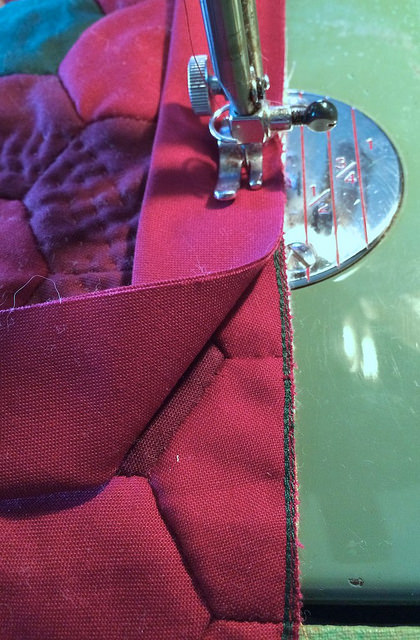
 

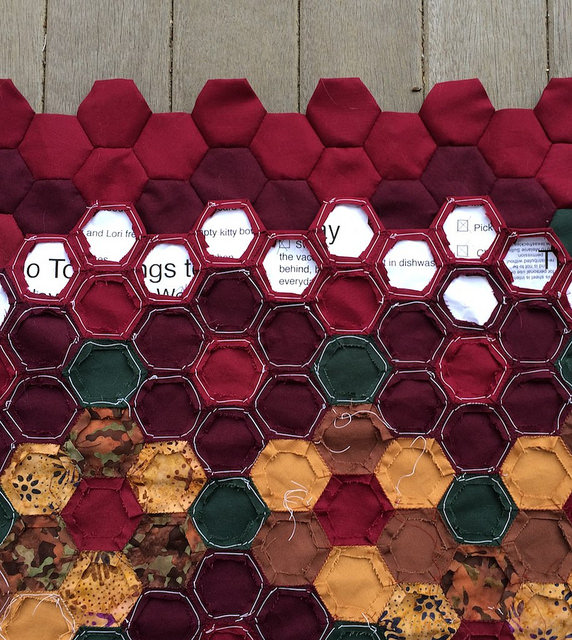
Here you can get a good look at the multiple rows of stitching I used to reinforce the seams of the hexagons that ended up having portions discarded in the binding process. I believe that I ended up doing four or five rows of stitches.
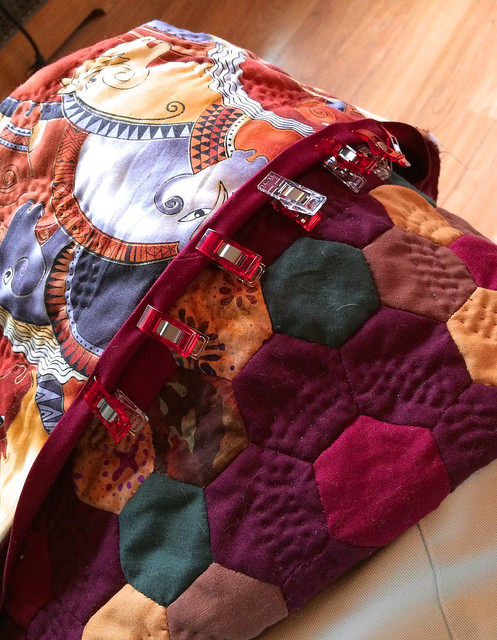
I’ll estimate the time spent on hand piecing the quilt top using my 10 minutes per hexagon estimate. This estimate takes into account the cutting of papers, cutting of fabric squares, basting of hexagons, and the sewing together of the seams. I won’t bother to include the hexagons on the final border in my count. There are 351 full hexagons in the quilt top, so it took a total of 58 hours and 30 minutes to piece.

Adding up all of the figures from above, the quilt took a total of 71 hours to complete, but I just realized that I need to add in the time spent basting in preparation for quilting, which is probably about two hours, so it comes to 73 hours total… 73 hours of my life. That’s almost two full weeks at a full time job.
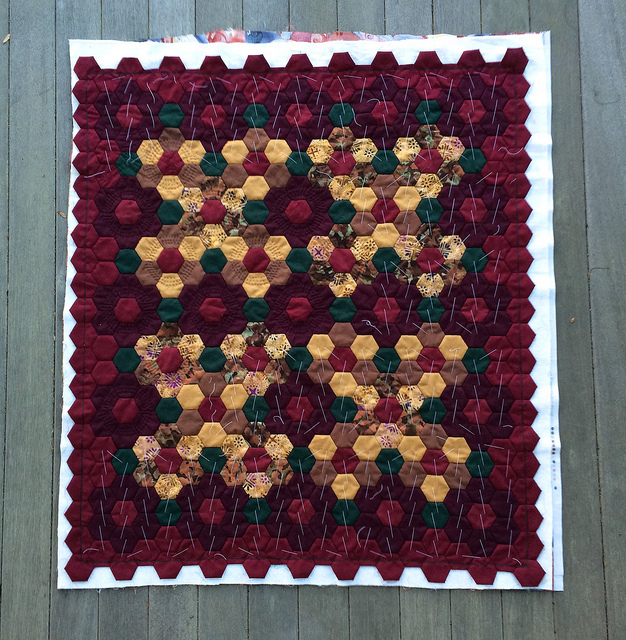
I was going to try to do some calculations based on the above figures to come up with an amount of time it takes to piece a square foot of hexagons, but then I got the brilliant idea of masking off a 12″ x 12″ area of the quilt and simply counting the number of hexagons, and using my estimate of 10 minutes per hexagon to come up with a time per square foot for piecing.
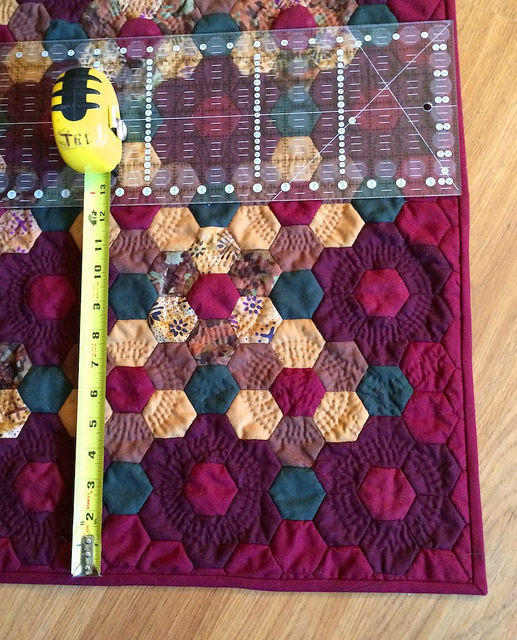
I came up with 60 hexagons per square foot for a total of ten hours to piece a square foot. That’s a very convenient estimate based on ten minutes per hexagon, which is probably the slowest speed at which I work. I doubt I can work as fast as 5 minutes per hexagon, but I can probably do better than 10 minutes if I try. However, English Paper Piecing is not about rushing. It is about relaxing and enjoying, so the 10 minute estimate is probably a good one.

I am happy with almost everything about this quilt. The only thing I am not happy with are my corners on my binding. They look very good from the front. However, I am dissatisfied with the way they look on the back. No one but a quilter would notice or care, but I do.
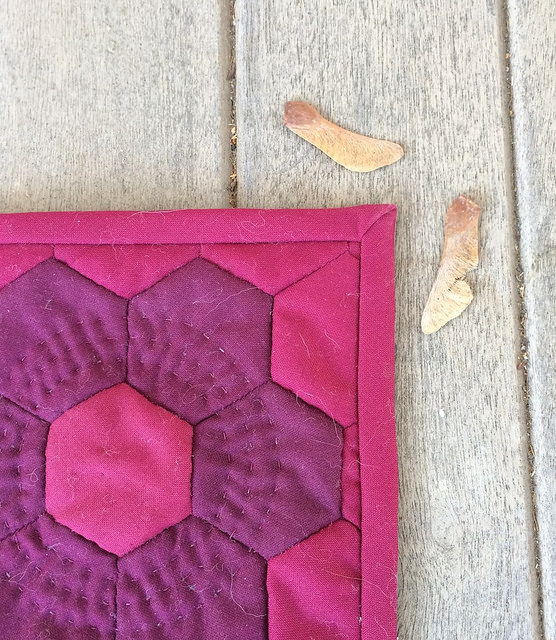
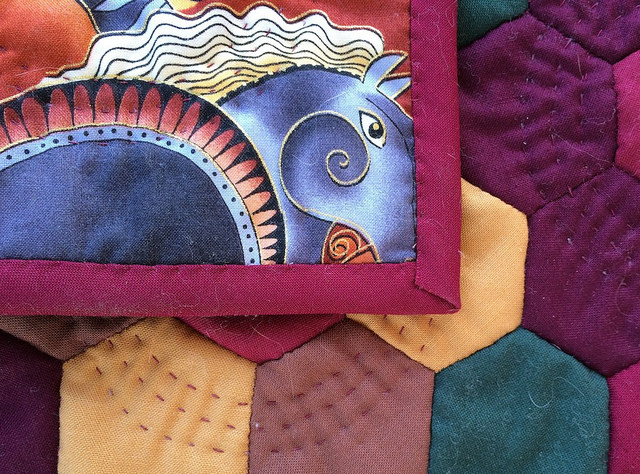
I want them to look like they are beautifully mitered. As it was, I fussed with these corners a great deal when I did the hand sewing on the back, In spite of that, I just could not make any one of them look like I wanted them to. I should be able to conquer the 90 degree binding corners, and I will.

I feel as if I have pretty well mastered the odd angled edges when binding. They seem to be more forgiving. I conquered odd angled binding edges on the piece below:
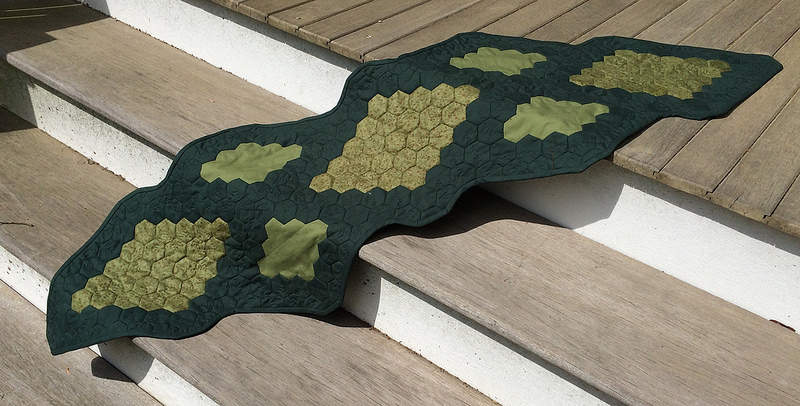
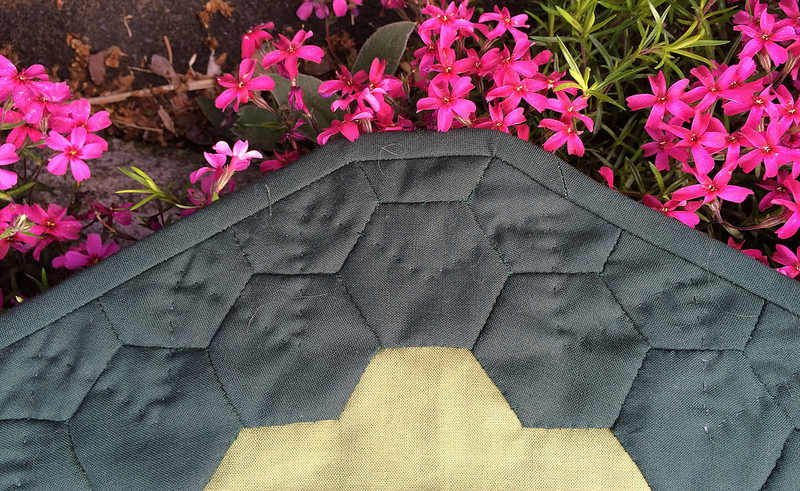
Yet 90 degree angles still have me flustered.

I took a course at the Pennington Quilt Works about binding, but I seemed to have missed something about the 90 degree corners. I’m going to make it a point to research this further. I’m going to look at a number of tutorials, and I am going to do many practice corners before I bind the large Batik Flower Garden quilt. It’s going to have 90 degree angles. The Diamond Quilt will not have any 90 degree angles, so I will be quilting and binding The Diamond Quilt top next.

I figure that it would take nine of these small quilts to equal the size of the queen sized Batik Flower Garden Quilt that I am making, so that gives me an estimate of 657 hours to complete the queen sized quilt give or take 50 hours. What’s 50 hours anyway on a large quilt?

I am linking back to Jessica’s Star Count as usual. Those of you coming here through Jessica’s blog might enjoy seeing the post about my photo staging area that I published since the last Star Count.
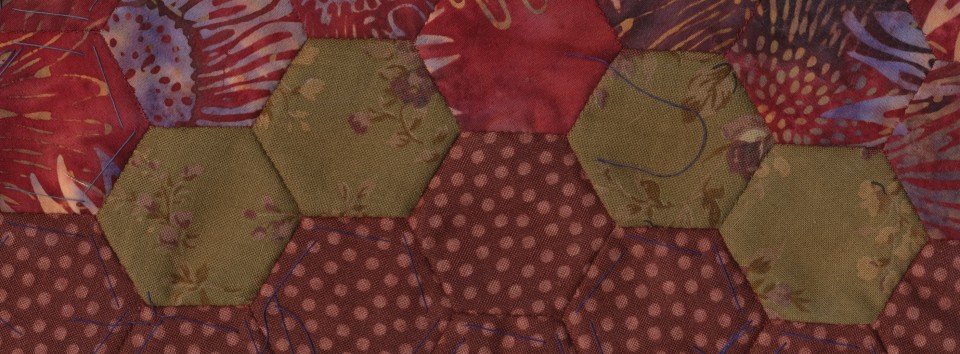
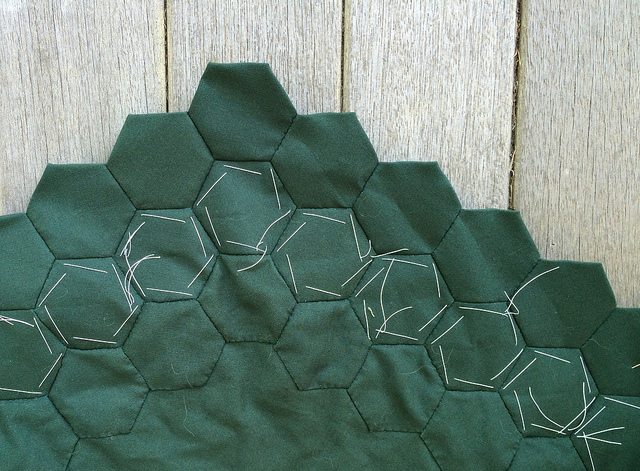
My Blog Photo Staging Area

Aside from just blogging about my fiber arts I will occasionally blog about the process of blogging itself, including such things as taking photographs for blog posts. That’s the topic today.

Today I had a One-to-One training session at the Apple Store on how to use Aperture, which is the professional level image editing and asset management program offered by Apple. I’ve been using Aperture for about two years now, but it will soon no longer be supported by Apple. My primary interest in seeking training in the use of Aperture at this point is to come up with an exit strategy for the day when Apple stops supporting the application. I will most likely start using Lightroom, but knowing as much as possible about Aperture will help me with that transition.

Aperture is an important part of my image work flow for my blog. I take my blog pictures with my iPhone and I have Aperture set up to automatically import my photo stream. Once the images are in Aperture I copy them into albums related to specific quilting projects. I share these albums on Flickr. From there I download medium sized versions of the photos I want to use in my blog posts. I arrange the files in my downloads folder by “most recently added”. This way I can drag the images directly into my WordPress posts. This works well for me. The images load quickly on the blog because they are small, yet I didn’t have to resize them myself because Flickr does all the work for me by offering me a variety of sizes for download. I merely select the medium size that I want.

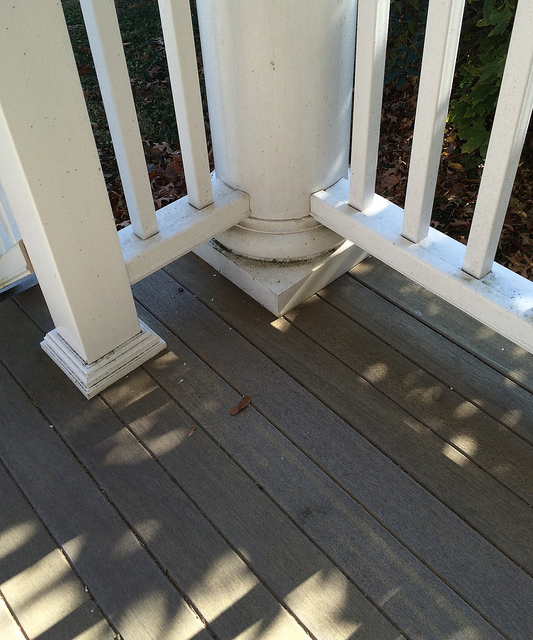
The Apple Creative who helped me today praised my workflow in Aperture, so I decided to describe to him the blog image workflow that incorporates Flickr into the mix. While explaining this I opened up my blog so he could see that it is very photo centric in terms of its content. While viewing the blog he asked if the wood in the background of most of my recent project images was a texture created in Photoshop. I told him that it was simply my front porch, and that I have a great staging area for taking photographs of my work using the surface of my front porch. I scrolled down to this image so he could see how nicely the staging area works. I was particularly pleased with the entire set of images from that post. which made very good use of the porch.

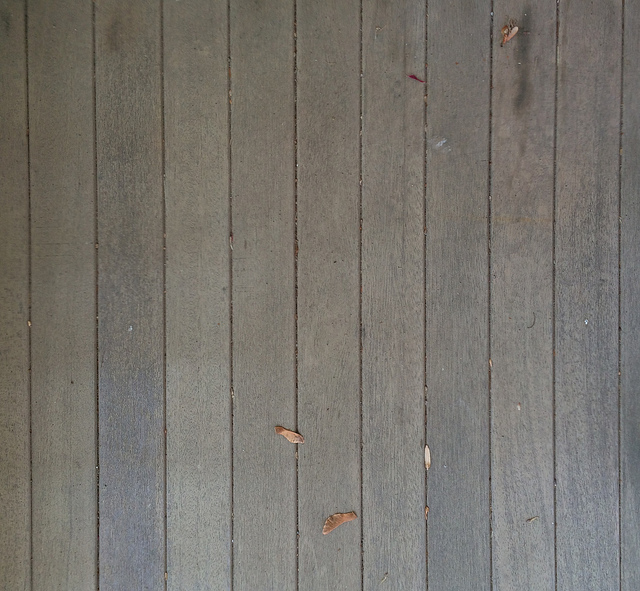
I like to use my porch because the really nice wood makes a great background, but also because I get nice natural light. I have not been pleased with most of the photos I took indoors for my blog. After talking about where I take my blog photographs with the Apple Creative for awhile, I decided that it would be nice to do a blog post showing my staging area in detail, so here we go…

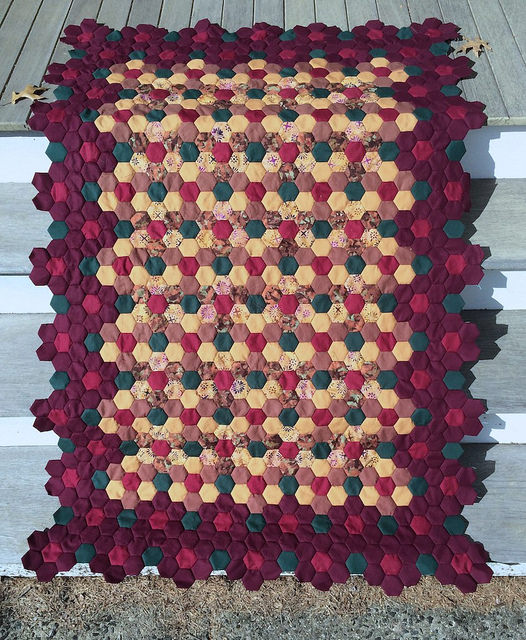
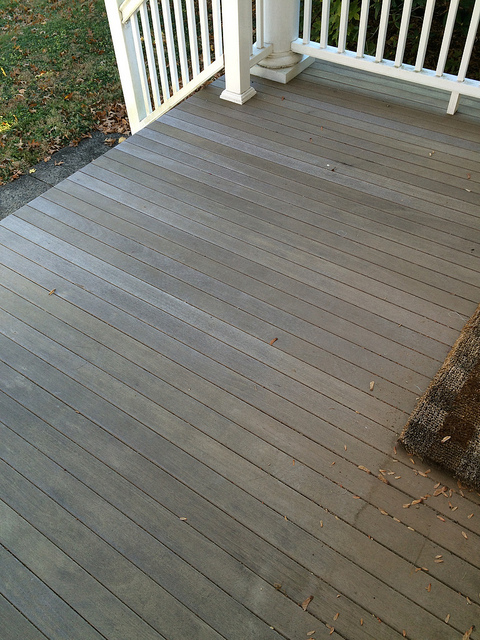
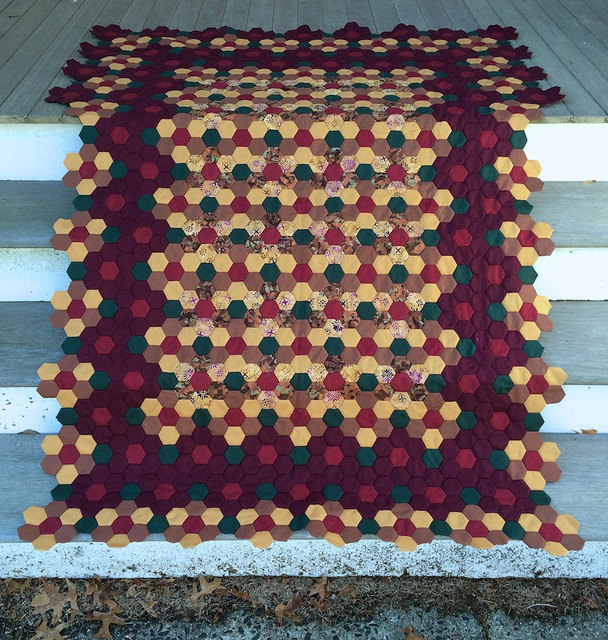
I’ll start with the steps that i used for photograph above. I deliberately placed the leaves at the top of the image above. The leaves in the image below just happened to be there when I took the photo. This is a great place to lay out a fairly large piece that just won’t fit well on the surface of the porch.

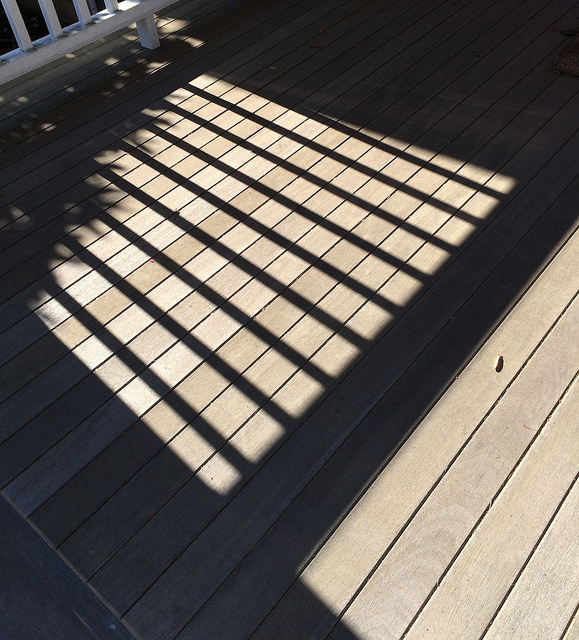
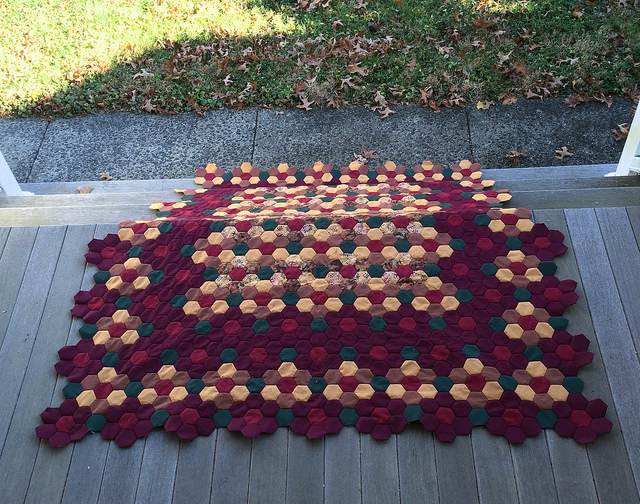
The porch gets a lot of direct sunlight in the morning which you can easily see in the photo below. Sometimes that makes for an artsy effect, but I like to wait to take my photos until the afternoon when the entire surface of the porch is in shade.

The railing can make an interesting background.

 And there is a nice railing to hang things from too.
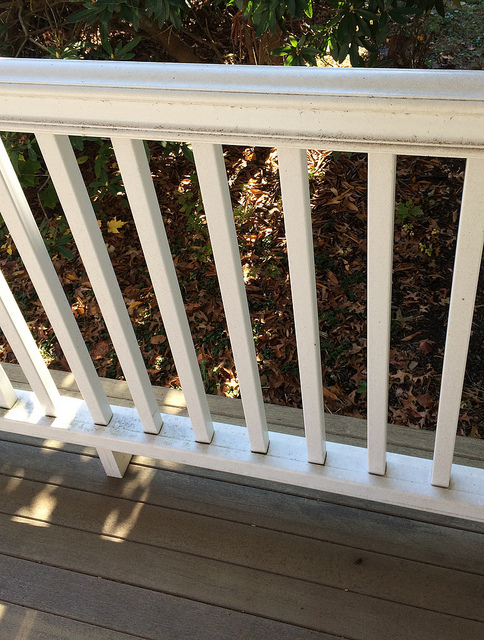
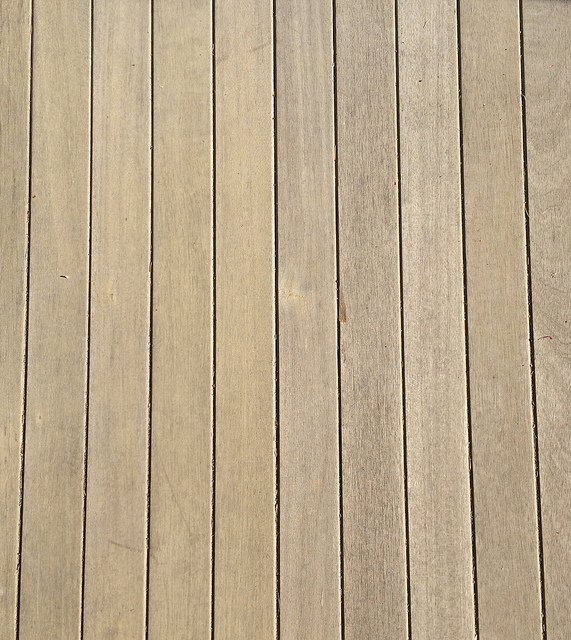
Here is the porch in direct sunlight. When I take photos this way I find it necessary to do white balance corrections and exposure corrections.

Here is a patch of porch in shade, which offers a better background for photographs in natural light. It is much less harsh than the morning sun.

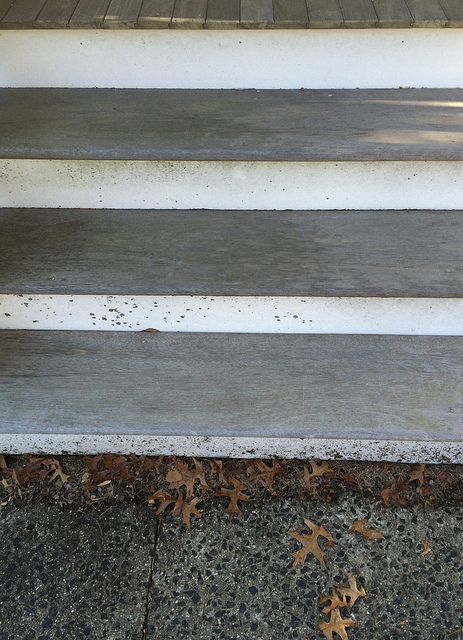
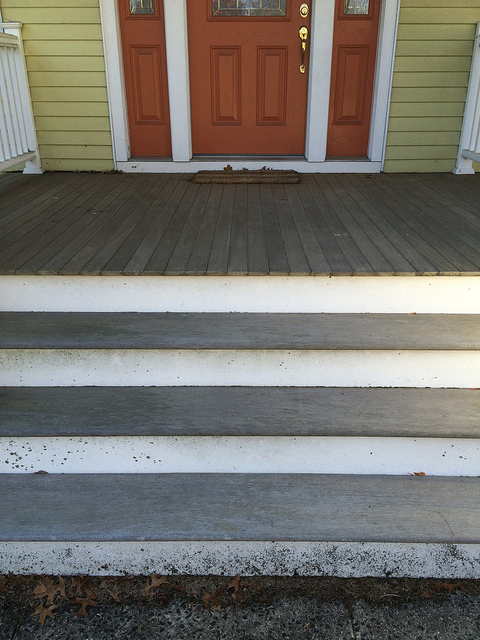
By 1:30 PM the porch and stairs are in shadow and it is a good time to take photographs. The light remains good up through about 4:00 PM.

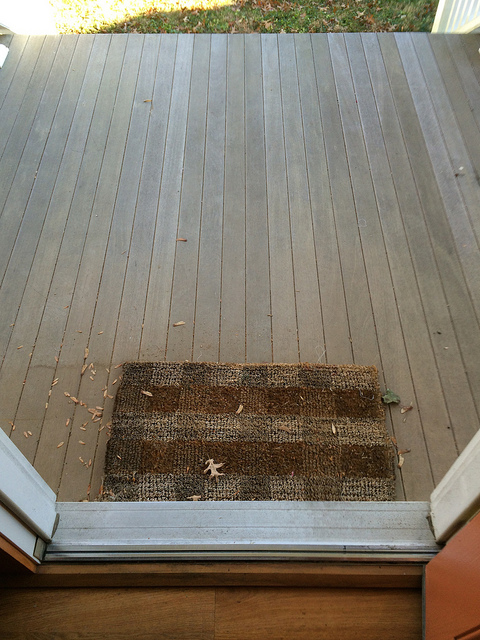
Here is the view of the porch in the afternoon from my open front door.

CJMQG Retreat

Last weekend I attended the Central Jersey Modern Quilt Guild retreat at the Hyatt House in Bridgewater, New Jersey. There were about 15 women in attendance working on a variety of projects. I was the only person there without a sewing machine.

I decided to work on my Batik Flower Garden Quilt projects.  I basted my quilting sample piece before the retreat, and I managed to do some quilting on it. Initially I had tried using both green and burgundy threads for the quilting using the pattern below. After doing a little of it I decided that you really couldn’t tell that two colors were being used. I think something like this would be better done with machine quilting which would emphasize the quilting stitches more.

So I tried doing some concentric circles around the crimson centers of the flowers. I decided that I liked the effect, and did quite a bit of quilting on this piece while at the retreat.

I spent most of my my time, however, creating burgundy flowers and adding them around the edge of the large batik flower garden quilt.

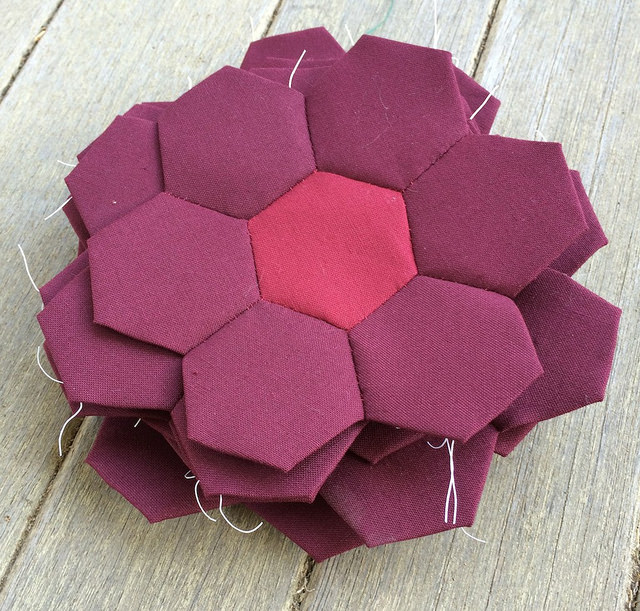
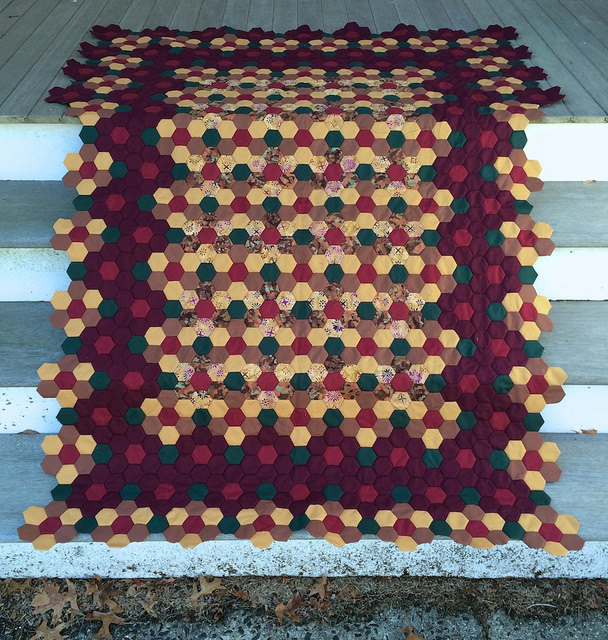
By the time I was done adding flowers I had added fifteen burgundy flowers around the border and the hunter green hexagons between them. They are at the porch level in the picture below.

Here is a better view of the new burgundy flowers.

And here is a nice close up of those burgundy flowers.

This retreat was my second opportunity to get to talk to some of the women in my quilt guild. The first opportunity was when we had a booth at the Pennington Farmer’s Market in October. I enjoyed chatting with the women as we all worked. I even showed Tatiana how to do English Paper Piecing. She was finishing up a very modern quilt based on a workshop she had attended. She thought that a few flowers scattered across the surface would enhance the overall appearance of the work. I am looking forward to seeing the finished quilt during the show and tell segment of a future guild meeting.

My primary motivation in attending the retreat was to get to know people in the guild. I found it really pleasant to be working along side a group of women. In order to make this social event pay off I decided that it was important to learn people’s names, but I know that I have a terrible time remembering names. I decided to admit my limitation openly, and ask people if I could take a picture and write down their names. That way I would have a chance of being able to remember them later because I could look at the photos and names to study a little bit.

By the time I left the retreat I was able to look at each person and say her name. I made only one mistake when I did that, which I thought was pretty good. I did warn them though that when I saw them next I might not remember the names because they wouldn’t be sitting in the same places. I am such a spacial person. If you gave me a floor plan of the room I could still write the names on the tables, but I’m not sure I could match the names up with the faces at this point.

Diamond Quilt Progress – Border Nearly Done

I had very little time for quilting this week. I picked up my new MacBook Pro from the Apple Store on Tuesday and spent most of my time fiddling with Aperture. I even had a group training session at the Apple Store on Saturday morning.

I took a break from the Batik Flower Garden Quilting Sample Piece which you can see at the top of the picture above. I got out the Diamond Quilt and did some more work on the final border of hunter green hexagons.

The last time I reported on that border I had put in 6 hours and 43 minutes on it. Since then I have put in another 9 hours and 23 minutes. I still have about a quarter of the border yet to finish.

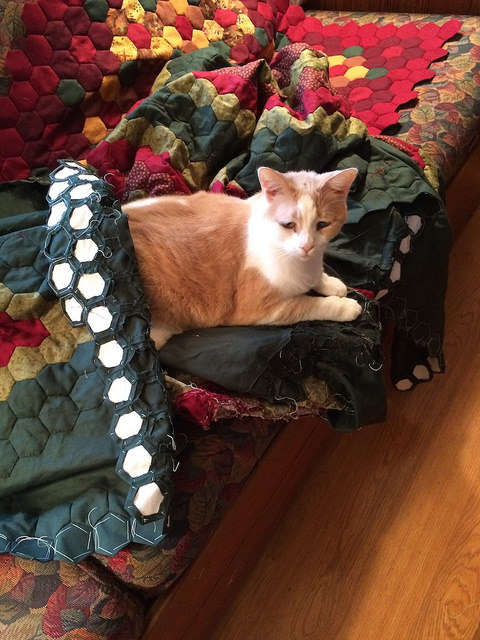
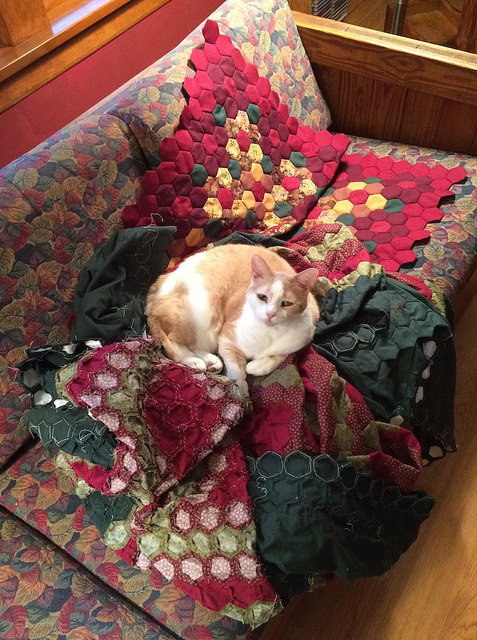
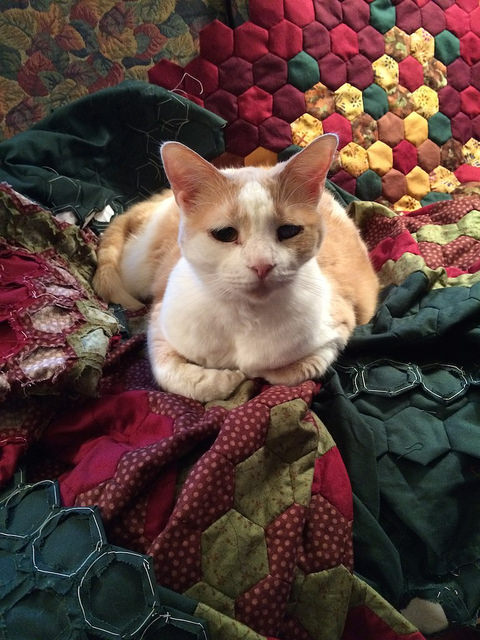
Lori decided that the quilt top had been laid out for her to enjoy. As it turned out I was able to work on it while she was laying on it because it is so big. Below are a number of shots of Lori enjoying the quilt top.

My plan for this week is to prepare things to take along with me for the quilting retreat I will be attending next weekend for the Central Jersey Modern Quilt Guild. We will be meeting in Bridgewater, NJ for three days.

I’ll prepare my quilt sample piece so I can work on that at the retreat and I will precut lots of burgundy squares and crimson squares so I can work on the large Batik Flower Garden Quilt.

I won’t be bringing a sewing machine to the retreat. I will be doing all hand work there. I could do that easily enough I home, but the main reason I want to go is to see what everyone else is doing and get to know people.

Quilting Sample Ready to Baste

I decided to flesh out the border of this quilting sample with the crimson fabric. As you can see very clearly below there is not a lot of contrast between the burgundy flowers and the crimson border.

I had actually considered finishing this piece off with a hunter green border, but I decided against it because hunter green hexagons join the flowers together. I thought that it might be confusing for them to mingle with the border. In retrospect I think this might have been a nice effect allowing the burgundy flowers to pop along the edge. Maybe I will do something like that in a future quilt. Imagine a hunter green border added to the image below.

I am linking back today to Life Under Quilts. Jessica has been very busy lately with a project that she will be able to reveal in the near future. It has an ISBN number, so I am really looking forward to seeing this new project. For the past few weeks Jessica hasn’t posted her usual Monday Morning Star Count link back post, and I have anxiously looked for it every week. After only one week of not being able to link back to Jessica, I realized how much I depended on her blog as a means of sharing my work with others. Before I started to link back I was blogging in a vacuum. I didn’t really think anyone was reading. Once I started to link back to Jessica’s blog I started to see comments on my posts, and I felt like a part of a community.

Anyone reading this from the Monday Morning Star Count linkup please take some time to scroll down and see what I’ve been up to in the last few weeks.

Thank you to Jessica for getting us sharing again. We English Paper Piecers need all the encouragement we can get to keep producing in a medium that takes so long and seems to move so slowly. I’m slightly late to the party this week, but I am looking forward to seeing what everyone has done since we last shared.

Edit: I was so grateful for the opportunity to share again that I made it a point to comment on every single link in the Star Count, and I will check back later in the week to comment on any links made between now and then. Keep stitching girls!

Paper Pieces: “Rolling” Your Own

You can buy pre-cut hexagons papers for English Paper Piecing from a number of sources. You can get them from Paper Pieces on the web. You can buy them at your local quilt store, the Pennington Quilt Works in my case, in bags of varying amounts. While paper piecing goes more quickly to have someone do this work of making paper pieces for you in advance, I think it is a waste of money. It is so easy to “roll your own”. Ummmm, I mean is that it is so easy to CUT your own, but being a child of the sixties I couldn’t resist the phraseology.

I like my paper pieces firm enough to offer support to my fabric, yet flexible enough for easy bending when it is time to join larger shapes or rows together. Therefore, I use a 20 pound all purpose office supply paper that I obtain from Staples. I may try a heavier paper at some time, but I am satisfied with 20 pound paper currently. The pre-cut manufactured papers I have tried are quite a bit heavier, and I find that they are not as easy to bend. Therefore, they are not as comfortable to work with.

I found a nice pdf file for cutting one inch hexagons at the Texas Freckles web site. I am offering a link to the main page of the web site. I urge you to explore the entire site, and then click on “Downloads and Patterns” to find the hexagon pdf. Since I have printed out many pages of hexagons using this pdf, the least I can do is encourage traffic to the site rather than just a link to the pdf file.

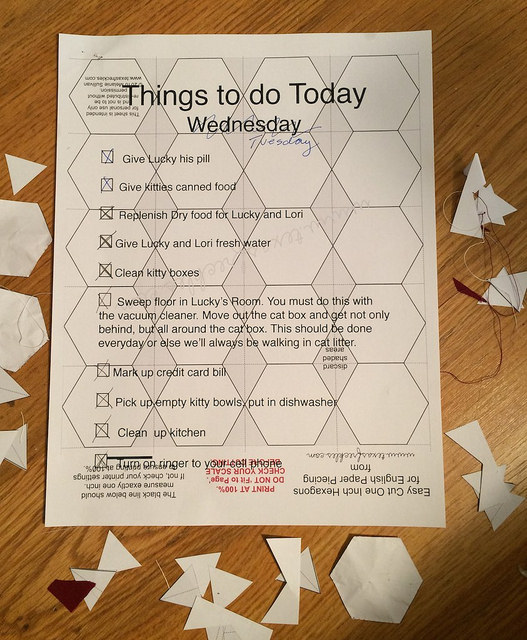
Ordinarily I print my hexagon shapes on blank paper. But today I got the brilliant idea of recycling my daily todo list from my husband. I am retired and my husband still works part time. He enjoys a clean and tidy house, whereas I simply to do not care about such things. I don’t even SEE the dirt and clutter around me. I’ve always been that way, and I am unashamed, might I say even proud? But I am clearly the Oscar to my husband’s Felix. Rather than have this become a bone of contention, we have set up a routine whereby I receive a list of things to do each day he is at work at least. I have the pleasure of checking off the completed items, and my husband has the pleasure of having the tasks completed that might otherwise have gone undone. Now, before anyone comments to offer sympathy because my husband provides me with a daily todo list, let me make it clear that he does MORE than his share of housework. I find the use of the todo list to be mutually beneficial. I take pleasure in checking things off, and I am pleased that he makes his needs known in a way that works for both of us. That is far superior to having him let his disappointment over my substandard housekeeping fester. I’m clearly the one with the problem, not him. So it’s all good.

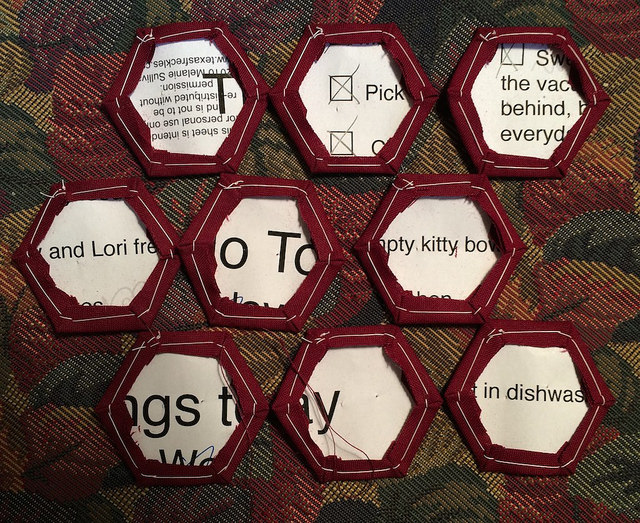
Here is the pdf file from Texas Freckles printed on the first page of my todo list from Tuesday.

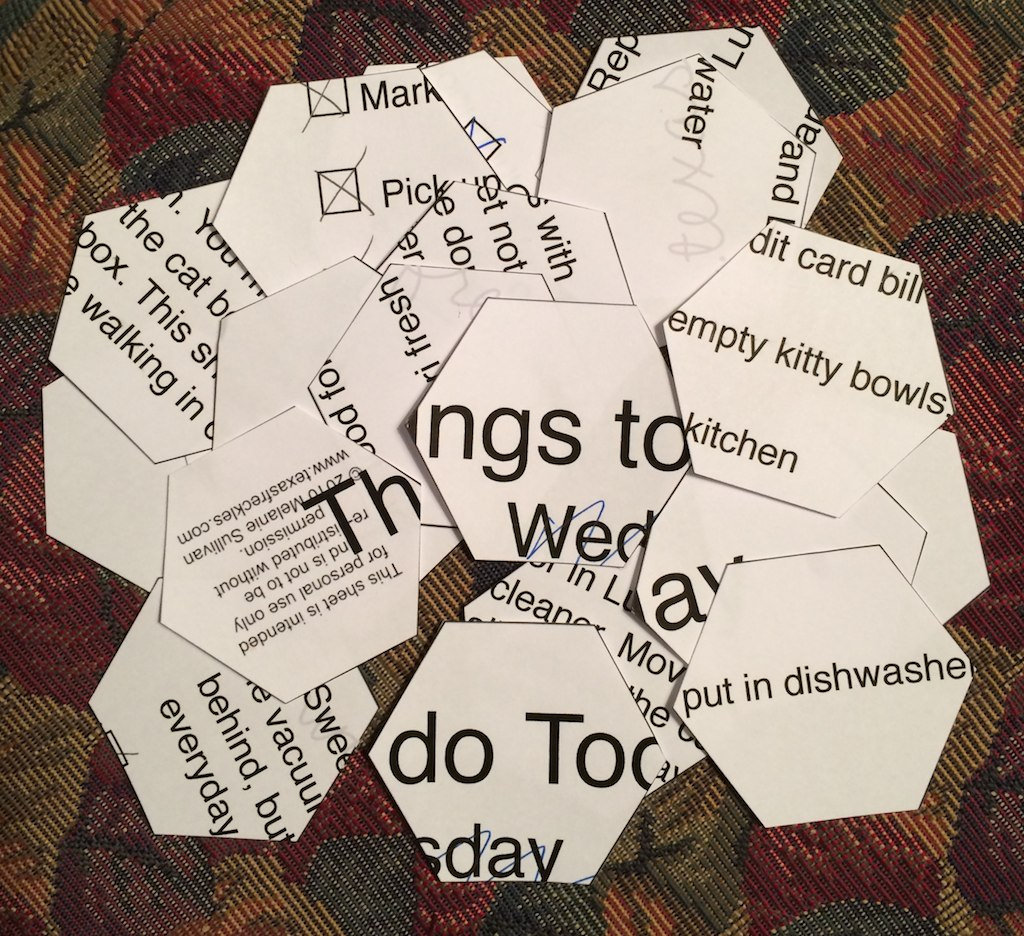
Here are the hexagons cut out and ready to use for basting.

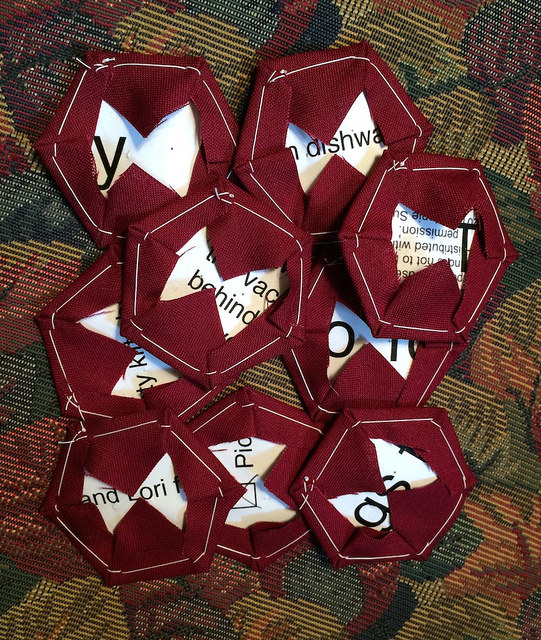
Here the hexagons are pinned…

basted…

trimmed…

and finally inserted into a piece currently in process.

A New Macbook Pro Is Being Built To My Specifications

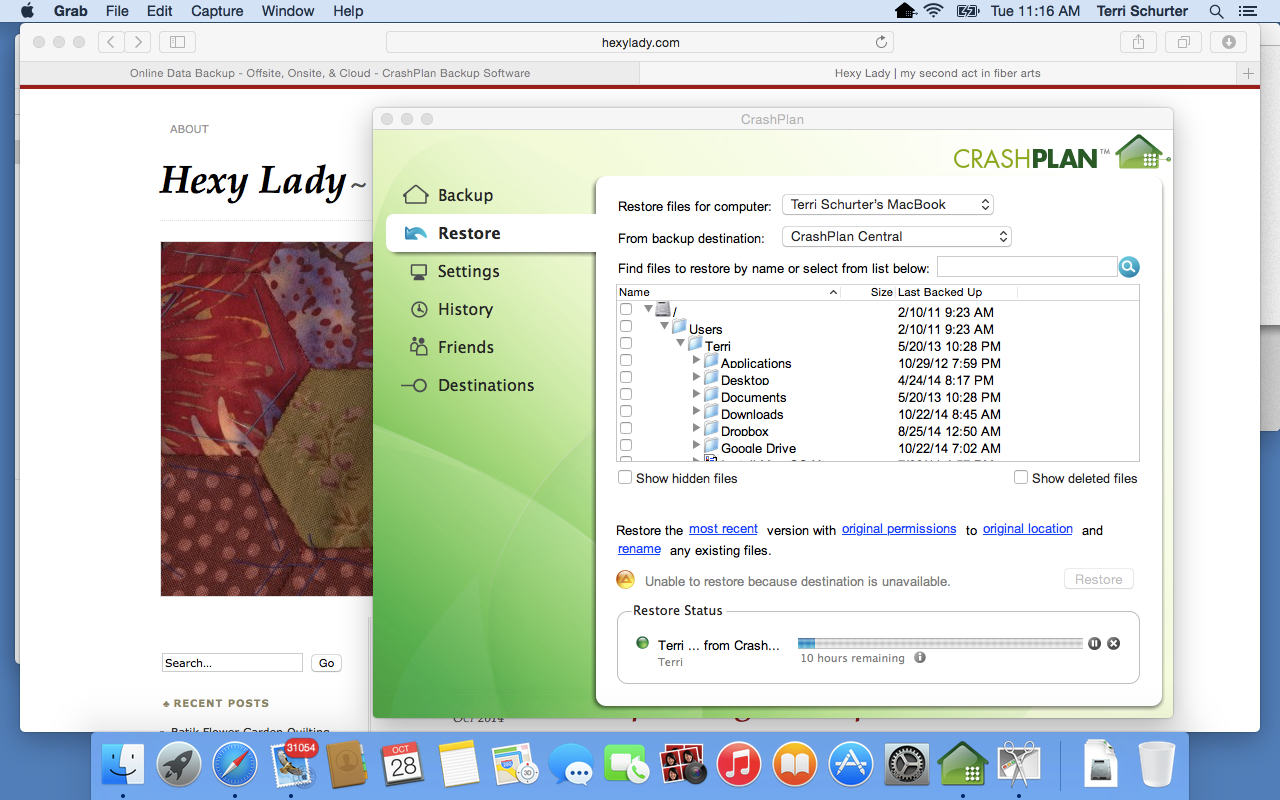
Above is a screenshot of the restoration of files from Crash Plan Central to my late 2008 Macbook Aluminum Body laptop. I had taken said laptop into the the Apple Store last week after it had failed to reboot following a simple “update all” in the App Store. I was doing those updates in preparation for upgrading to Yosemite. The Genius that helped me had to reformat my hard drive and reinstall Mavericks. I took it home and upgraded to Yosemite without a hitch, but all of my data was gone. I had no recent Time Machine backup. I thought I was out of luck, but then I remembered my Crash Plan subscription. In fairness I have to point out that I never bothered much with backup on the laptop because it was a secondary device, and anything of real importance was in Dropbox. If this restore doesn’t work I will not have lost much other than a second Aperture library and some miscellaneous files scattered across the hard drive outside of the Dropbox folder.

I’m getting ready for my setup session of my “One-to-One” subscription, which I ordered as part of my new Macbook Pro purchase. I intend to take the old Macbook in and have them use it to set up the new machine. once I get the files restored from Crash Plan I should be good to go.

You are probably thinking that this blog post is off topic, but it really isn’t. I’ll explain. While this blog is about my second act in fiber arts, and while this post has to do with technology, my technology purchases influence how much money I can afford to spend on my quilting habit. This post is as much about Quiltcon 2015, and my conflicts over attending, as it is about the Macbook Pro purchase.

I was sitting on the fence about whether or not I would attend Quiltcon 2015. I really wanted to go, but I had reservations about it from the start. I booked a room for it even before registration opened in June. After seeing the price for the room, and estimating the other expenses involved I figured that Quiltcon 2015 would set me back at least $2,000 if I decided to attend. One of the reasons this was going to cost me so much is that I didn’t know anyone to share a room with, so the hotel was going to be a major expense.

I also had some fears of being a social wallflower since I don’t know people on the web yet to meet up with in Austin. I also have not broken the ice yet with the members of the local guild who might be attending. As a result of that I wasn’t sure that I would have people to hang out with. I’m actually pretty independent, having attended Photoshop World on my own without knowing a soul, but it can be lonely to be at a convention on your own, and it’s more fun if you can share the experience with others.

A couple days after registration opened for Quiltcon 2015 I decided to bite the bullet and just go ahead and register even though it would be a major expense, and I might be alone. I logged in, filled my cart with lectures, and went to pay. There was a glitch with my credit card. I could have whipped out another card and paid, but I took it as some sort of a sign. I logged out, and sat on the idea. That was in June. I’ve been sitting on the idea for four months now. Between now and June I’ve been back and forth a few times about whether I should go or not.

At the last CJMQG meeting someone mentioned that air fares to Austin are very good right now. I checked them out and decided to register for the event before getting the air fare. I started to register, but it was the day of the Apple event where they would be presenting the new retina display 27 inch iMac, and I wanted to see the live stream of the event, and the time for event was approaching. So I waited.

Coming away from the Apple live stream I was very conflicted about where my money was going to need to go in the next couple of years in terms of my upgrade cycles for Apple devices. I have an iPhone, an iPad, a notebook, and a desktop to think about. The retina display iMac was looking very tempting, but it had an entry price of $2,400, which was just about what I expected to drop on Quiltcon 2015 if I went.

I had some serious thinking to do.

In the meantime I started to get my laptop ready for Yosemite. In the process my laptop refused to boot up from an “update all” of standard minor apps before the big OS upgrade. I scheduled an appointment at the Genius Bar of my local Apple store for my 5 1/2 year old aluminum body macbook. They tried to repair my hard drive first and boot it up with the contents intact. That didn’t work. They then reformatted my hard drive and installed Mavericks. It came up and I was told that I could install Yosemite at home. If the unit did not boot up that would mean that my hard drive had failed and would need replacement. If it booted back up it was good for now, and the drive could be replaced at a future date if necessary. However, I’d need to get it from Crucial, or New Egg or Radio Shack because the computer is so old that Apple no longer provides parts for it. They don’t provide parts for units over six years old, and even though I had the laptop since Spring 2009, it was a late 2008 unit, making it over six years old.

The really good news is that Apple charged me nothing to scan my drive, reformat it, and install Mavericks even though my laptop was no longer under Apple Care. Since The things that they did for me fell under the category of diagnostics, and since I hadn’t needed any hardware replacements there was no charge to me. (Well, if i had needed hardware replacements I would have been out of luck because of the age of my unit, so I was really lucky.)

While I was at the Apple Store I looked at the new retina display iMac. It is beautiful, but I am not sure that I need it. I looked at the retina display Macbook Pro units, and they are nice too, but I don’t think I need one of those either. I took a fresh look at the lowly 13 inch Macbook Pro with the mechanical hard drive and the Optical Drive. It’s the only notebook left in the line that can accommodate an optical disk without an external drive attached.

I formulated an upgrade plan right then and there. I would max out the lowly Macbook Pro with non-retina display in every way possible… processor, ram, hard drive. I would make it my primary machine. I would hook it up to my 3 1/2 year old iMac when I want a larger display. I would downgrade my desktop unit to the status of an external monitor and file backup system. Two years later I would revisit the idea of a retina display iMac, but I would probably get a non-retina display iMac, and the cycle would be in place where I would upgrade my laptop and desktop using a four year replacement cycle. Or I would forgo a desktop altogether and get a cinema display when the desktop finally died and upgrade the laptop every three years.

Minimally, I would not need to think about a retina display again for another two years, and that would be a relief.

I had my plan formulated. If I did not attend Quiltcon 2015,  I could just move forward with the plan because I had enough money saved for the new laptop. I figured I would wait until Saturday to make a final decision about Quiltcon because I would be spending the day at the Pennington Farmers Market with members of the CJMQG. I’d have a chance to speak with the president of the guild about Quiltcon. As it turned out I had a chance to speak with a few other women about Quiltcon too. What I discovered is that the workshops and lectures are mostly filled at this point. There are some lectures still available in the evening, but many people will be out socializing at that time, and I will miss out on a lot of social aspects of the convention if I register for the evening workshops that area still available.
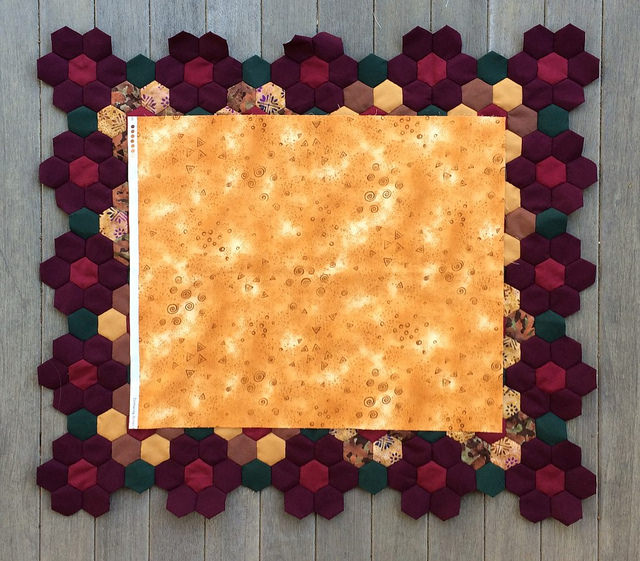
So the decision about Quiltcon was made for me by my own procrastination in registering. I don’t regret it though. I remember actually feeling relieved when I realized that I shouldn’t go to Quiltcon this year. It’s the right thing. The first time I attend Quiltcon I should be looking forward to meeting people I’ve met on the web through my blogging activities. I hope that will be the case for the next Quiltcon.

The maxed out Macbook Pro is ordered, and I am glad. I am having it delivered to the Lawrenceville Apple Store where I will pick it up on November 6th. I ordered a year of one-on-one instruction for the first time ever. I’m really looking forward to learning as much as possible from the people at the Lawrenceville Apple Store. For the first time ever I live close enough to an Apple store to take advantage of “One-toOne”.

Batik Flower Garden Quilting Sample Progress Report

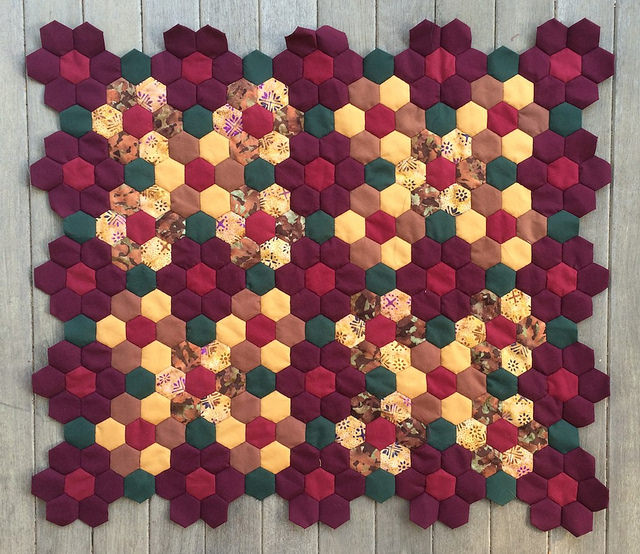
This week I finished adding the outer border of burgundy flowers.  Here is what it looked like before the hunter green hexagons were added in.

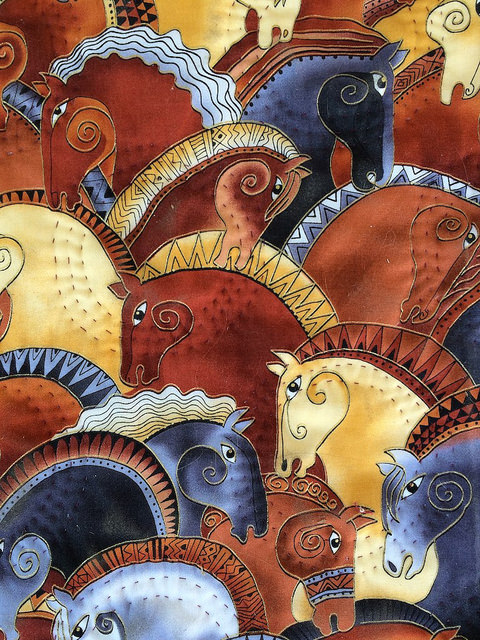
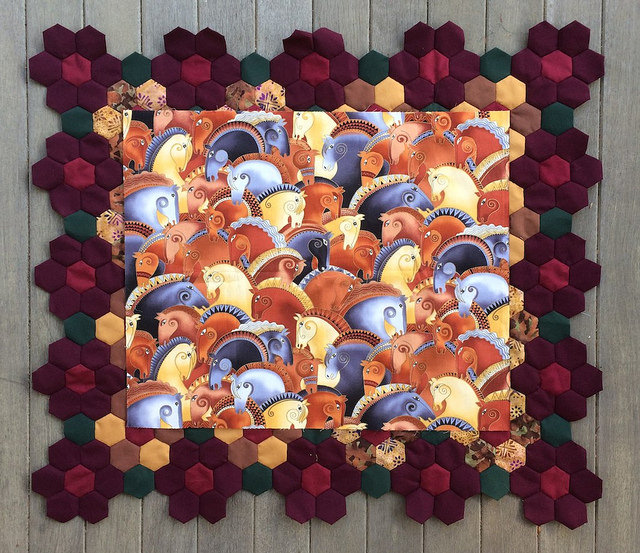
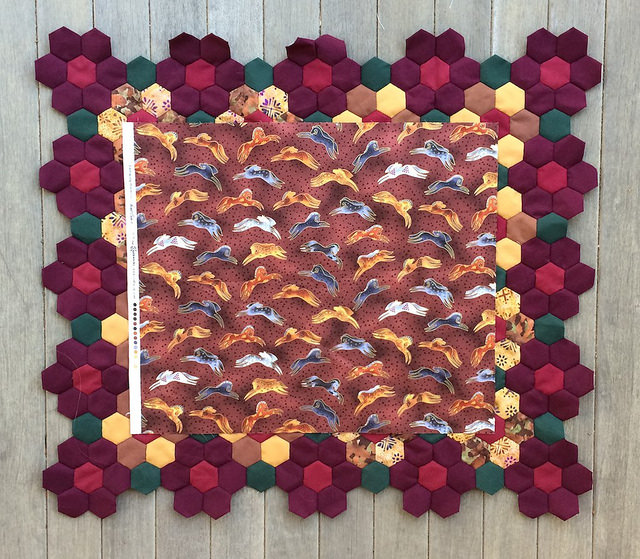
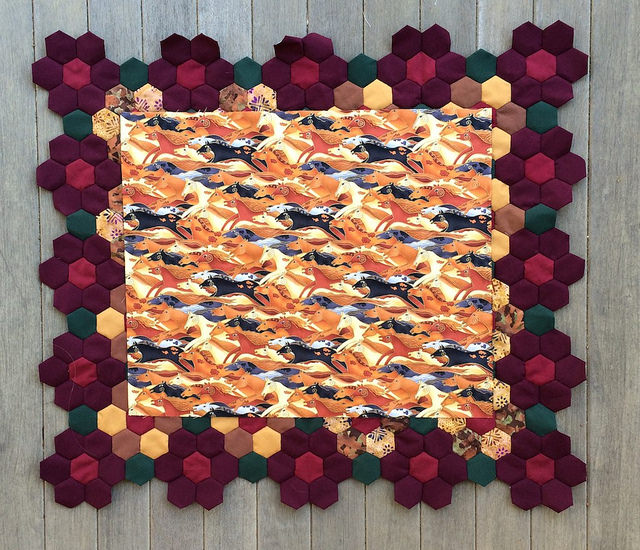
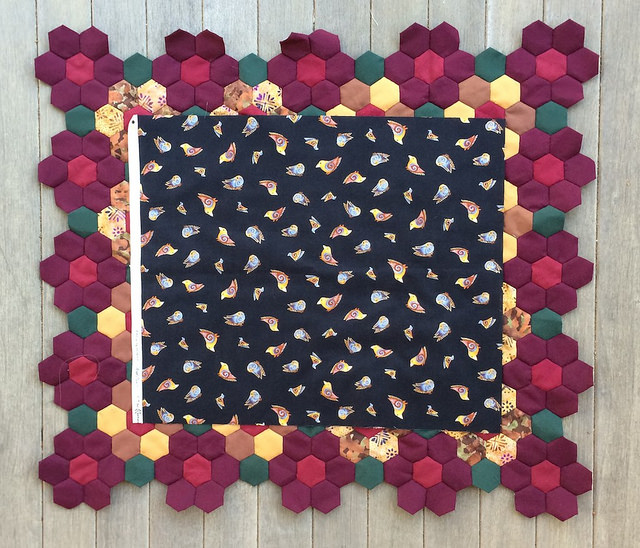
Last week I showed sample fabrics from the fat quarter bundle that I ordered from Keepsake Quilting. The medley of fabrics is called “Embracing Horses Quilt Fabric Medley” and was created by Laurel Burch. I used the images posted on the Keepsake Quilting web site when I showed the fabrics last week. The fabrics look really nice in those photographs.

The fat quarter bundle arrived this week, and I was not disappointed when I saw the fabrics in real life. The scale of the patterns was a little smaller than I expected, but I was very happy with what I saw. I am hoping to use the largest scale horse pattern as the back of this quilt sample. It doesn’t have any red in it, but i think it will harmonize very nicely with the crimson binding I am planning on using.

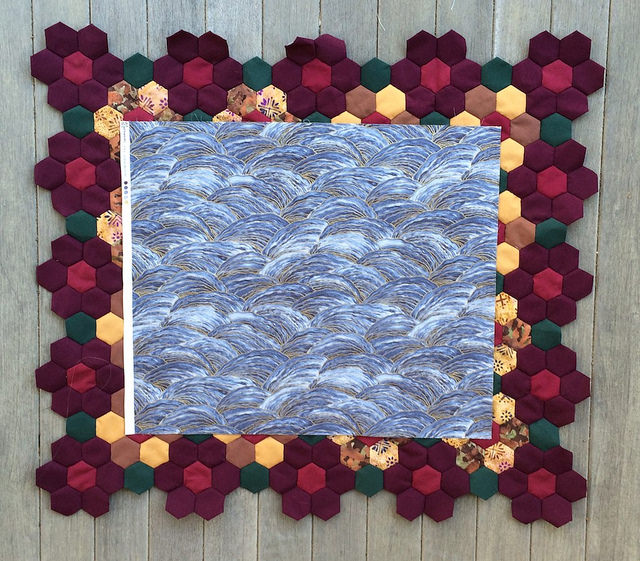
I’m going to show each of these fabrics below using my quilt sample piece as a backdrop. I’ll start with the largest scale horse design. For a sense of scale bear in mind that the edge of a hexagon shape is one inch.

I do think that some fussy cutting may be in order.

Batik Flower Garden Quilting Sample

I Joined the two square units as pictured below.

I had planned to create two additional units of the same type, but then I realized that it would be easier to just add the individual flowers in rows to flesh out the intended design. That is what I did.

The central design is complete and all that remains is to finish the outer border of burgundy flowers, with single hunter green hexagons between the flowers. I’ll then need to finish off the edge from there. Currently the plan is to use the crimson fabric to fill in with the single hexagons necessary to finish off the border. I am planning to bind this piece using a bias binding. I will cut away half of the hexagons along the borders before binding. I plan to document that process well to create a binding tutorial for the half hexagon finish technique which I intend to use for the Diamond Quilt, and also the Large Batik Flower Garden Quilt.

I need eleven additional burgundy flowers to flesh out the edge. It is my goal to have the edge finished this week and be prepared to begin basting this sample piece the next week. I am currently estimating the finished size of this piece at 35 inches by 32 inches. If I want to make it larger I could end up adding additional rows of crimson hexagons to the border. I need to research baby quilt sizes in order to come up with an appropriate finished size.

Recently I got a catalogue in the mail from a company called Keepsake Quilting. Most of the catalogue was full of kits. I don’t use kits, and these were not particularly to my liking anyway. I wasn’t particularly impressed with the fabric selections until I came across a collection of fabrics that really spoke to me. It is the “Embracing Horses Quilt Fabric Medley“.  I ordered the fat quarter collection to get a good look at all six of the fabrics, but I particularly like the large print pictured above, and I think it would make a really nice backing for this sample piece. After I have had a chance to look at the fabric up close I will probably order a few yards of it.

Pictured below are the other fabrics in the medley.

Will these birds be small enough to fussy cut?

What a nice texture.

Here is another great texture.

This fabric is a nice complement to the larger horse print, as is the fabric below.

These images and colors really speak to me. The colors fit in with my current color pallet and will expand it slightly. I’m not sure what I will end up doing with all of these fabrics, but once I get my hands on them I think I am going to have to order yards of each of them. Sometimes you see something that you know you have to have. I think I will need to have these.

I may even end up piecing something from this collection in a modern fashion for the back of the large Batik Flower Garden Quilt to make that quilt an interesting reversible piece.