• About Terri Schurter

Hexy Lady

~ my second act in fiber arts

Hexy Lady

Monthly Archives: February 2016

Glorious Hexagons: More Thoughts on Layering

26 Friday Feb 2016

Posted by Terri Schurter in Uncategorized

≈ Leave a comment

After a happy experience with layering I decided that I wanted to cut and layer more of my large horse head print. Rather than isolate just one repeat I decided to do a slice clear across the width of the fabric. This would cut the drop repeat in more than one location.

Here is the resulting stack.

If you have enough yardage to allow for it, I believe that cutting clear across the width is the simplest way to cut pieces to layer. It is easy to understand. It eliminates the need to make vertical cuts in the yardage. It cuts down on wastage along the edge of the repeat which is where a good deal of waste resides. This method works especially well with a small repeat, like the one I am using, because there isn’t as much fabric to wrestle with as there would be with a larger repeat. I am not sure that I would try this with my Feathers fabric, which is a large repeat, but I might.

In assembling the layers, I started pinning at the center of the width of the fabric. I then added pins at approximately 5 inch intervals running to the left and right of my first pin. After that I put another row of pins along the top and also along the bottom.

In addition to creating the six layer stack pictured above, I decided to make a three layer stack as well. There are times when I really only want to cut three of a shape and would just as soon not have an extra three pieces hanging around waiting for a home. It will be nice to have both stacks to work with as I select cuts for future hexagons.

I have recently gotten interested in selecting cuts that create more abstract arrangements in the finished blocks, and am enjoying the challenge of making blocks from one fabric and making them uniquely different from each other.

A little trick I discovered to help with the placement of the initial two pins in the stack is to anchor the first pin with a piece of material designed to hold pins in place while doing machine quilting. These little devices are made by a company called Pinmoor.

You can stick the Pinmoor into the end of the pin as pictured above or you can actually catch just the edge of the pinafore and slip it up near the head of the pin to hold the layers more securely while allowing for a bit of movement. I found this useful to allow for adjustment of the vertical and horizontal orientation of the layers as I was adding my second pin. Adjusting the layers while adding those first two pins is the hardest part of layering, in my opinion. Anything I can do to make that easier helps me get started with my stack.

I’m really enjoying layering and fussy cutting. I am getting a lot faster at putting a stack together. I am now on the hunt for more Embracing Horses fabric, as it has become obvious to me that I am going to need a lot of it as I move forward.

Share this:

  • Email
  • Facebook
  • Twitter
  • Pocket

Glorious Hexagons: Layering Fabric for Multiple Cuts

22 Monday Feb 2016

Posted by Terri Schurter in Uncategorized

≈ 3 Comments

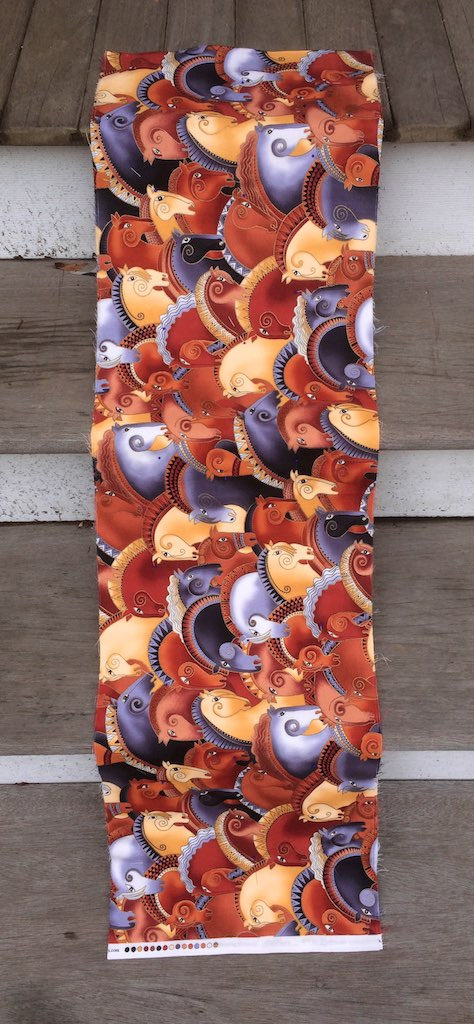
The key to creating great Glorious Hexagons is fussy cutting. This can be done one piece of fabric at a time. One can eyeball the remaining cuts to match the first going on to create multiples of 2, 3, 4, or 6 depending upon the effects desired. I started out eyeballing my fussy cuts, but I found that this resulted in pieces of yardage riddled with holes. It was also very difficult finding the repeats desired. After making a few cuts from a piece of yardage I found myself feeling as if I was on a hunting expedition to find what I needed. I also ended up with far more wasted fabric than necessary.

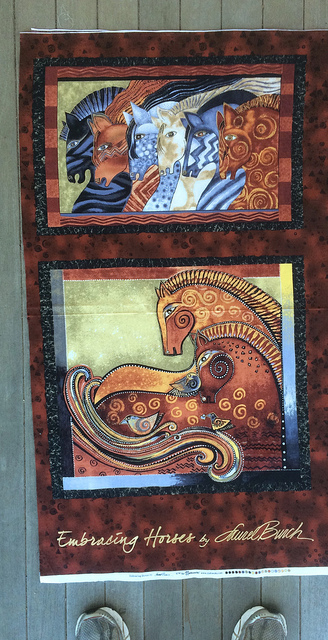
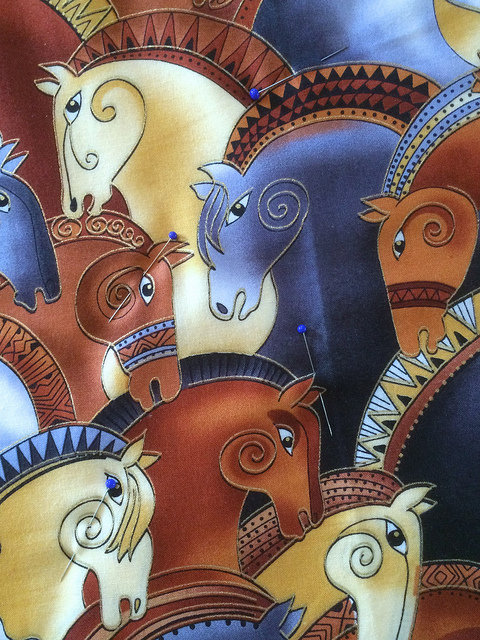
I knew about layering. It is explained in the companion booklet for the Glorious Hexagons project. But I was afraid to do it. I was afraid that I wouldn’t pin the layers accurately enough. I had six repeats of the large horse head print cut. I had even purchased extra thin pins to increase accuracy when layering. All that remained was to finally screwed up my courage to pin my repeats together.

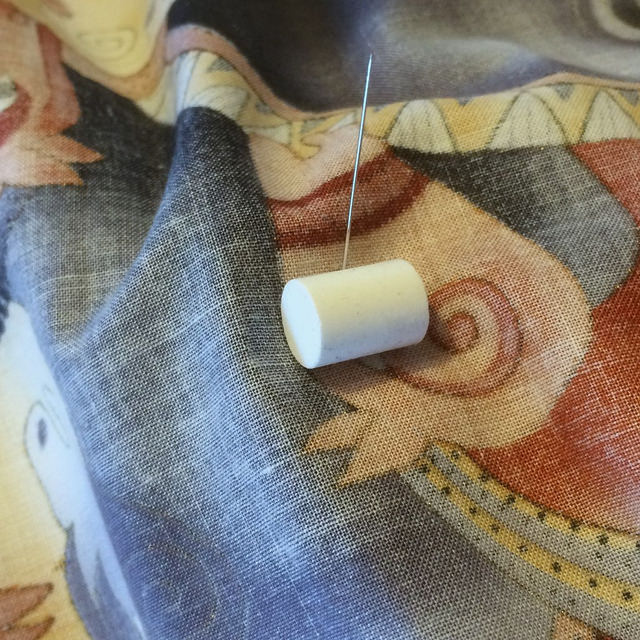
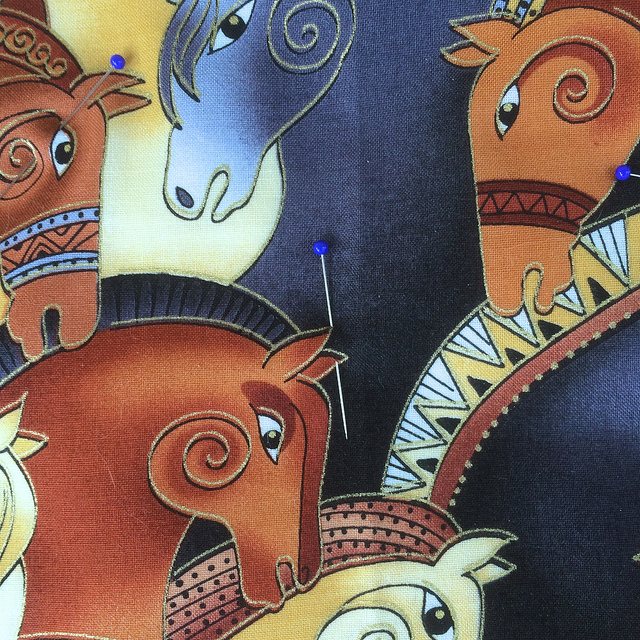
I started out with one pin near the center of the repeat (as recommended) and worked my way out.
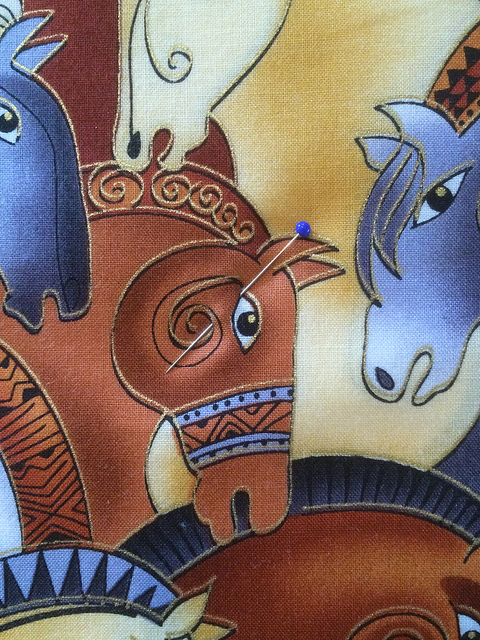
one pin

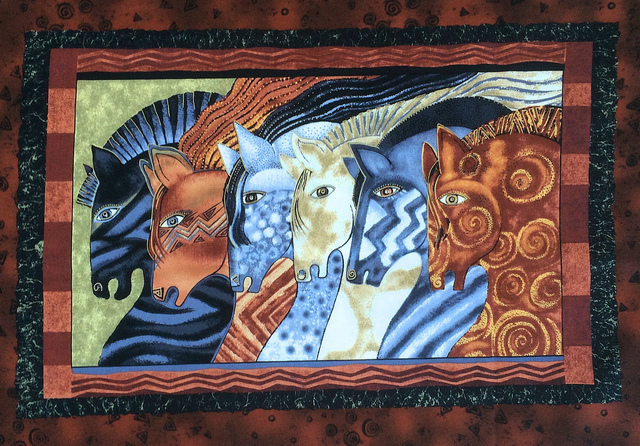
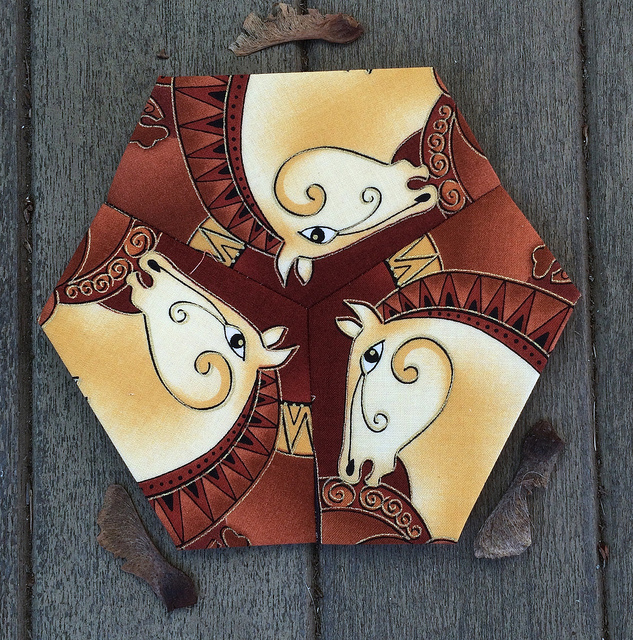
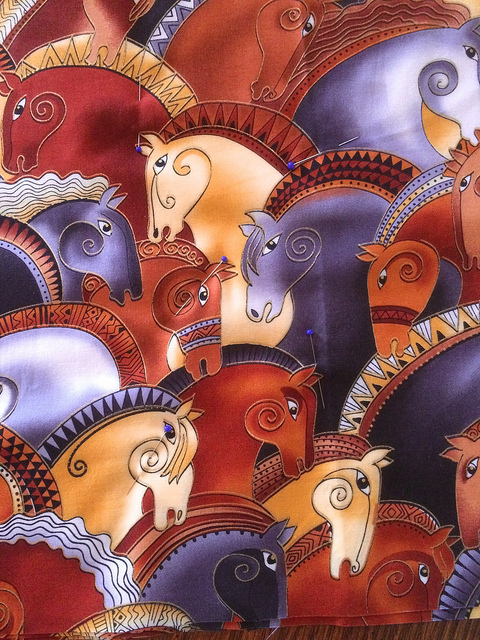
I found it helpful to pick really easily recognizable points to match in the pattern each time I added a pin. I started with the corner of the eye on the horse above. When matching points I slide the fabric all the way to the head of the pin before looking for the point on the next piece of fabric. Then I slide that one to the head of the pin and continue on in that manner. The first set of points is the hardest because the fabric needs to be aligned vertically and horizontally at this stage of the process. I looked to the edges of the repeat to see that I was doing this correctly.
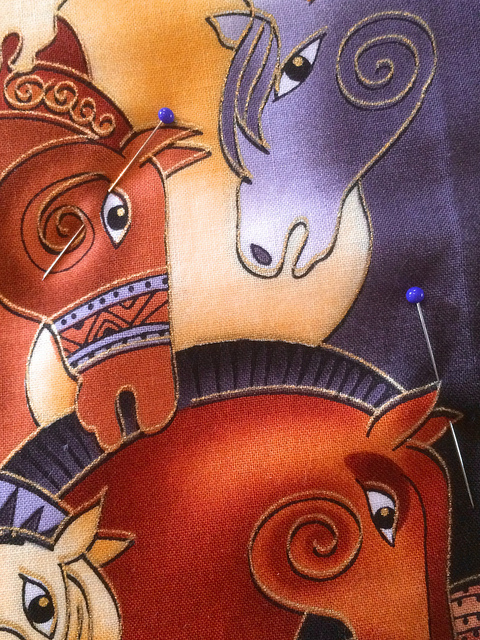
two pins

Each time I added a new pin I slipped my fabric slightly off the edge of the table to align each additional point having all layers pushed up against the head of the pin, grabbing the fabric to hold it in place before pulling the head up slightly to anchor the pin in place.
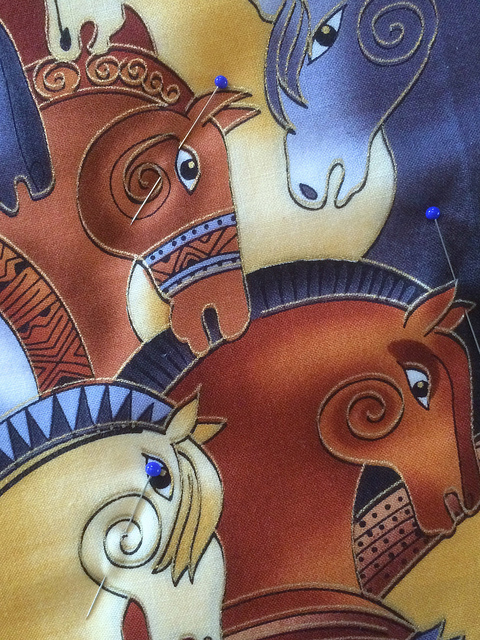
three pins

four pins

five pins

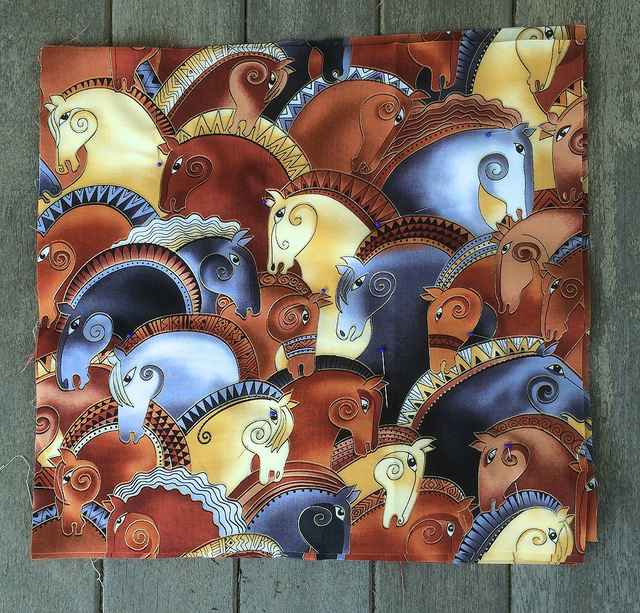
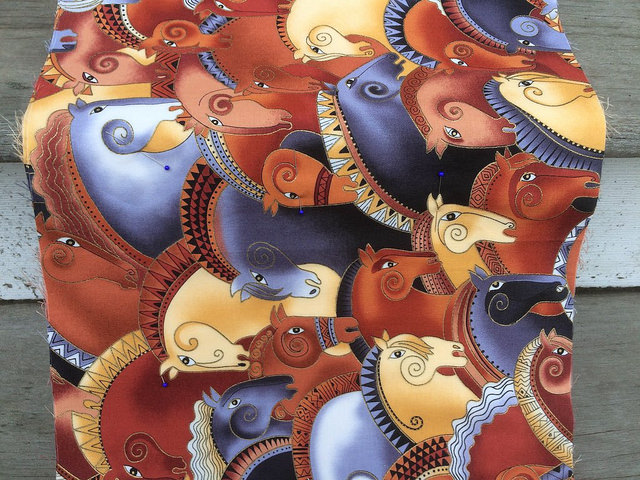
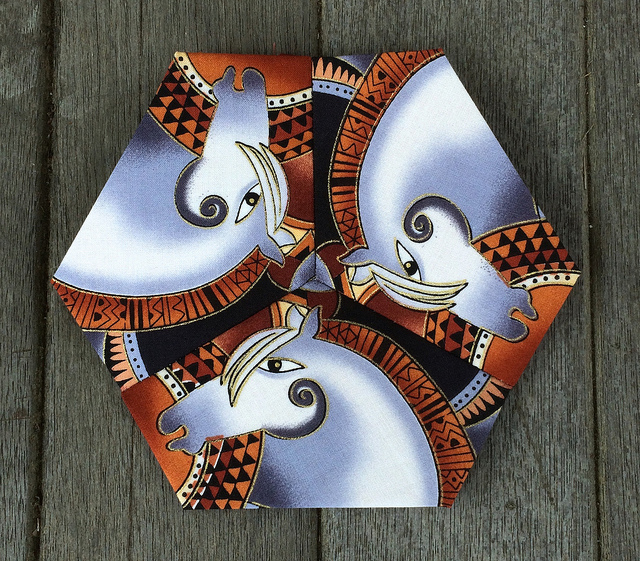
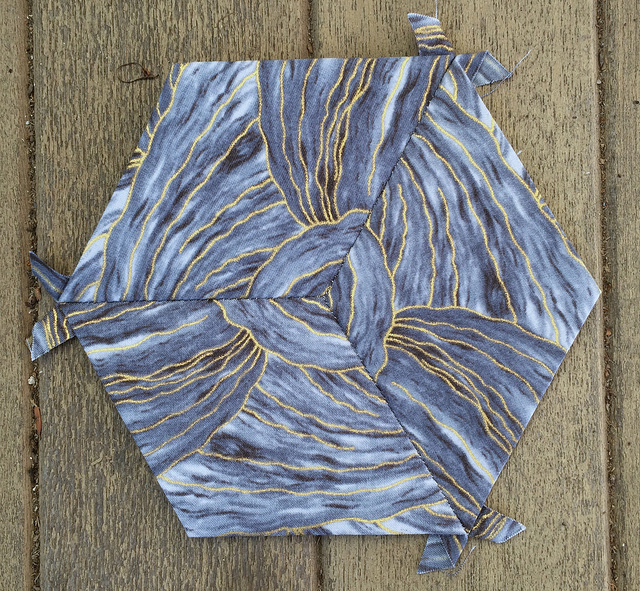
After getting the pieces adequately pinned I was ready to begin cutting. I put a fresh blade into my rotary cutter and picked an area to cut out a hexagon shape. I focused in on an area where two horse manes overlapped to get a repeat with an abstract feeling.

Sometimes an area I wanted to cut had a pin in it. in that case I simply added more pins nearby and eliminated any pins that interfered with the cutting of the shape I wanted to make. Once the initial anchor pins are lined up it is safe to add pins without needing to align the fabric because the fabric is already in alignment.

I was skeptical about the accuracy of the layering, but you can see from the image above that it was quite accurate. The second piece from the top is slightly miss aligned, but only by a little bit. “Good enough for government work”, as they say.

Not bad if you ask me.

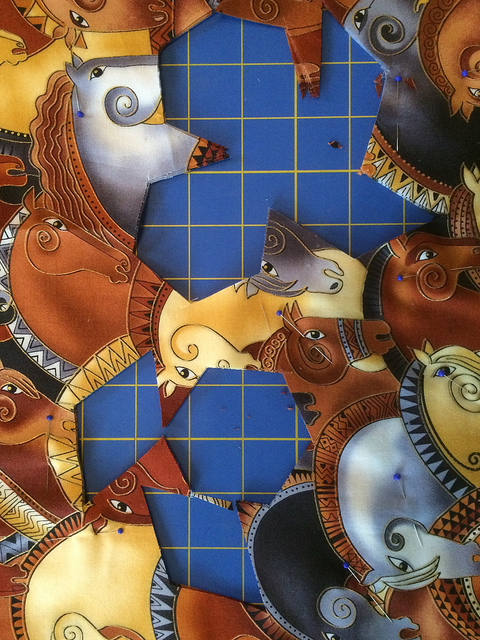
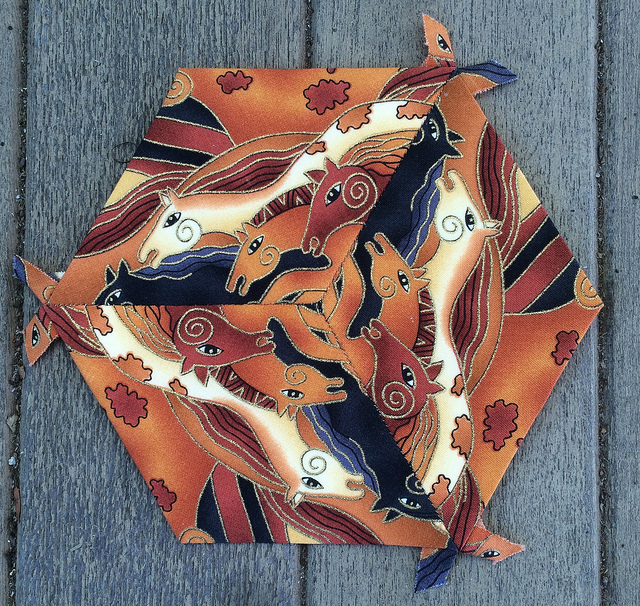
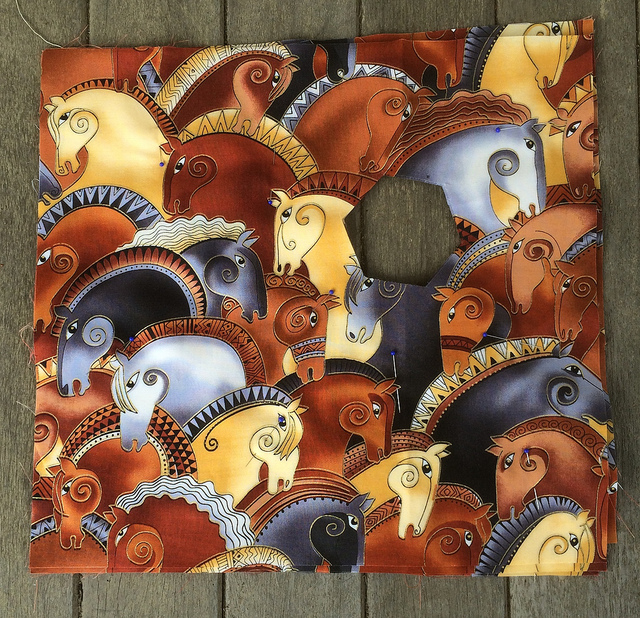
As I was cutting shapes I found that it was possible to place my cuts really close together to make optimal use of my fabric. I am really getting my money’s worth out of these pieces.

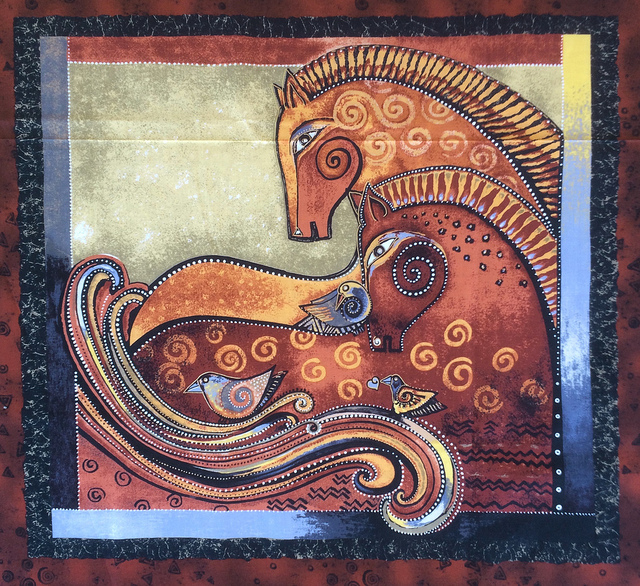
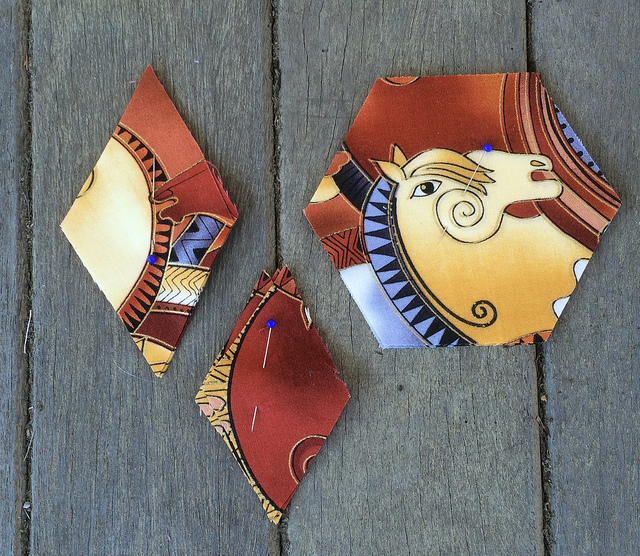
Cutting away shapes from the aligned fabric, and placing them close together, made me think beyond what I might have ordinarily cut. I was also no longer thinking about the next hexagon immediately at hand. Instead I was thinking of how to make the best use of my yardage, and looking for shapes that would do that. I was trusting that I would be able to use those shapes for future hexagons. As I was trying to get as much out of the fabric as possible I discovered that I could cut one inch diamonds of solid color by using the necks of the horses. I cut some shapes not even sure how I might use them in the future. I knew I would find a way to work them into some hexagon that would come along.

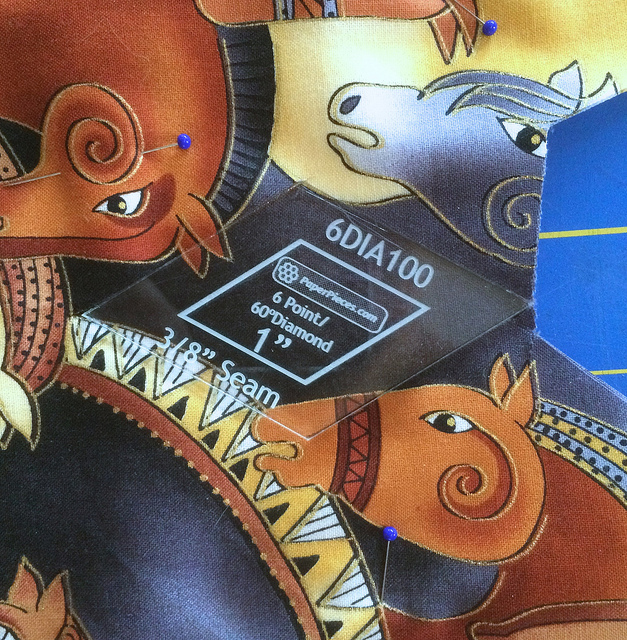
This is the same area as the photo above it but turned on its side. It shows how the one inch diamond fits in the solid area. I wanted to use some solids in my hexagons, but I thought it would be best if they came from the fabric rather than from some nearly matched Kona Solid.

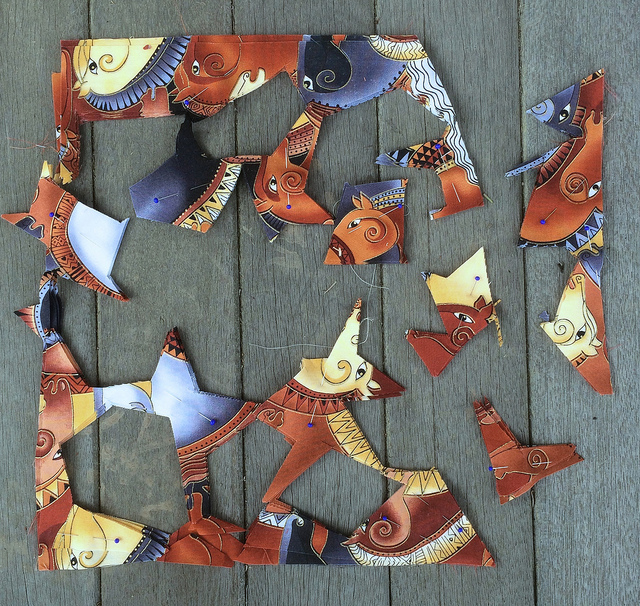
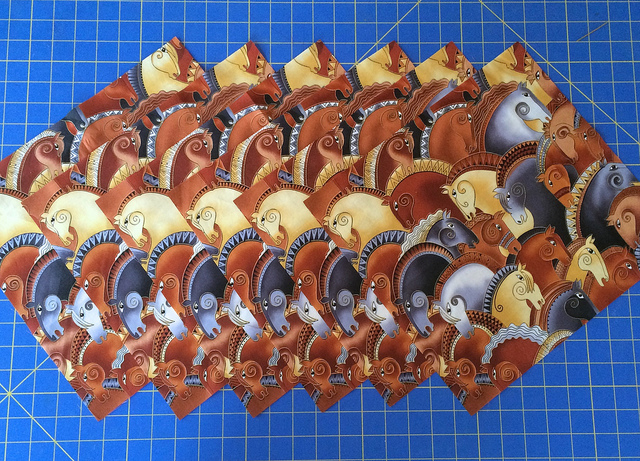
These are the pieces that were left after I had used every possible area on my first set of layered fabrics. I know it looks as if I could get shapes out of some of the remaining fabric, but I tried. The 3/8 inch seam allowance takes up quite a bit of room on the small shapes, and does make for quite a bit of wastage.

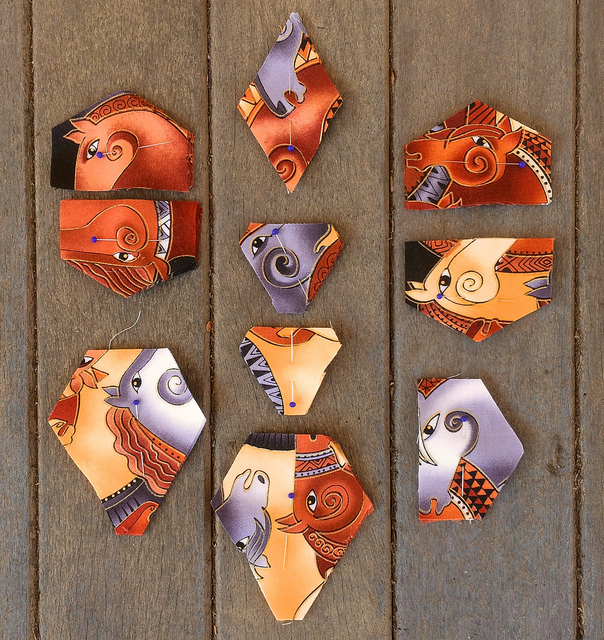
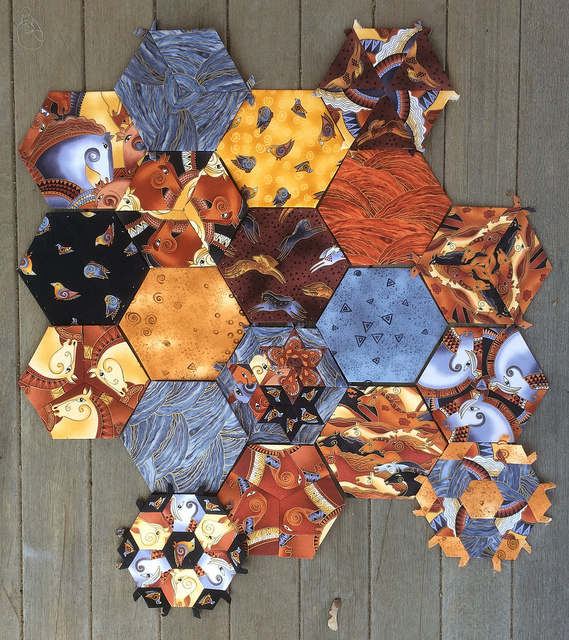
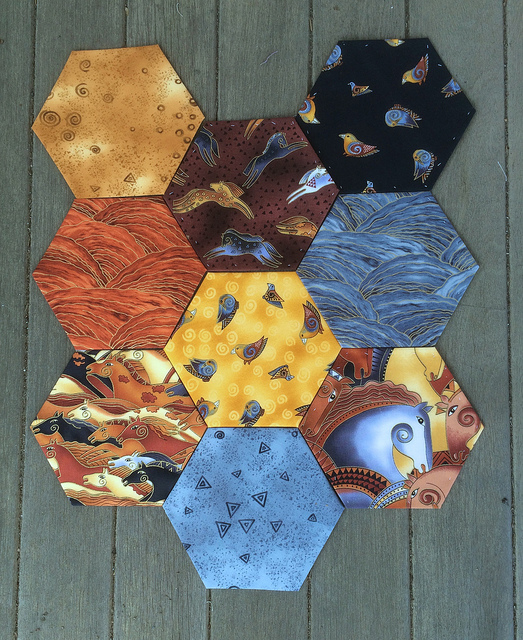
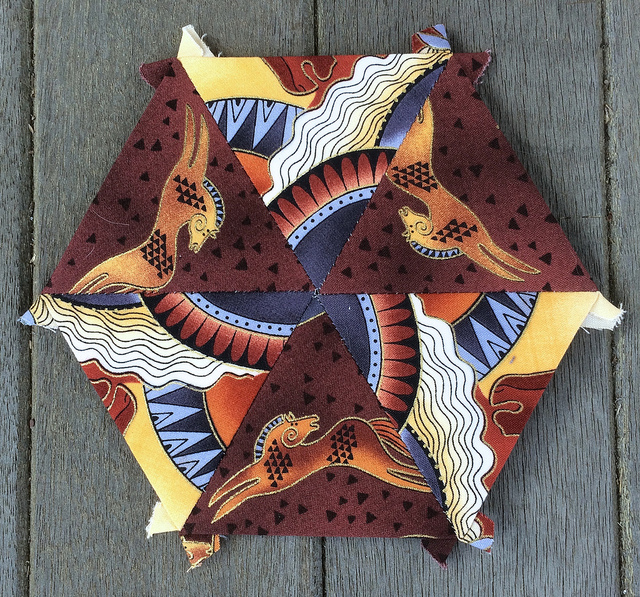
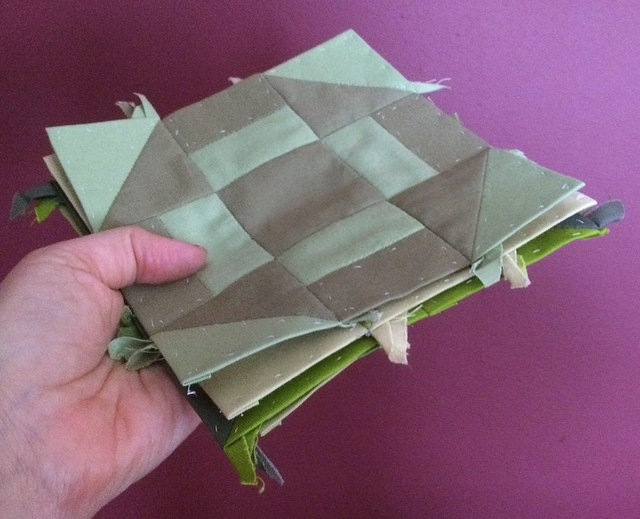
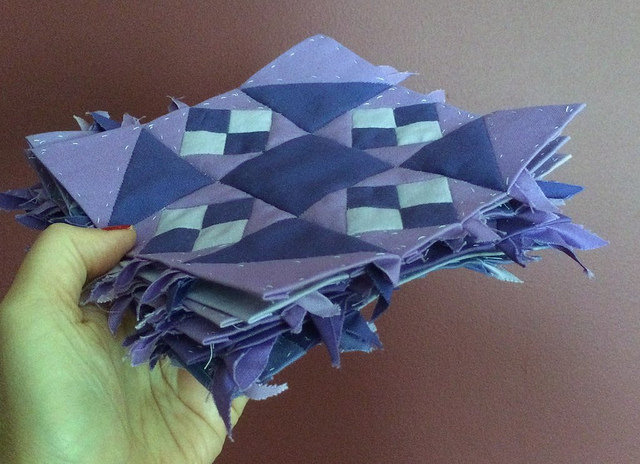
Here are some sets of six waiting for their final destinations…

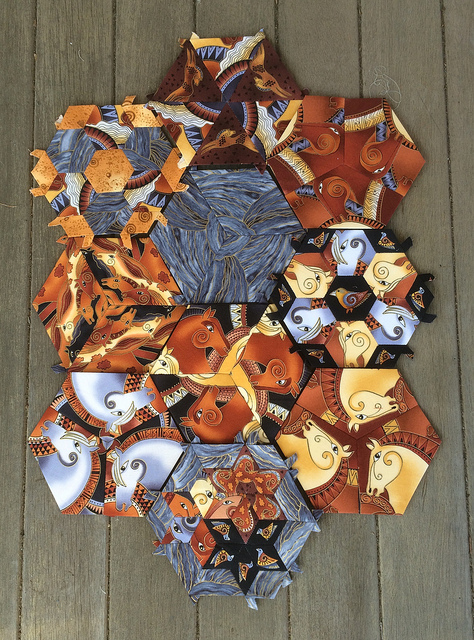
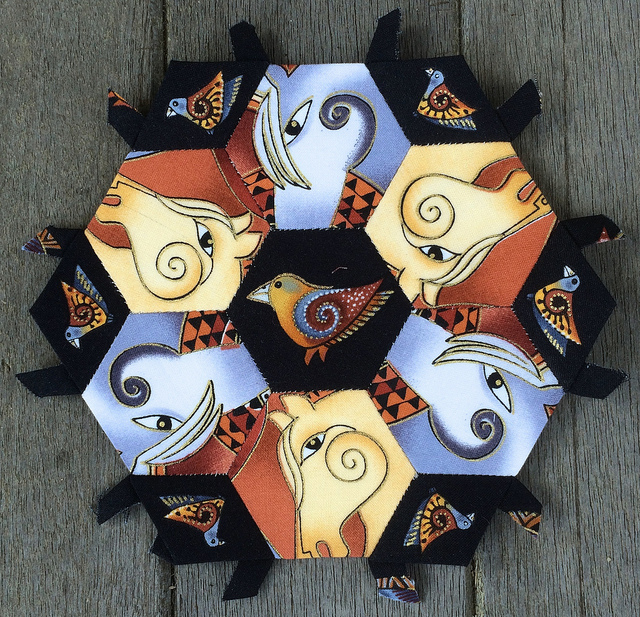
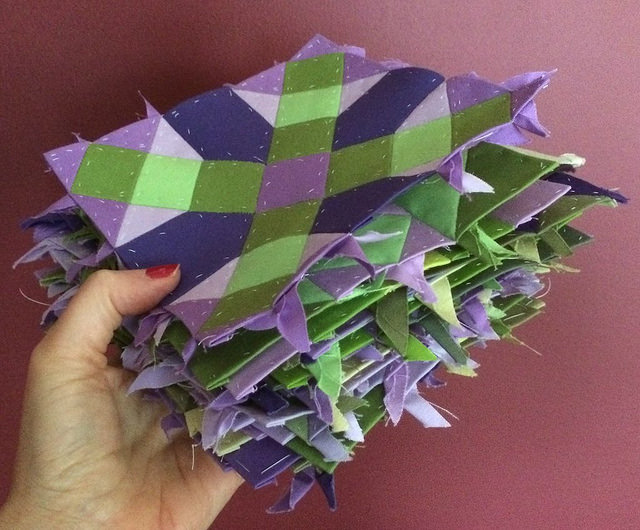
as well as some sets of three which remained after I used three of the shapes that had been cut.

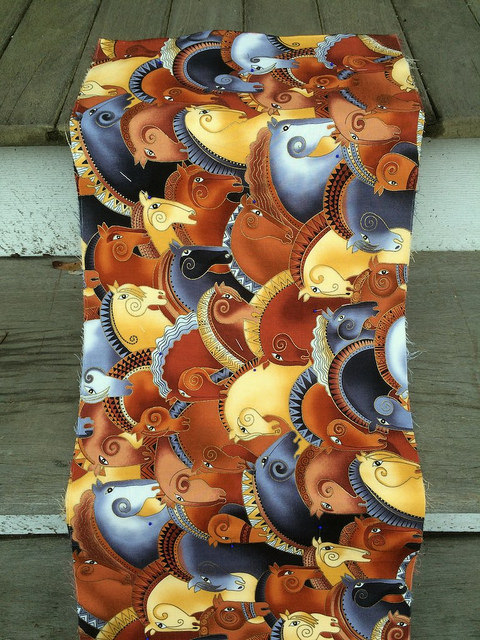
My experience with aligning and cutting layers has convinced me that it is worth the effort to cut the repeats and pin them in place. With the large horse head print I want to cut and pin a few sets of fabric so I have more choices as I fussy cut for specific hexagon designs.

One thing to consider when cutting your repeats is where the repeat starts and ends. I don’t want to start and end my repeat in the exact same place for each set because that would make it impossible to cut parts of the design that correspond with the edge of the original repeat. If I start the repeat in another location I will have additional options.

If you are participating in the Facebook group for the Glorious Hexagon project consider trying layering if you have not already done so. The rewards are well worth the effort in my opinion.

I am updating this post. Today someone in the Glorious Hexagons Facebook group was asking about fussy cutting and I provided a link to this post. Another member of the group asked what happened with the six hexagons that were made with the first cut from this layer stack. Here is the answer to that question.

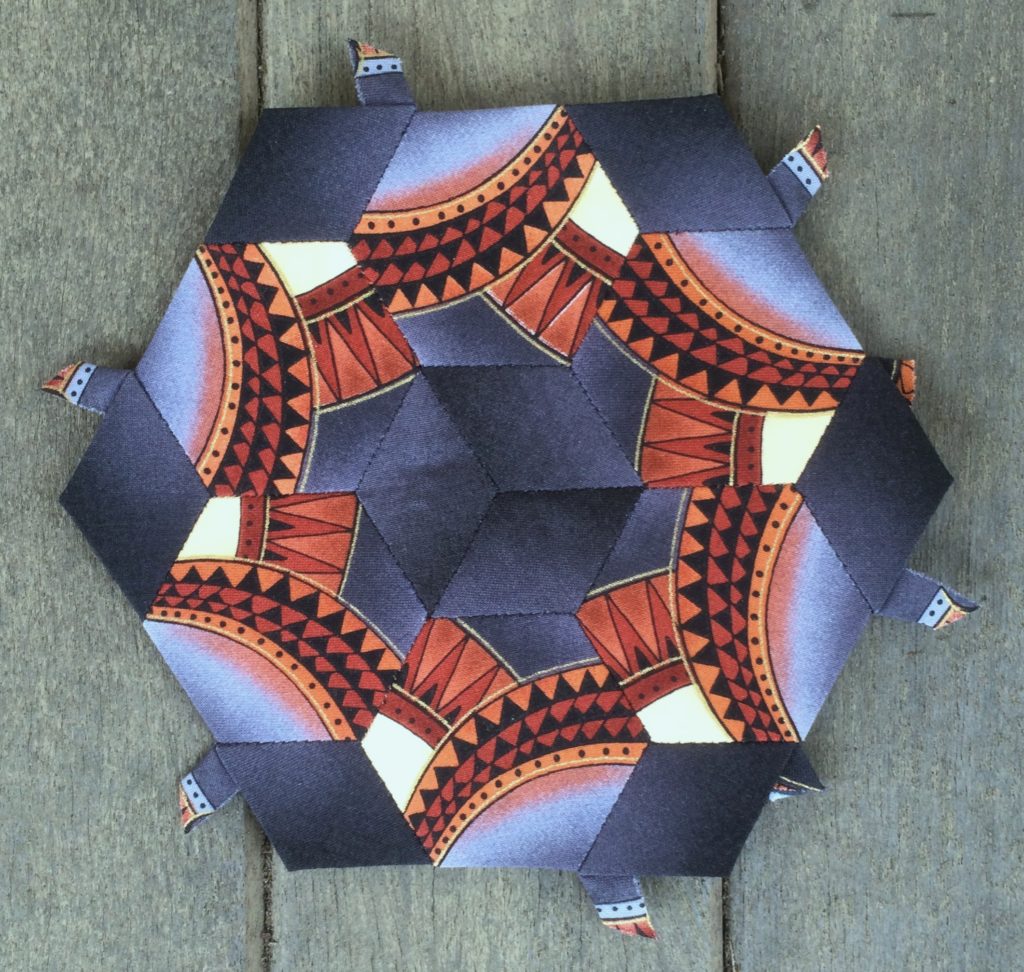
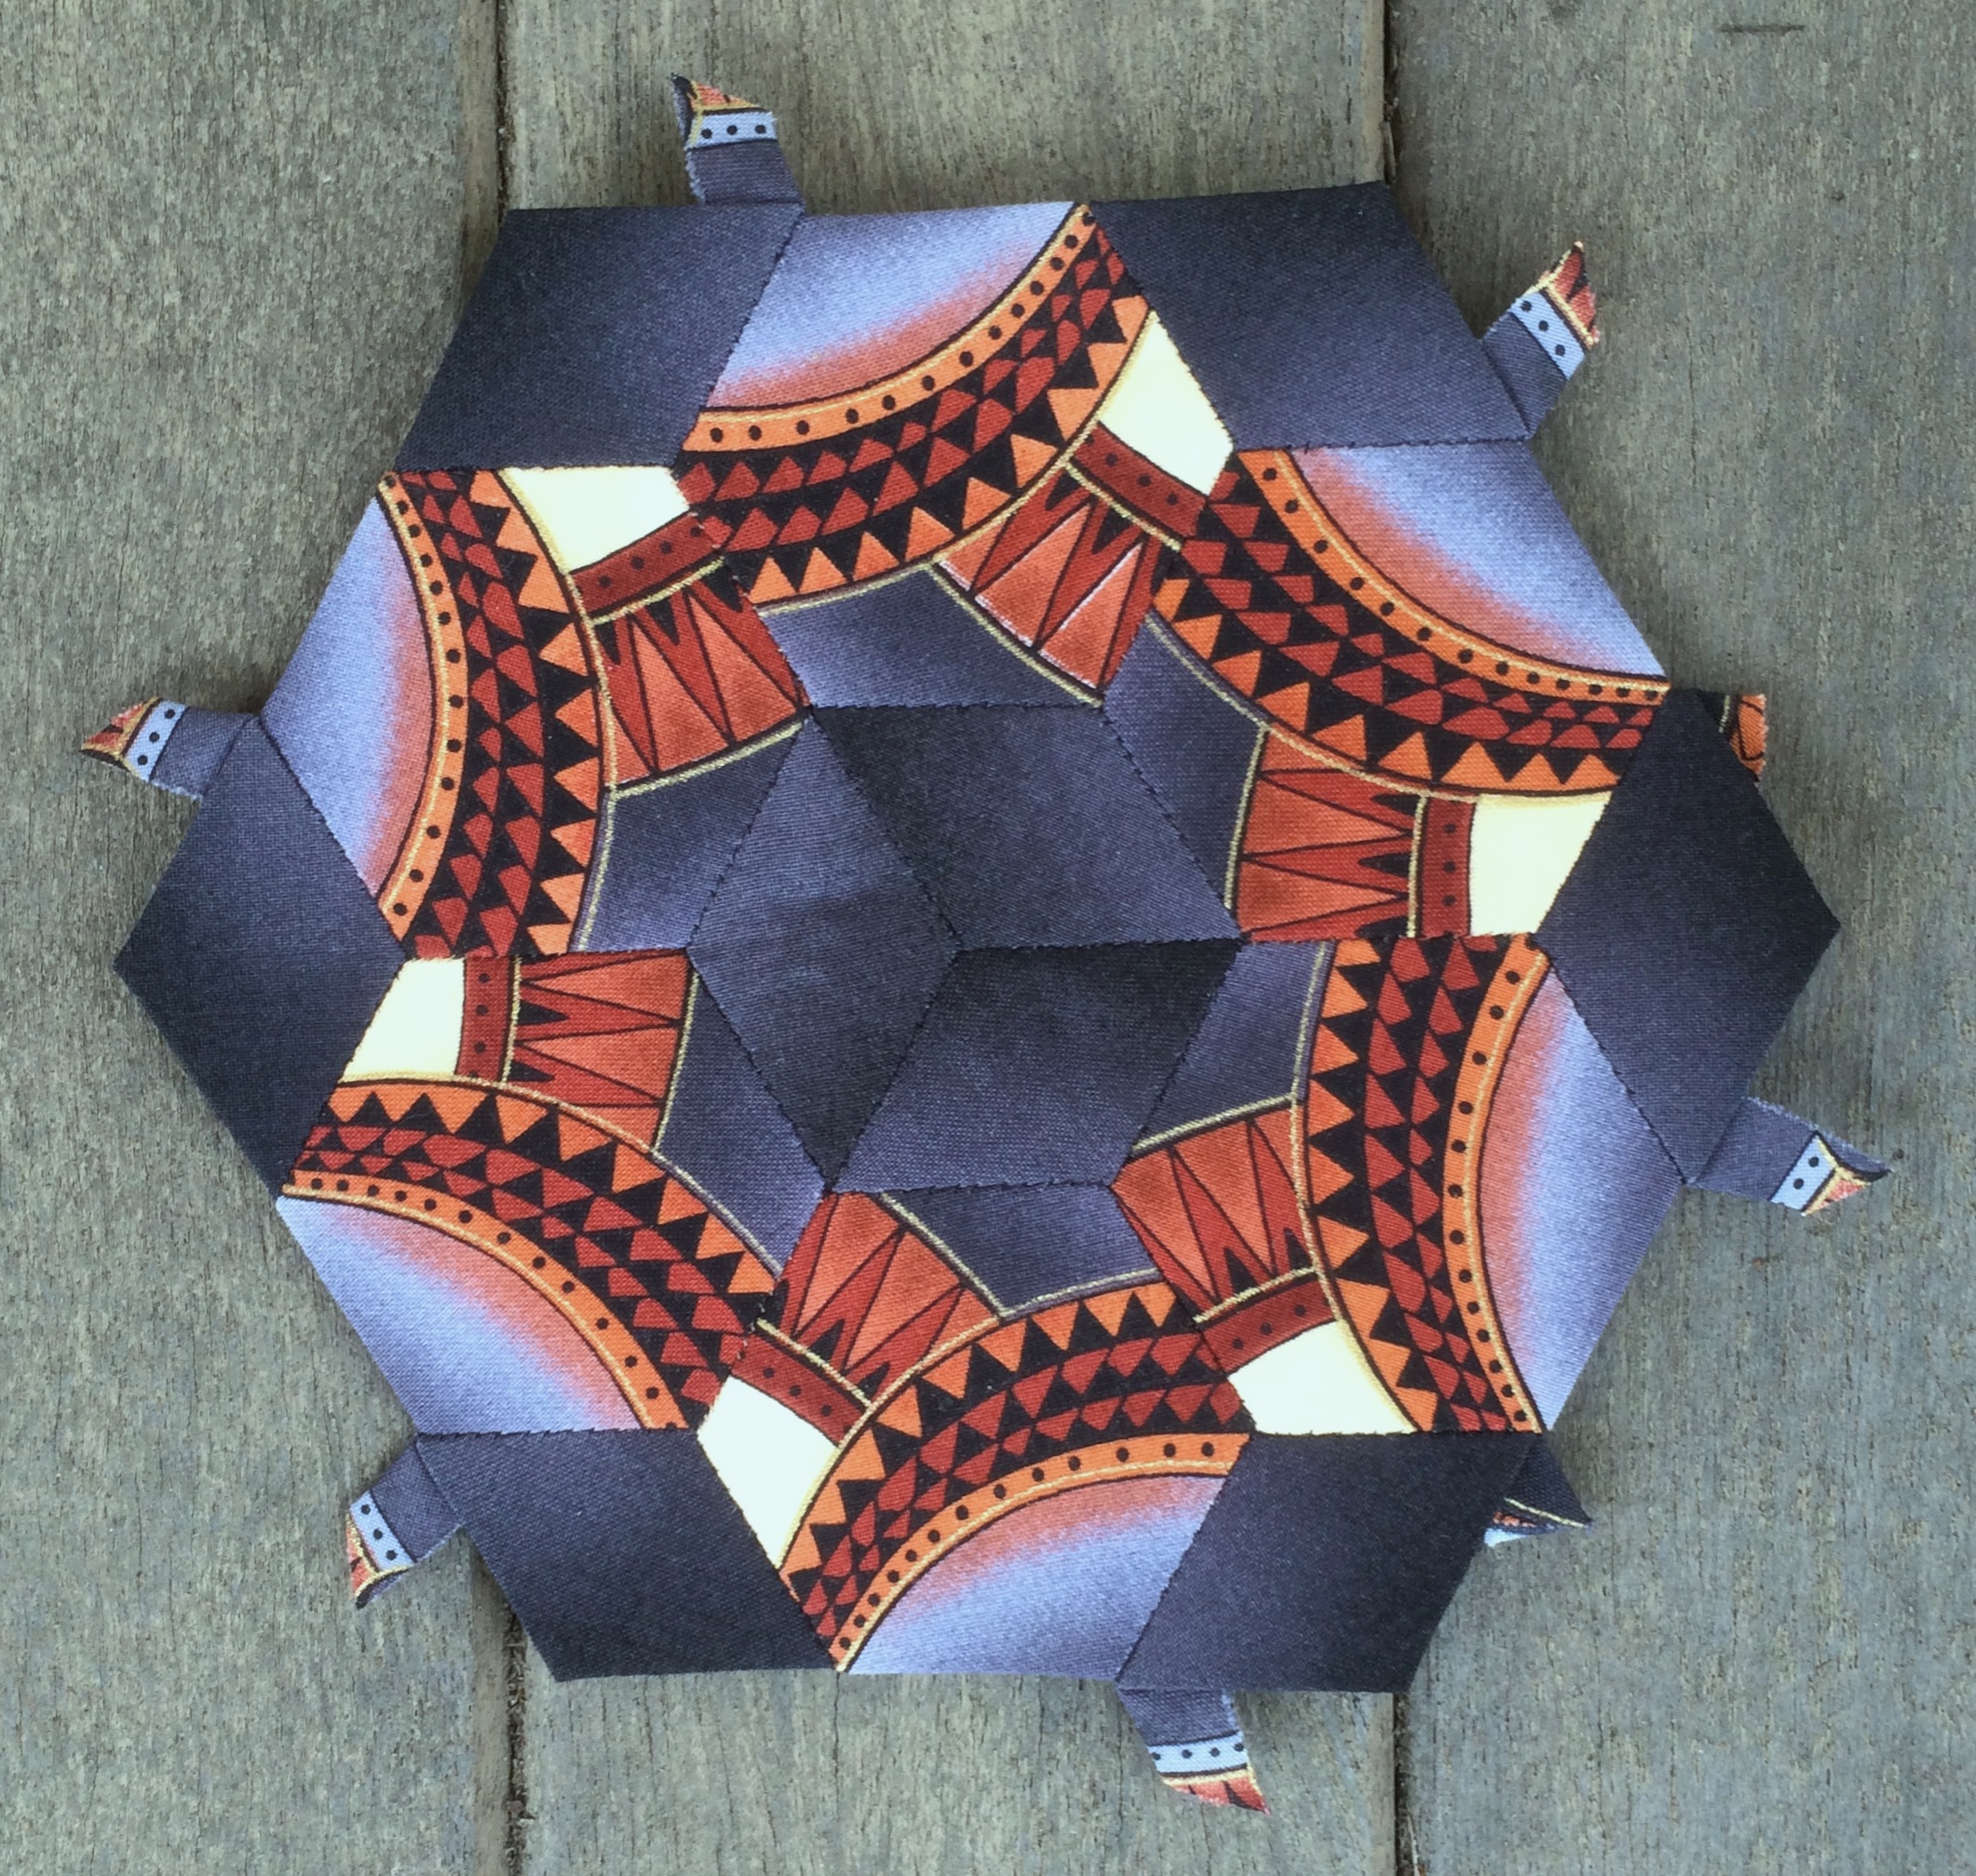
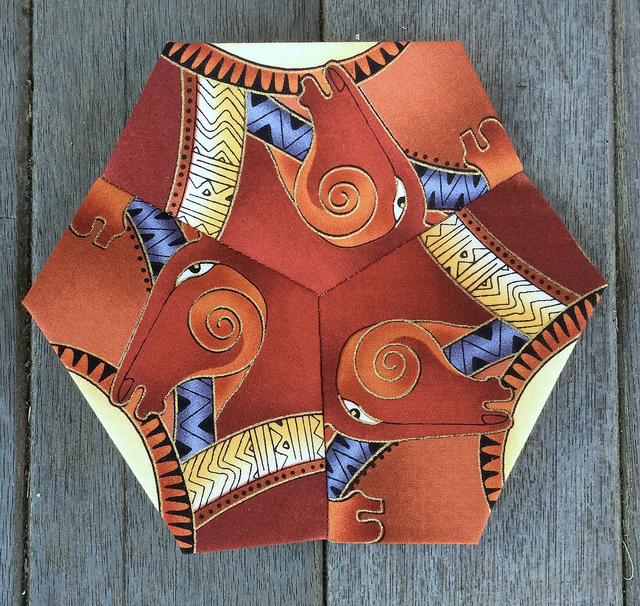
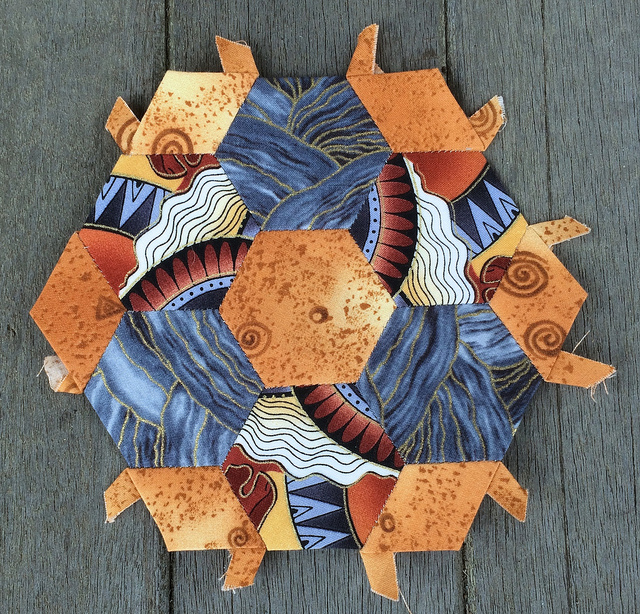
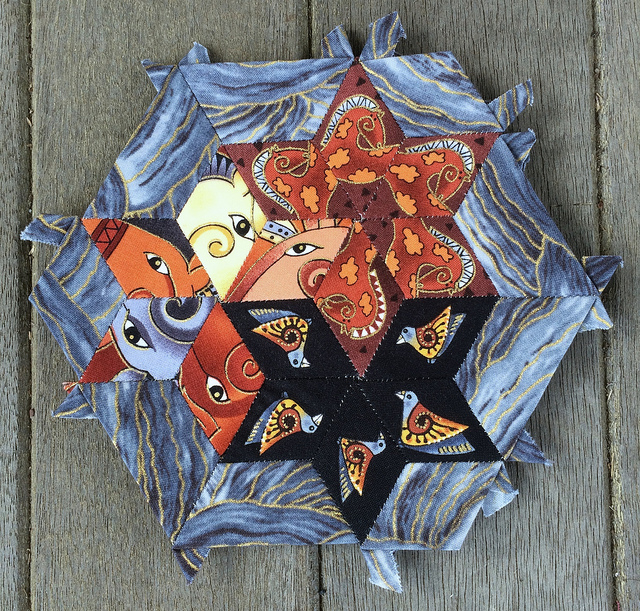
Those one inch hexagons found their way into a Judy block. In fact, it was the 17th block I created for the project. Notice that the central hexagon of this Judy is made from three diamonds. These diamonds and the diamonds along the outside of the block were cut from the neck of one of the horses in the fabric.

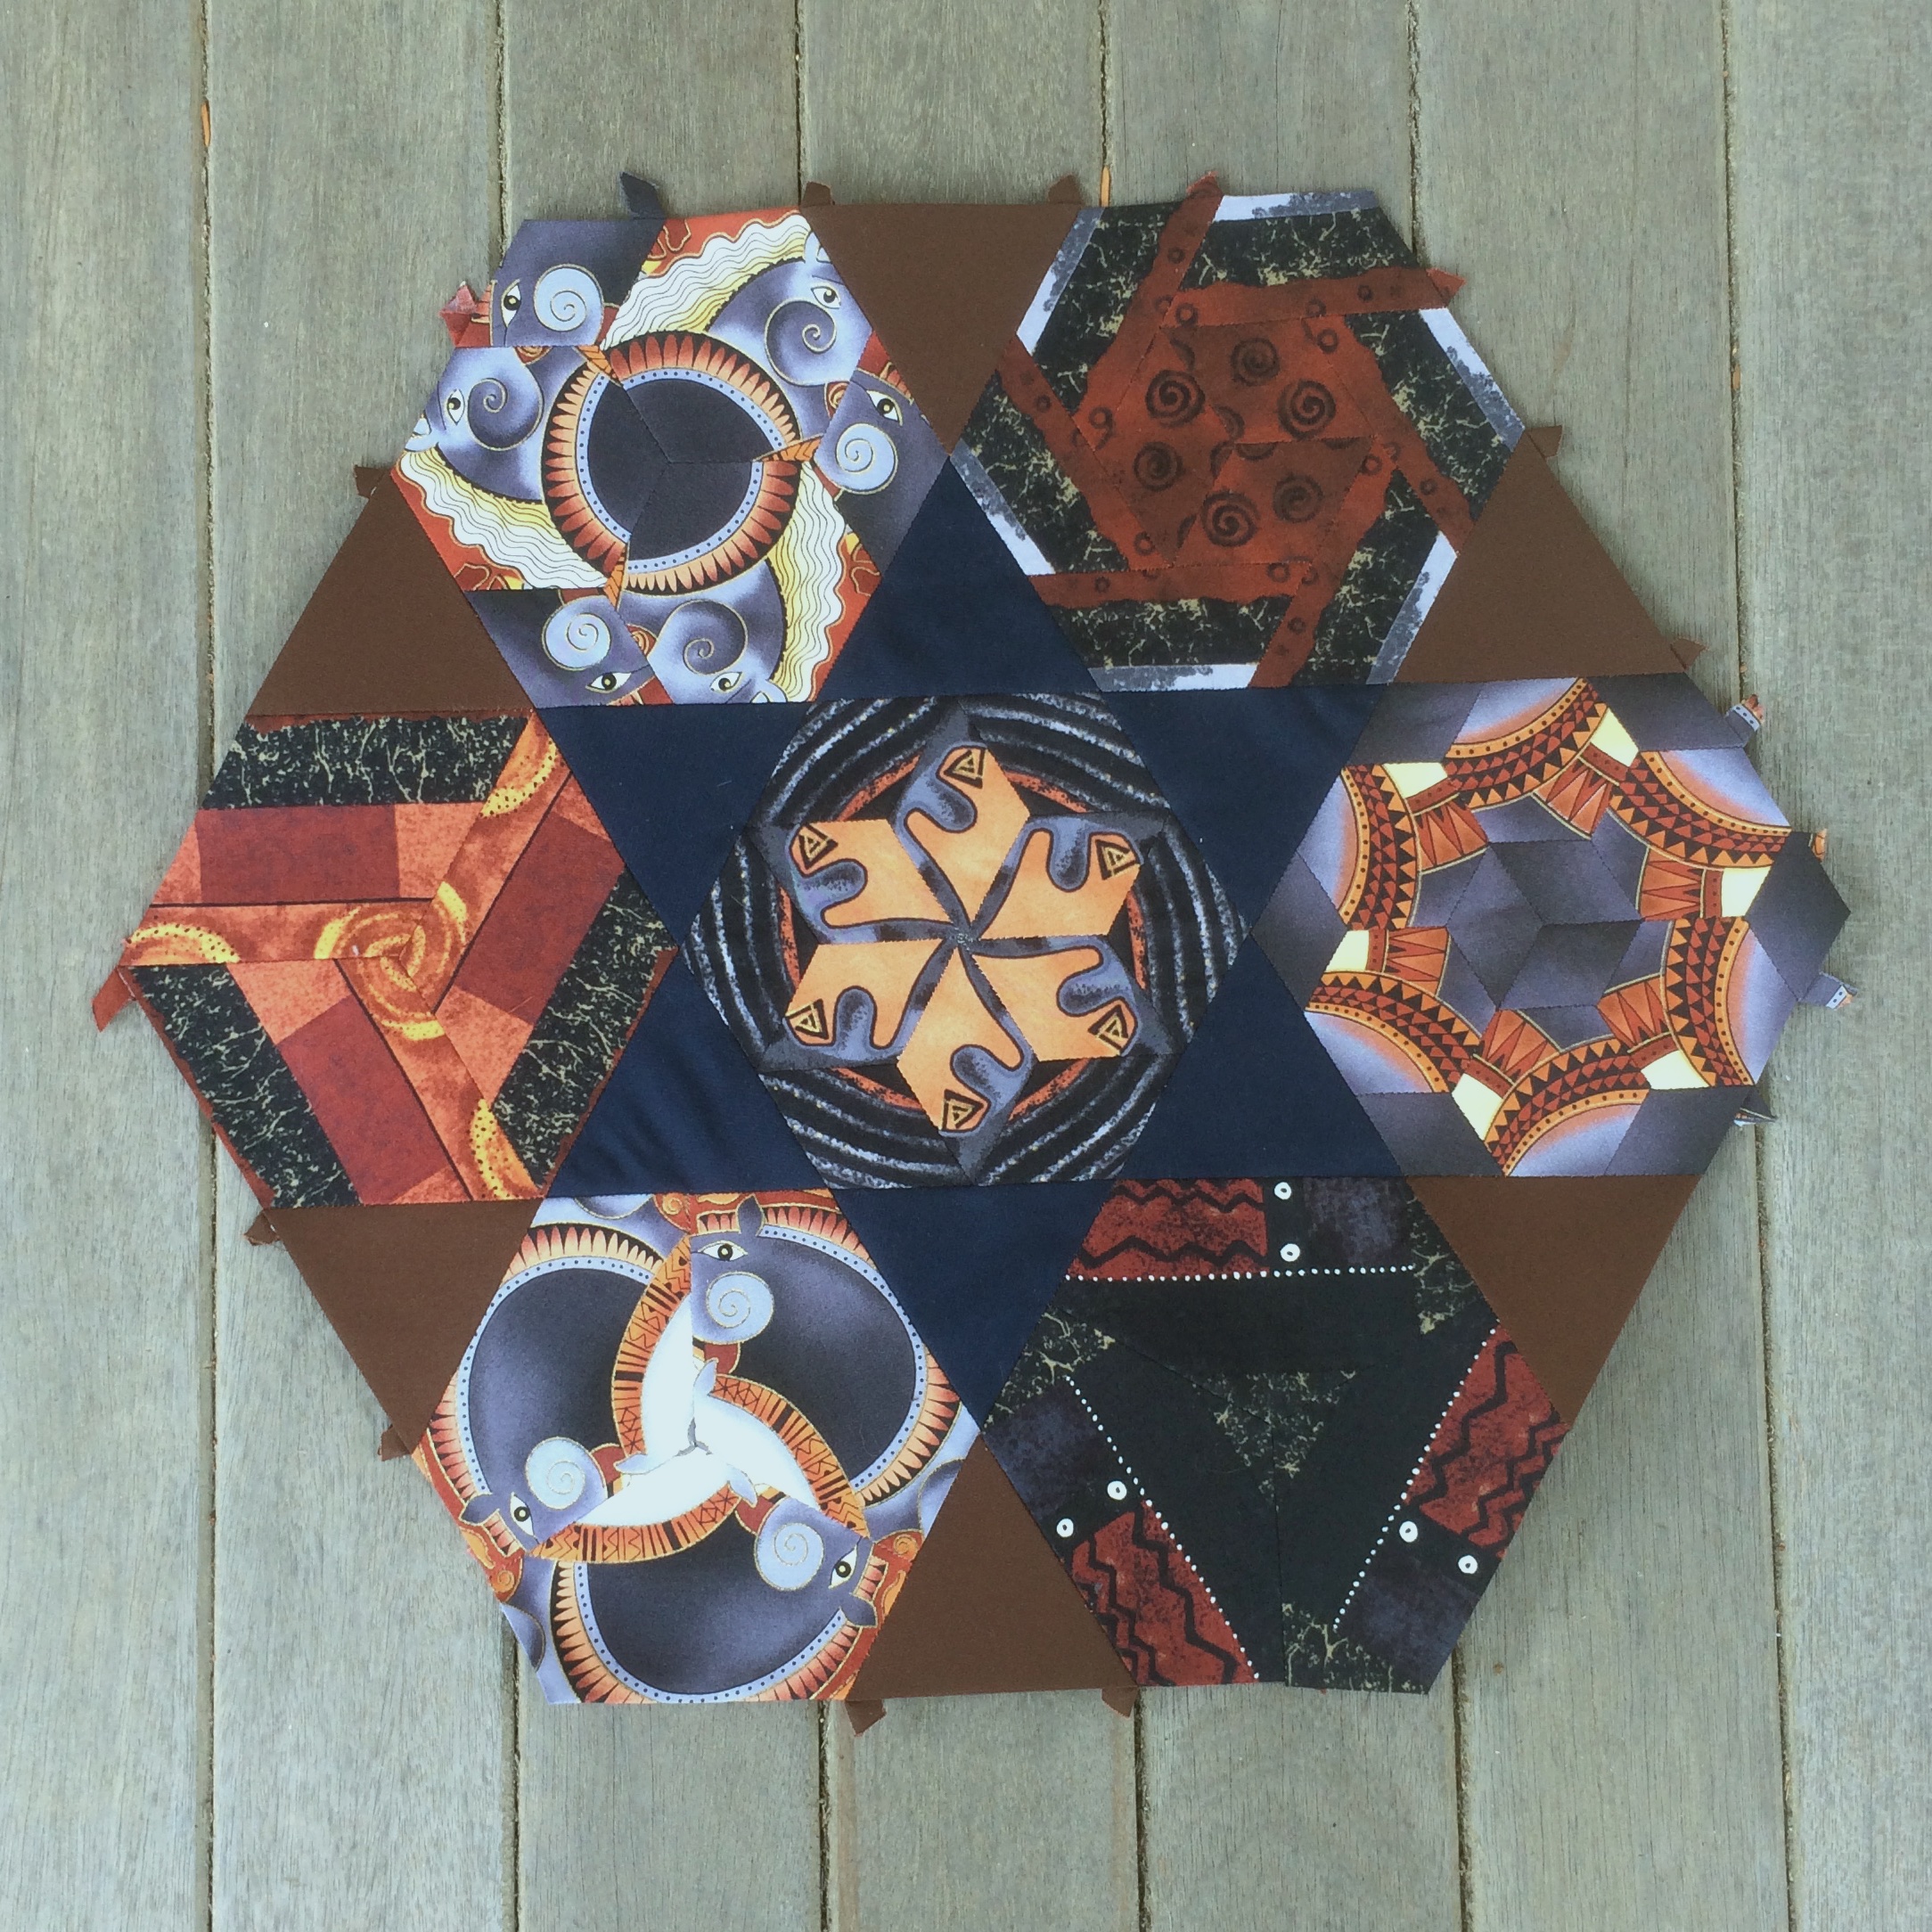
That Judy block made its way into the large hexagon above.

Share this:

  • Email
  • Facebook
  • Twitter
  • Pocket

Glorious Hexagons: All Together Now

16 Tuesday Feb 2016

Posted by Terri Schurter in Uncategorized

≈ 1 Comment

Sail the ship.
Chop the tree.
Skip the rope.
Look at me.

Altogether now…

The above represents the pieced and solid hexagons that I have made so far. I wanted to place them next to each other to get a feel for what the finished piece will look like.

Here are just the pieced hexagons, and I think it is obvious that they need the visual relief of the solid hexagons.

Here are solid hexagons showing all of the fabrics that I have obtained to work with so far. The above nine fabrics are from the Embracing Horses collection by Laurel Burch. I will be taking these hexagons with me to the Pennington Quilt Works when I go shopping for some complementary tone on tone fabrics to use along with what I already have.

The collection comes in a couple more color ways that I was not aware of until I searched for more fabric to complete this project. They are very attractive, but would not combine well with what I have here.

I found a source online for these fabrics and was even able to obtain three panels like the one pictured above. Those panels should provide me with some interesting fussy cutting possibilities. I may even try to obtain four more panels, three to fussy cut, and one to put on the back of the quilt.

Great stuff…

and more great stuff.

I am not sure how I am going to make use of all of this fabric, but I am really excited about the project. Each block feels like a finished piece.

Share this:

  • Email
  • Facebook
  • Twitter
  • Pocket

Glorious Hexagons: Jumping In

13 Saturday Feb 2016

Posted by Terri Schurter in Uncategorized

≈ Leave a comment

I had all the tools at my disposal to get started on my Glorious Hexagon journey. Plus my six yards of the Feathers fabric had arrived. I wanted to start, but I was afraid to cut into that precious Feathers fabric. In order to get going I decided to simply jump in with something I had on hand. I had some of the Embracing Horses collection by Laurel Burch, which I had used awhile back to make some containers. I grabbed some yardage from the largest print and got to work. Here are the blocks I made:


#54 Kim.

The first block I tackled was #54 Kim. All three of the blocks above are Kim. The first month came with enough papers to make three of these Kim blocks. They are the simplest of the pieced hexagons, so I thought it would be a good place to start my journey. I was still a bit concerned about pinning layers for fabric for fussy cutting multiple layers so I did my fussy cutting by eyeballing the pattern. I posted these to the Glorious Hexagons Facebook Group and they were well received.

#6 Delores

The second block I tackled was #6 Delores. All three of the block immediately above are Delores. Delores offers the same level of simplicity as Kim, so it was a logical second choice for me. I like to ease myself into the waters of the unknown. Fussy cutting is definitely outside of my comfort level since I had never done it before. The rest of the blocks I have made so far are shown below in no particular order.

#2 Carol

#13 Judy

Judy appeals to me because it is actually a Grandmother’s Flower Garden piece with some diamonds added to flesh it out. The flower garden part is easy, but adding those diamonds I found to be difficult. It seems that the first edge goes on easily, but then the second edge inevitably needs to be stretched a bit in order to make it fit. That doesn’t make sense to me, but I am doing it anyway. My first Judy utilized a decorative portion of the large horsehead print featured in most of the blocks above. If you look carefully you can see the mouth of a horse along one of the edges of the hexagons on the outside of the flower. This block also utilized the horse mane fabric from the Delores block as well as a nice gold filler fabric.

#13 Judy

This rendition of Judy is my favorite block so far. This is the block that forced me to consider the orientation of my hexagons in the finished quilt. I made that decision before I cut the bird for the center. One thing I especially like about this block is the way the blue and yellow horses are both shown as upright on the top and bottom of the flower. This happens because the yellow heads orient one way towards the center while the blue heads orient the other way towards the center.

After making this block I noticed that one could create a one inch hexagon for the center using three of the diamonds utilized along the edge. This would be a good way to allow this block to have a circular symmetrical effect like that found in a kaleidoscope without needing to revert to a solid (or tone on tome filler) for the center of the block.

#19 Nicole

Nicole is a bitch. There are no two ways about it. This block is not easy to do. I used four different fabrics for Nicole. For the first star I used heads from the Jumping Horses fabric. I thought I had all five heads the same, but you can see that the lowest head is actually a different head. Next time I will be more careful. I used birds for the bottom star. For the left star I deliberately cut five different portions of heads from the large horse head print. The blue head nearly melts into the border, which is an interesting effect. I used the Horse Mane fabric for the border. I am not altogether happy with the way the border works, but I think that when the block comes together with others that I will like it more.

Ten hexagons are done of the 28 for the first month. The first month is January, so I am already quite a bit behind, but I will not allow myself to stress about that. I am enjoying this journey immensely, and I feel much more at home with this project than I do with The Farmer’s Wife Quilt which I took on primarily as a challenge to my EPP skills. What I discovered is that I can stitch just about anything using EPP, which is comforting. I also discovered though that there is something vaguely unsatisfying about using EPP for a project that could be more easily done with some other method. This project, on the other hand, demands EPP. I like that.

I think I will find a way to bring The Farmer’s Wife Quilt to her logical conclusion and put my greatest efforts into Glorious Hexagons for now. The challenge will be to not allow the Farmer’s Wife Quilt to become a UFO. Perhaps the best way to do that is to allow it to be a wall hanging. We’ll see.

Share this:

  • Email
  • Facebook
  • Twitter
  • Pocket

Farmer’s Wife Quilt: My Declaration of Indepenence

04 Thursday Feb 2016

Posted by Terri Schurter in Uncategorized

≈ 3 Comments

I’ve been working on this quilt now for four months. Up until recently I have done every block assigned and posted them within days of their completion. I even got ahead of the game with a few blocks. Now, however, I put a stop to that foolishness. and declare my independence. I no longer feel compelled to follow the crowd.

There are a couple of reasons for this. First of all, I needed to prepare work for my stint at the Michener Art Museum, so I went off track to baste up a few blocks to have them on hand for the demo. However, the main reason for my reluctance to follow the crowd is that a block came up which I refused to do. It wasn’t because it was hard. It looked easy. It was because I didn’t want it in my quilt. At that point I realized that I didn’t need to make every block to prove I could make them. I had already proven that when I did Daffodil.

Here is the offending block.

#40 Grandmother

It isn’t an ugly block. It is just not an interesting block. If I had been working with patterned fabrics I might have been able to fussy cut something interesting to go into the basket, but I am doing this quilt in solids, so that option was out. I took one look at this block and something inside me said a loud, “No.”

Choosing not to make this block was a very freeing experience. After declaring my independence I realized that I didn’t need to do every block. My layout would probably require me to make choices among the remaining blocks anyway. Instead of making every block moving forward it would make sense to put some effort into examining the blocks I have made so far, come up with a design scheme, and to give some thought as to how future blocks can flesh out that final design.

I started by sorting my blocks into three categories: all green, all violet, and mixed. What I found is that I have 40 blocks completed, some of which have not yet been featured on the blog. Four of them are green, eight of them are violet, and 28 of them are mixed.

My instincts tell me that I should be making more green blocks. So the next couple of blocks I make will be all green unless they scream for some violet to be included.

After looking at the colors of my blocks I then resorted them into ones I definitely want to incorporate into the final quilt design, and ones that might be better used in testing out a sashing strategy on a smaller sampler piece. Here are the results:

31 blocks made the cut for the final quilt, and nine may get sacrificed for the greater good. Here is a potential layout for the sampler piece. I anticipate the hunter green area to be broken up with some Raisin.

I’ll feature the Daffodil block in the center of the sample. I do not intend to make any more flowers, though that might change. The only reason I made Daffodil was to prove to myself that I could make it. Having made it I now believe I can make any of the blocks if I choose to. So now I can choose not to make any of them that I think will not be a good addition to the final piece.

I have at least four blocks that I have not yet shown, so my next post will be devoted to that task plus any more I create between now and then.

Share this:

  • Email
  • Facebook
  • Twitter
  • Pocket

Subscribe to Blog via Email

Enter your email address to subscribe to this blog and receive notifications of new posts by email.

Join 41 other subscribers

Recent Posts

  • Not Sure if I Want To Blog Anymore
  • Annoyed With Bluehost
  • Pandemic Still Life
  • Staying with Bluehost
  • Farmer’s Wife Friday: Week 20

Recent Comments

  • AmandaEcobiab on Not Sure if I Want To Blog Anymore
  • Wynne.price, nz on Not Sure if I Want To Blog Anymore
  • Visionhuq on CJMQG Fall Retreat
  • Deidre Jenkins on Annoyed With Bluehost
  • Wynne on Annoyed With Bluehost

Archives

  • December 2024
  • June 2023
  • June 2020
  • January 2019
  • December 2018
  • November 2018
  • October 2018
  • September 2018
  • August 2018
  • August 2017
  • May 2017
  • April 2017
  • March 2017
  • January 2017
  • November 2016
  • October 2016
  • September 2016
  • August 2016
  • July 2016
  • June 2016
  • May 2016
  • April 2016
  • March 2016
  • February 2016
  • January 2016
  • December 2015
  • November 2015
  • October 2015
  • September 2015
  • August 2015
  • July 2015
  • June 2015
  • May 2015
  • April 2015
  • March 2015
  • February 2015
  • January 2015
  • December 2014
  • November 2014
  • October 2014
  • September 2014
  • August 2014
  • July 2014
  • June 2014
  • May 2014
  • April 2014
  • March 2014
  • February 2014
  • January 2014
  • December 2013
  • September 2013
  • August 2013

Categories

  • UFO
  • Uncategorized

Proudly powered by WordPress Theme: Chateau by Ignacio Ricci.