Now and Then: Cutting Fabric

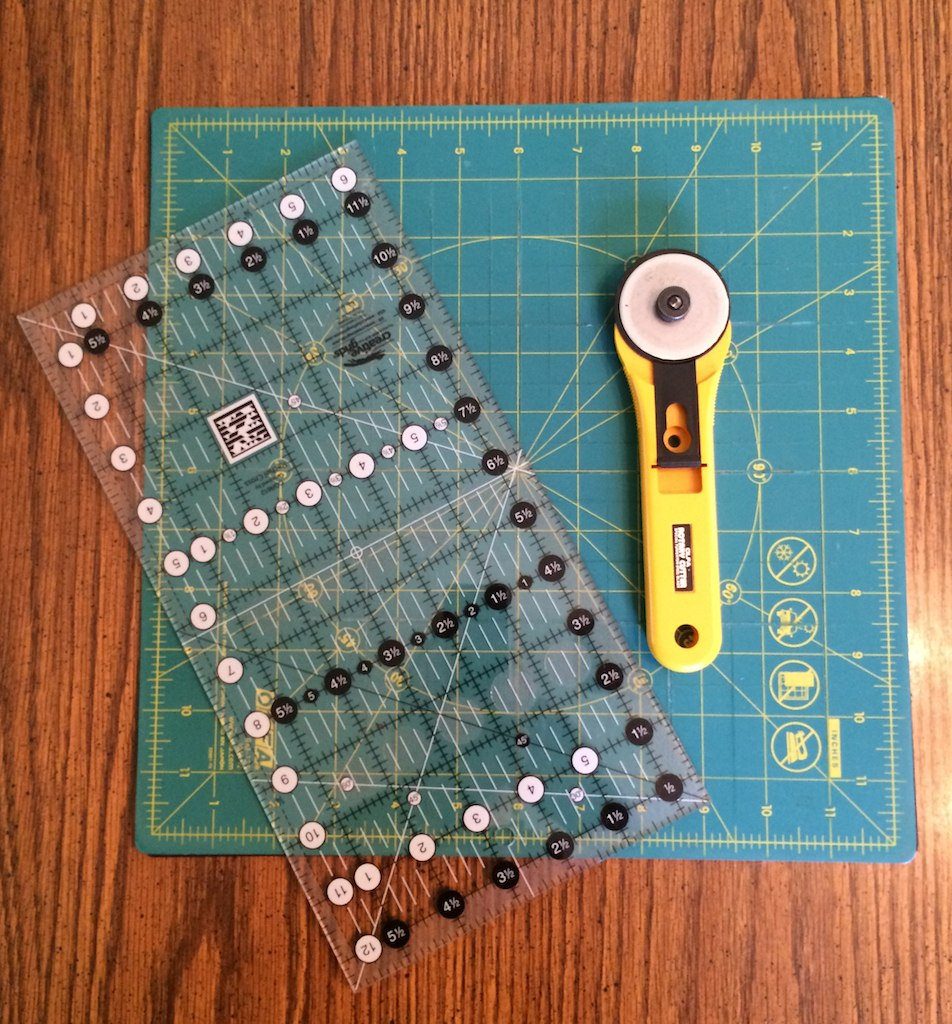
The Olfa Rotary Cutter has turned 35 years old. The use of rotary cutters and self healing mats has radically changed the way we cut fabric for quilting today.

For those of you too young to remember how we used to do things, I thought it might be fun to take you on a walk down memory lane, and tell you how we used to cut fabric.

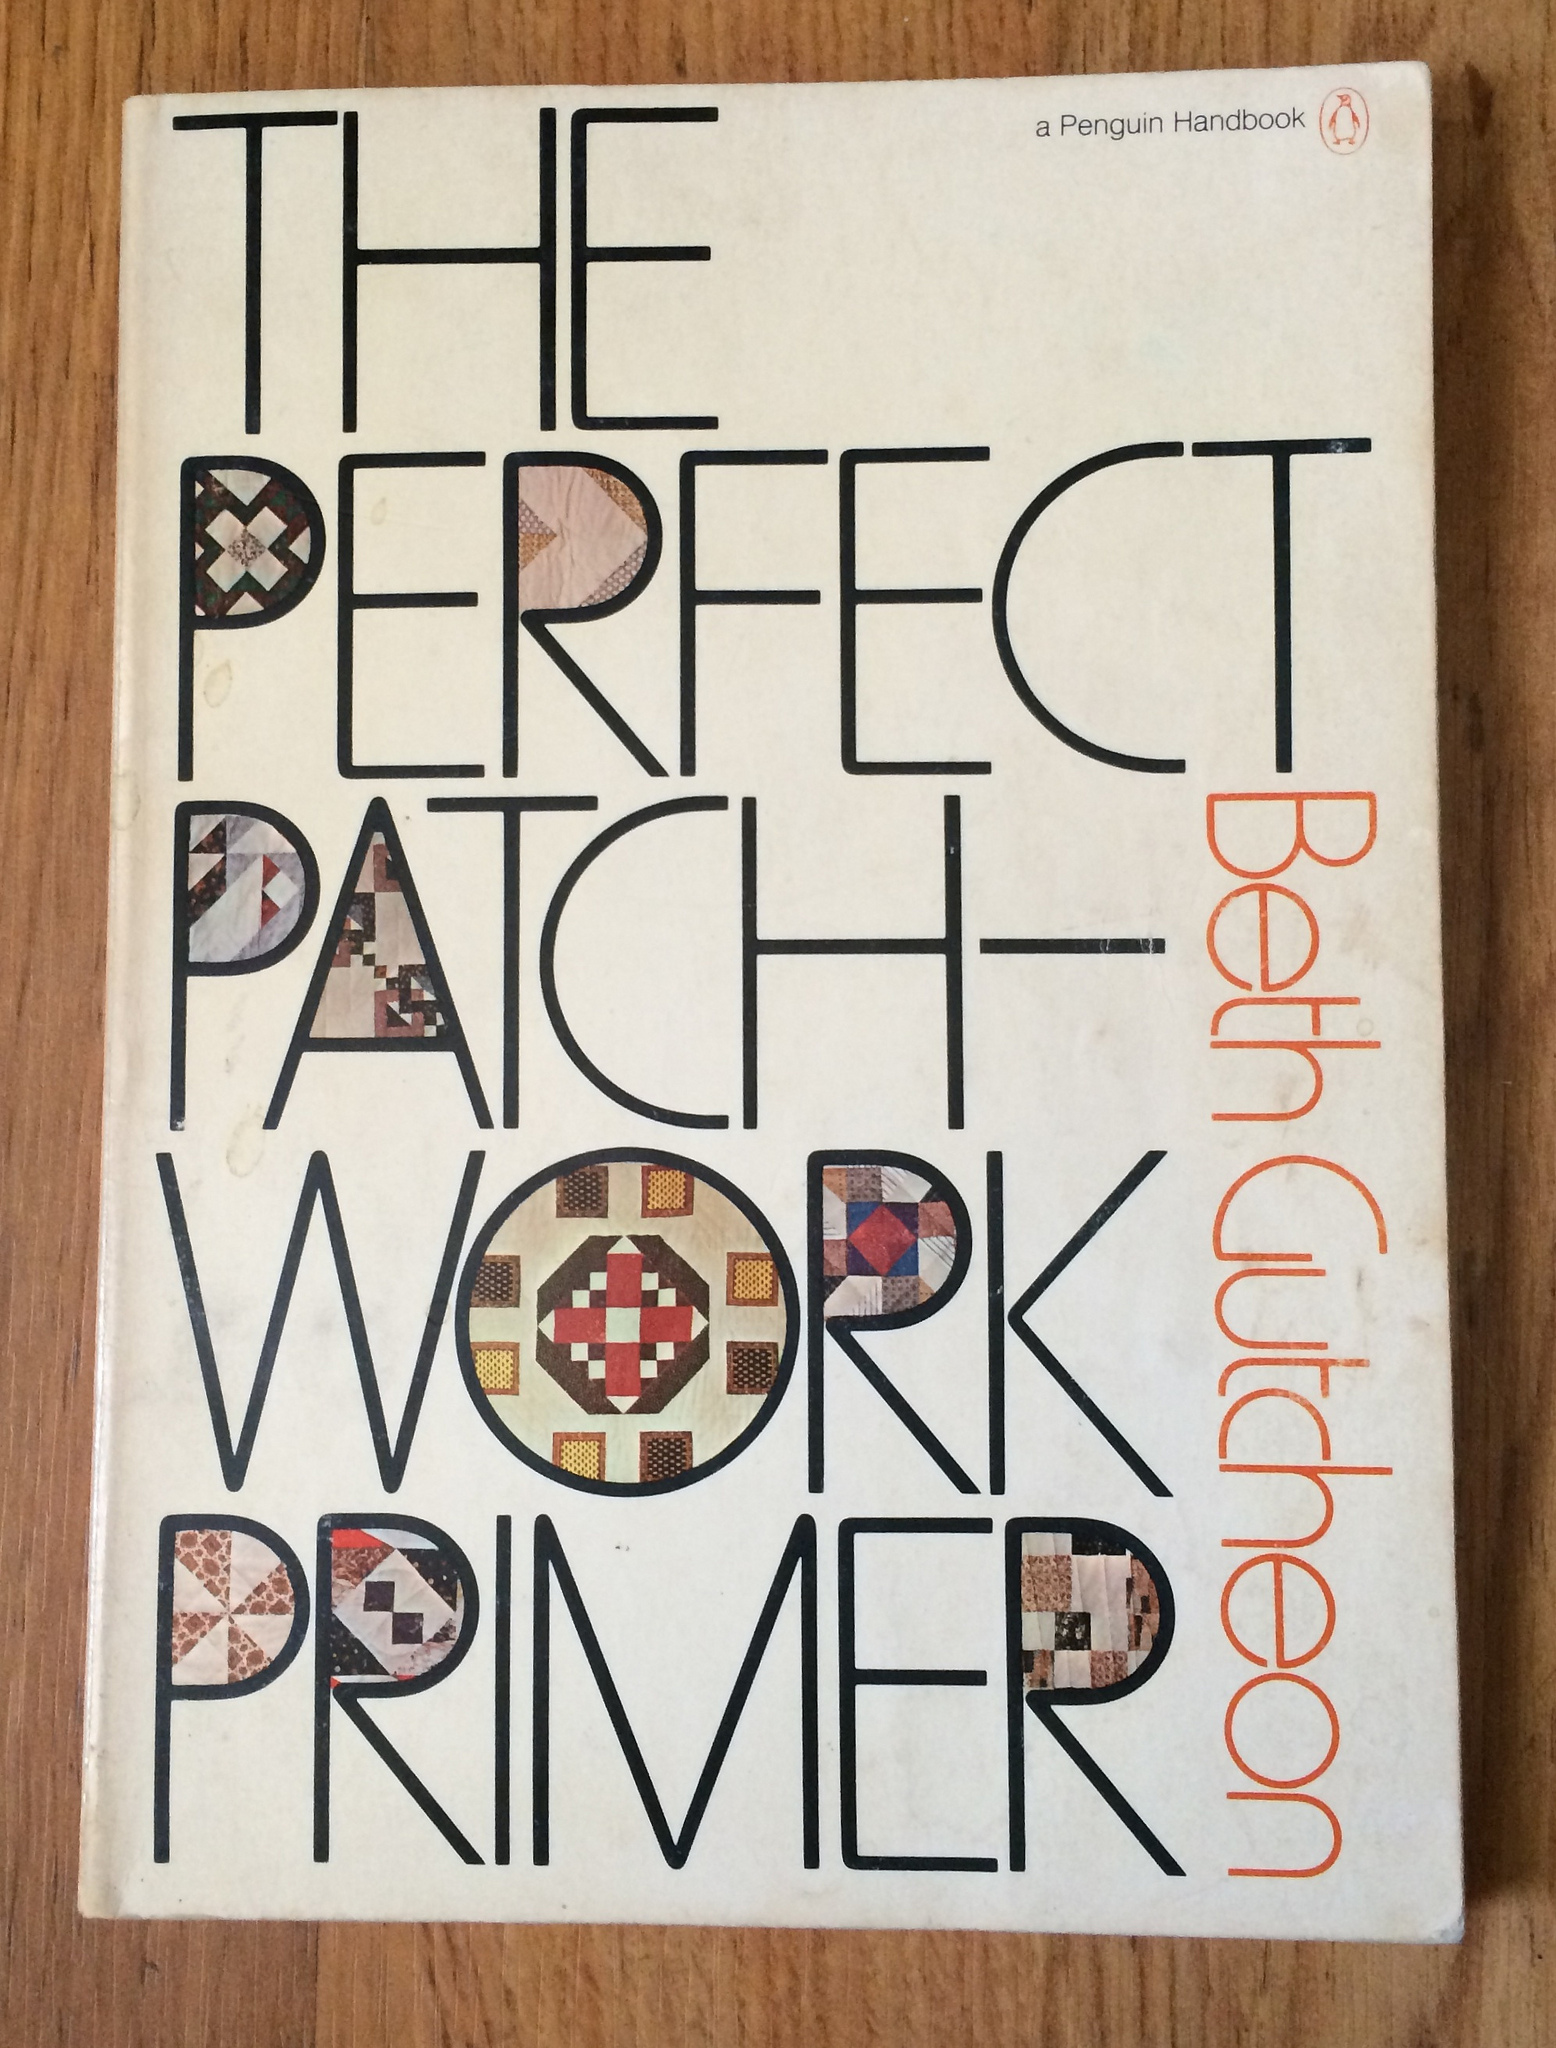
I started to quilt forty years ago in 1974 at the tender age of 20.  In those days cutting pieces for patchwork was a tedious process.  The only book I had available to me at the time was The Perfect Patchwork Primer, which does not appear to have been updated recently, but you can still find some older copies on Amazon.

I read that book from cover to cover. This is where I learned how to make templates for cutting the pieces of fabric I needed for my patchwork blocks. There is a detailed section about “Making Templates” beginning on page 124 of the softcover edition of The Perfect Patchwork Primer published in 1973.

This book recommends using graph paper, but also goes into detail about how to use drawing instruments to draw a quilt block to scale. I used graph paper for my fist few sets of templates, but lucky for me I eventually completed a required course in mechanical drawing as part of my Art Education degree at Kutztown University.  As a result I became adept in the use of a drawing board, T-square, drafting triangles and even the use of an architect’s scale when it was needed.  I could get by without the use of graph paper if necessary, and there was some pleasure in knowing that I could do things the hard way.  All I needed was a plain piece of drawing paper, and my drafting tools, and I was good to go.

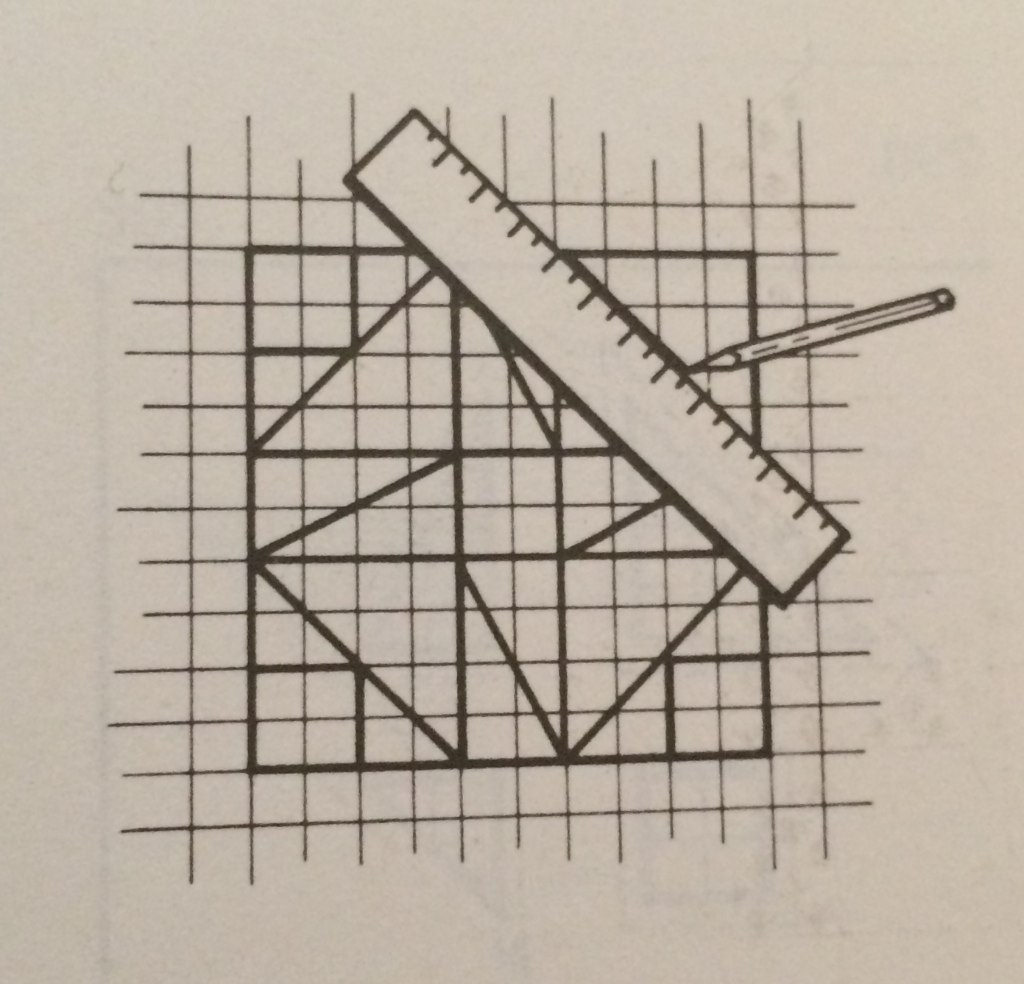
The recommended technique for creating templates, especially in complicated blocks, was to first draw out one’s entire block to scale. (Diagram from page127)

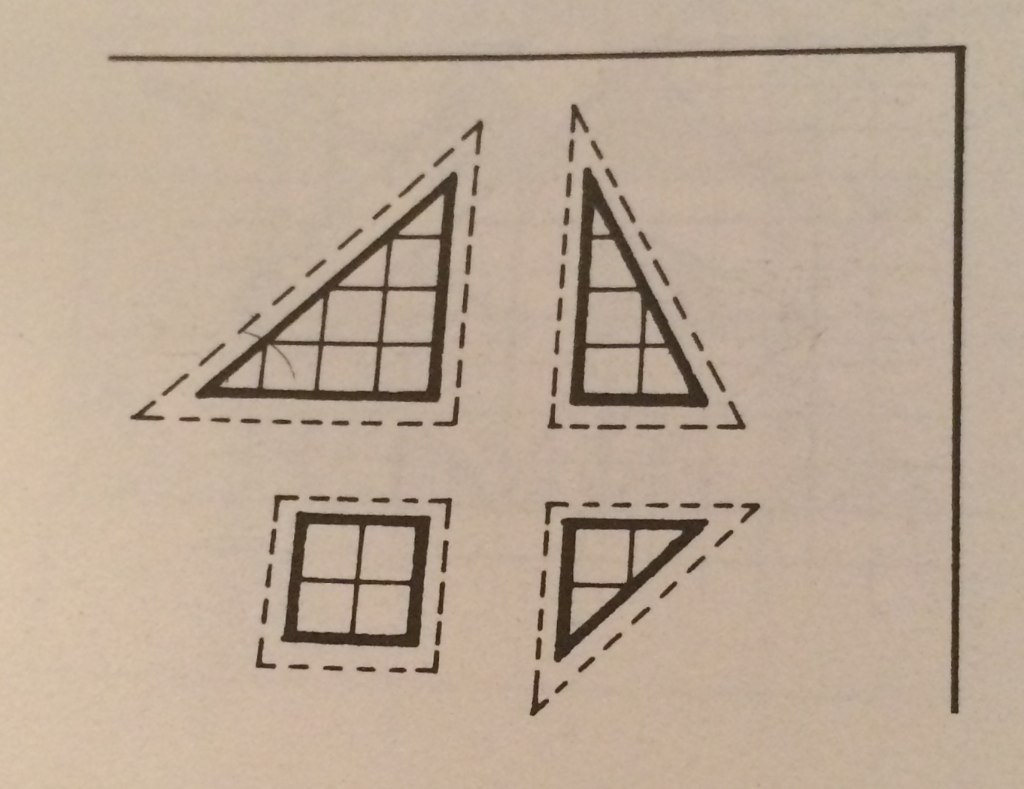
You then cut the pieces apart very carefully.  You adhered each unique shape to poster board leaving plenty of space between the pieces to allow for adding the desired seam allowance, which you then drew into place. (Diagram from page 128)

Then you cut out your templates. If you were using poster board you could do that with scissors, but if you had the skill to use a mat cutter that was even better. Templates were traced with pencil directly on your fabric.  You kept your pencil sharp for accuracy.  It was important to realize that simply tracing a poster board template would eventually degrade it’s accuracy. Therefore, you diligently made fresh templates for each project even though the shapes may have been exactly the same as shapes you had used in previous projects. You also may have made a fresh template in the middle of a project if you had to make a great number from a specific shape.

My First Act In Fiber Arts lasted about five years. The end of my First Act quilting days would have been the time when the Olfa Rotary Cutter first appeared.  I didn’t notice it then.  I did notice it a few years ago when I considered getting back into quilting and embarking on My Second Act In Fiber Arts. I have to admit that I was intimidated by the cutters and the mats, and that my intimidation contributed to a delay in getting back into fibers. I bought them, however, and eventually gave them a try.  There’s no turning back to hand drawn templates at this point.

Do you want to really appreciate how good we have it now? Find The Perfect Patchwork Primer in the library, or borrow it from your local guild dinosaur. I’m proud to be a quilting dinosaur myself, who appreciates NOW but remembers very vividly what things were like THEN.

Weekly Hexagon Progress Report

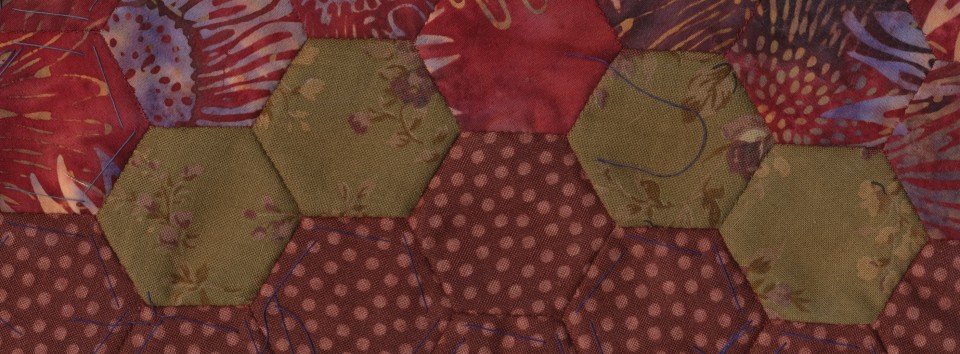
This week I was looking for some fabric that I could use to baste some hexagons with no particular plan for what I would eventually do with them. Some mindless stitching was what I needed. I discovered a bag with a quilt pattern in it along with a number of strips that I had cut to be used with the pattern. The pattern was a very easy, nonthreatening type of thing. I picked it up a few years ago to get me involved in quilting again, but hadn’t used it, except as inspiration to cut a great number of 2.5 inch strips. It was my first rotary cutter experience. The pattern and the strips sat around in a bag since then. The pattern has never been used, and probably never will be because I believe that I can come up with something better on my own at this point. This pattern has “quick and easy” written all over it. It was what I needed at the time, but it isn’t what I would choose for myself now.

I had actually cut about eight different fabrics to use with this pattern, but only three of the fabrics were still in the bag.  I had raided the bag previously to make hexagons for my room divider projects.

I set about cutting some 2.5 inch squares from all three of the fabrics that remained in the bag.

I’ve been busy basting hexagons with those squares, and have about 100 of them completed so far. I am focusing primarily on the batik fabric, and have started to generate some ideas.  I am planning to purchase some Kona solids to coordinate with the batik. I’ve got my eye on some grays and some yellows. I might use the other two print fabrics (primarily in strip form) to piece something interesting for the back of the piece along with the Kona solids. Maybe I’ll even use the pattern for the back.

In addition to basting hexagons I was busy this week moving my blog from WordPress.com to Bluehost.com.  That was the subject of yesterday’s post.

Soon I will be attempting to bring over my subscribers from WordPress.com, but if that doesn’t work  and you have subscribed in the past, you might want to resubscribe. Wait a couple weeks before you do that though.  My domain is still not 100% set up to work with Bluehost yet.

The process of taking hexylady.com from being hosted at WordPress.com to self hosting has been nerve racking simply because I am a control freak at heart and I put this into someone else’s hands because I was afraid to do it myself.  I am really feeling really good about Bluehost though. They offer free webinars, and I will be participating in a webinar today for new users.  Tomorrow I have my one on one quick start phone call session scheduled, and Wednesday I am participating in a webinar for getting started with WordPress. This company seems to offer a lot of support and resources.  Their online chat has been very helpful in answering questions, and it is great to know that they take phone calls just incase I feel that it would be better to talk.

I am linking back to Life Under Quilts as usual. If you visit over there you will see what Jessica has worked on this week and you can also click the links at the bottom to see the work of the others who link back.

Bluehost – A New Home for Hexy Lady

While this is a blog about fiber arts, quilting in particular, and hexagons even more specifically, I would like to take some time to write about blogging. I am doing so because this is a momentous post for me. It is the first post that I am making from my self hosted WordPress blog hosted with Bluehost. The training wheels have come off. I am now free to customize my blog to my heart’s content. I am also free to do actual business here if I choose to at some point in the future.

I’ve been active in blogging ever since 1996 when I started my first blog with Geocities under the user name “terriblue”. I’ve owned a few domains too. My first domain was terriblue.com.  I dropped it, and purchased terrischurter.com when it was pointed out to me that it looked as if I was branding myself as a porn star by using terriblue.com because it included the word “blue”, as in blue films.  Who knew? Why did it take so long for anyone to mention this to me? I had to laugh. I was naive. What does this say about Bluehost?  Only kidding.

Not long ago I went through a period of dietary denial, and became the proud owner of nearlyvegan.com, which never really took off.  I started to eat meat again, my LDL cholesterol went back up, and I dropped the domain.

I’ve had a number of blogs with Blogger, including a once very active blog about the game of go at terrischurter.blogspot.com, which I call Enriching My Love of the Game. It’s still there.

When it came time to try to make a name for myself in the quilting community it didn’t seem right to use terrischurter.com because, who is Terri Schurter anyway?  So I looked for a name that would be short, easy to remember, and related to quilting. I chose hexylady.com.  What I didn’t know was that it probably should have been hexielady.com because hexie is the abbreviation commonly used for hexagons in the quilting community.  Don’t ask me why. To confuse matters even more, a Google search will reveal that “hexylady” has World of Warcraft associations with which I was unfamiliar when I chose it.  Be that as it may, I am now Hexy Lady, and I have the business cards to prove it.

While Blogger had been my platform of choice for years, I wanted to give WordPress a try because it is recommended by Michael Hyatt.  I became aware of his blog when Evernote retweeted his tweets about using Evernote.  I read his book “Platform: Getting Noticed in a Noisy World” when it first came out, and I even joined his community at Platform University.

In spite of Michael Hyatt’s recommendation that one should self host, I decided to host my blog with WordPress.com using a premium package that included my own domain name. This meant that I could self host when I was ready and take my domain with me.  That premium package and domain were scheduled to renew on July 24th. I decided that rather than spend another year with limitations on what I could do with my blog over at WordPress.com, that I would make the switch to self hosting now.

The process has been fairly seamless. Bluehost took care of the details by migrating my content and installing WordPress for me. Today I chatted live with a representative who assured me that I could begin blogging again and pointed me to my login page.

Things probably still look the same to my readers, and that is the beauty of migrating one’s content. I may not make changes right away, but changes will be coming. Specifically, I have my eye on the premium WordPress Theme that Michael Hyatt created called “Getting Noticed“. I would not have been allowed to use that theme at WordPress.com, but I can use it at Bluehost, and probably will very soon.

I’ve been reading a thread over on Platform University, where the members are discussing the merits of using one’s own name vs. choosing a domain name that reflects one’s content. I had that struggle myself. Michael believes in registering one’s own name if it is available, and having done that awhile ago, I will probably point it to hexylady.com soon to give readers two ways to find me, and to build brand recognition with both names. Once I do that, and gain some recognition under my real name, I might make terrischurter.com my primary url. In the meantime, terrischurter.com is still hosted at FatCow. I noticed that they have a three dollar a month upgrade to a simplified WordPress panel. My package with FatCow doesn’t renew until November, so I might do a web host “bake off” in the meantime and see what that FatCow panel looks like.

Blogging is so much fun.


Weekly Progress Report

I spent a good deal of time this week gathering together pre basted hexagons, trimming those that needed it, and placing them in a container. I may be sorting them out by color group at some point, or I may be using this container as a source of hexagons for spontaneous scrappy piecing.

I have also been basting even more hunter green hexagons. My container is now nearly overflowing with hunter green goodness.

I’m pleased to say that the Double Wedding Ring paper pieces I ordered arrived this week. I ordered enough pieces to make a quilt with 36 rings.

The pieces come in three types, A, B, and C shown below in order.

I’m sad to say that the acrylic templates that I bought to accompany these paper pieces were a total waste of money for me, but not much of a loss at $8.00 for the set. I’ll tell you why I have no use for these templates so others can benefit from my mistake. The standard 3/8th inch seam allowance is way too large, and it costs an extra ten dollars to get the templates with a 1/4 inch seam allowance, which would have brought the price of the set to $18.00.

More importantly, however, anyone with any sense of spacial relations can easily cut a satisfactory seam allowance with a pair of scissors once the paper has been pinned in place on a strip of fabric. It’s not rocket science. The time one would invest in cutting around acrylic templates with a rotary cutter (even if they had a smaller seam allowance) would be a total waste of time. Who wants to be hunched over a table with a rotary cutter when she could be sitting on a couch with a strip of fabric and a pair of scissors in hand? The only reason I can think of to use these templates is if I wanted to do some fussy cutting. Even then, I would probably end up trimming my the seam allowances by hand after basting.

Even though I’m not yet ready to tackle a full quilt, I went to the trouble of basting a few of the “C” shapes. They were easy to baste. I added an extra stitch along each edge rather than just doing the corners. I think that extra stitch will be important in maintaining the subtle curves of the pieces.

I’m going to the trouble of making sure that I fold my fabric over in such a way that I can remove the papers before appliquéing the rings without having to do any additional reinforcement. The directions that come with the pieces recommend leaving the paper pieces in place when you appliqué the rings, and then cutting the fabric from the back to remove the papers. That seems to me as if it would make it very difficult to sew the rings in place with the thickness of the papers getting in the way and making the piece inflexible. It also seems like a lot of extra unnecessary effort to cut through the fabric for paper removal. Rather than using a full cloth background, I’ll be cutting individual pieces to appliqué behind the openings in the rings. Perhaps I’ll do this as the piece progresses. Perhaps I may wait until I’ve pieced all of the rings.  I haven’t decided yet.

The green pieces I am working with right now are simply for practice. I’ll probably do one ring as a table topper to experience the process before I start to work on a full quilt design. I’m big on making samples before tackling a big project. I’m thinking of planning out something in advance and purchasing the fabric necessary to complete it rather than going scrappy. The package of paper pieces comes with a line drawing of the 36 circle quilt that you can color for planning purposes.

I’ve got a 20% off birthday coupon from the Pennington Quilt Works that I need to use this month. Though I purchase my solids online from sample cards, I like to see prints in person before I buy them.  I will likely buy a lot of batting and some fabric for a wedding ring quilt with my coupon this year. I’m also interested in getting another rotating self healing cutting mat.

I have an idea of basting up enough pieces for a full quilt completely from scraps. This would be a very long term project. I’d put the pieces into separate containers by type, A, B, and C.  I’d then pull pieces randomly as I assembled the arcs. The only rule would be that if I picked the same fabric two times in a row I would throw it back and try again.

I also thought about tracing a set of the papers, scanning them, and then enlarging them to 200%. This would create a much larger ring for a more modern look.  A 200% increase in size would create rings 30.5 inches in size.

It’s time for a report on my experimental binding piece.  This piece has endured 14 regular washes and dries.  It has endured an additional 4 gentle washes and dries. While my binding became quite crinkly from the regular drying, my little seams are holding up very well, and that’s what I’m interested in evaluating.

I am linking back my weekly progress report to the Monday Morning Star Count on Life Under Quilts with Jessica Alexandrakis, whose book “Quilting One The Go” is available from Amazon.

The Prodigal Thimble Returns

A few weeks ago I lost a sterling silver thimble which I had bought when I first started to quilt forty years ago.  I had used it on every quilting project I had ever created during my First Act in Fiber Arts, and more recently on every quilting project created during my Second Act in Fiber Arts.

I was basting hexagons one afternoon and got up to take a short break.  I thought I threw the thimble in my little Tupperware sewing box when I walked away for a few minutes.

Upon returning my thimble was nowhere to be found.  I looked for it all over the living room.  I even turned my This End Up couch on end and tore off the pillows.  My husband even got in the act and we looked everywhere.

I felt as if I had lost a valuable part of my history, and I will admit that there was a lot of crying and sobbing going on over this incident.  It didn’t make sense, yet a few weeks after it happened, with the thimble not having materialized, I was getting ready to blog about my loss.

Then a couple days ago, while tidying up the living room in preparation for a visit from my stepdaughter and her son, I picked up a nearly empty package of tissues.

Something was peaking out of the lower edge of that package of tissues. Can you see it? When I picked up the package I didn’t see it, but I felt it.

A very bad word sprang loudly from my lips as I held the package in my hand. It was a strange reaction, I will admit. It was actually an expression of extreme joy and disbelief.  My husband was nearby and wanted to know what was wrong.  I said, “You’ll never believe what I found.”  He asked, “Your credit card?” (That’s another story.) I said, “No, even better! MY THIMBLE.”

I quickly figured out what had happened. When I came back to my stitching that day, and had been unable to find my thimble, I started to toss things out of my sewing kit in search of it.  The tissue package got tossed into a container on the sewing table with spools of thread and other miscellaneous items, and there it remained while I tore the house apart. There it remained for the next couple of weeks mocking me from the sewing table.  I guess this is proof that cleaning and organizing are good. Don’t tell my husband I said so. Notice the hexagons on the tissue packet.  I think that’s a nice touch.

This thimble had been lovingly used for forty years, which is obvious from the shape the edge has taken on over the years.

I used to carry this with me to do EPP work outside the house.  No more.  I’ve learned a lesson. If I keep the thimble at home, I can at least be fairly sure that if it goes missing again at some point, it will show up again. I do, however, enjoy using a quality thimble when I work, so I am thinking of buying a second sterling silver thimble for traveling, and I have been looking at the ones available on eBay.  If I lose a new sterling silver thimble, all I will have lost is the money necessary to replace it… no big deal.  I won’t have lost something of sentimental value.

Second Act Saturday: A Crumb Pillowcase

Second Act Saturday is a recurring feature through which I share projects created during my Second Act In Fibers, but about which I have not previously blogged.  It’s a way of getting my full body of work up on the web eventually.

Today’s post is about a pillowcase that my husband requested that I make for him to cover a very old, large, and dirty pillow which he loves.  The pillow was originally covered with corduroy, but could not be laundered. At one point I covered the pillow with some flannel sheeting because it had gotten so dirty, but I actually stitched the sheeting onto the pillow, so it still couldn’t be laundered.

When I started to create objects out of hexagons my husband saw an opportunity to request a simple utilitarian cover for his beloved pillow.  I saw an opportunity to use scraps, or crumbs, left over from the creation of basted hexagons.  I also saw an opportunity to find out if the maroon fabric I had purchased was going to run if I didn’t prewash it. I was getting worried because I had read some blog posts about the value of pre washing fabric.  In addition to that, I had been doing some reading on the web about “quilt as you go” units quilted by machine and joined with strips. So I decided to try to kill as many birds as possible with this one stone. I made this pillowcase in October of 2013.

First let’s take a look at the finished pillowcase.

FRONT

BACK

A closer look shows that my fear of bleeding proved to be unfounded.

I used solid maroon fabric to back the square units from which this piece was made, so if there was going to be a bleeding problem it definitely would have shown up during the first wash.  Apparently good quality quilting cotton looks safe, even if it is in the bright red family.

On the back of the pillowcase you can see a maroon batik, which I used not only to see if it would bleed, but also to come up with an easy way to finish off the back of the pillowcase with fabric on hand that would harmonize with the maroon.

I wasn’t particularly fond of the maroon batik, but cut into narrow strips it worked well for this project, and showcased my construction method.

Let’s take a look at the pillow that desperately needing covering:

To create the pillowcase I used small rectangular crumbs that were left over from the cutting of fabric squares for the creation of basted hexagons.  I didn’t have enough crumbs to make the six 12 inch squares I needed for the front of the pillowcase, so I did end up cutting extra crumbs from fabric I had on hand.  The solid maroon strips and batik maroon strips used to unify the pieced squares, and to join the quilted squares, could not be called crumbs because they were cut from yardage. However, at least half of the pieces used on the front were actual crumbs.

I cut 13 inch squares of maroon fabric (and batting) as the base on which I built my units using strips, and sewing them into place as I added them.  After making the units they were trimmed down to 12 inches square.


Here we see three of the units for the front laid out on my couch before they were trimmed to the 12 inch size needed for joining.

I joined my squares using one inch strips, which come out to 1/2 inch strips on the front of the piece because half of the width is lost to the seam allowance.  The strips on the back were sewn into place by hand.

I made the pillowcase larger than it needed to be, and joined the quilted front and back with maroon yardage along the edges.  I wasn’t sure how much the pillowcase was going to shrink, and actually ended up going back and sewing it even smaller. If you look past the lint and dirt in the photograph below you can see how I added extra seams to make the pillowcase smaller after the first washing. I never did go back and cut off the excess fabric, but may do so at some point.


Here you can see how much fraying took place during washing.


I ended up cutting away a lot of frayed fabric.

I am sure that there is a way to finish off the inside to avoid the fraying, but I had never made a pillowcase, and I made this whole thing up myself as I went along.  I knew that my husband was not going to be critiquing the inside of the pillowcase, so I wasn’t too worried about what couldn’t be seen from the outside. I just wanted that dirty pillow covered.

Here we see the pillowcase flat without the pillow inside:

Once again, forgive the lint and grime.

I’m not particularly pleased with the way I constructed the open end of the pillowcase.  I should probably look for a pattern online if I do this again. Instead of hemming the fabric near the edge I should have probably used a double layer of fabric for the entire end of the pillowcase.

Love those crumbs…

Notice that no quilting shows because of the “quilt as you go” strip method used.  It creates quite a clean look.


Hexagon Crumbs

When I first started to work with EPP Hexagons I noticed two distinct types of “waste” products from the production of basted hexagons. These could be referred to as crumbs. There is actually a type of quilt design referred to as crumb quilting.  Before I show examples of the two types of “crumbs” I became aware of, I will provide you with a few links to give you an idea of what crumb quilting is all about.  I didn’t want to show an example directly because I didn’t want to post someone else’s work without permission.

Here are the links:

Crumb Quilts on Pinterest

The above link gives a really good idea of what crumb quilting is all about, so you can probably skip over the links below and come back to them later if you want to see more about crumb quilting after reading the rest of my post.

Crumb Quilt Round Up

Crumb Along With Me Quilt Along

Crumb Chaos Blocks – A Photo Tutorial

Adventures In Crumb Piecing

Crumb Quilt Pattern

I take no credit for the links above except that I found them through a Google search for “Crumb Quilt Patterns”. You could surely do a similar search if you wanted to see what else is out there.

I would like to mention that the crumb quilting movement is closely related to the “made fabric” techniques that Victoria Findlay Wolfe teaches in her book “15 Minutes of Play” in which she shows a variety of methods for joining small pieces of fabric and then using the resulting “made” fabrics to piece projects.  Her pieces could rightfully be called crumb quilts. I recently bought a copy of Wolfe’s book, and have enjoyed reading it. However, when I first started EPP I was totally unaware of crumb quilting, and was also unfamiliar with Wolfe’s work. As a result, I came up with my own limited understanding of the waste products of hexagon production.

FIRST I noticed that the method I was using to make my hexagons created a great many infinitesimally tiny pieces that truly deserved the name “crumb” although I didn’t call them that. I baste my hexagons using 2.5 inch squares of fabric. Then I trim the excess fabric from the basted hexagons leaving a seam allowance of about a quarter inch.

This yields lots of tiny bits of fabric WAY to tiny to use for ANYTHING… yet I saved them. At first I just wanted to see how many I could accumulate, like a kid tying together pieces of string and winding them into a ball. I was surprised how quickly my gallon container filled and overflowed with tiny pieces of fabric. There is something obsessive about having more than a gallon of totally unusable fabric crumbs. The only purpose it serves to save them is to prove visually how much work I have put into the creation of basted hexagons.  When I fell in love with the color hunter green I decided to save those crumbs separately from all of the others since I knew I would be making so many hunter green crumbs.

SECOND I noticed that when I cut my squares of fabric using 2.5 inch strips of fabric, I inevitably ended up with pieces at the end of the strip that were narrower than 2.5 inches, yet too large to throw away.  At first I did throw these pieces away. However, since they actually looked usable, I started to save them, and to think about what I might do with them.

After awhile I started to sew the pieces together randomly into strips.

Eventually I decided to make something of these strips.  My husband had asked me to create a pillow case for a large old dirty pillow he loved, so I made it for him.  My first crumb piece was born, even though I had no idea what a crumb piece was at the time, and didn’t even know that leftover pieces of fabric were called crumbs.  My husband’s crumb pillow case will be the topic of tomorrow’s Second Act Saturday post.


Ordered Double Wedding Ring Paper Pieces

Last week on my 31st wedding anniversary I decided to purchase paper pieces to make a double wedding ring quilt.  I also bought the acrylic templates for the pieces.  This particular set of pieces is only for the arc units, so I will be appliquéing them onto background fabric.

rings

A screen capture from the web site shows the current price of $35.00 for the paper pieces.  However, they were on sale last week for $26.25, which is why I jumped on the purchase.  I have been looking at double wedding ring quilts for a long time, and the idea of being able to do one with English Paper Piecing really appeals to me.

These are large rings, a bit bigger than 15 inches in size.  I might try something really modern and make all of the pieces with solids. I may vary the color of the background units as well as the arc pieces. One possibility that comes to mind is to do the arcs in warm colors and the background in cool colors.  Something a little more subtle might be to use greens for the arcs and blues for the background.

I’ll probably start by doing six rings to create a piece suitable for a baby quilt, which I can appliqué onto a piece of yardage and bind.

My actual work for this week consisted of binding more hunter green hexagons.  There are quite a few more hexagons in my container now.

 I am linking back to the Monday Morning Star Count at Life Under Quilts.

Table Runner Number Three: Binding Finish

Table Runner Number Three is bound.

Here are some details of the binding on this piece.

I’d like to show this binding beside the binding for my Table Runner Number Two, details of which can be seen here, and here.


The tape measure has been included in the photograph above to provide a sense of scale.  The seams perpendicular to the edge in the wider finish come to about 3/4 inch.  The same seams in the narrower finish come to about 1/4 inch.  I like both finishes and would choose one over the other solely based on what I think would work best with the design of the item to be bound.

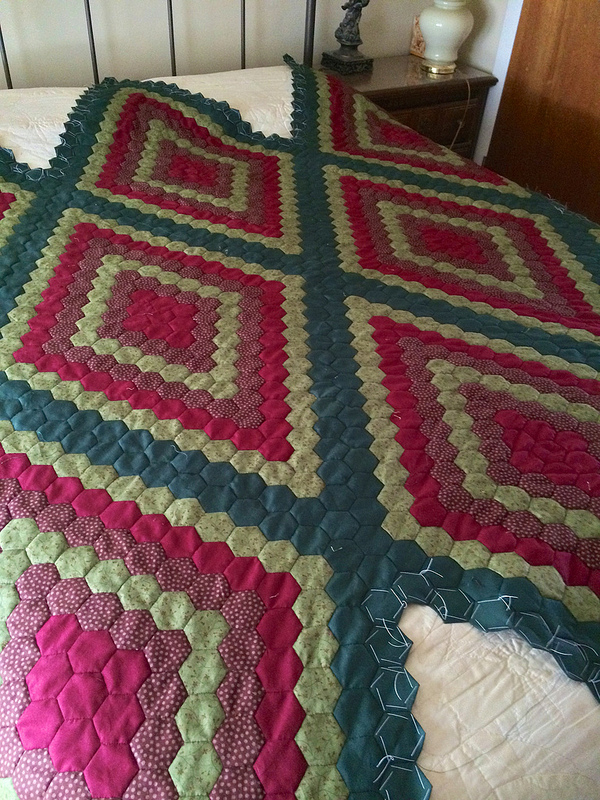
In addition to this table runner finish I have been basting a great number of hunter green hexagons.  I may be using these to finish off the Diamond Quilt eventually, or they may go into some other project.  I’m trying a new method of basting hexagons.  Up until now I have pierced the paper when binding my hexagons, which allows stitches of the basting thread to show on the front of the hexagons during piecing.  For these green hexagons below, I am trying a method that doesn’t pierce the papers, and which will make it unnecessary to remove the basting stitches to remove the papers.  I have to admit that one of the reasons I am trying this other method of basting is because it will make for more aesthetically pleasing progress photos.  It takes longer to baste this way, but I think it will be a wash because I will probably recover the time by not having to cut basting threads and remove them later.