• About Terri Schurter

Hexy Lady

~ my second act in fiber arts

Hexy Lady

Monthly Archives: July 2016

Glorious Hexagons: Stacks, Stacks, and More Stacks

20 Wednesday Jul 2016

Posted by Terri Schurter in Uncategorized

≈ Leave a comment

I’ll be away from home soon for a week, and I want to take enough basted hexagon pieces to last me for handwork through ten hours of train travel as well as any idle hours during my week away from home. When I started to think about this I was faced with some remnants of previous layer stacks which I exhausted of useful cuts. I made those cuts with no particular use in mind. After that I looked at my piles of yardage and decided that it was time to take inventory and make up layer stacks for every fabric in the Embracing Horses collection.

Since January, when I started making Glorious Hexagons, I have scoured the internet and purchased a great deal of fabric from the Embracing Horses collection. Every once in awhile someone from the Glorious Hexagons Facebook group will ask me how much fabric I bought for this quilt. It is a reasonable question to ask, but not an easy one to answer. I can’t imagine that one could possibly plan out a Glorious Hexagons Quilt well enough to buy the fabric in advance.

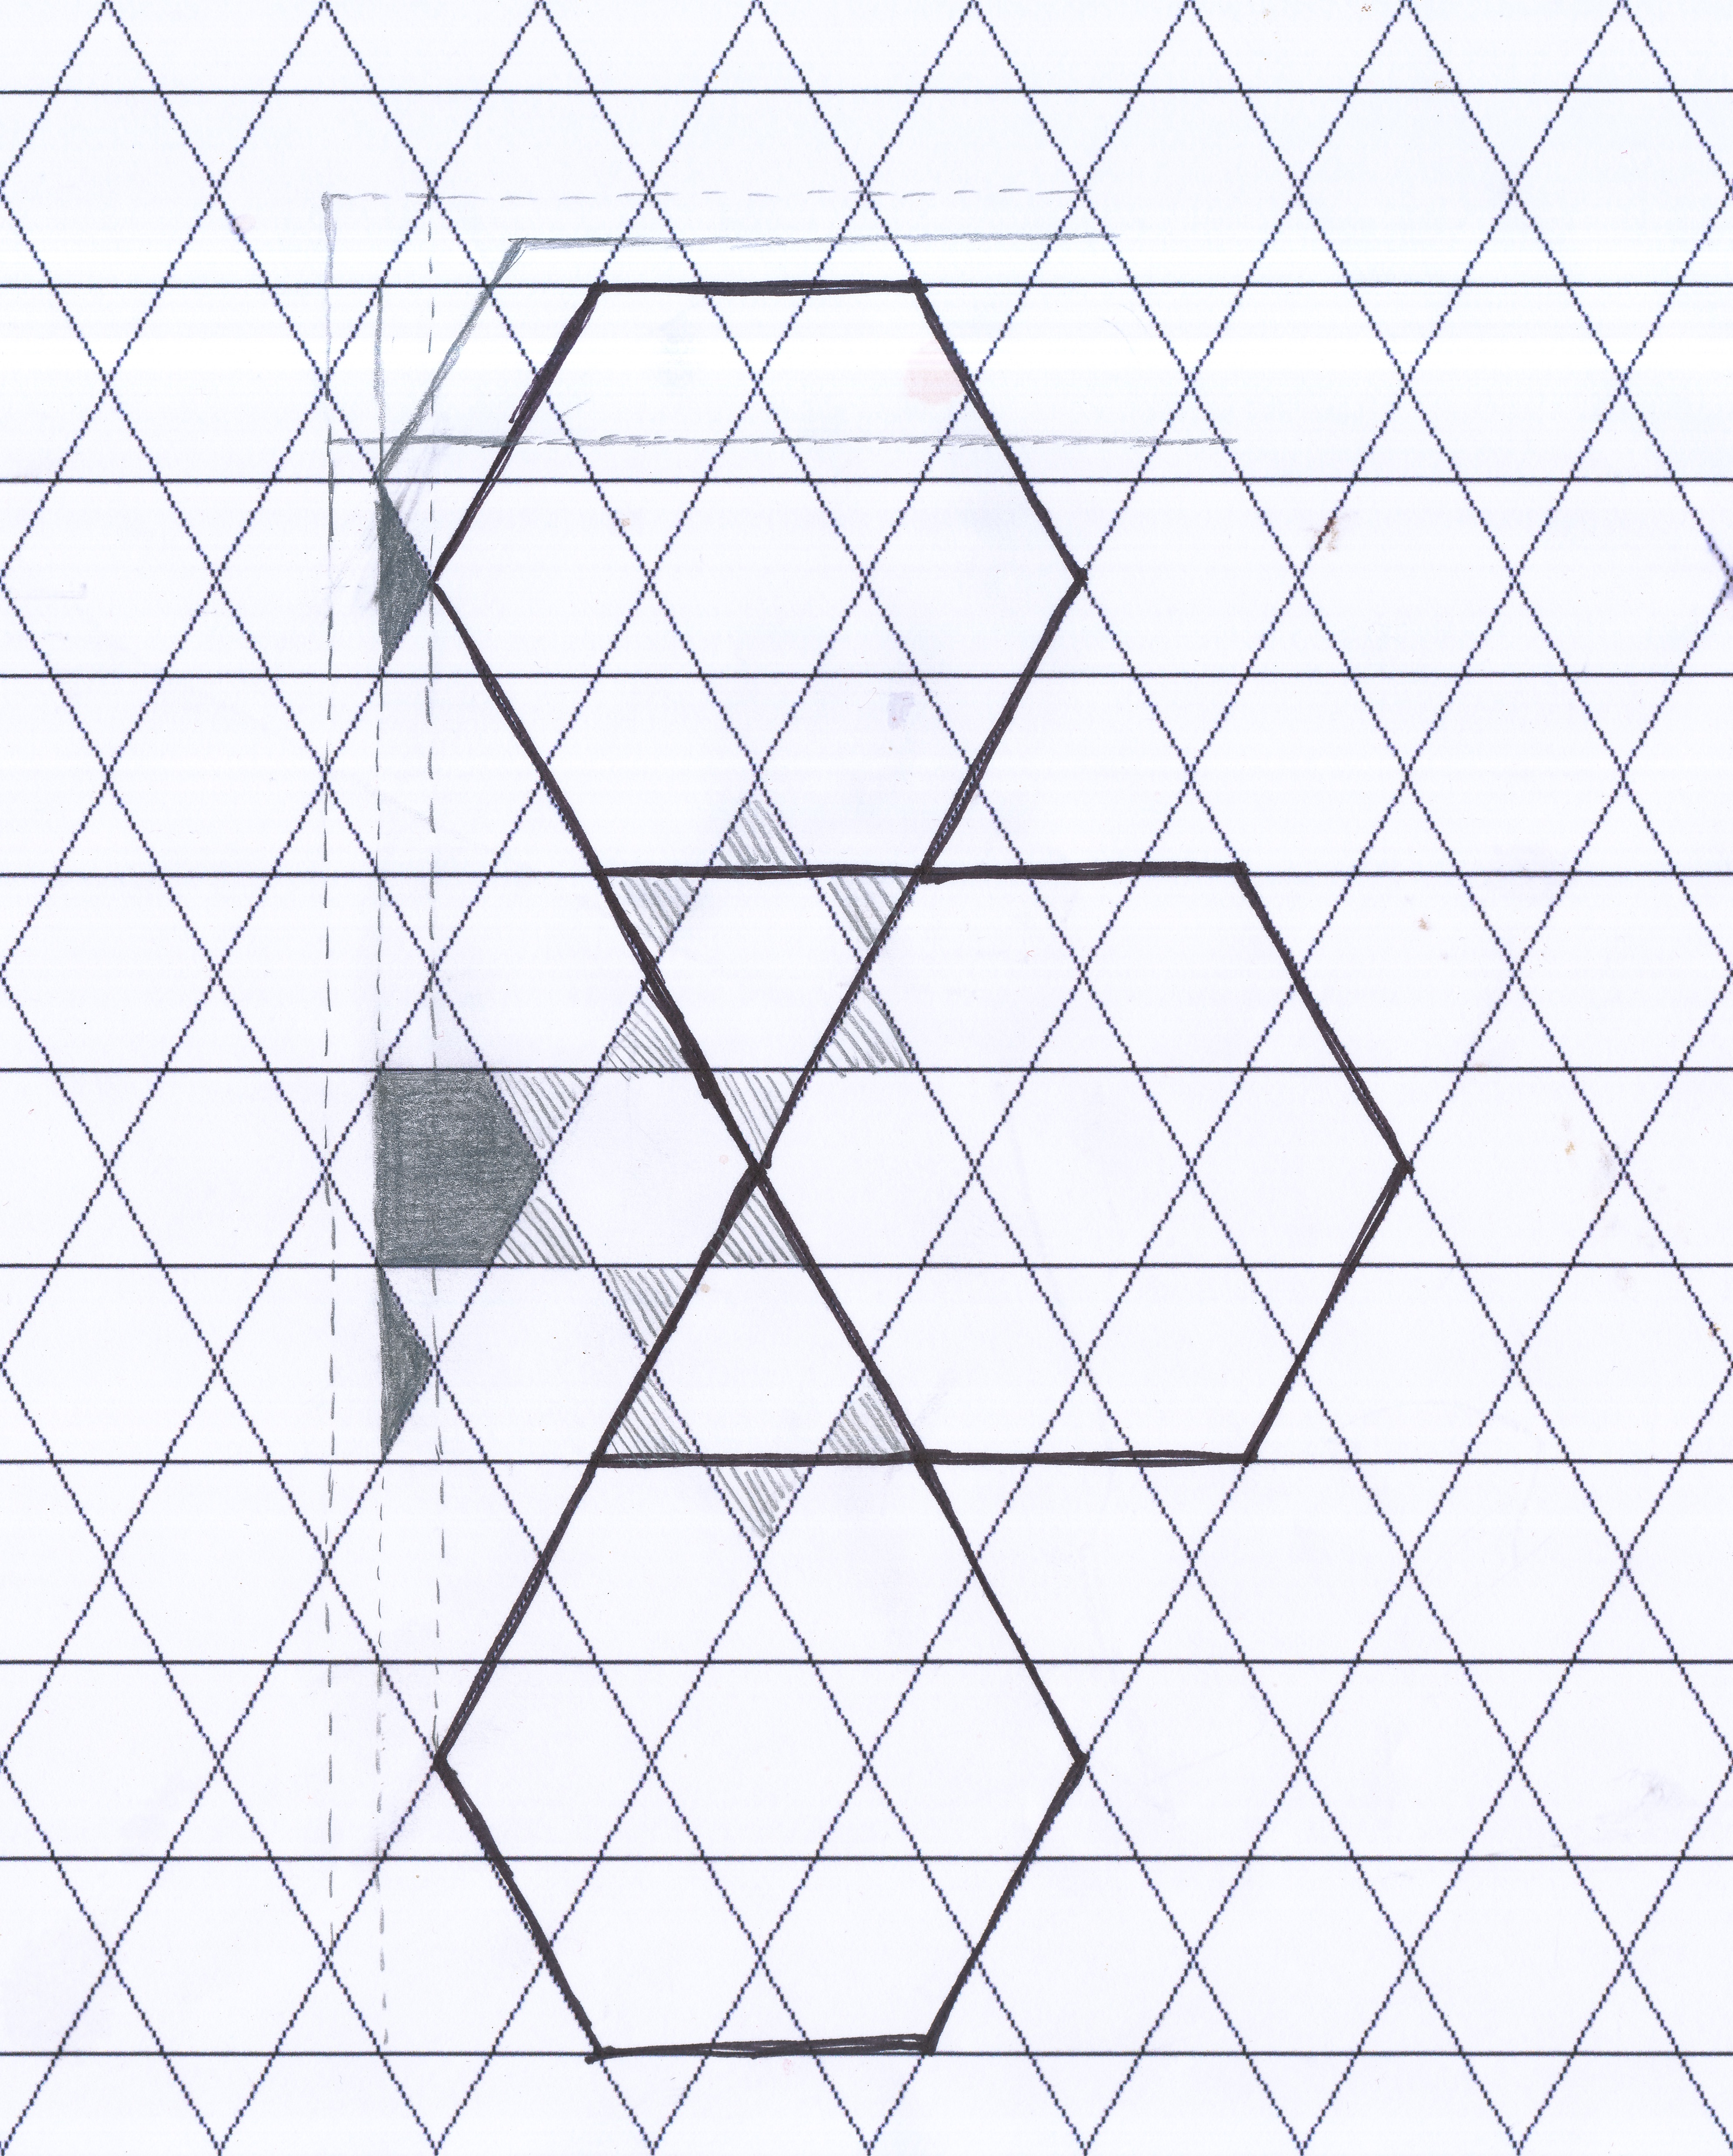
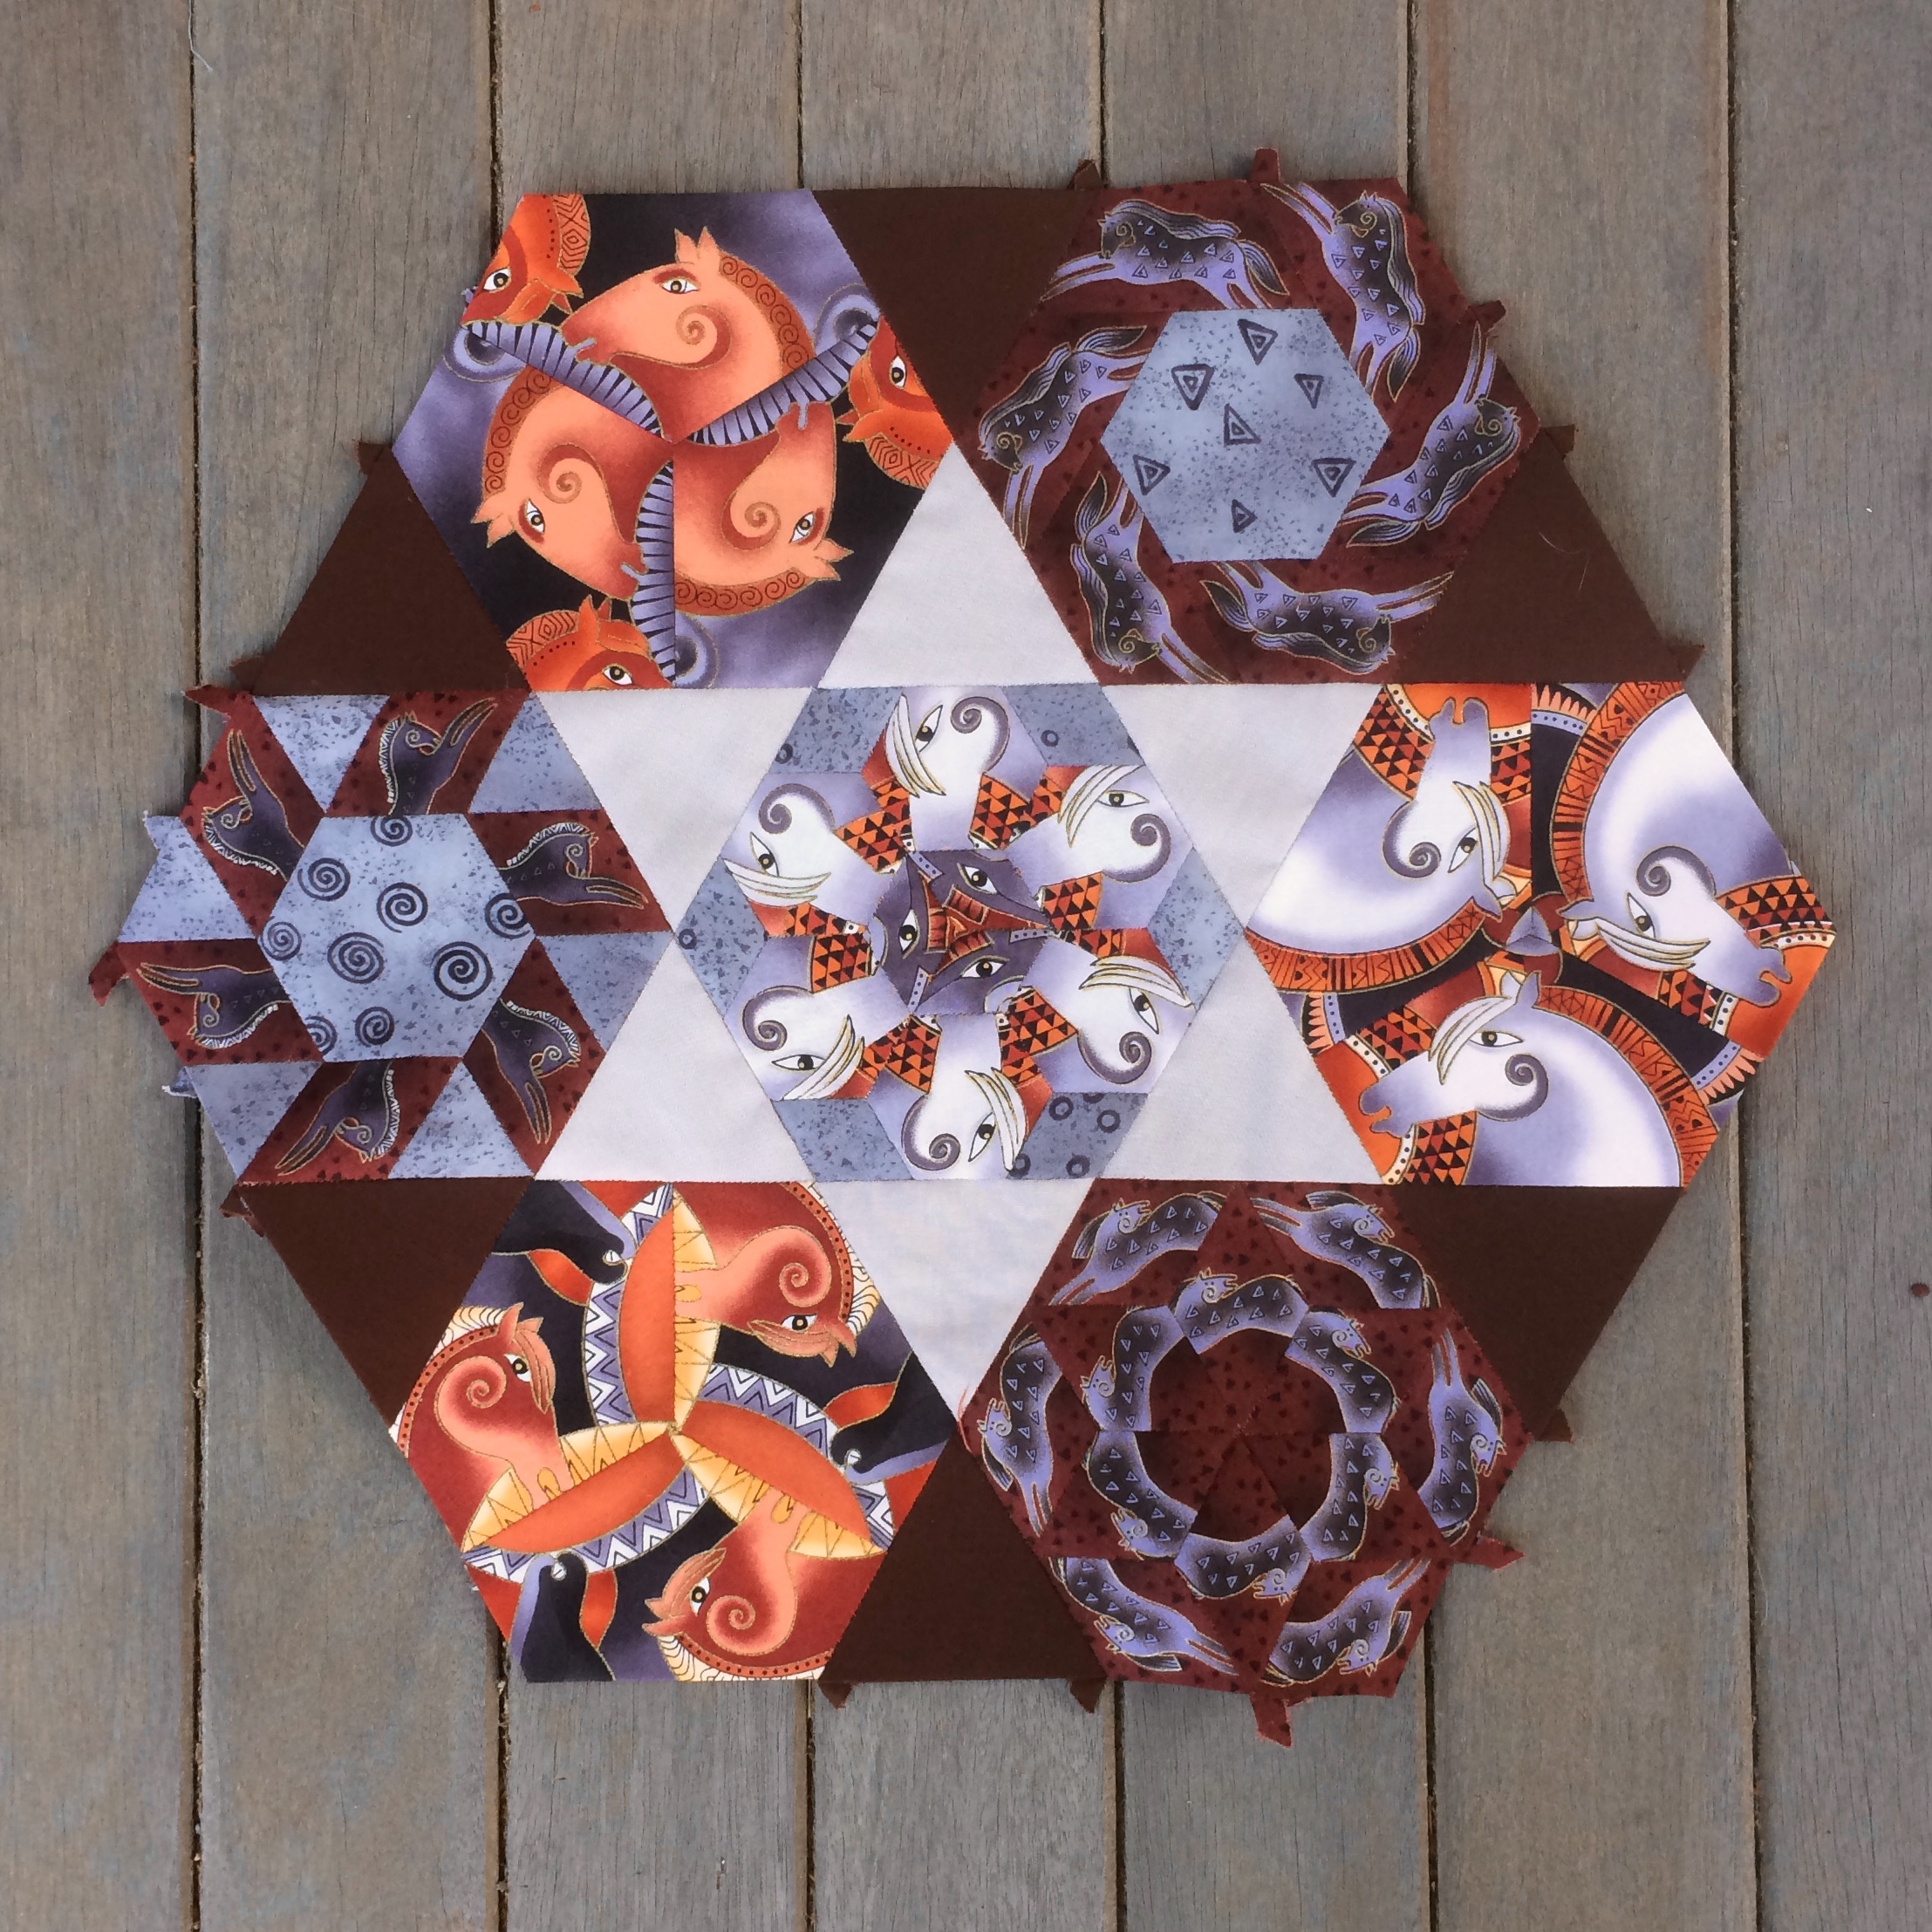
The Glorious Hexagons project is by its very nature an evolving work. I may still seek out and purchase more fabric as I continue. There was a time when I was loath to add any solids to the mix, but I changed my mind about that when I started to assemble large hexagons using triangle shapes. I found Kona Solids that worked well with my fabric, so anything is possible.

This post will be an attempt to express how much fabric I have remaining to date of the various fabrics that make up the Embracing Horses collection. When people ask me how much fabric I have bought I will be able to refer them here.

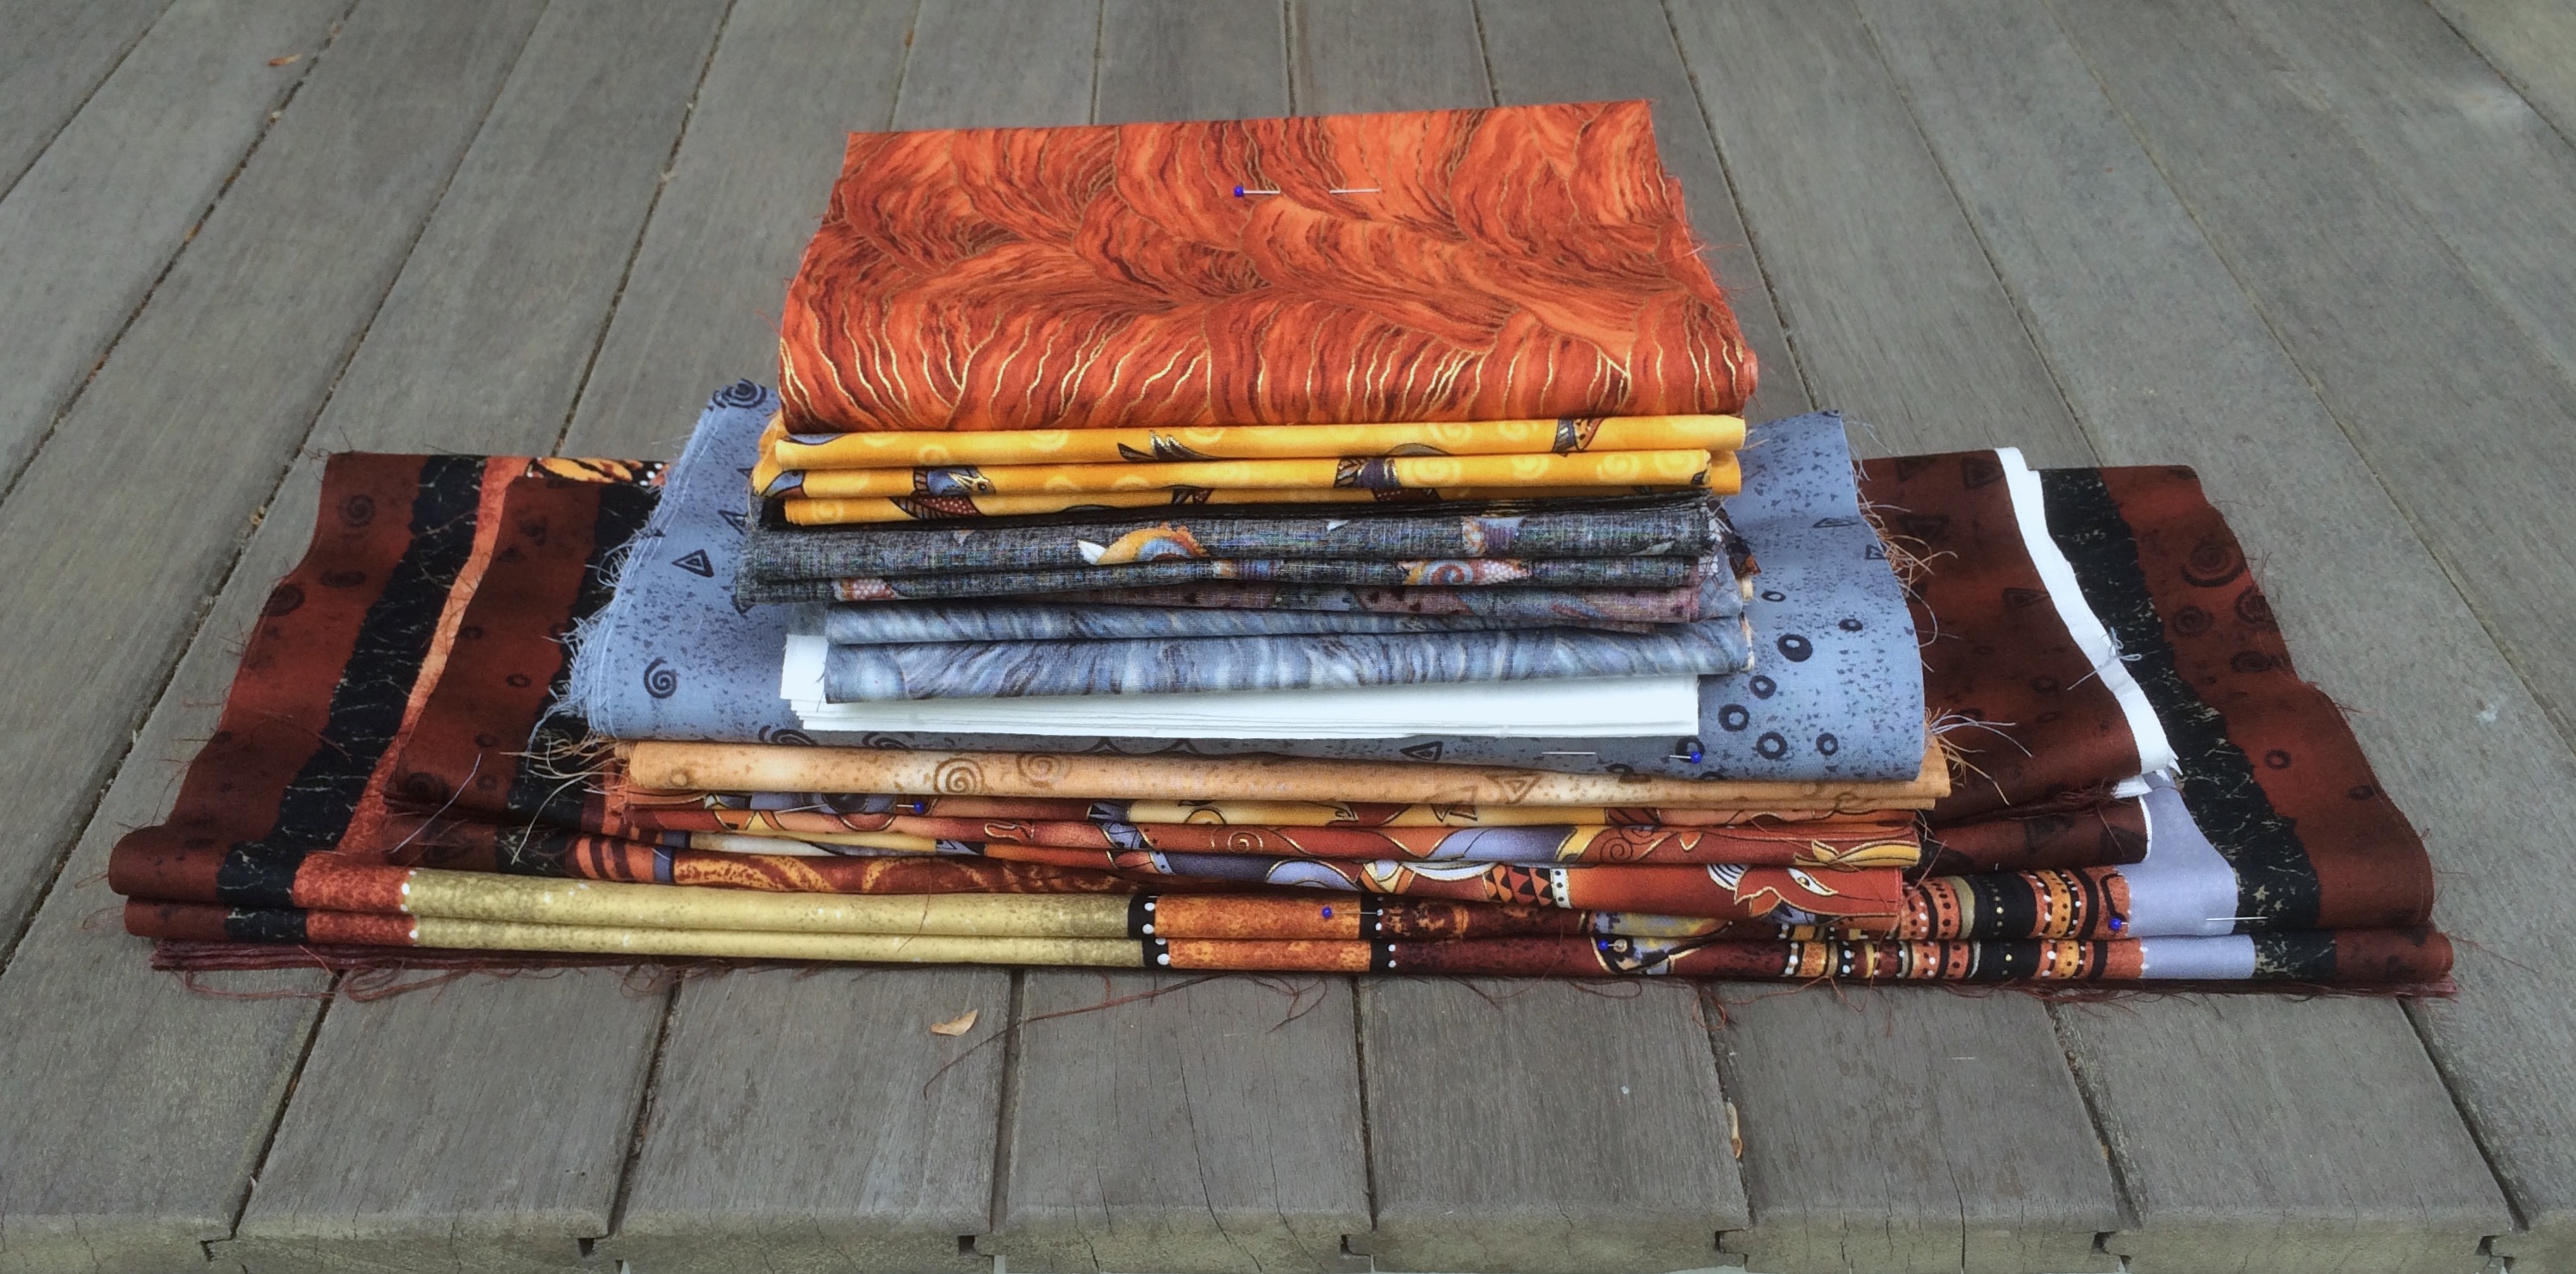
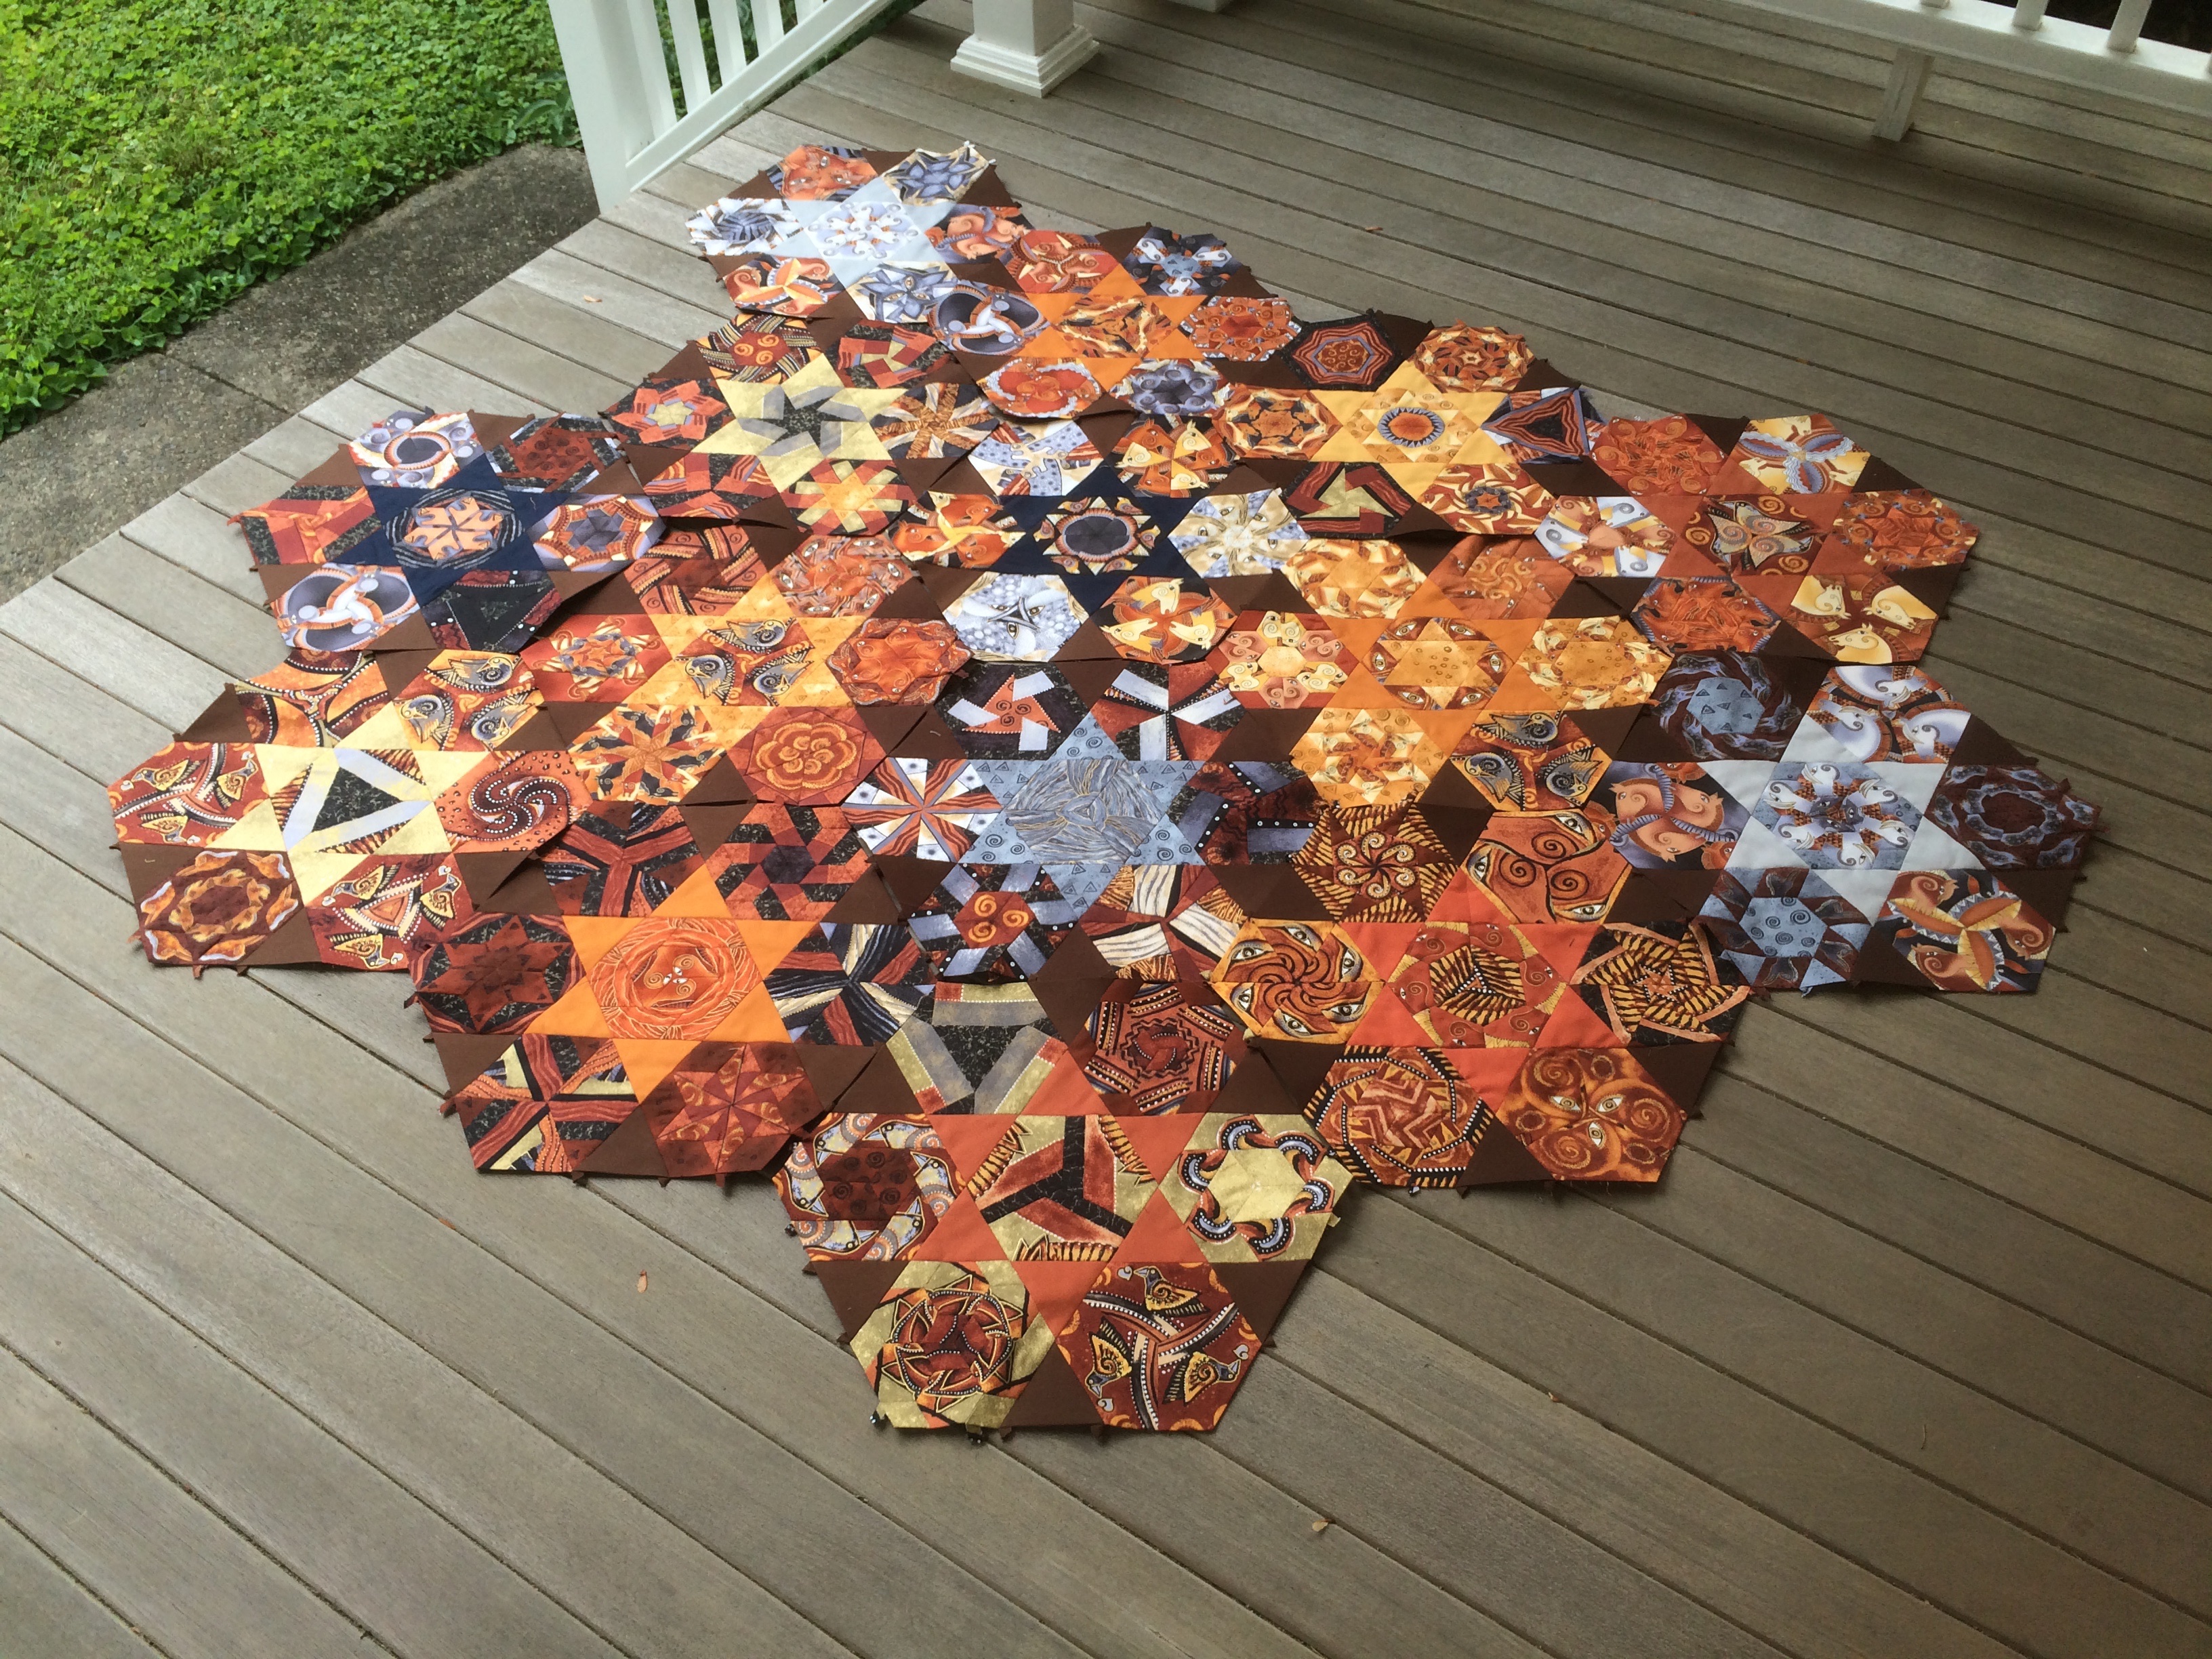
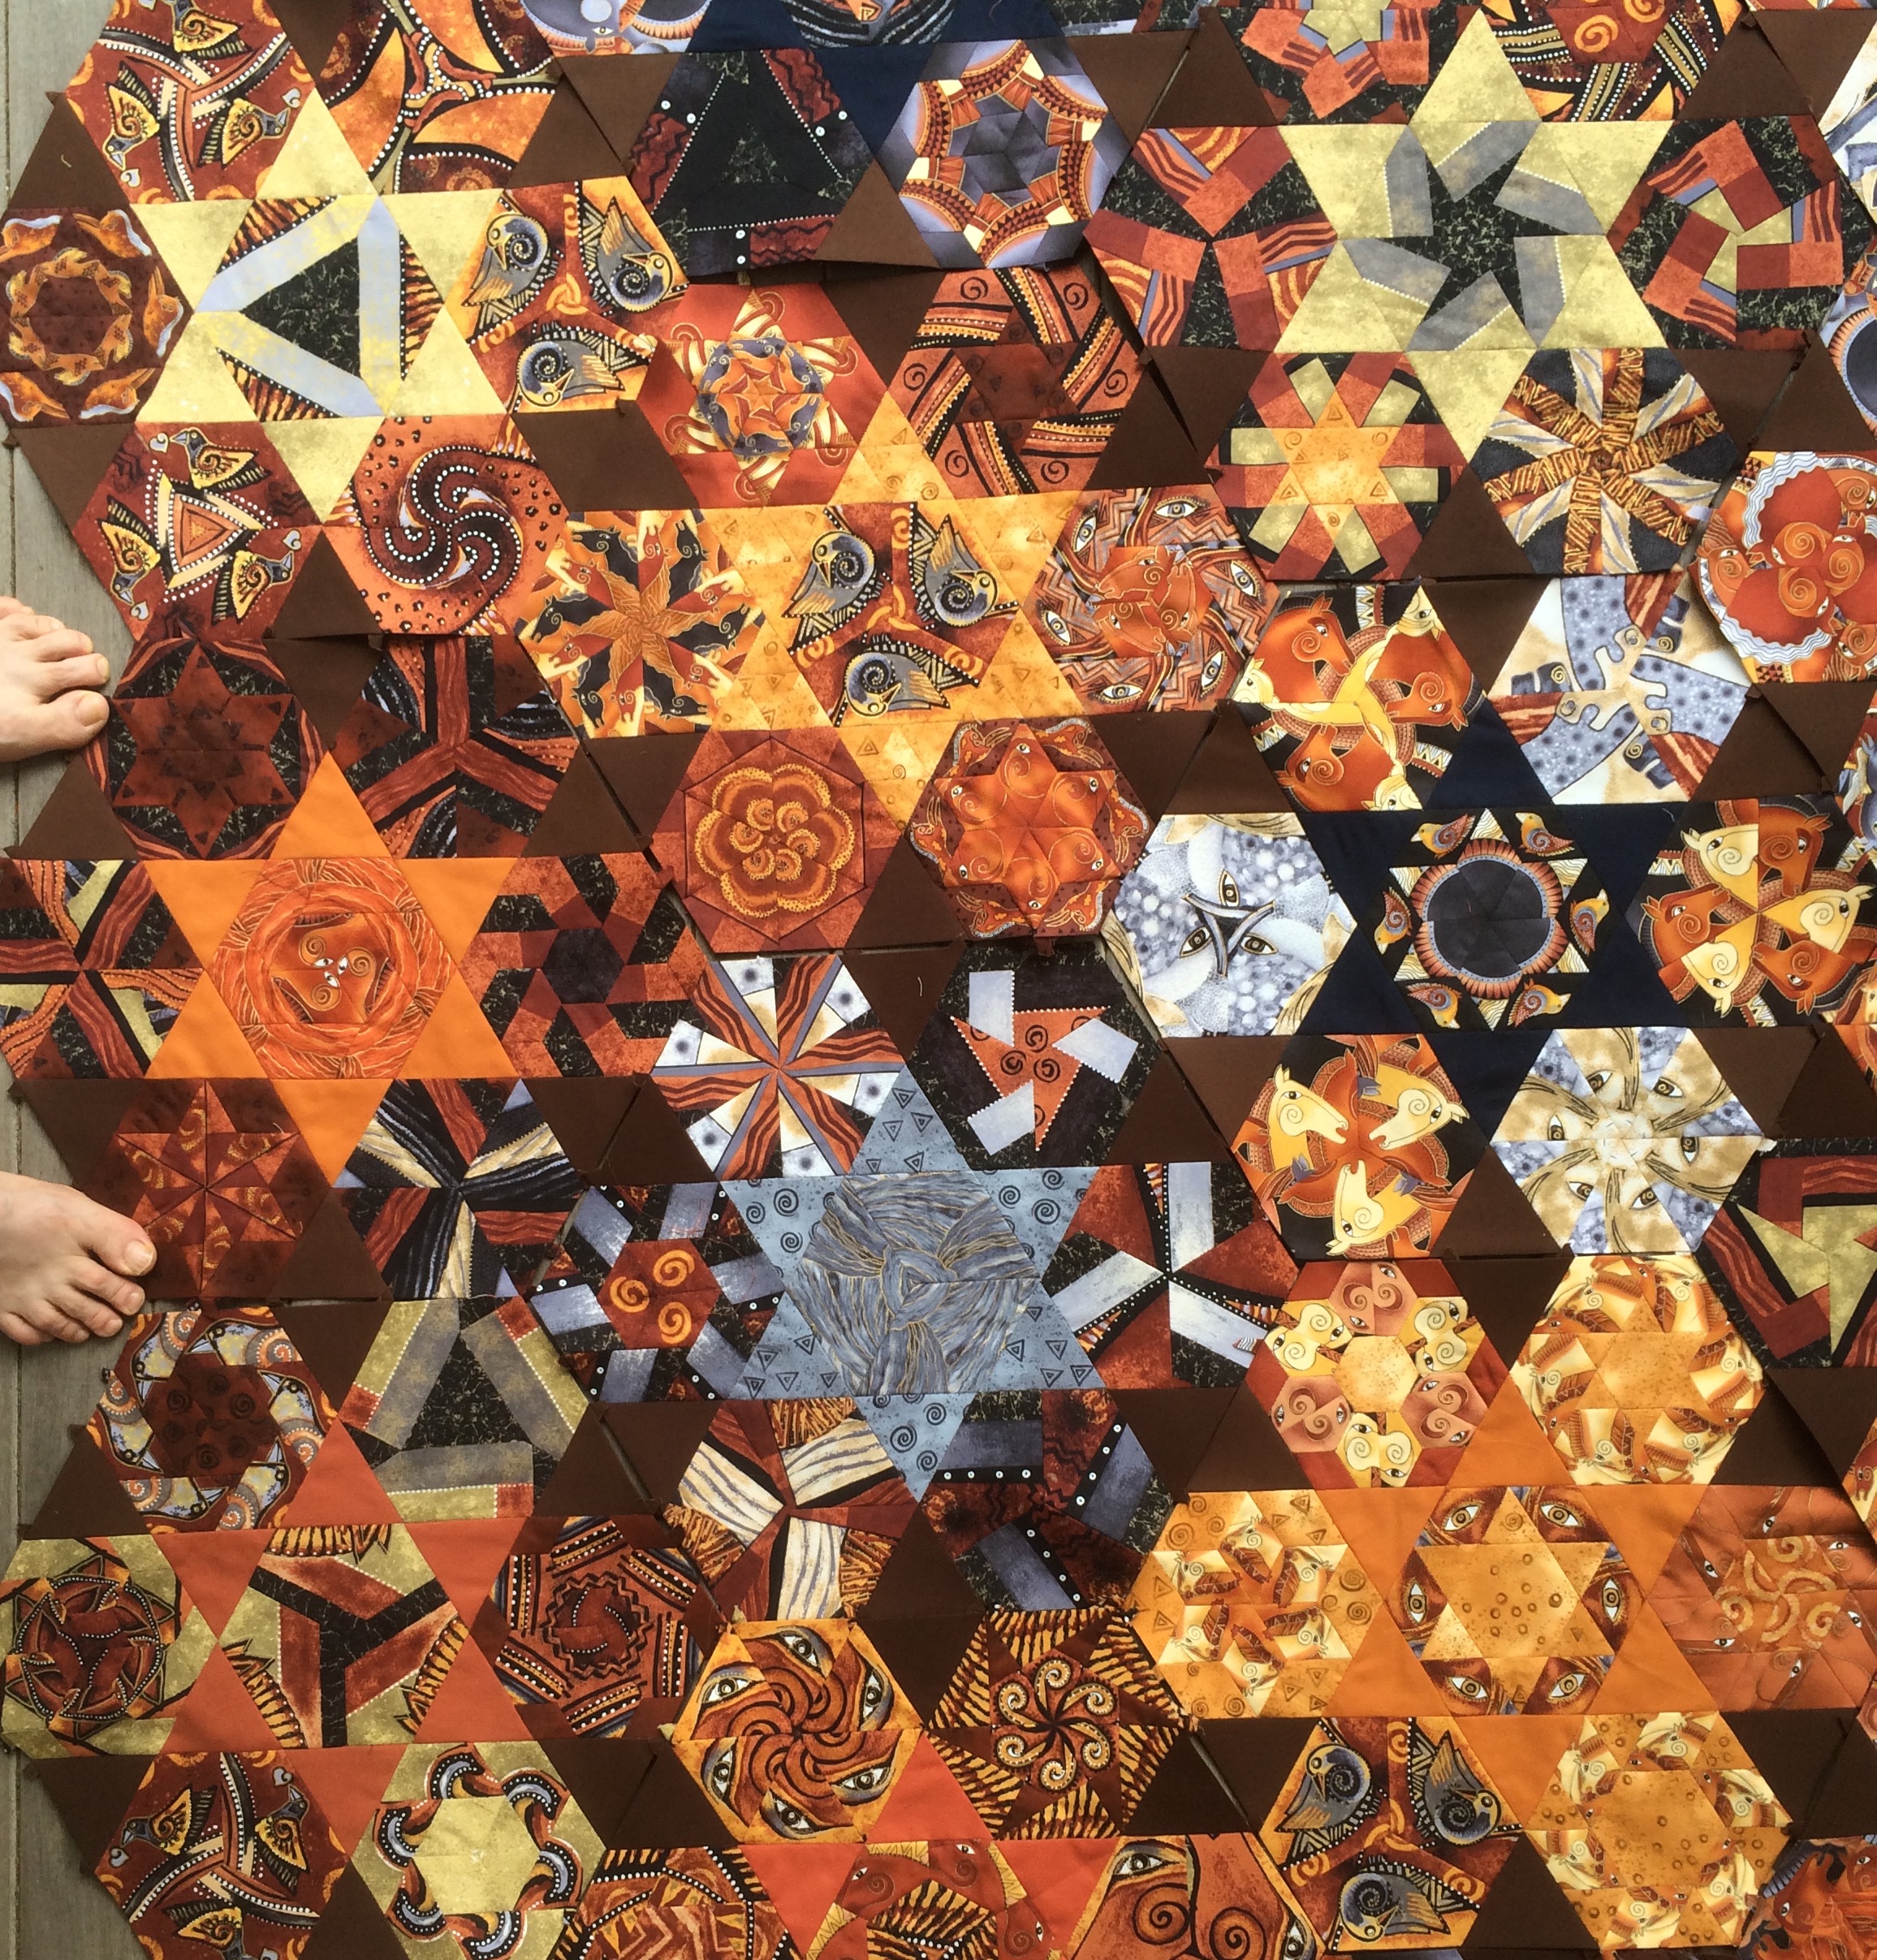
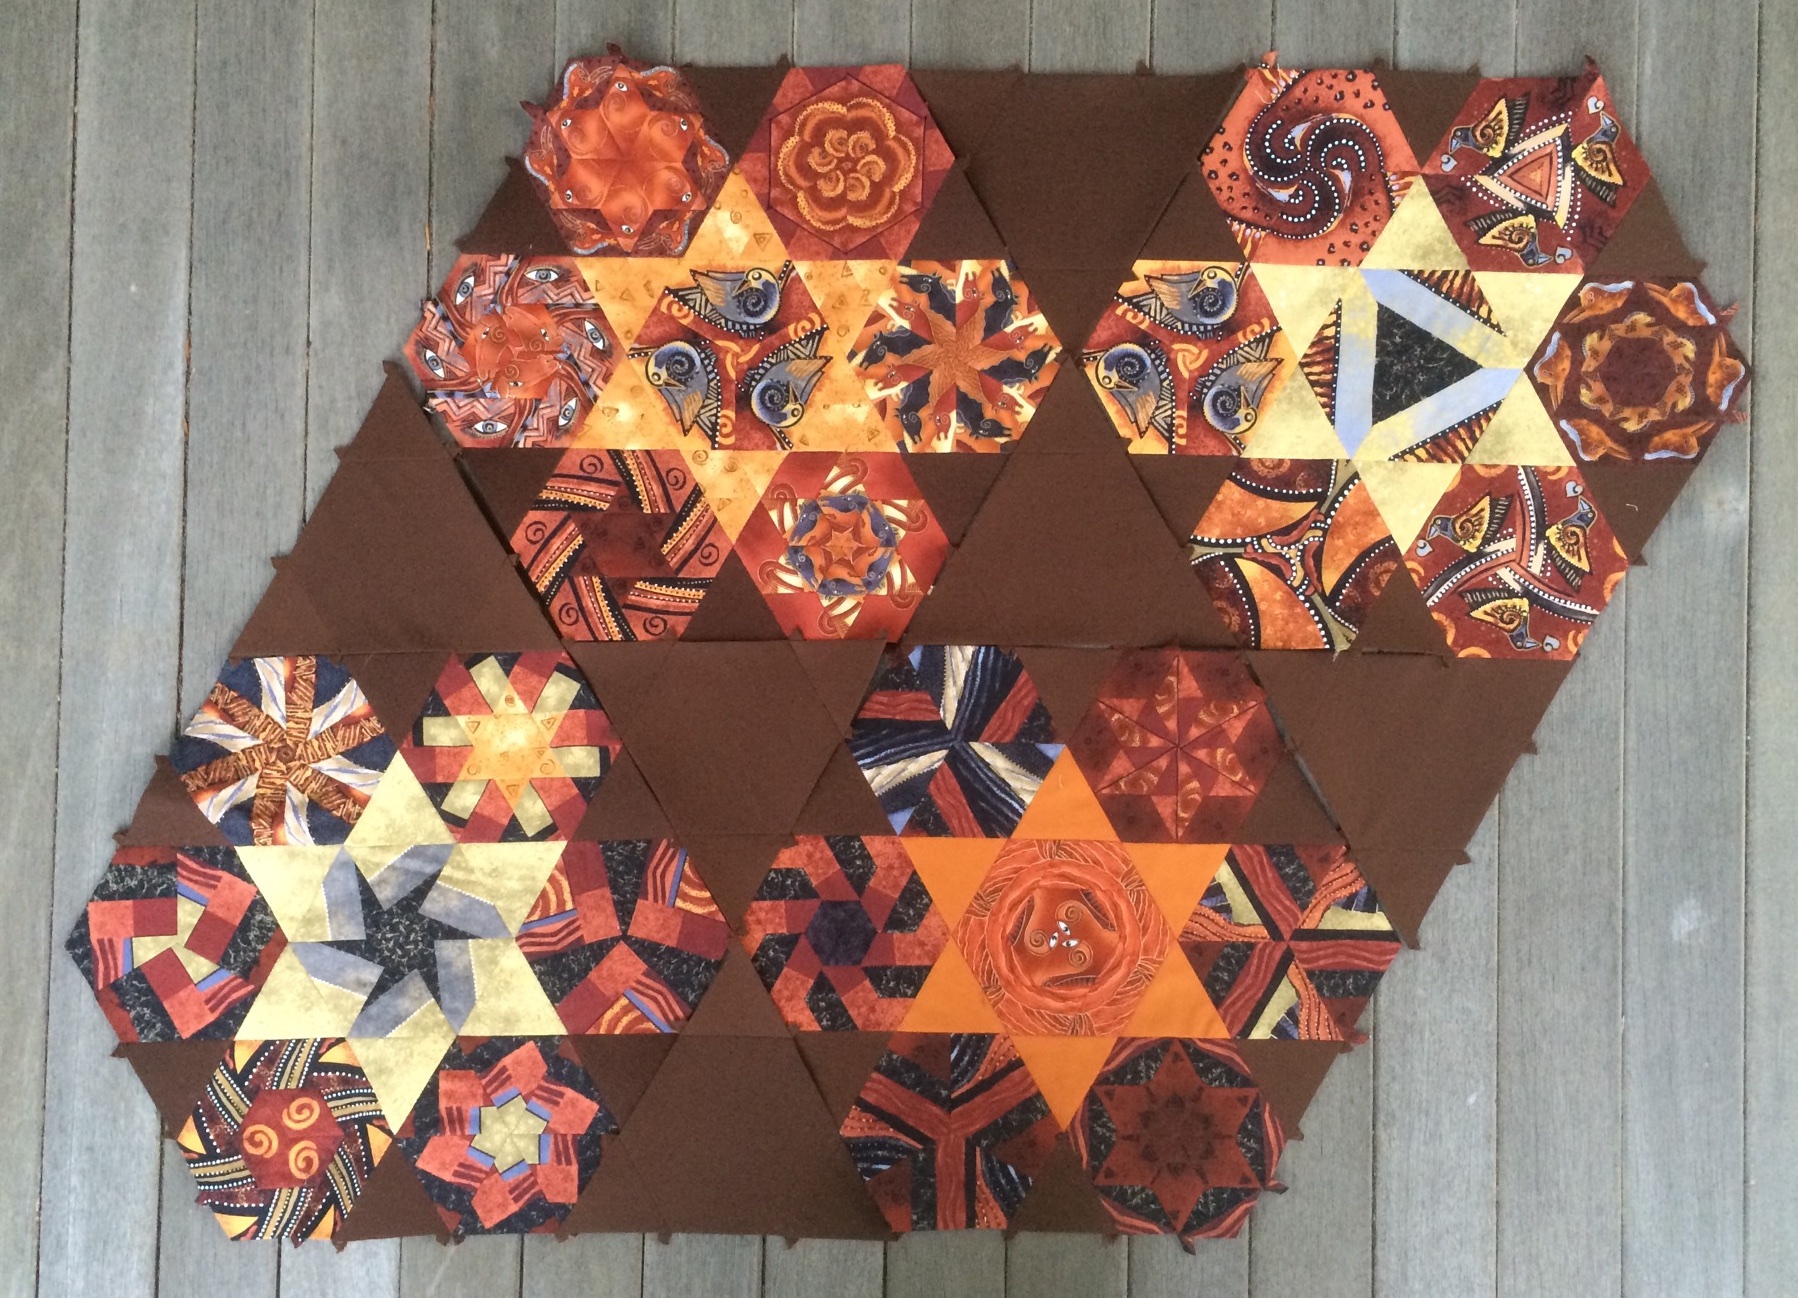
Let’s start out with the big reveal of the huge pile of layer stacks that I was able to create over the course of the past week. This pile is composed of layer stacks (using six layers) of every one of the ten fabrics in the Embracing Horses collection including the Panel Fabric, which I have divided into Section One and Section Two segments.

Above I show 20 yards of fabric cut from ten different patterns and pinned into stacks with widths of 8 inches, 12 inches, and 24 inches.

I will show the various stacks below so you can see the individual patterns clearly.

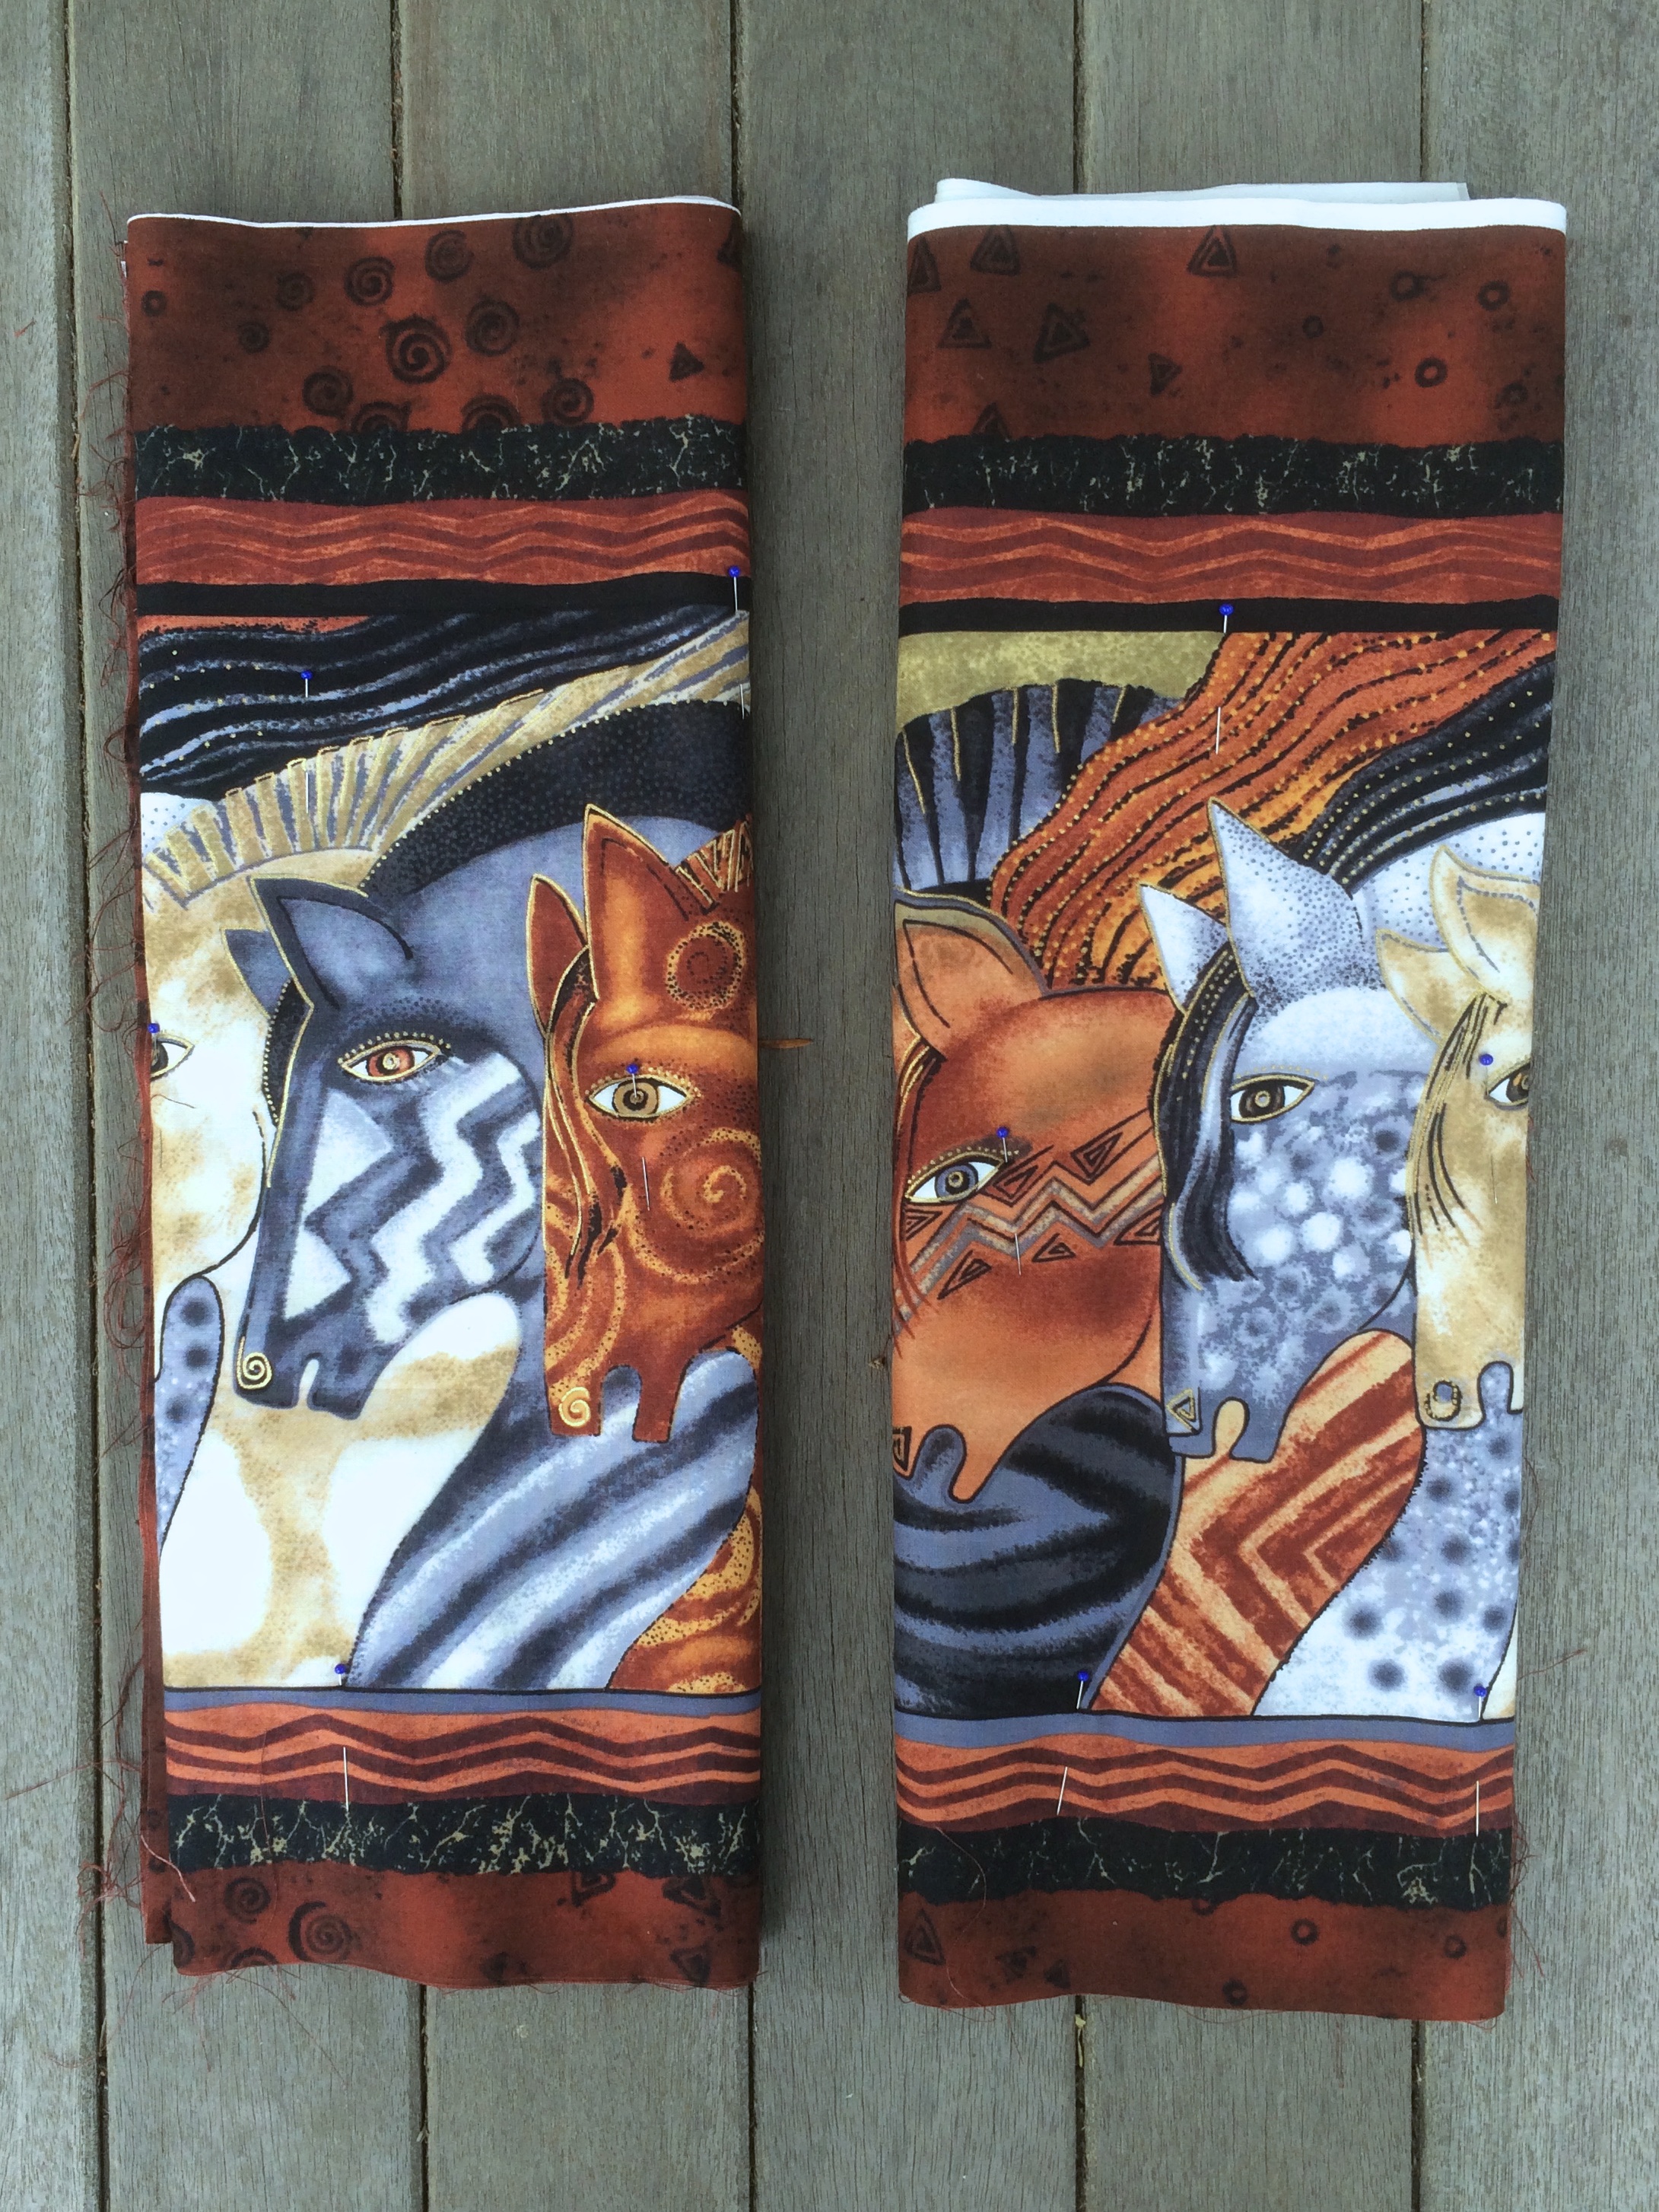
I made two stacks of Section One of the Panel Fabric.

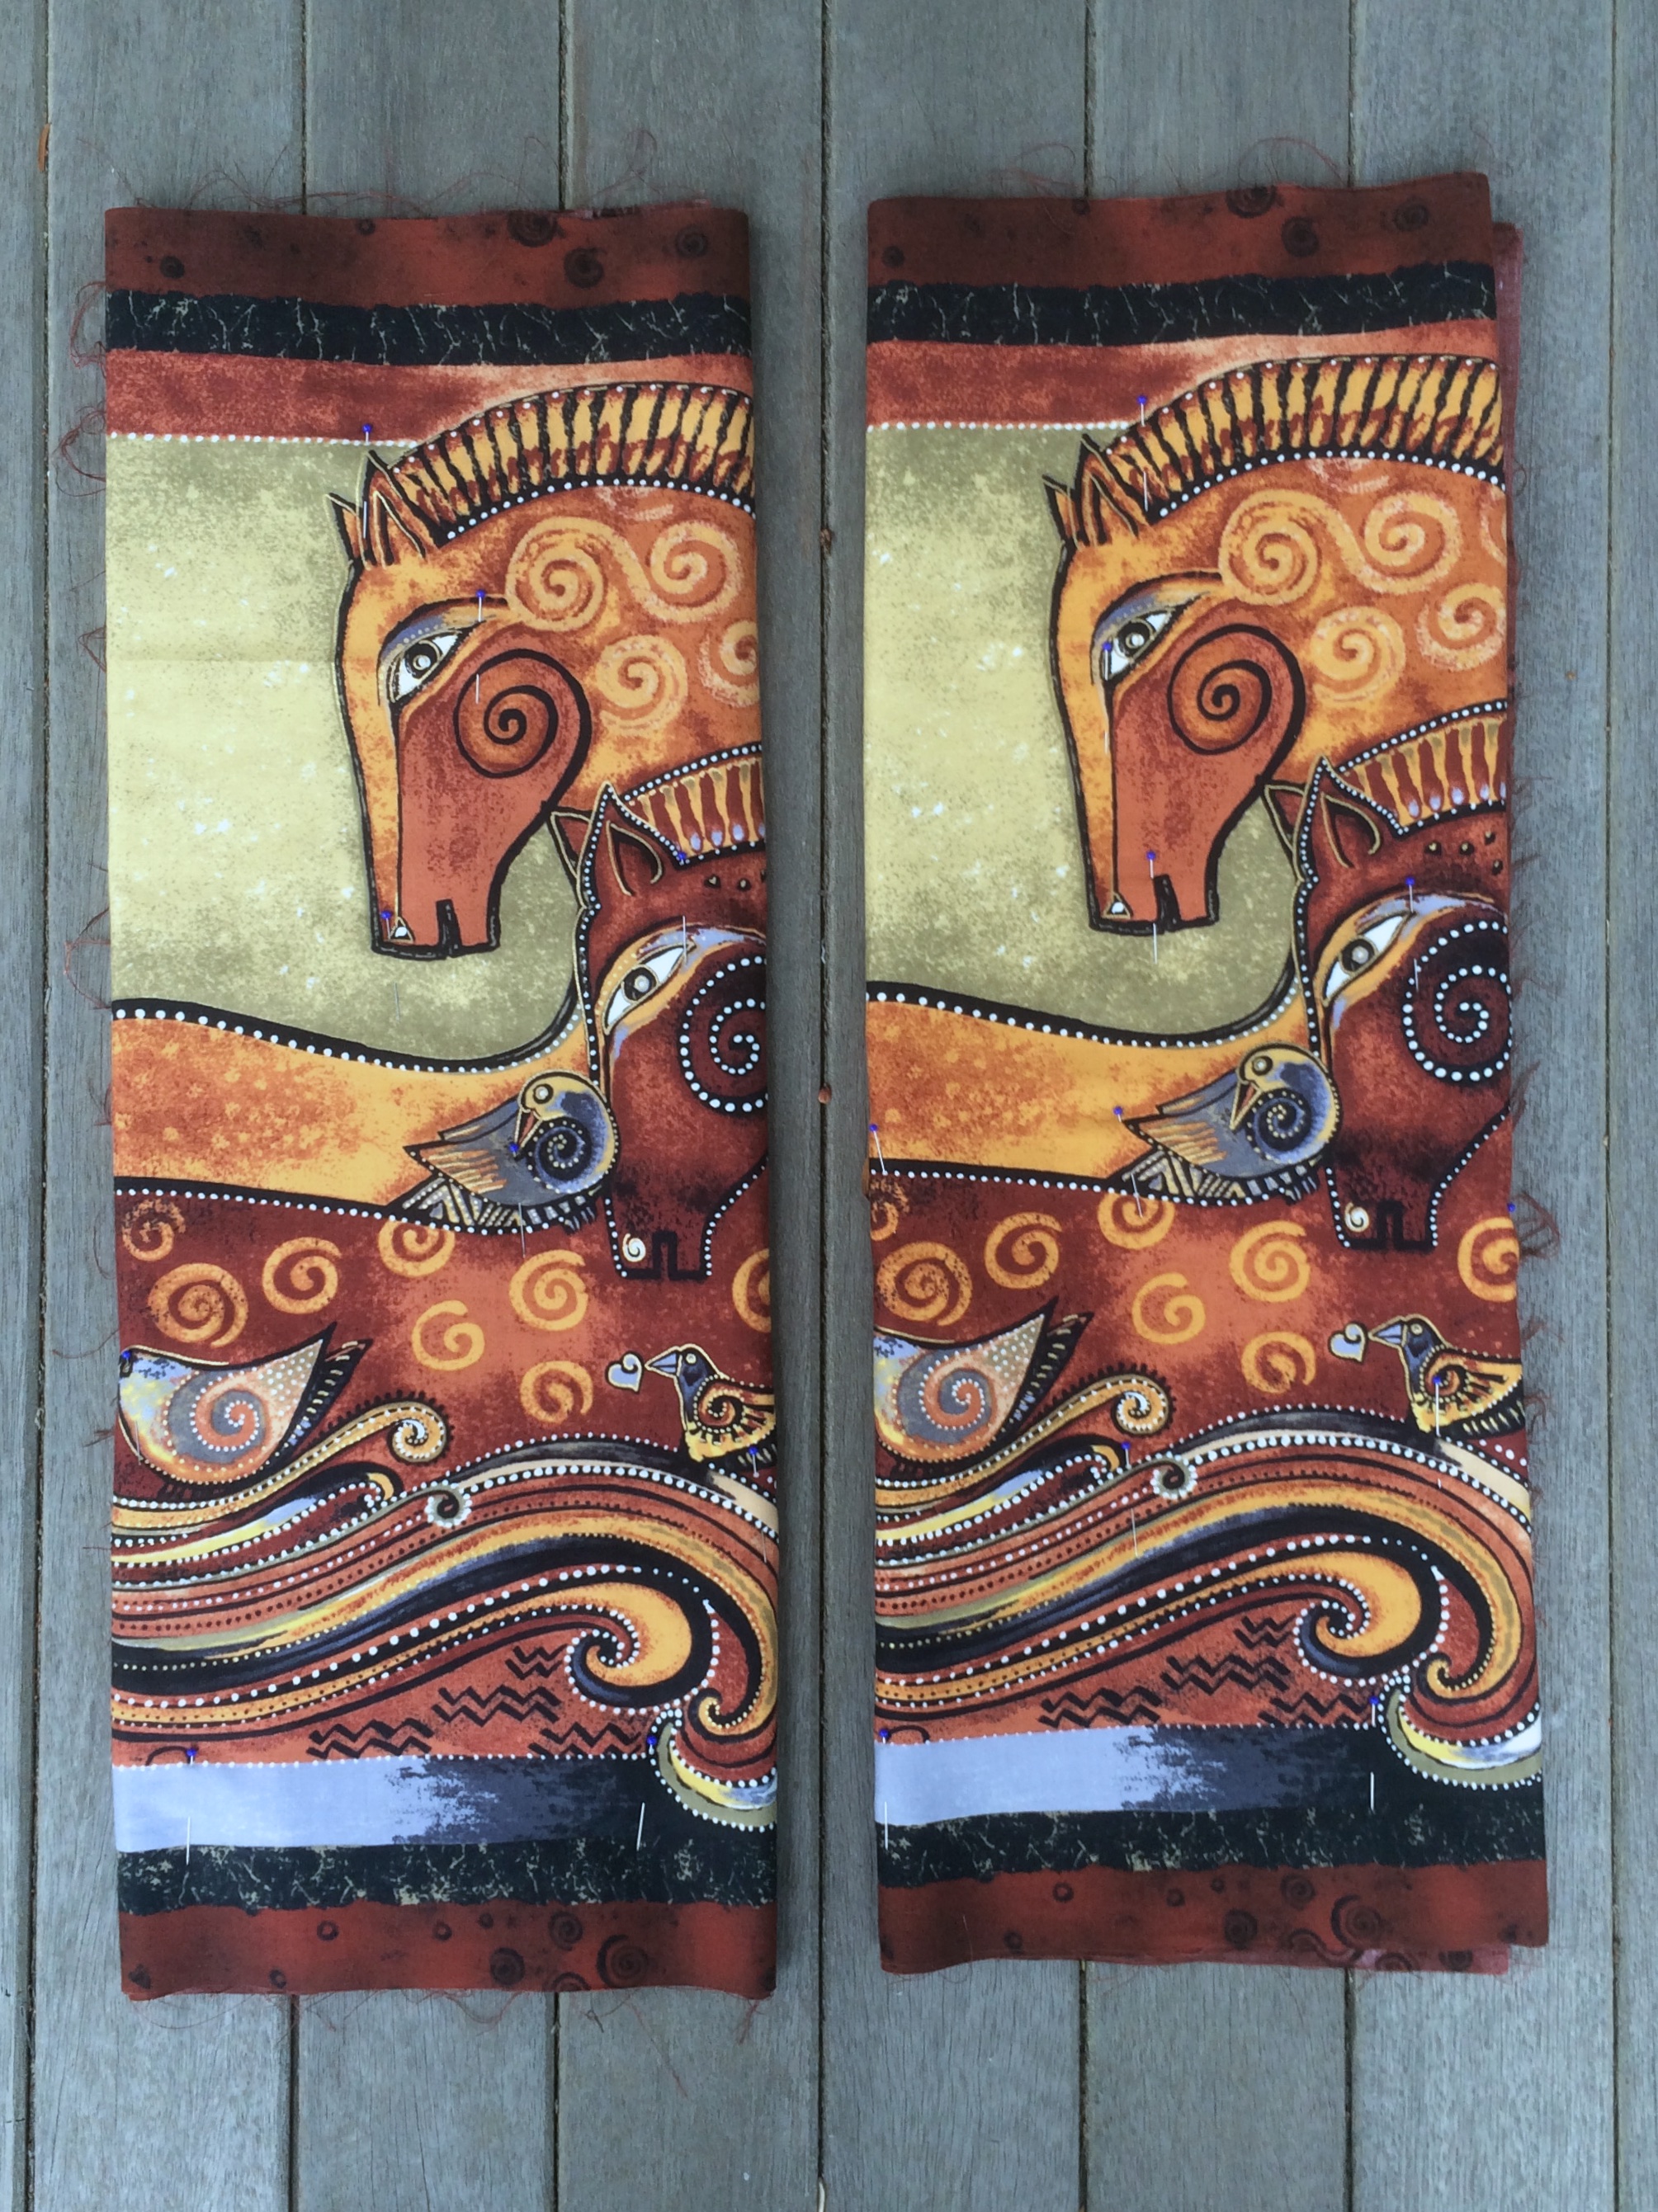
I made two stacks of Section Two of the Panel Fabric.

The four stacks from the Panel Fabric, being approximately 24 inches wide, represent eight yards of fabric. They are pictured folded for storage so they do not show off the full pattern of the fabric. I will show them unfolded below.

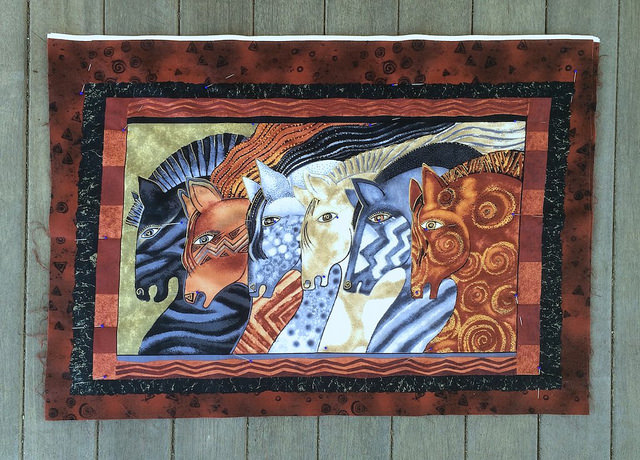
I wasn’t sure at first if I would enjoy working with these panels. But after I started to cut into them to make Kim blocks I really fell in love with this fabric. It is my favorite fabric in the collection. I still have twelve more yards of this fabric in the form of 18 panels. In addition to the panels shown above there is a small strip at the bottom of each panel with gold lettering. I have not yet decided how I will make use of those. I have used some of that fabric so far to cut brown tone on tone pieces from the background.

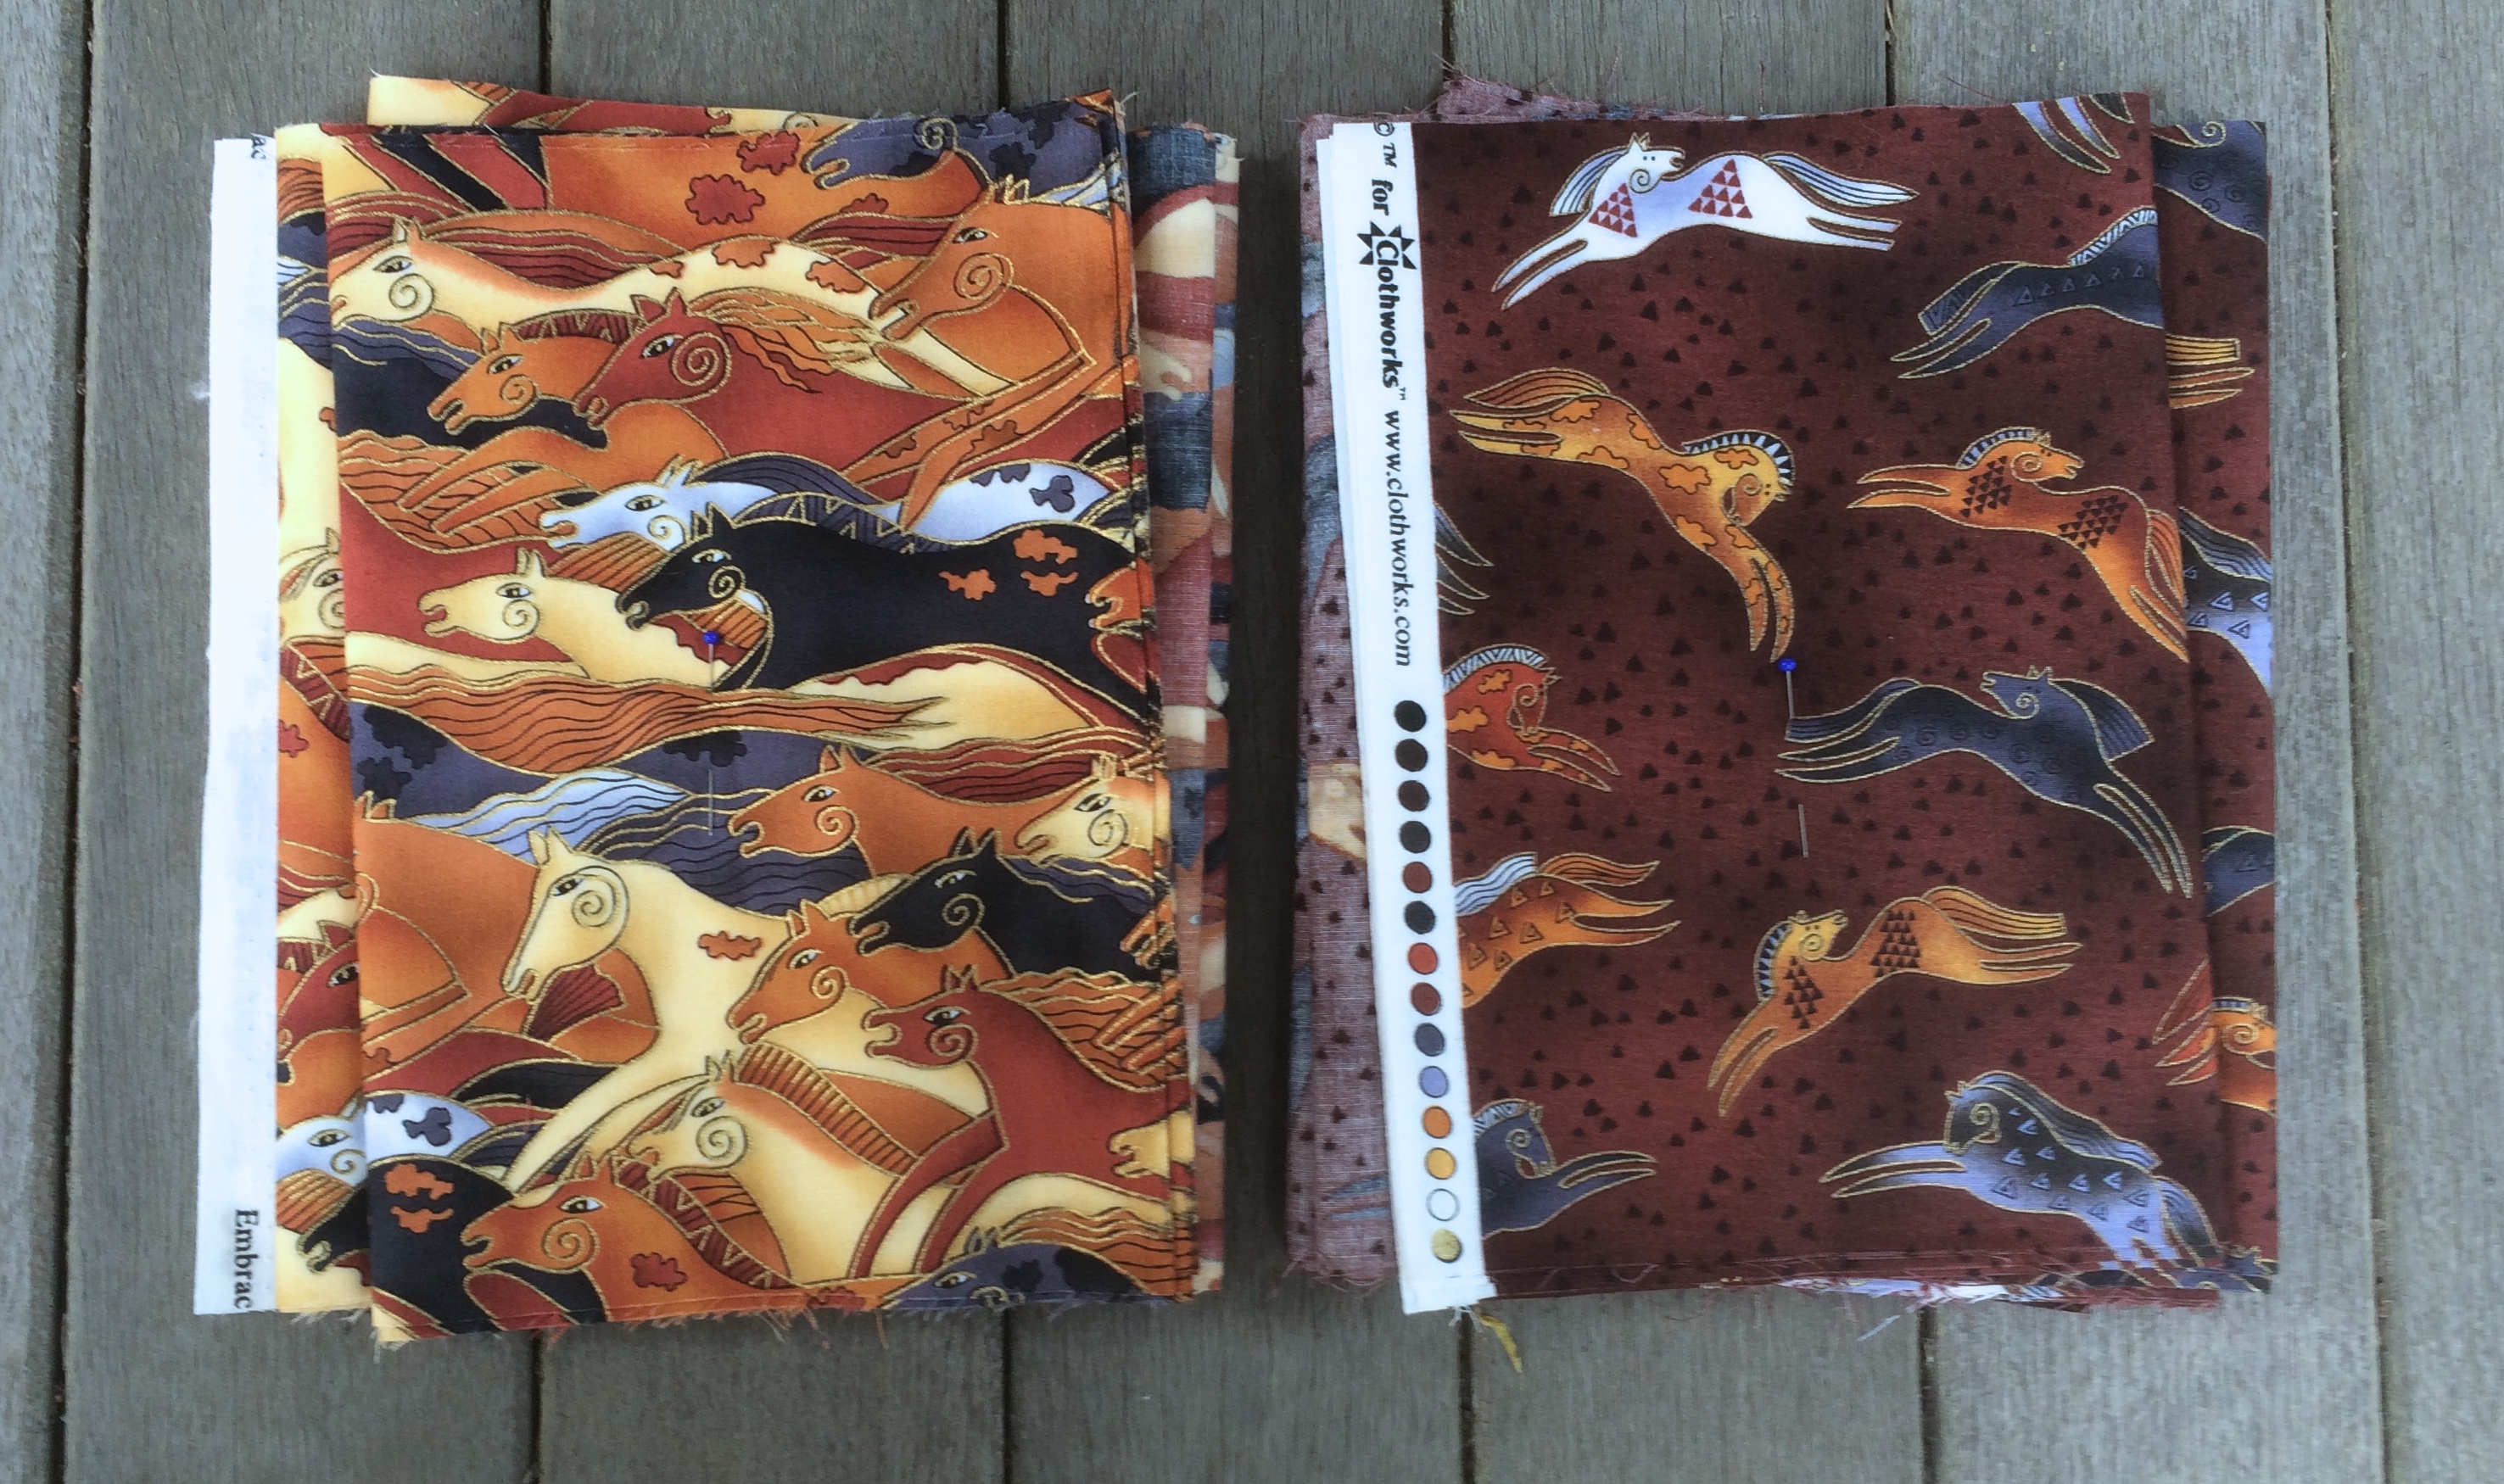
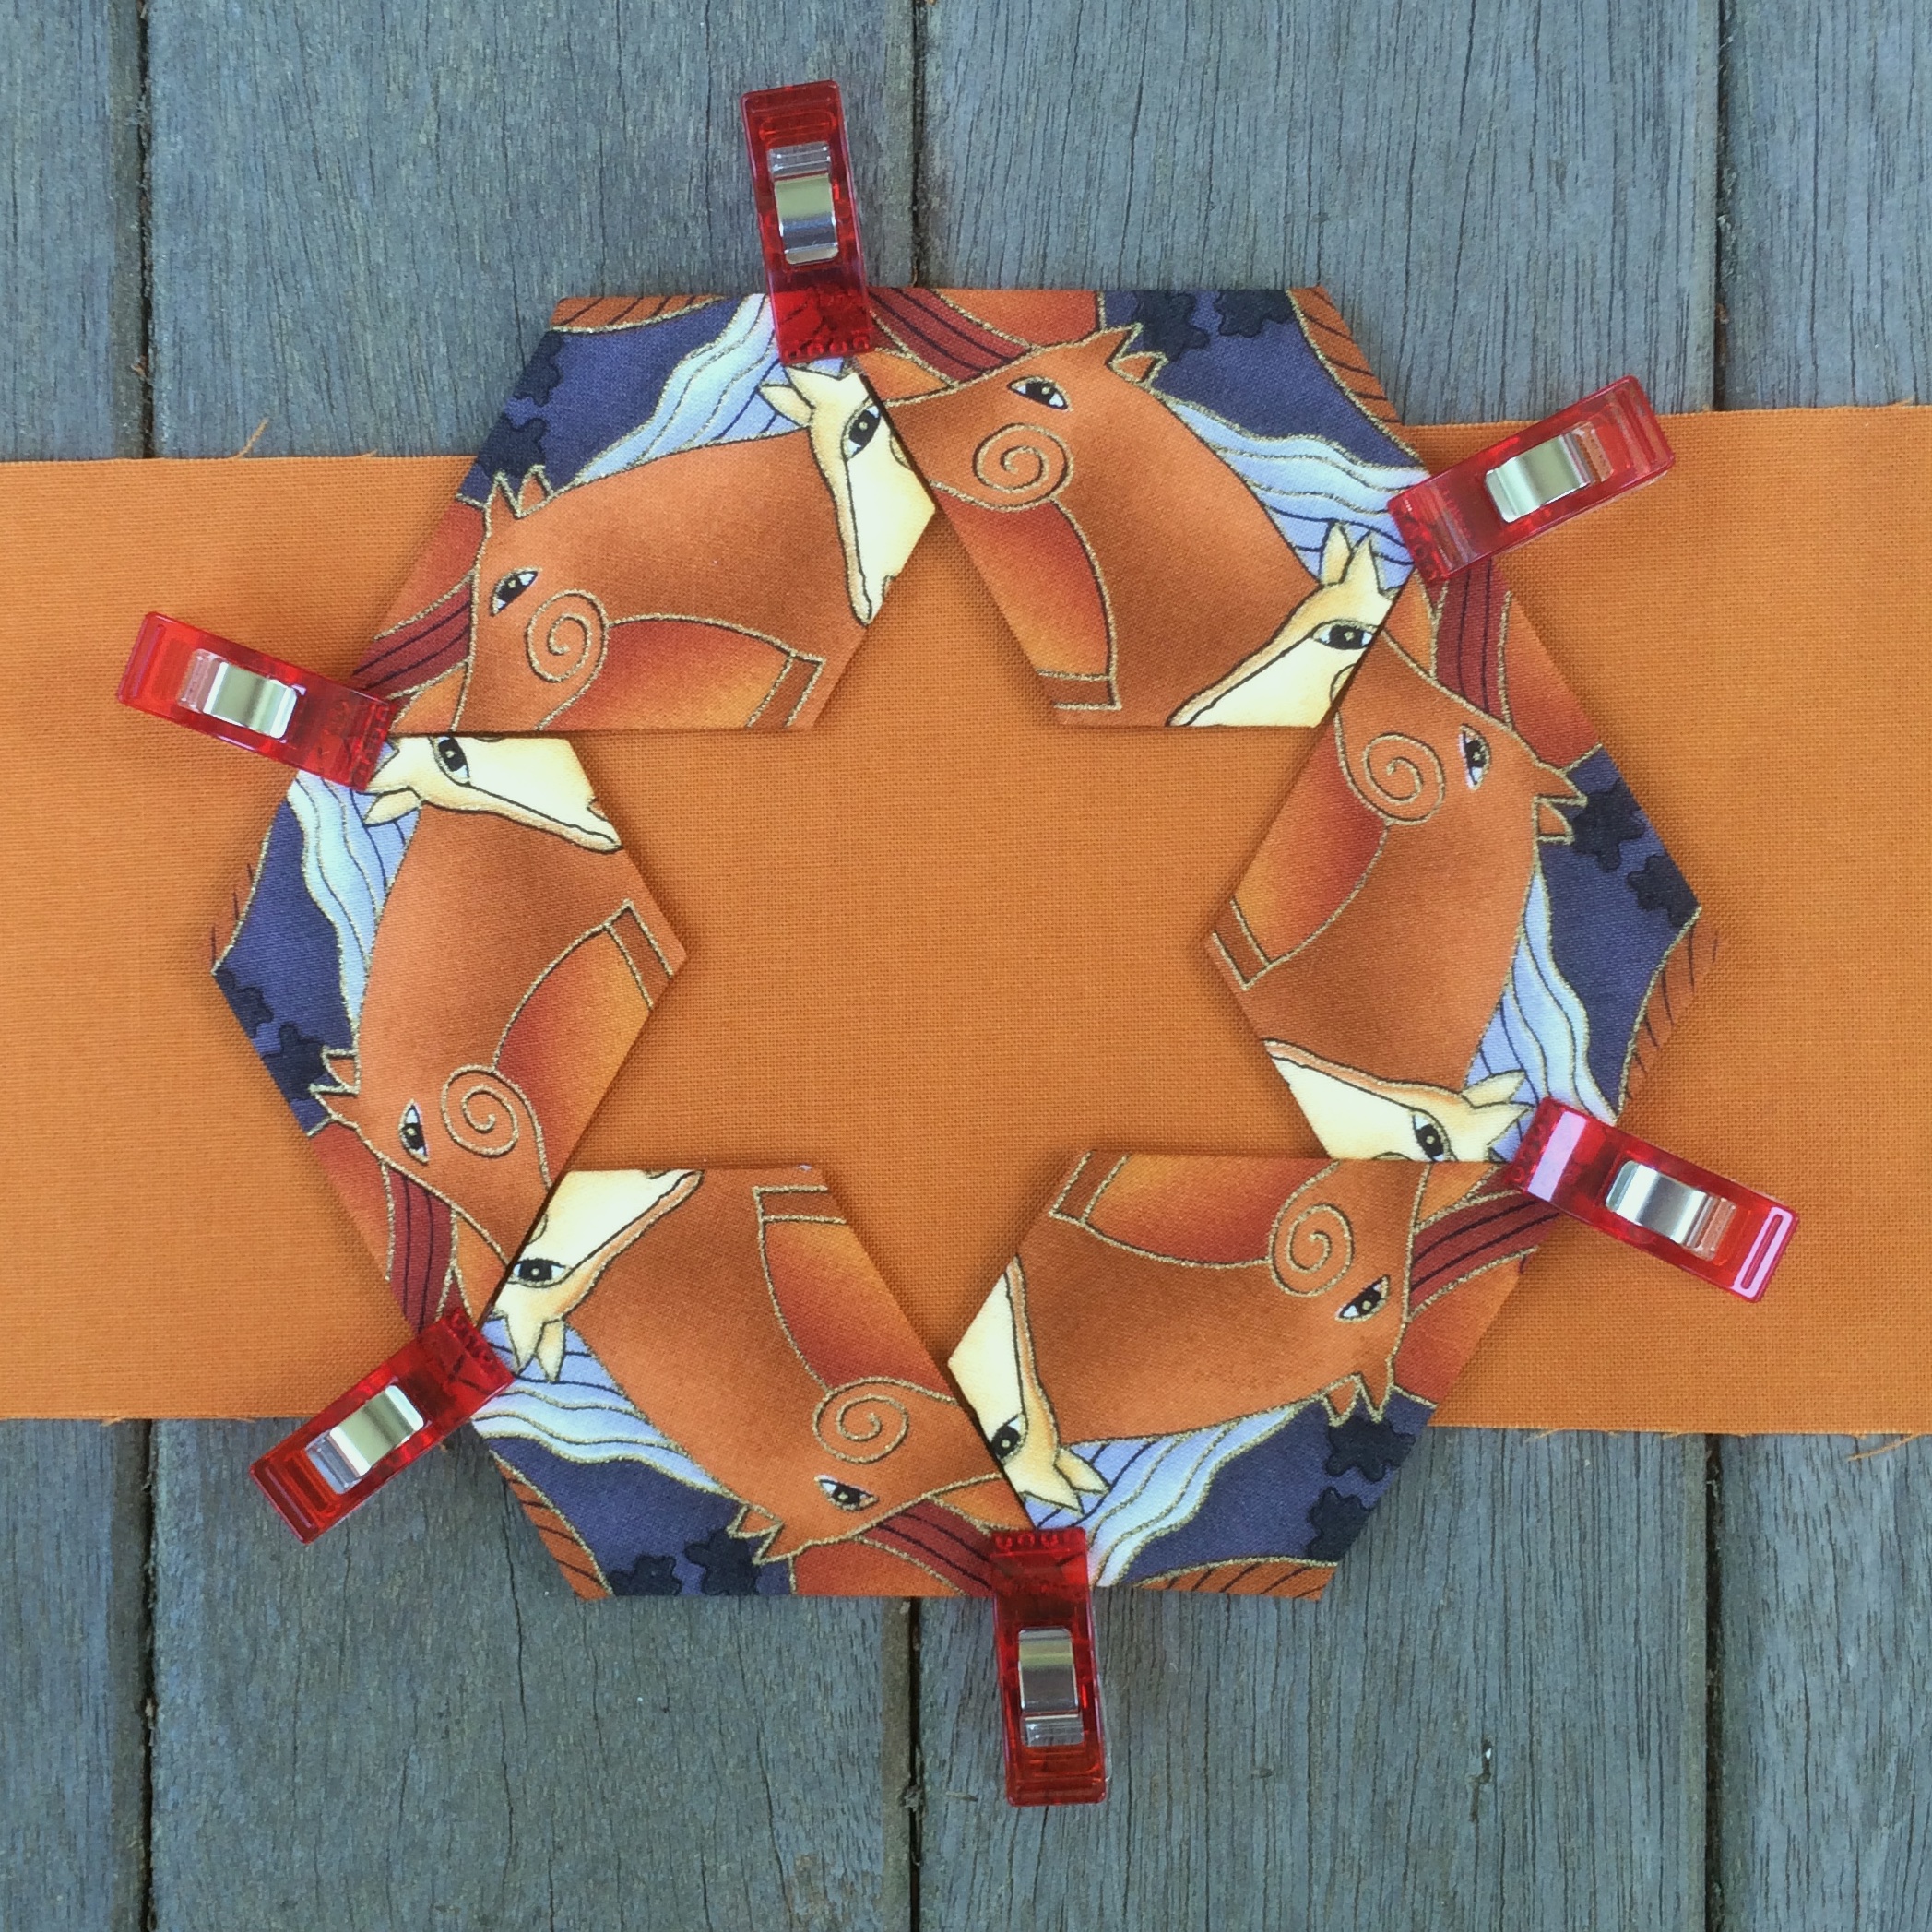
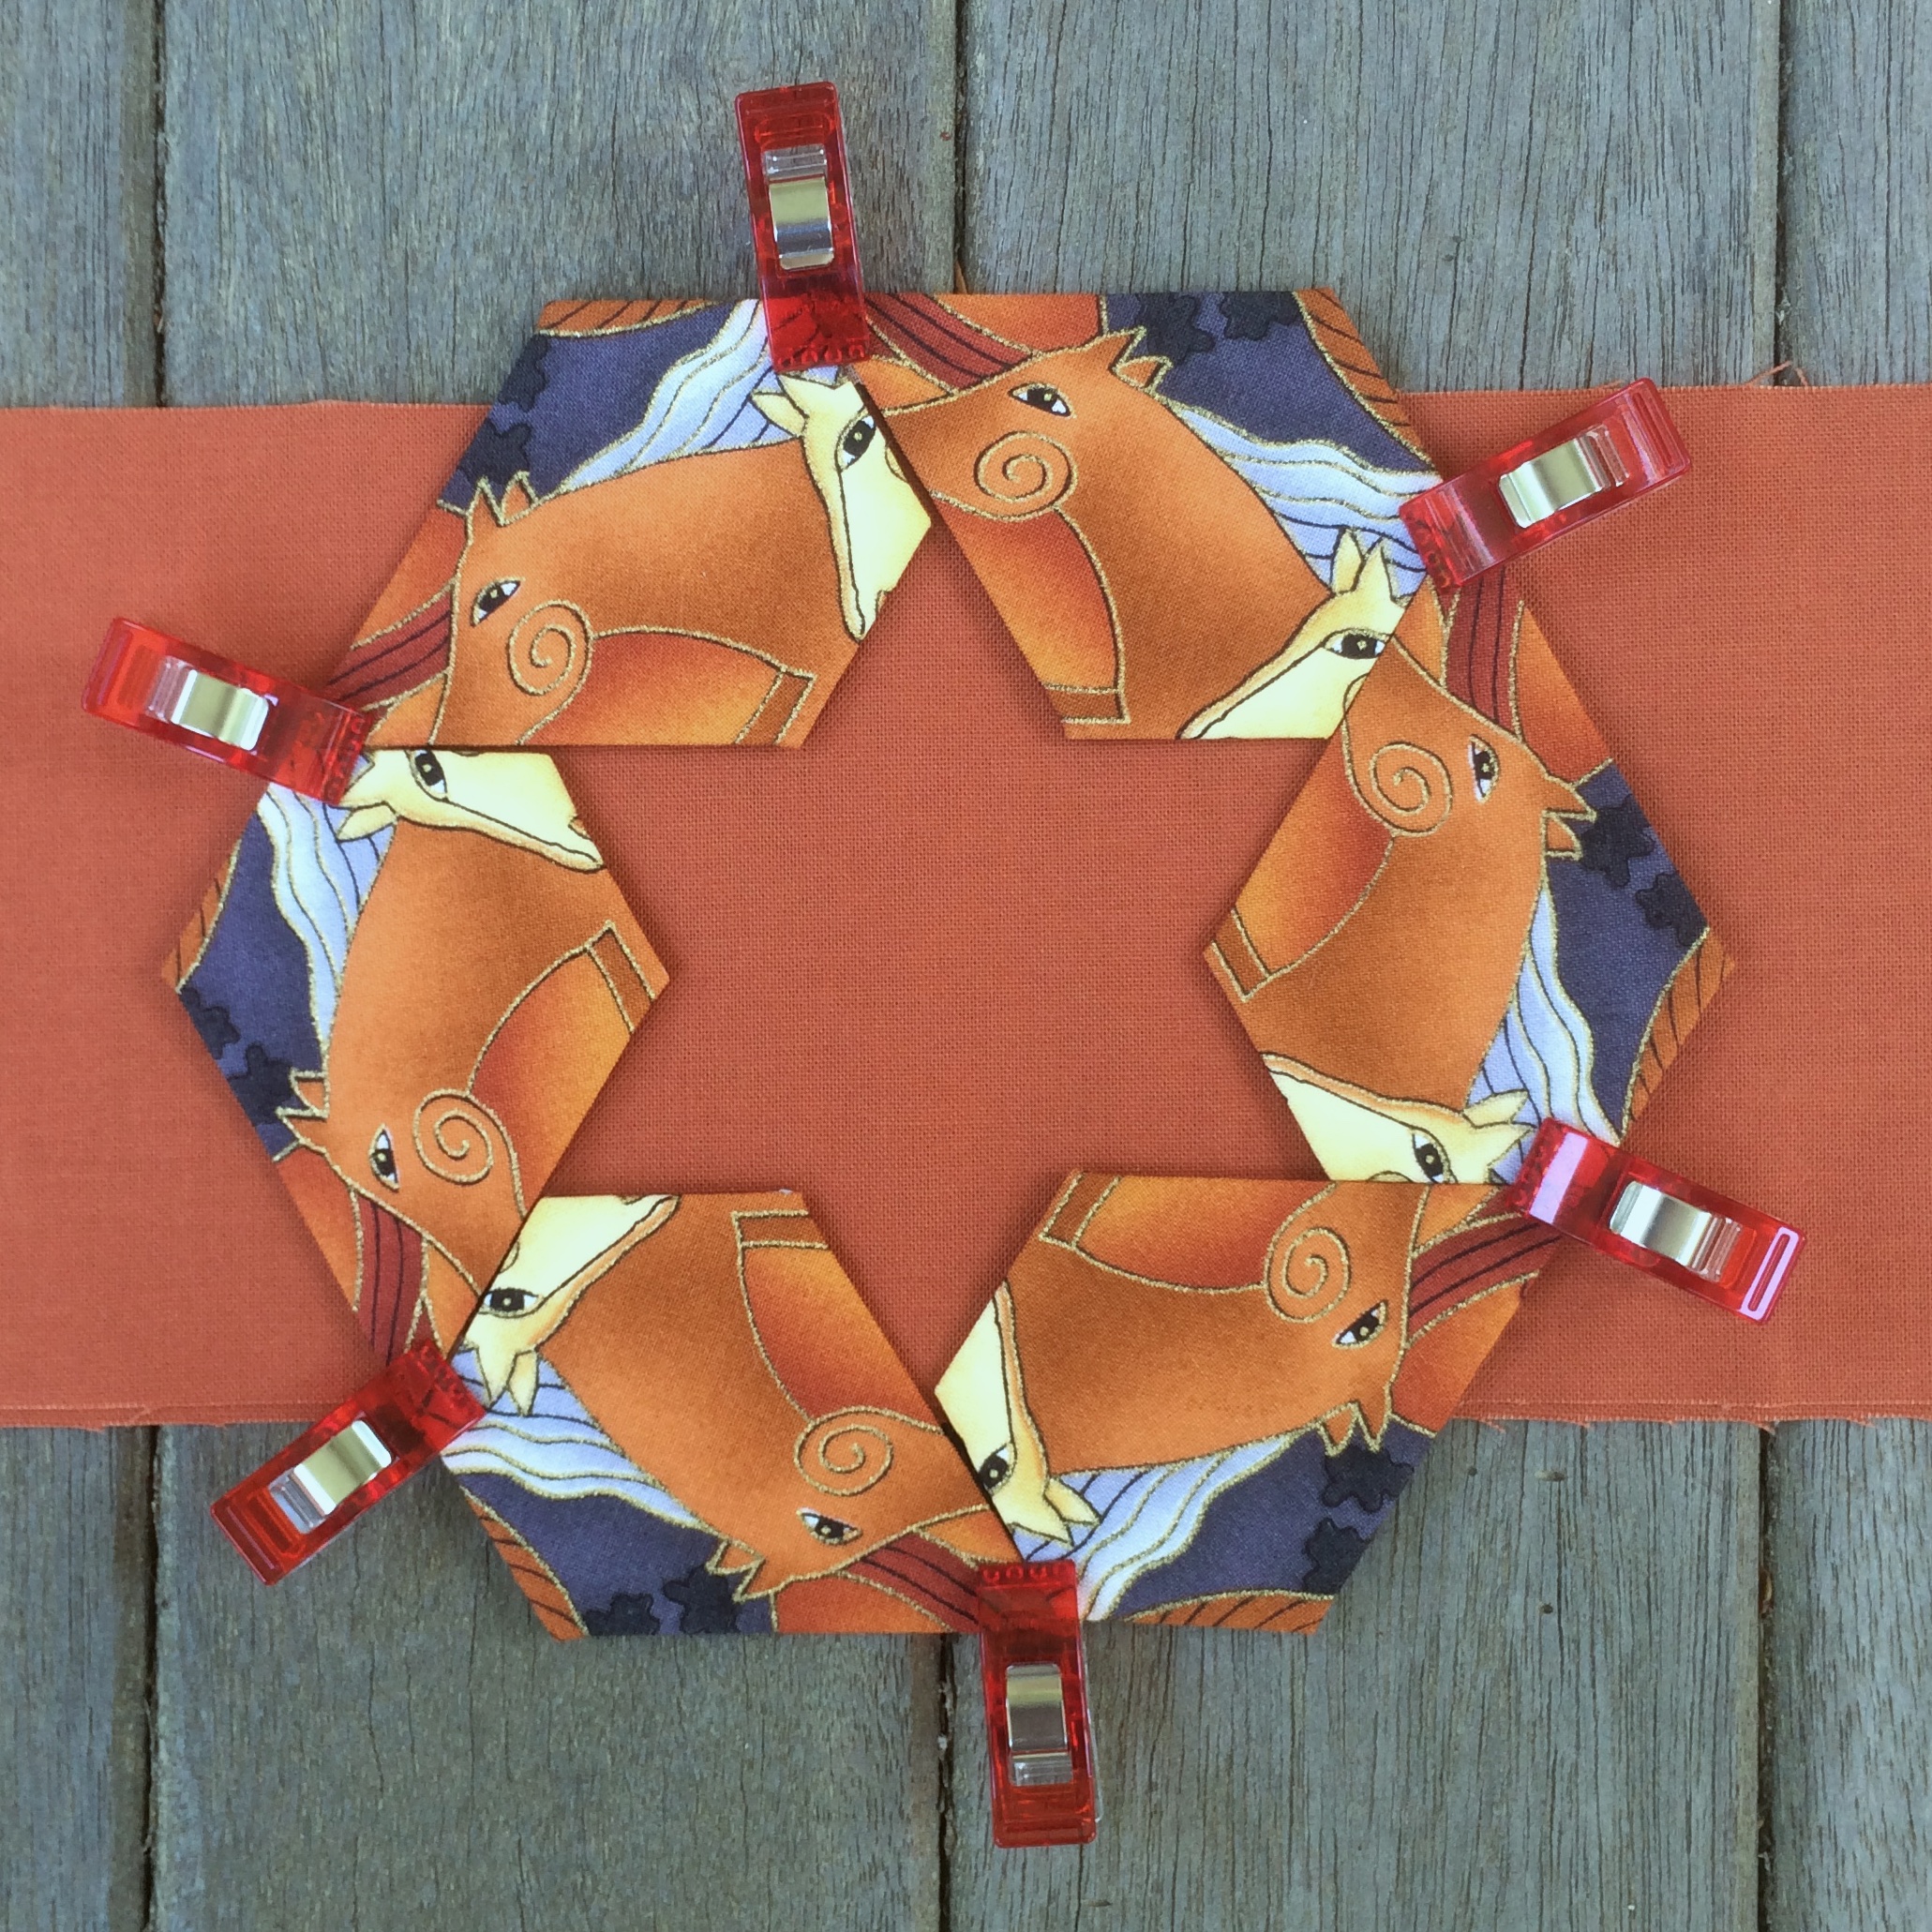
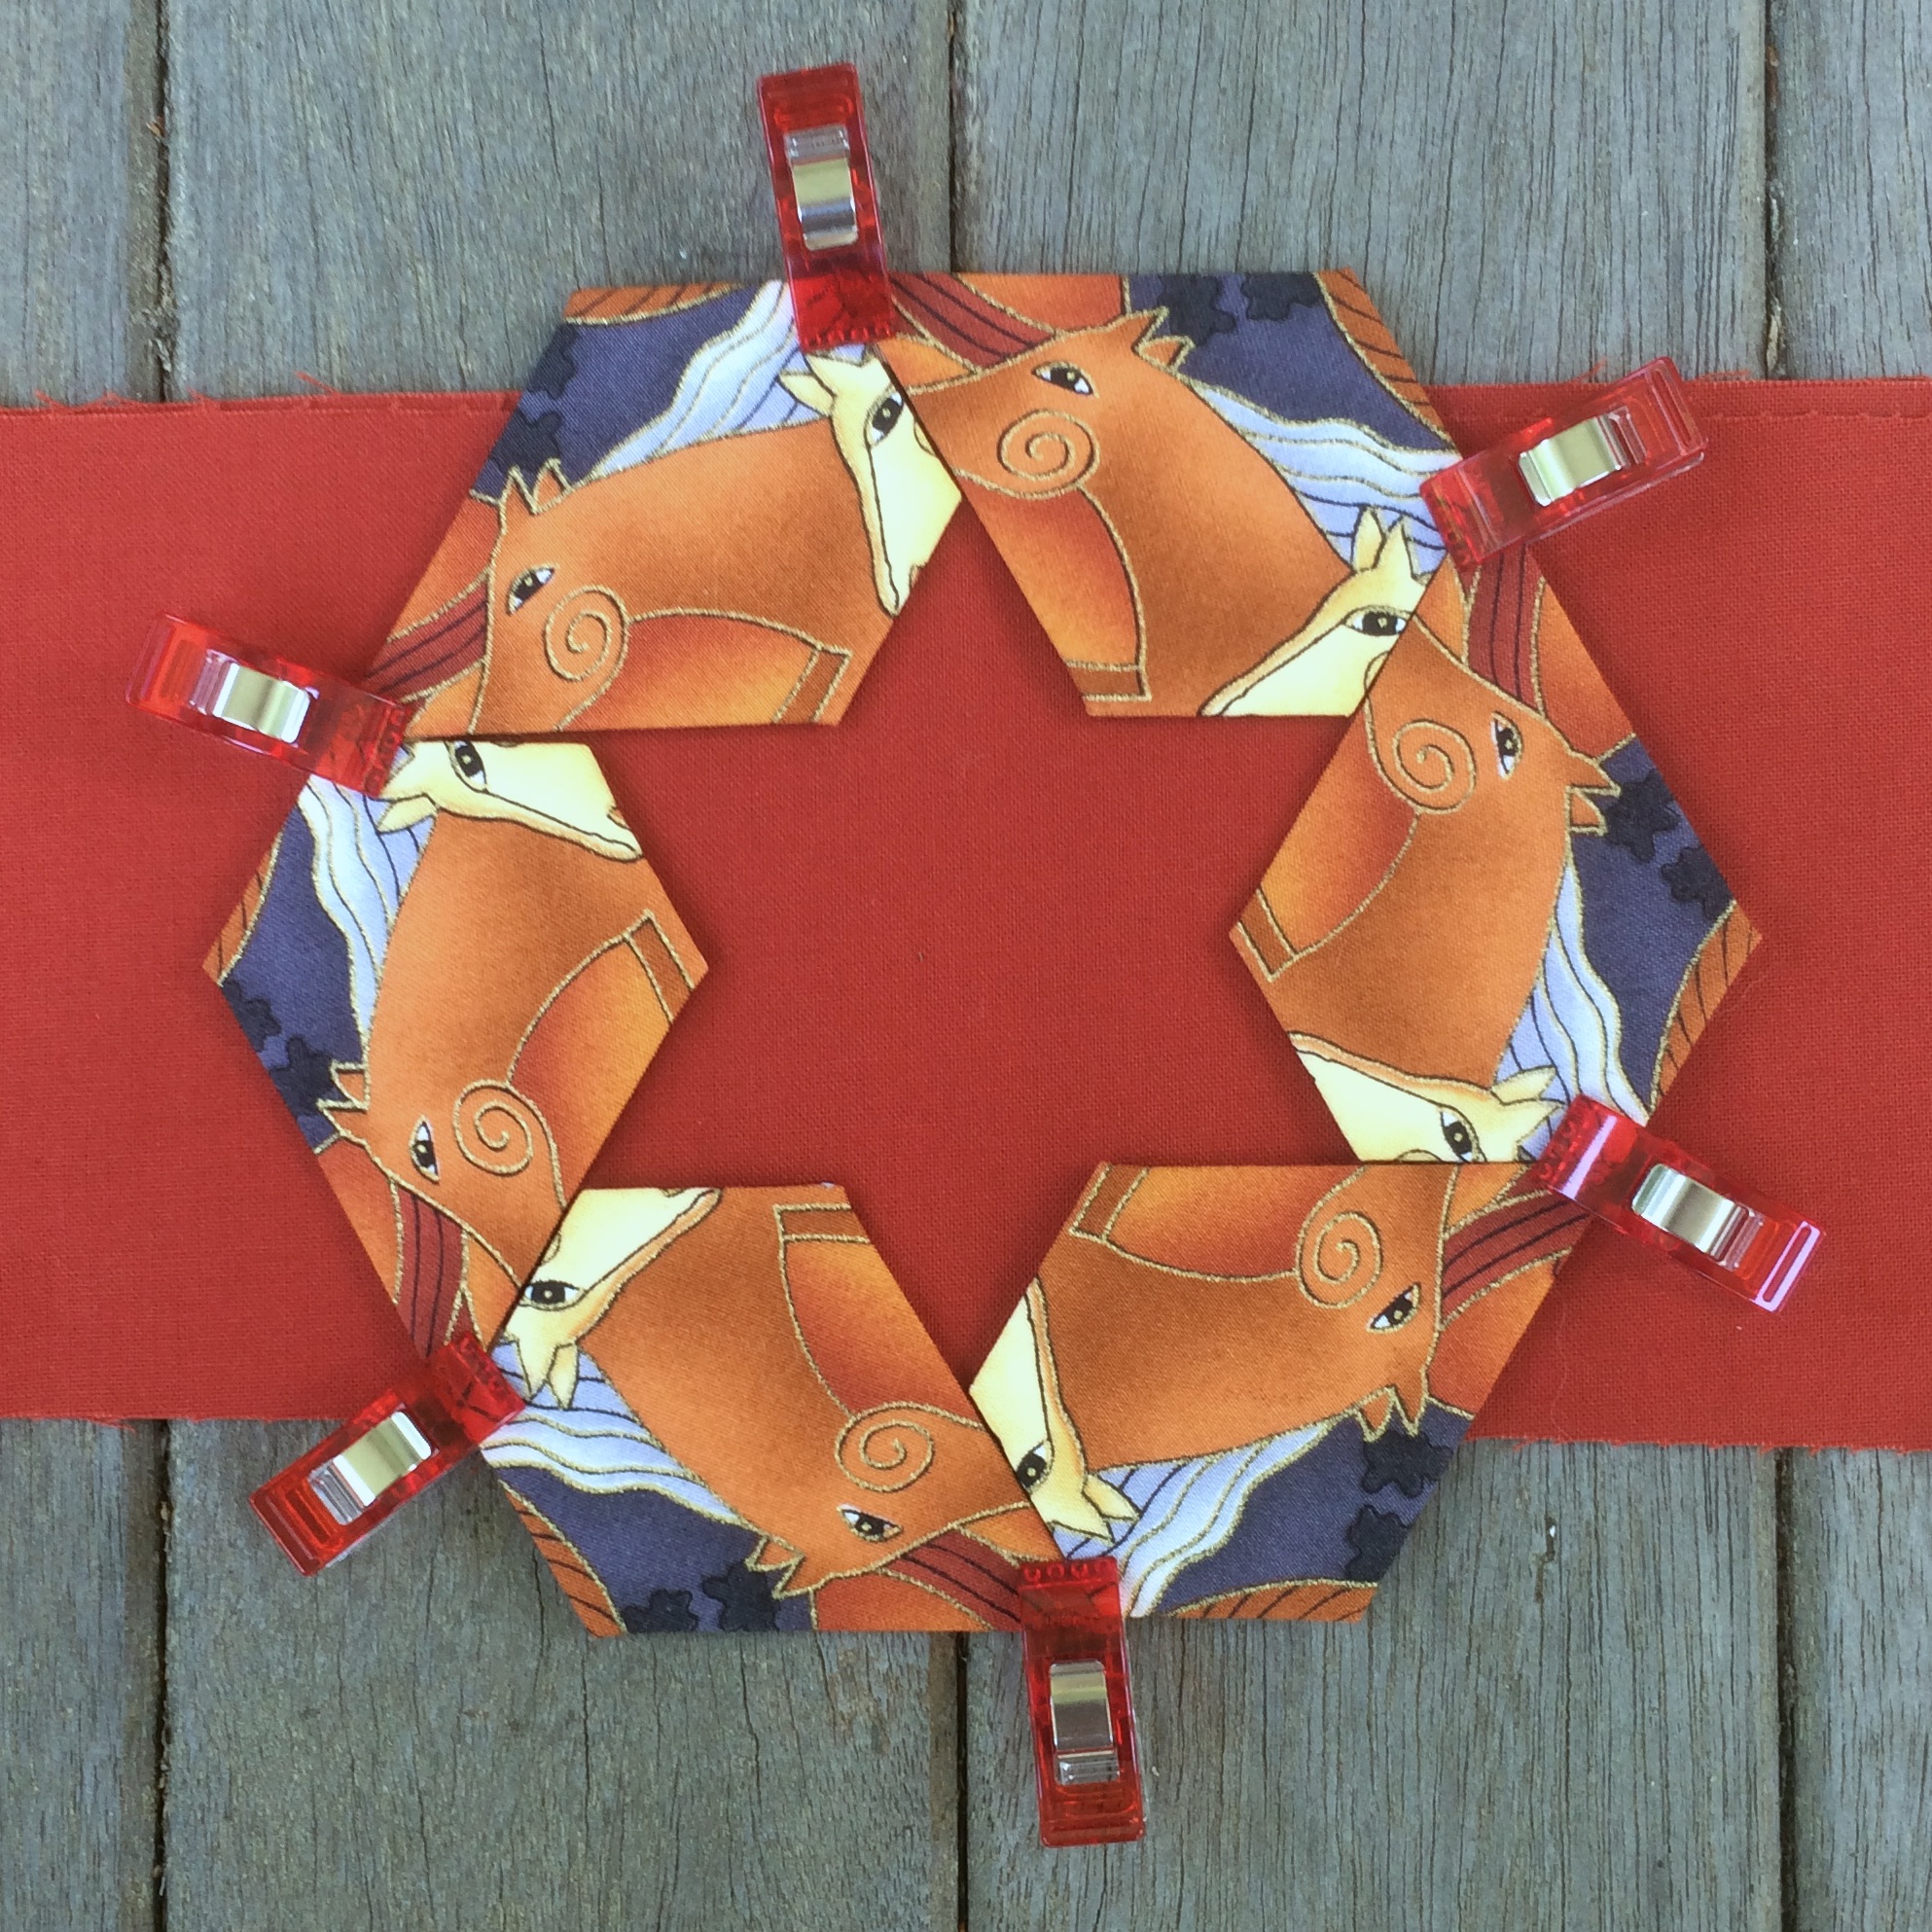
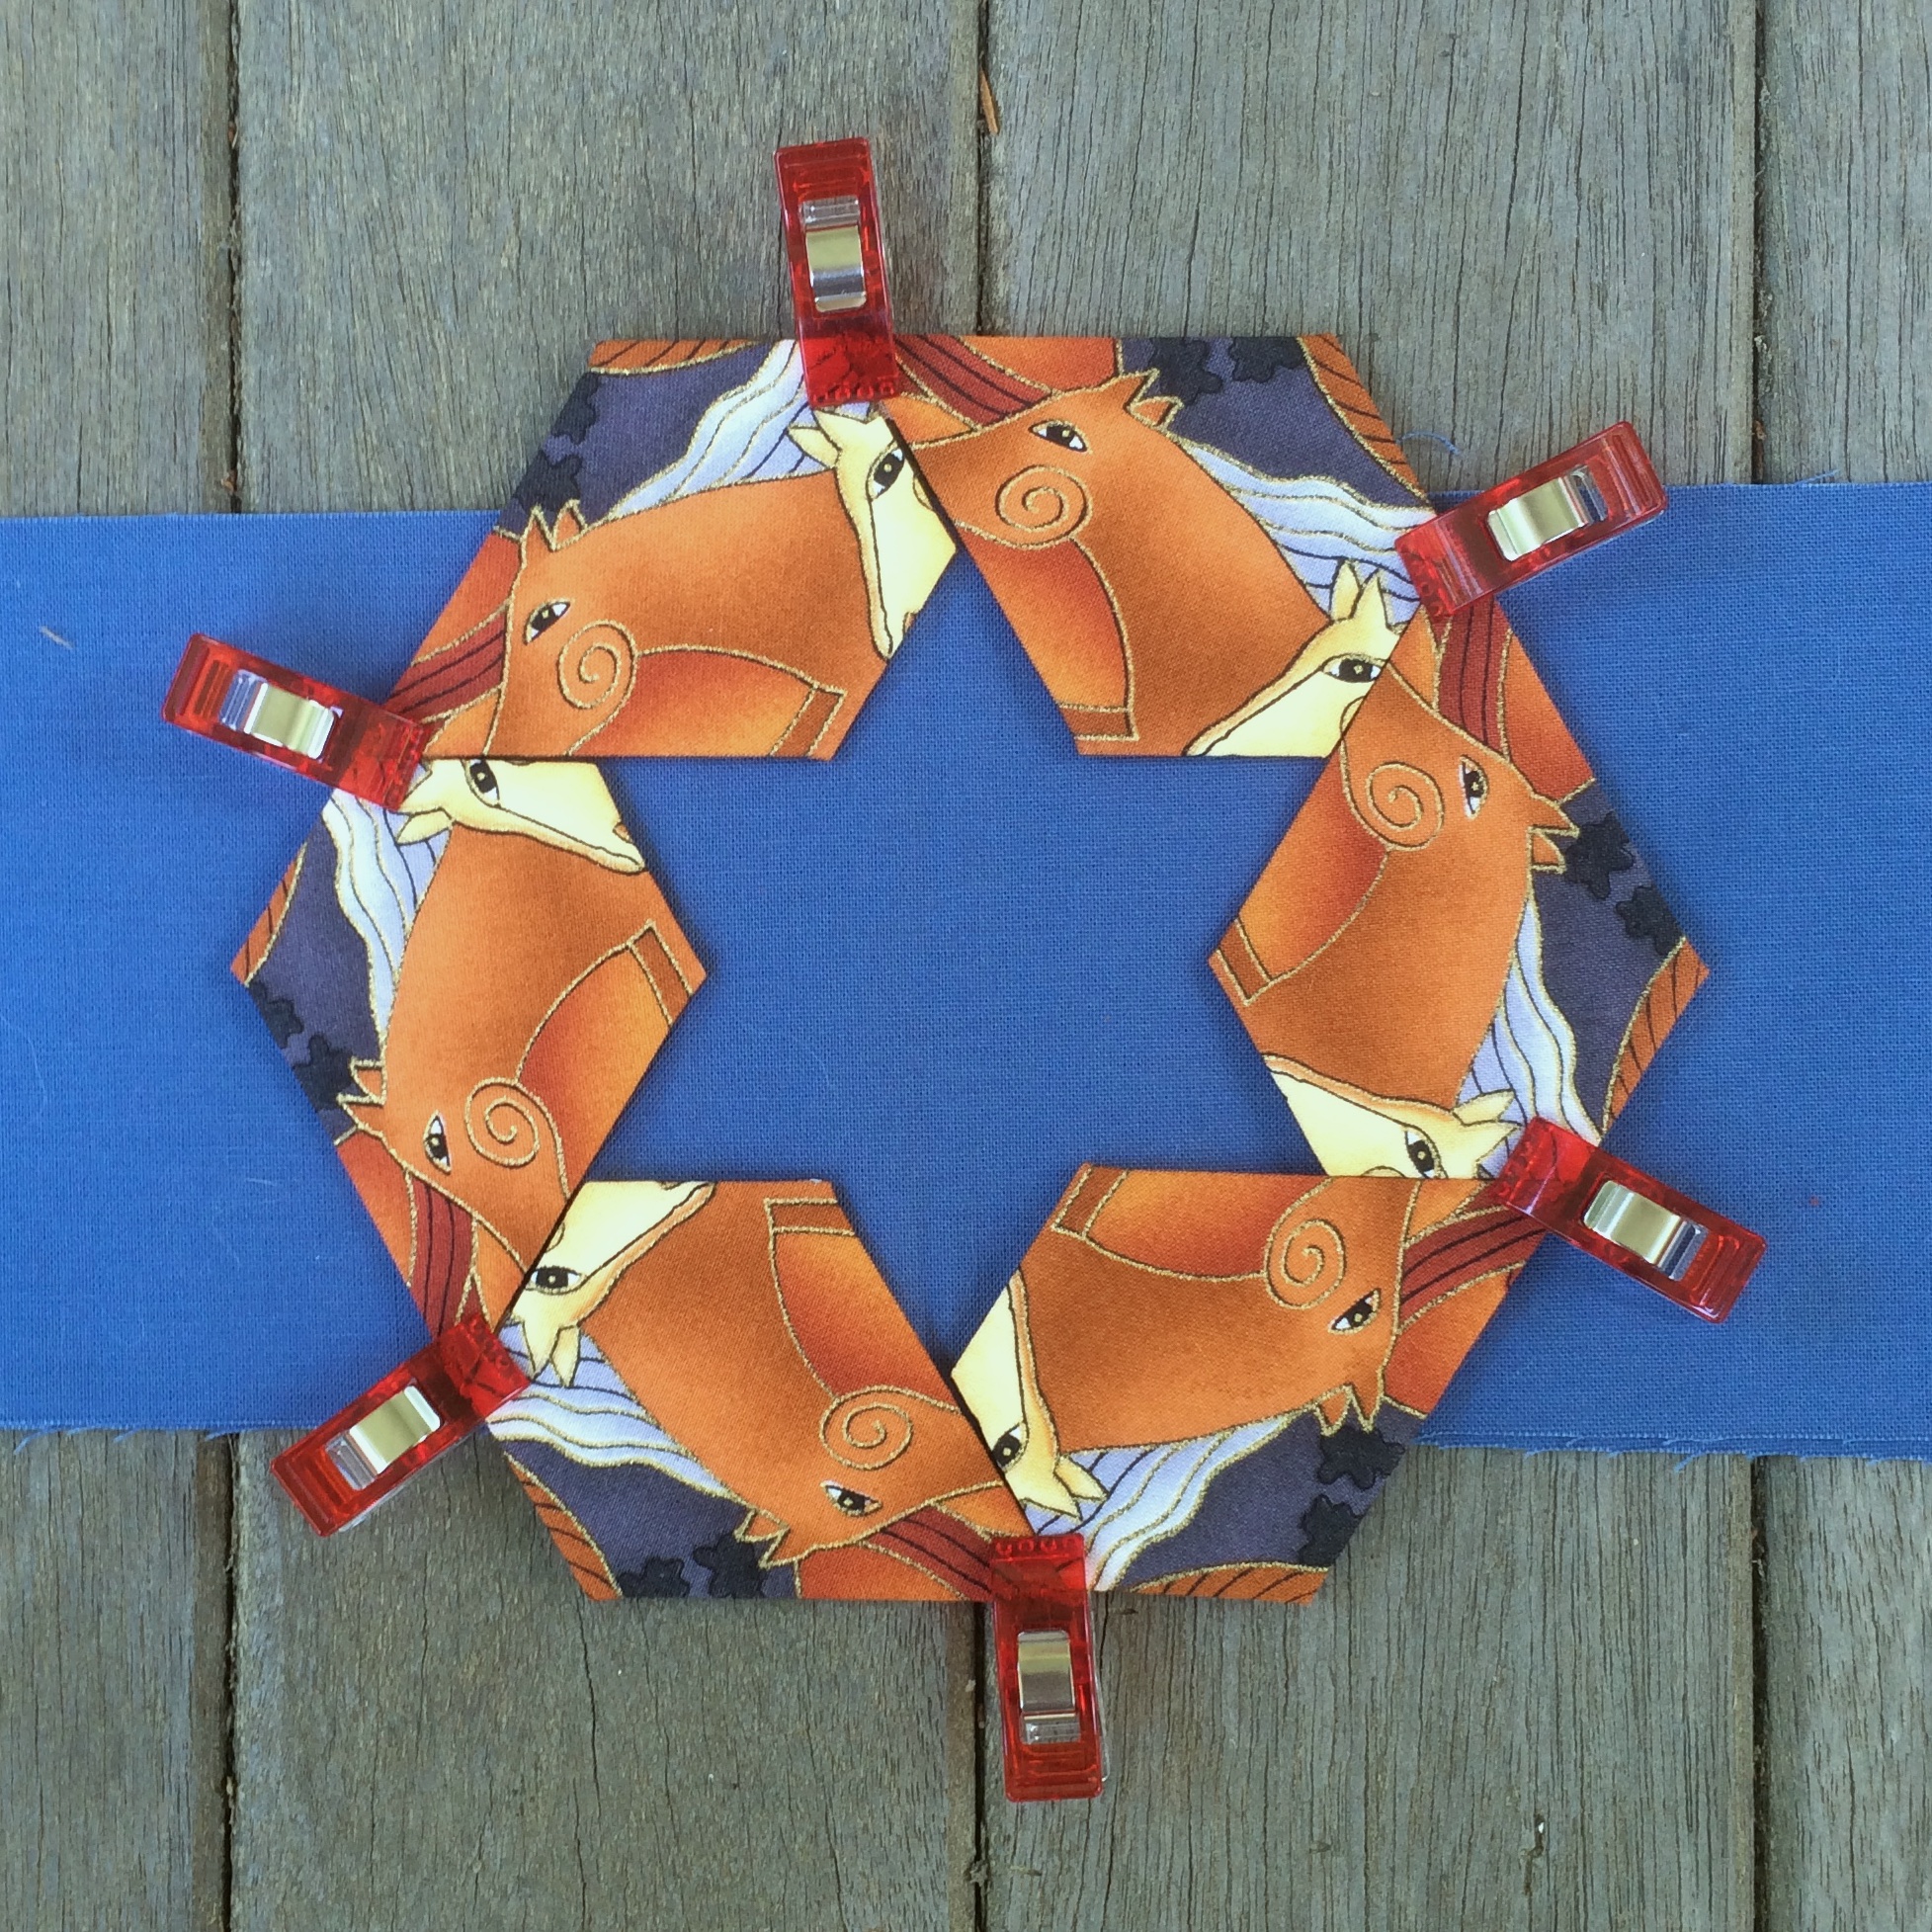
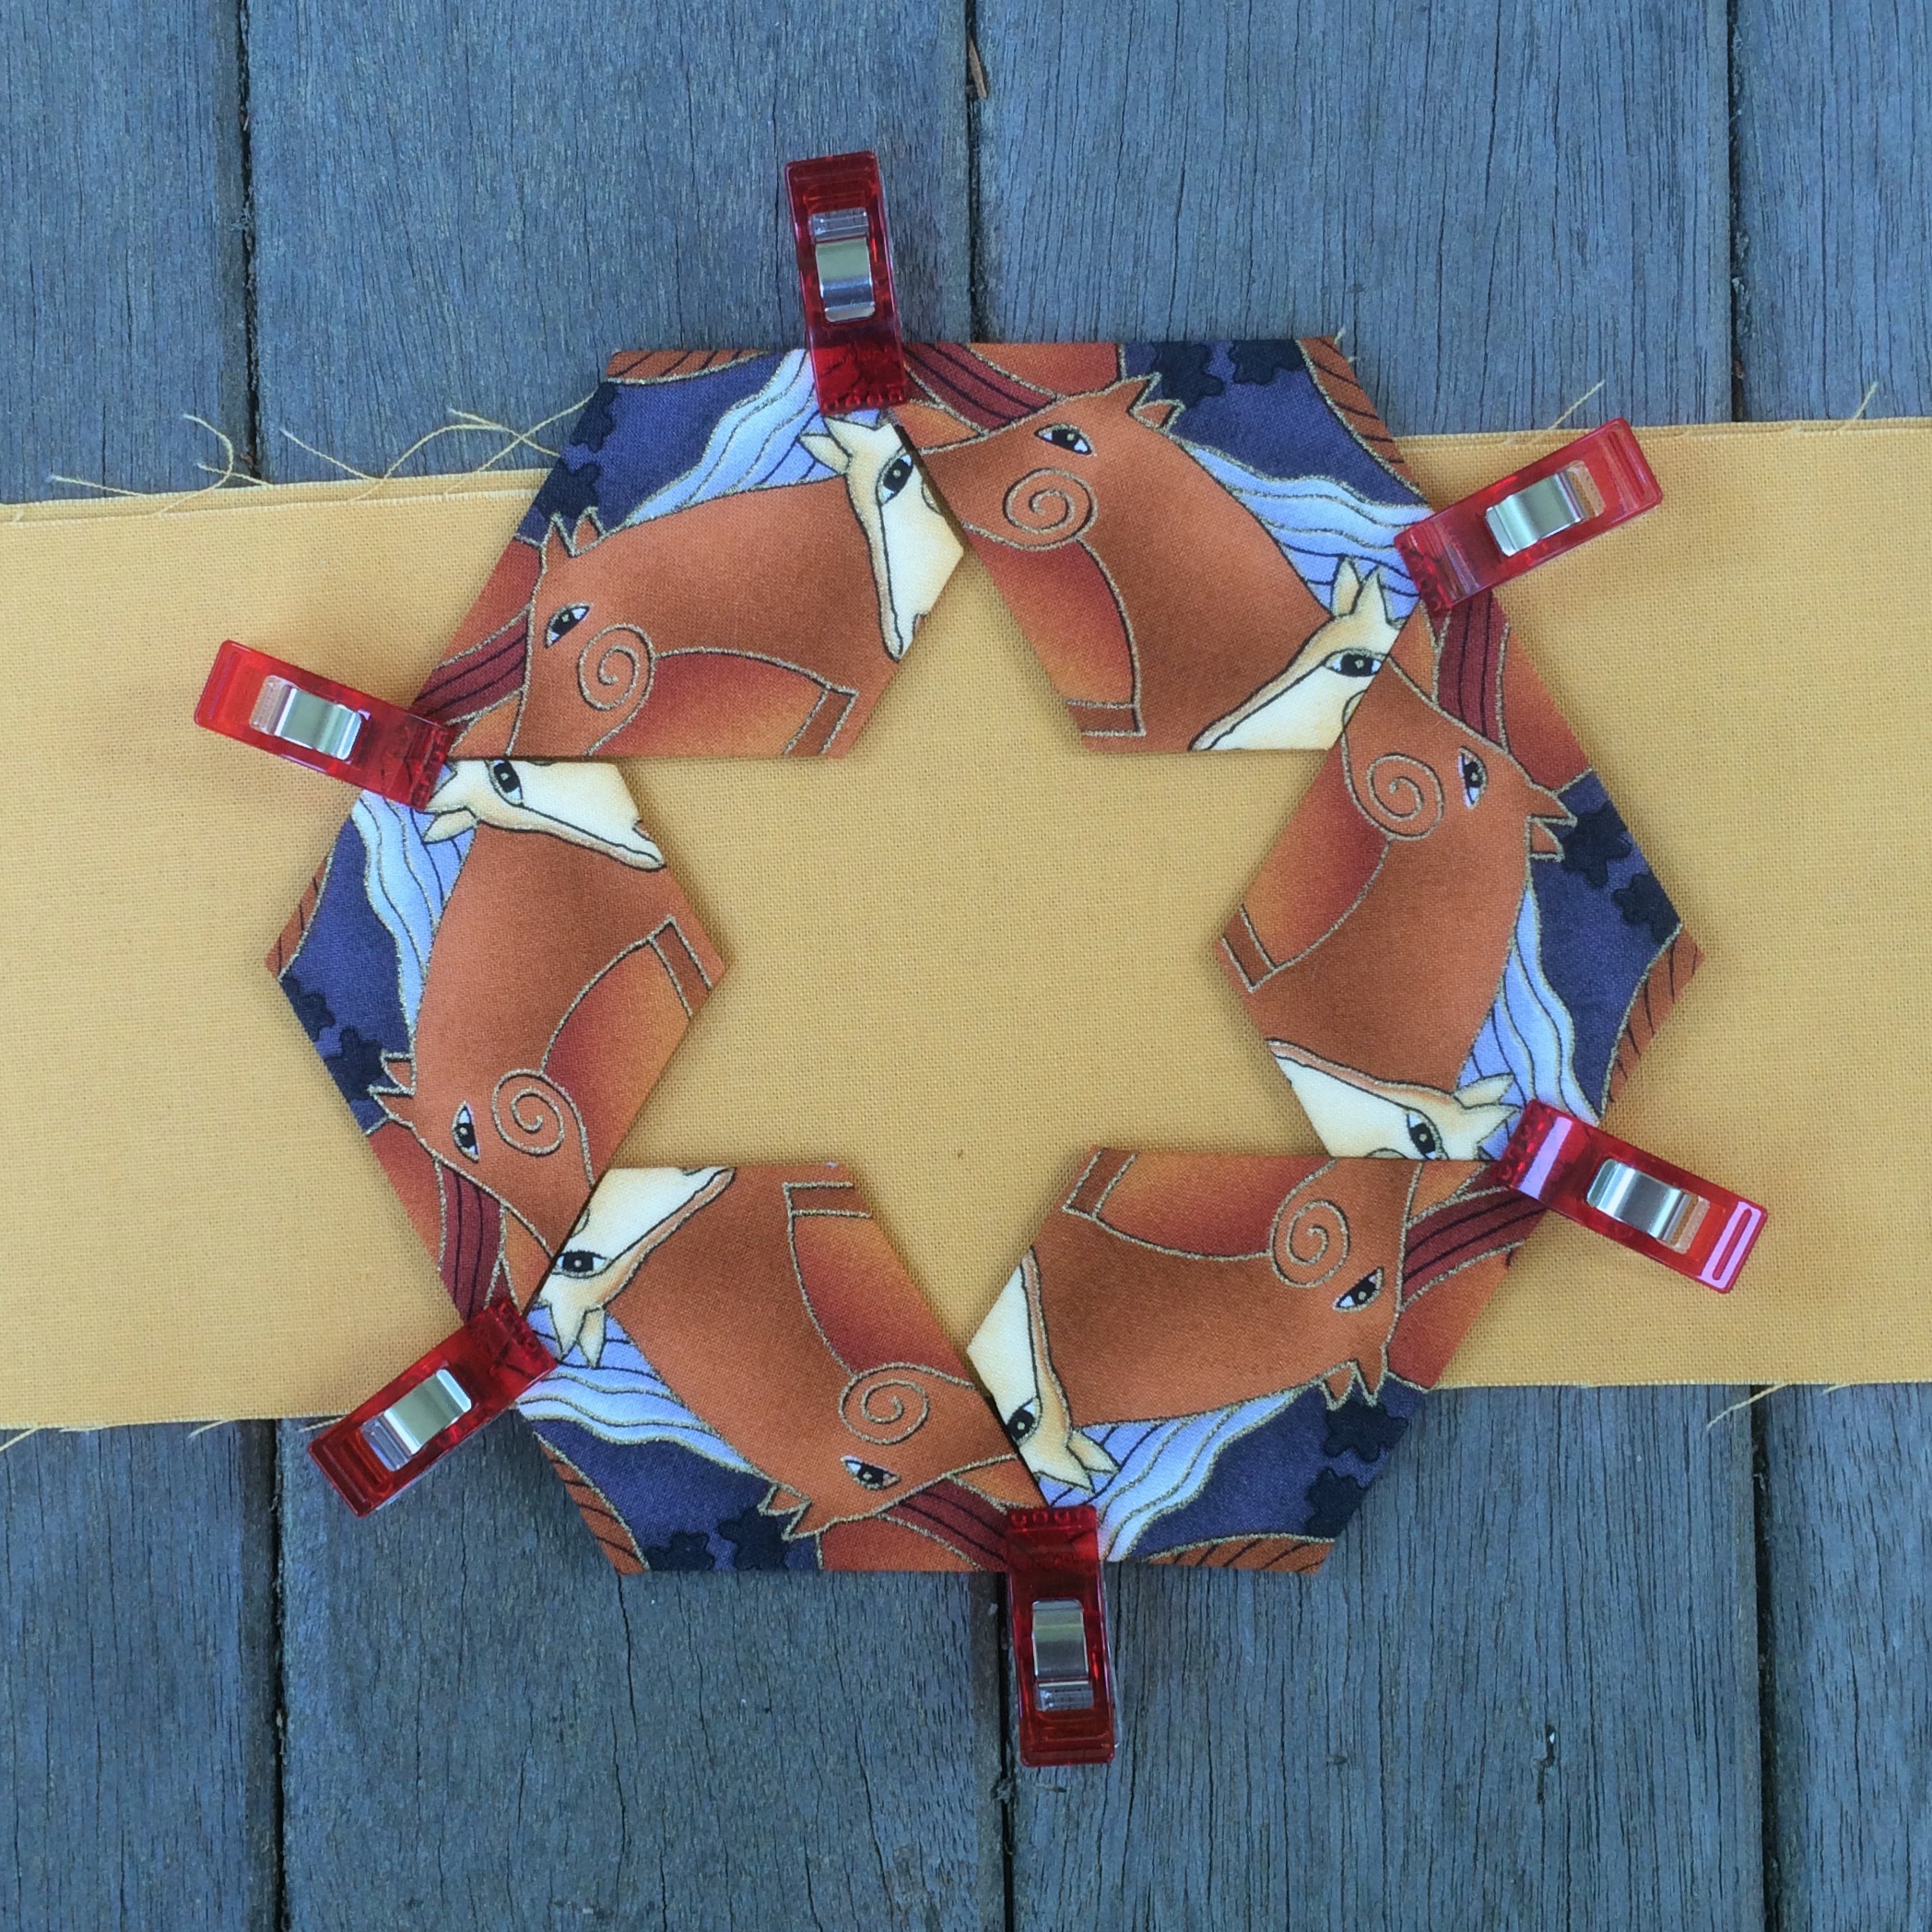
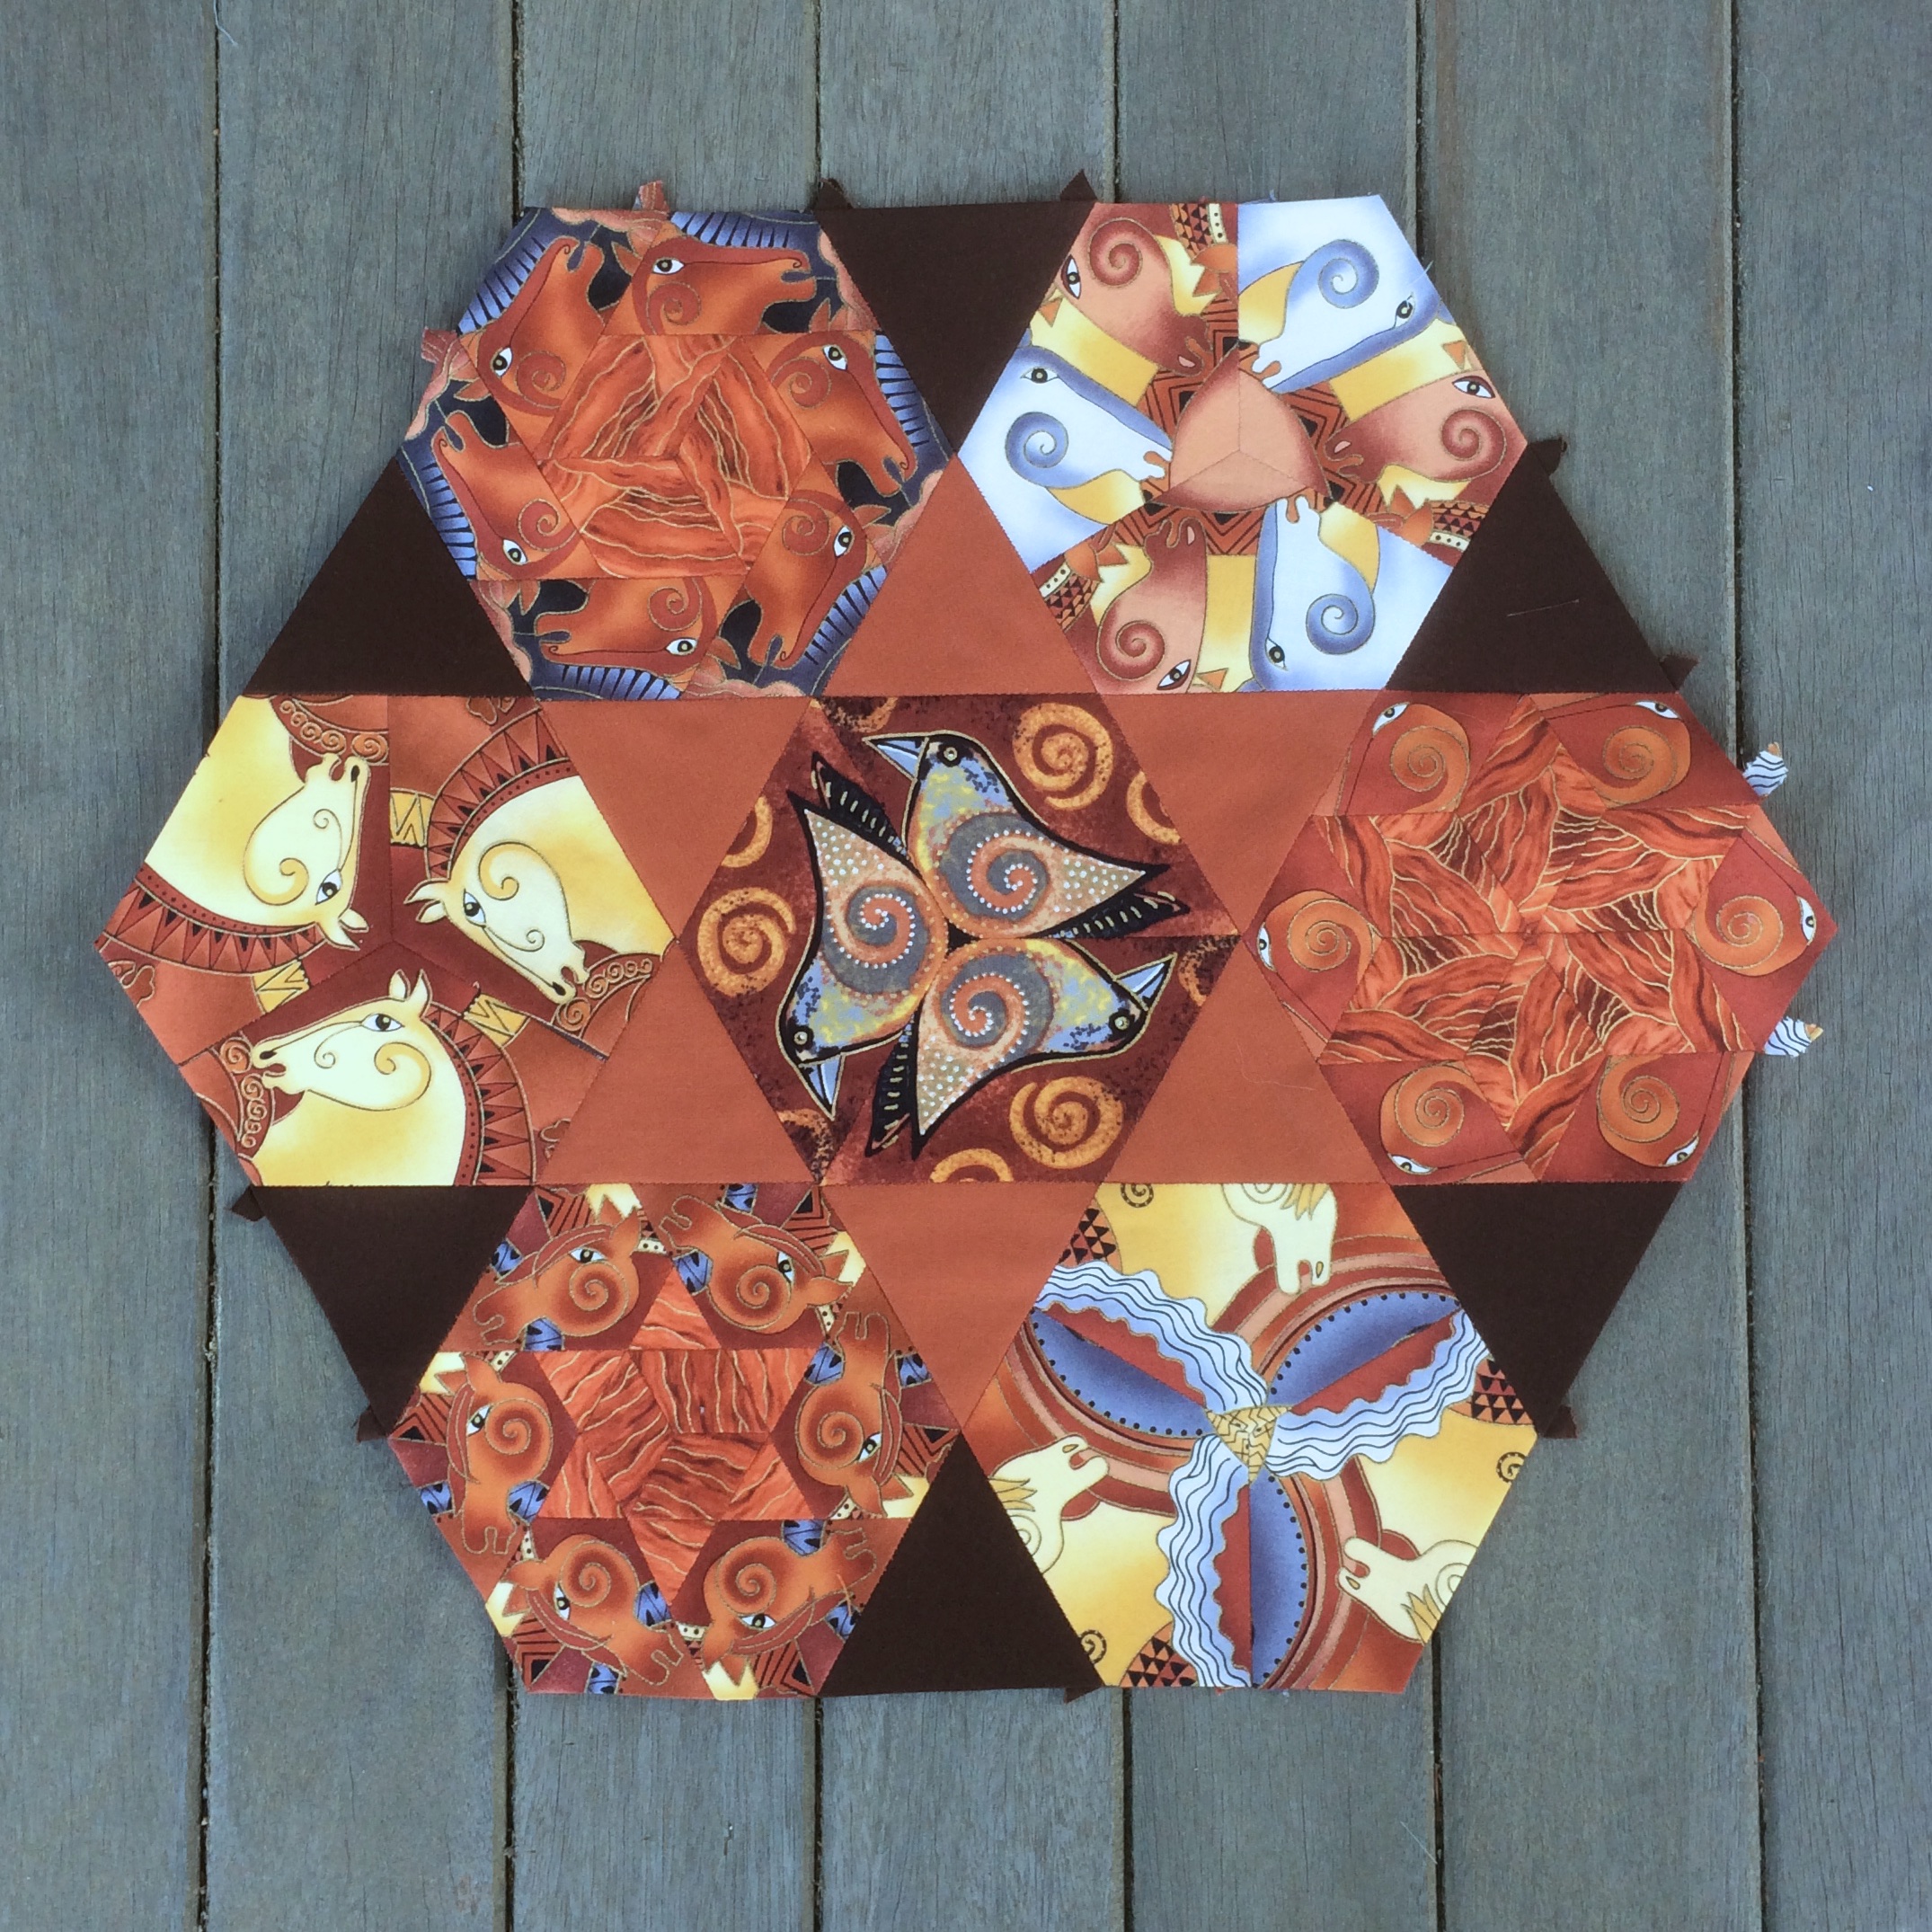
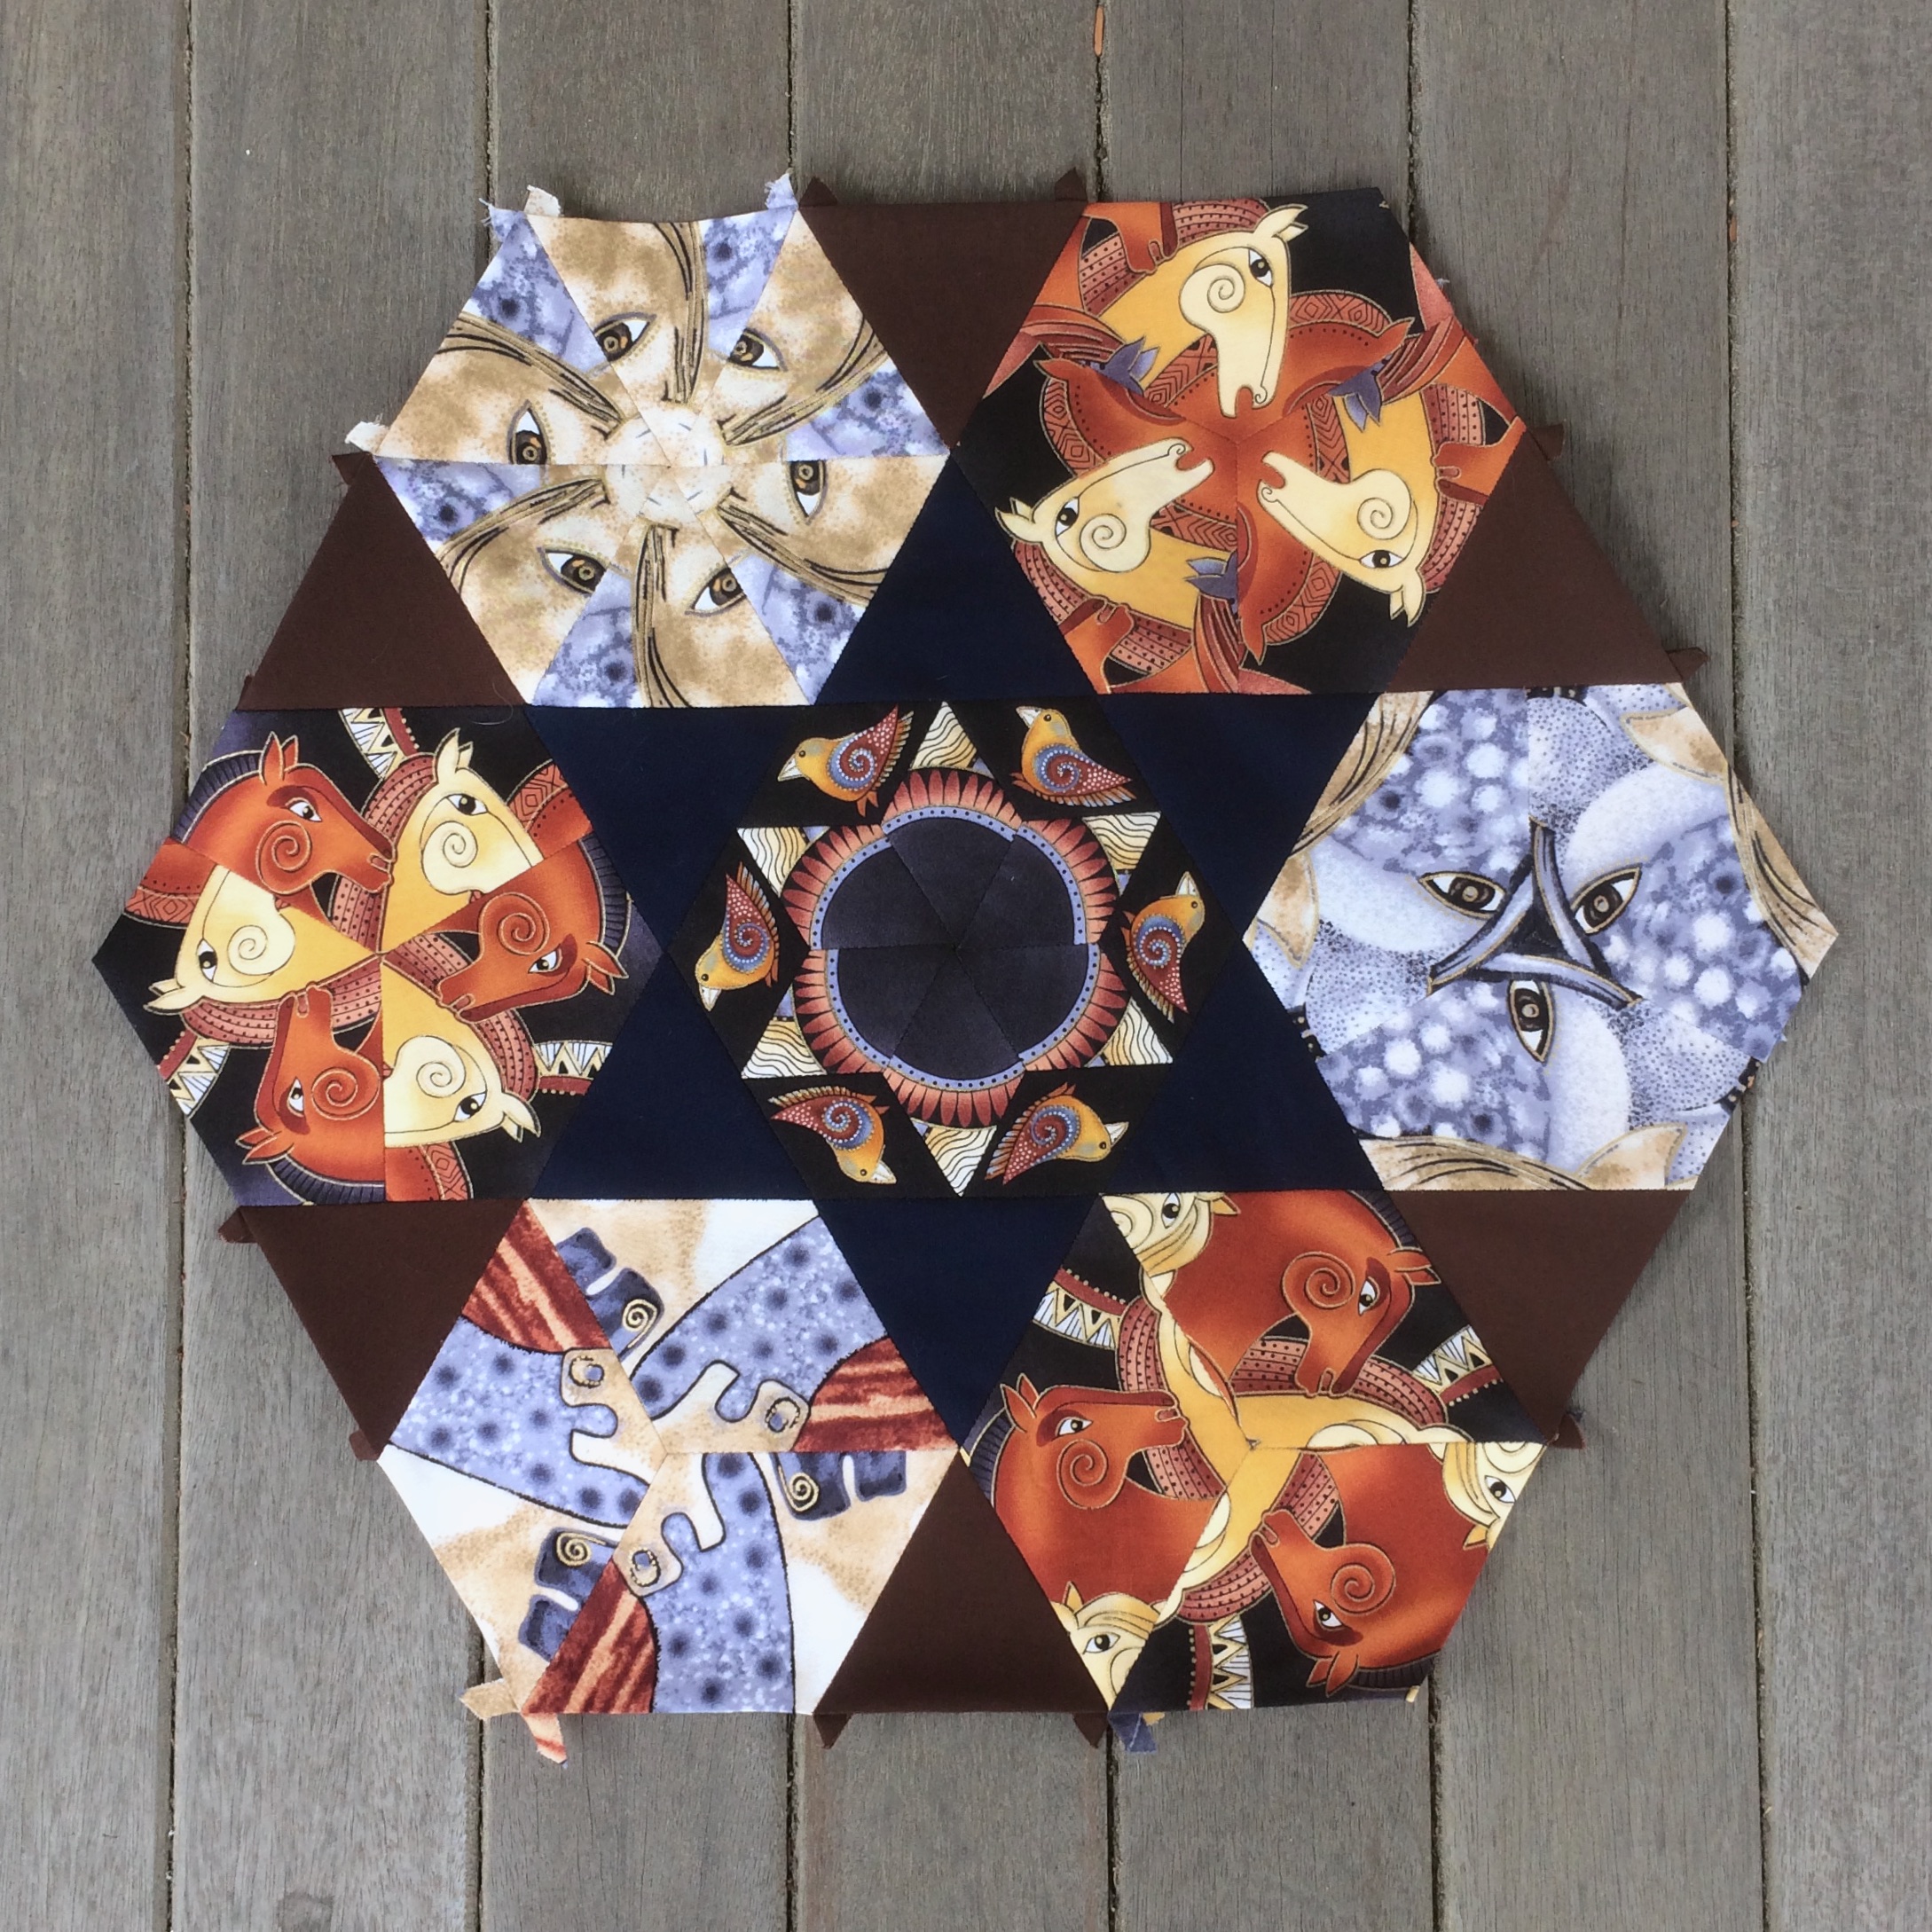
Here we have stacks that are eight inches wide of what I call the Running Horses fabric and the Jumping Horses fabric. These stacks amount to 48 inches of yardage each. I have six yards remaining of the Running Horses fabric, which is enough to make three more layer stacks. I also have an additional yard of the Running Horses fabric.

I have three more yards of the Jumping Horses fabric, which is enough to make two more layer stacks with 12 inches left over.

I have found both of these fabrics to be quite useful in the creation of my Glorious Hexagons.

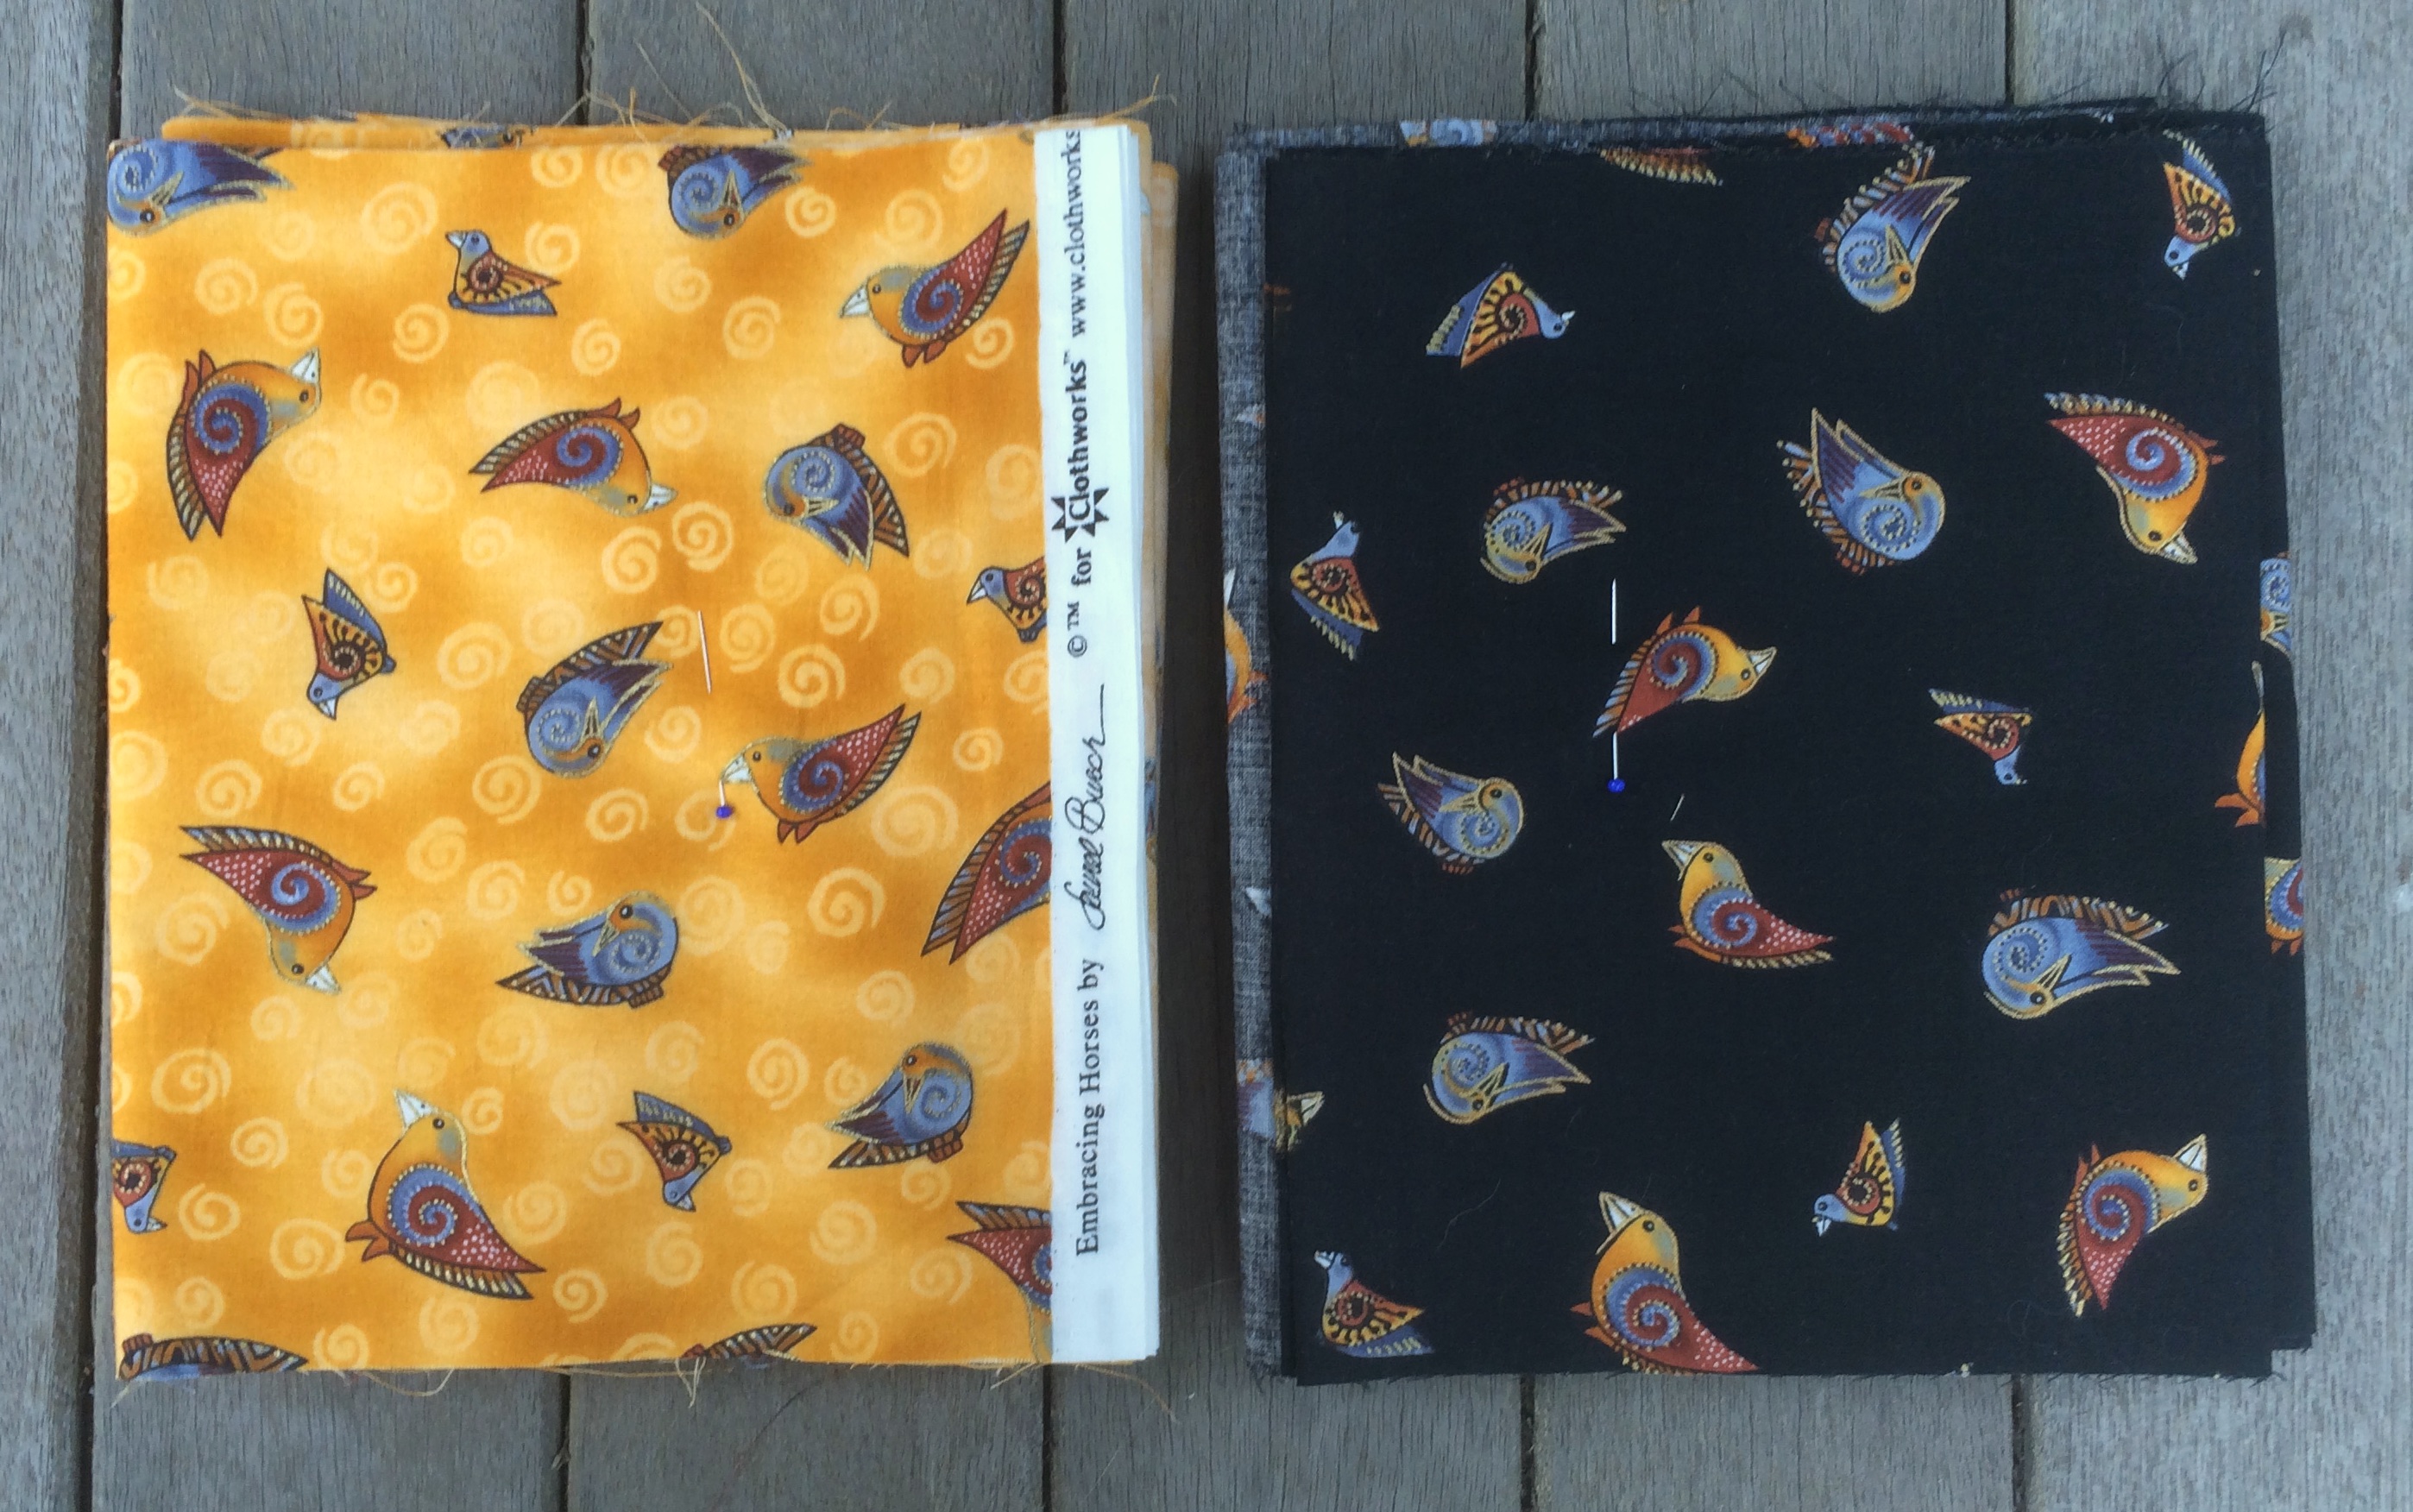
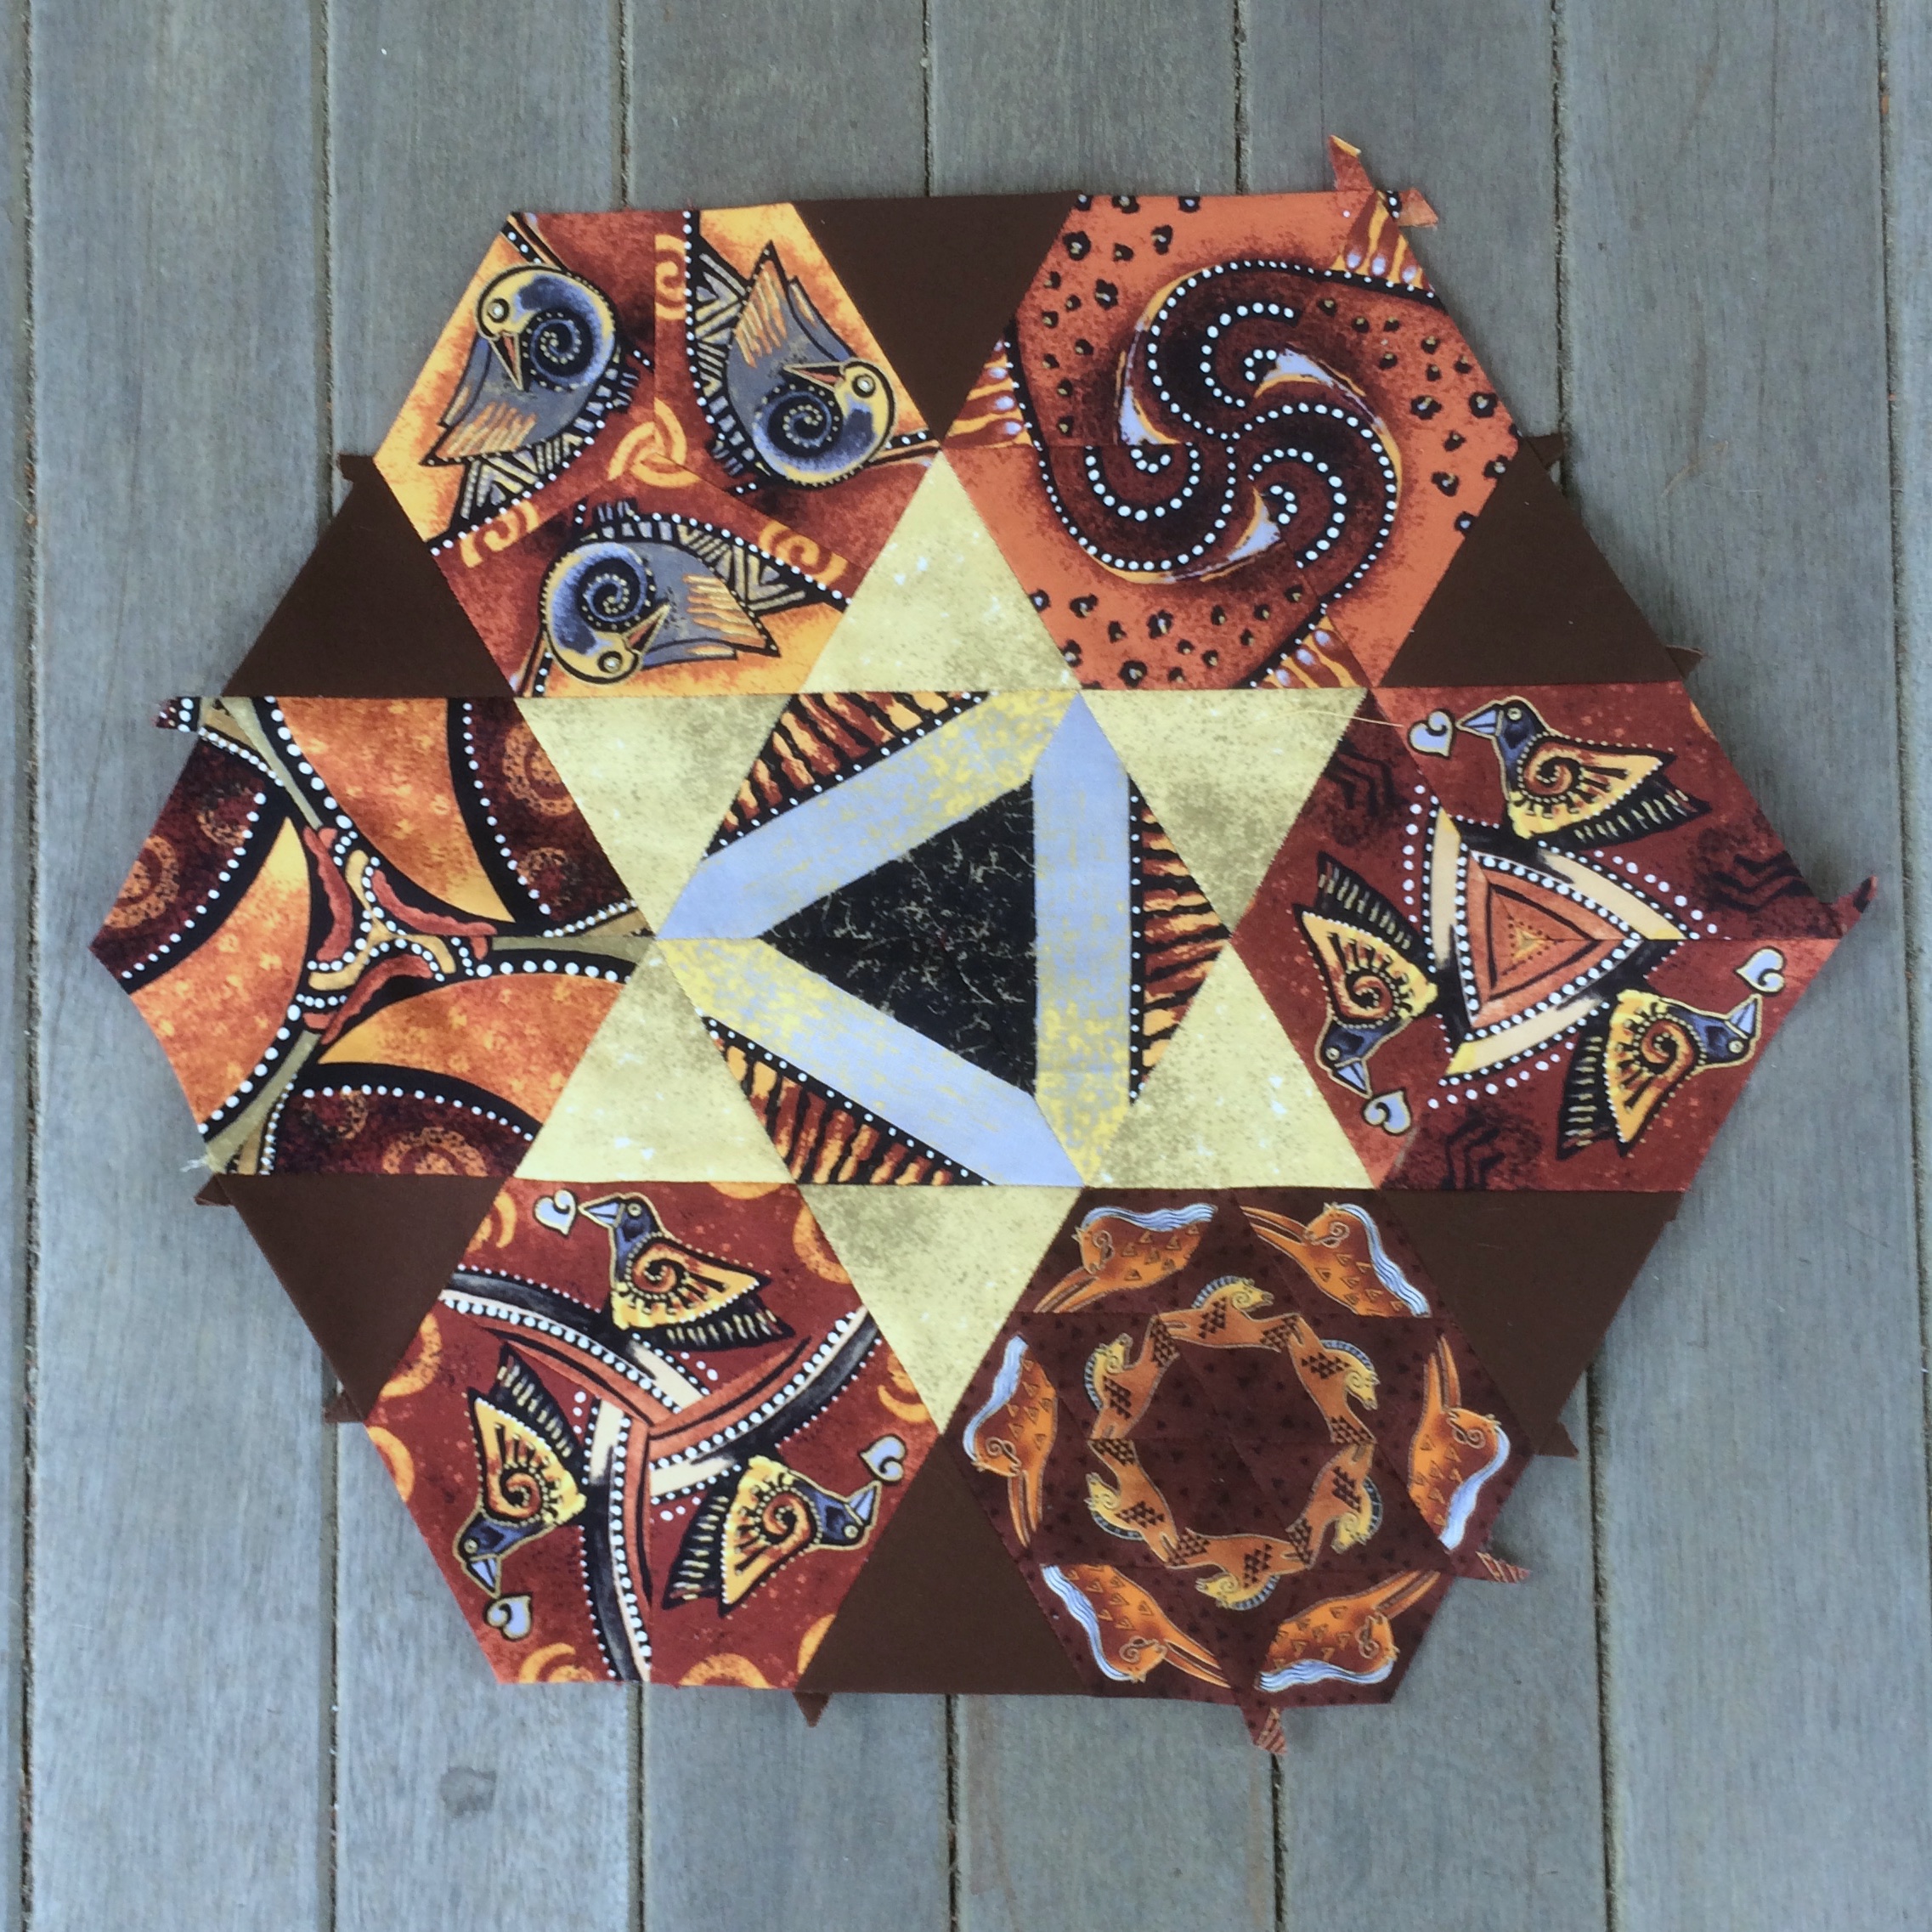
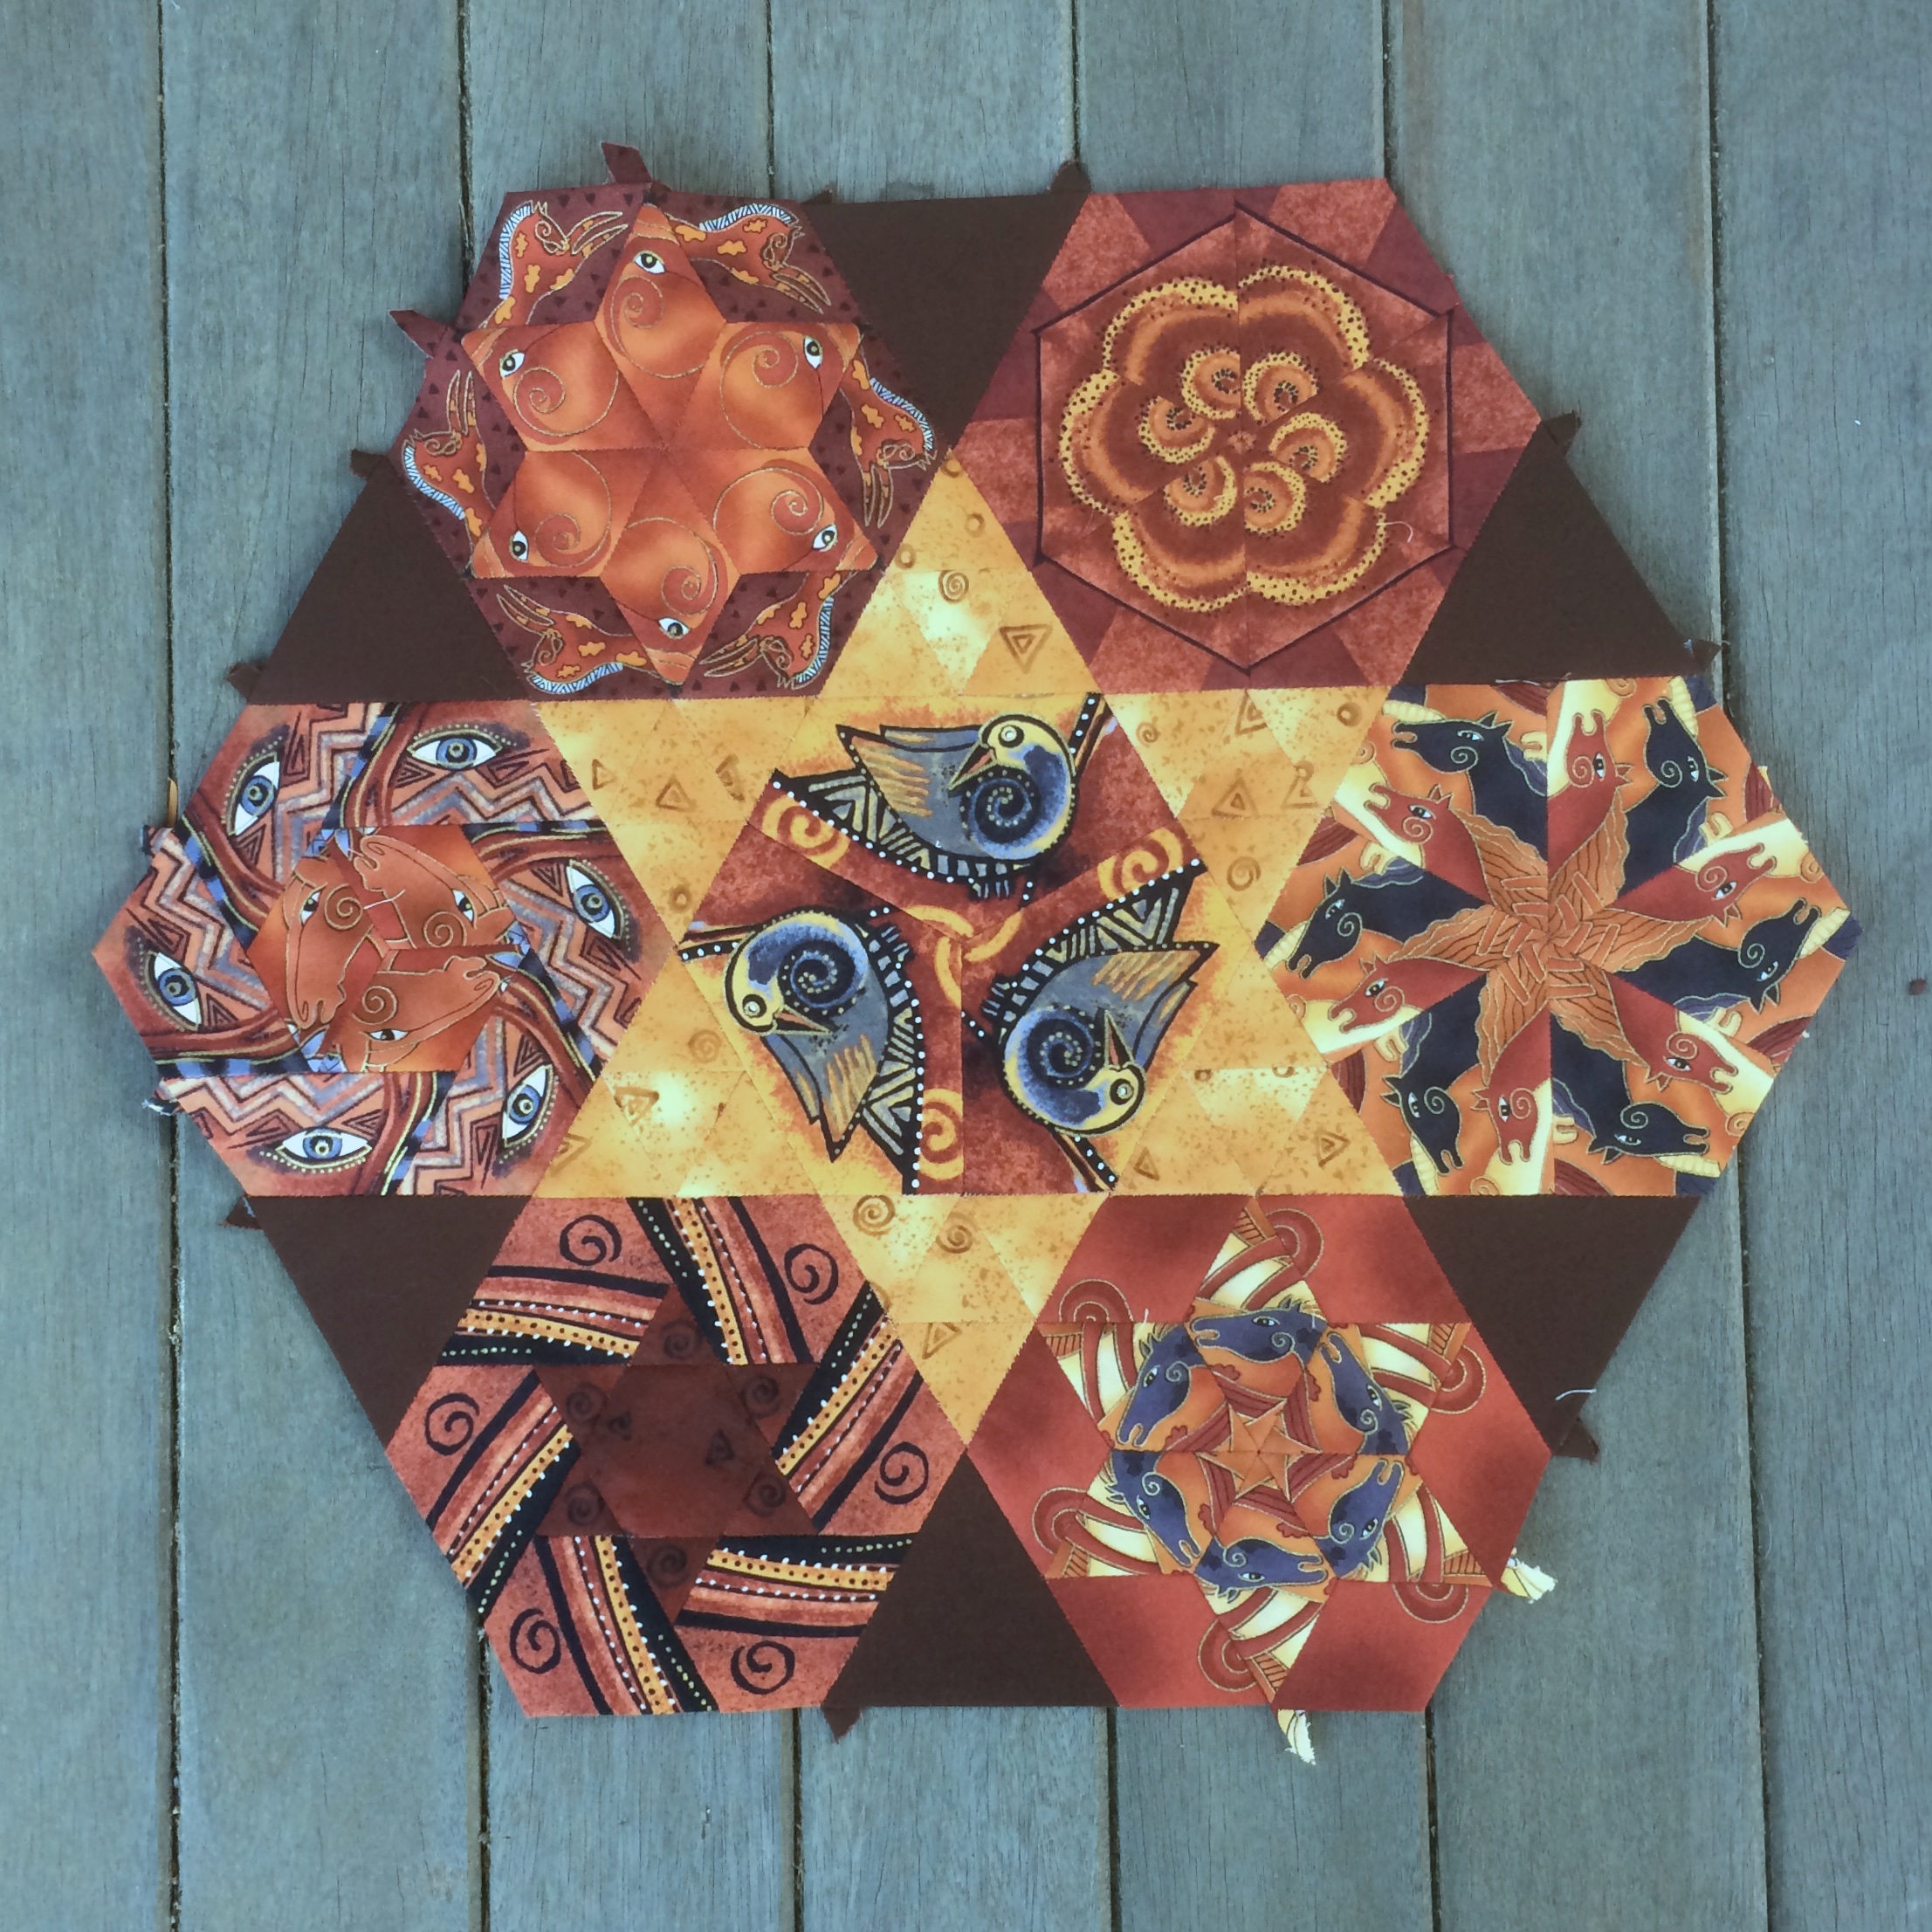
Here we have stacks that are eight inches wide of the Birds on Yellow fabric and the Birds on Black fabric. These stacks amount to 48 inches of yardage each. I don’t have enough of either of these fabrics to make another layer stack. I do have eight inches of the Birds on Yellow fabric and 24 inches of the Birds on Black fabric. These are the fabrics that I like the least in the collection. They each have their charm, but I have not enjoyed using them in the hexagons very much. I doubt I will order more of either of these.

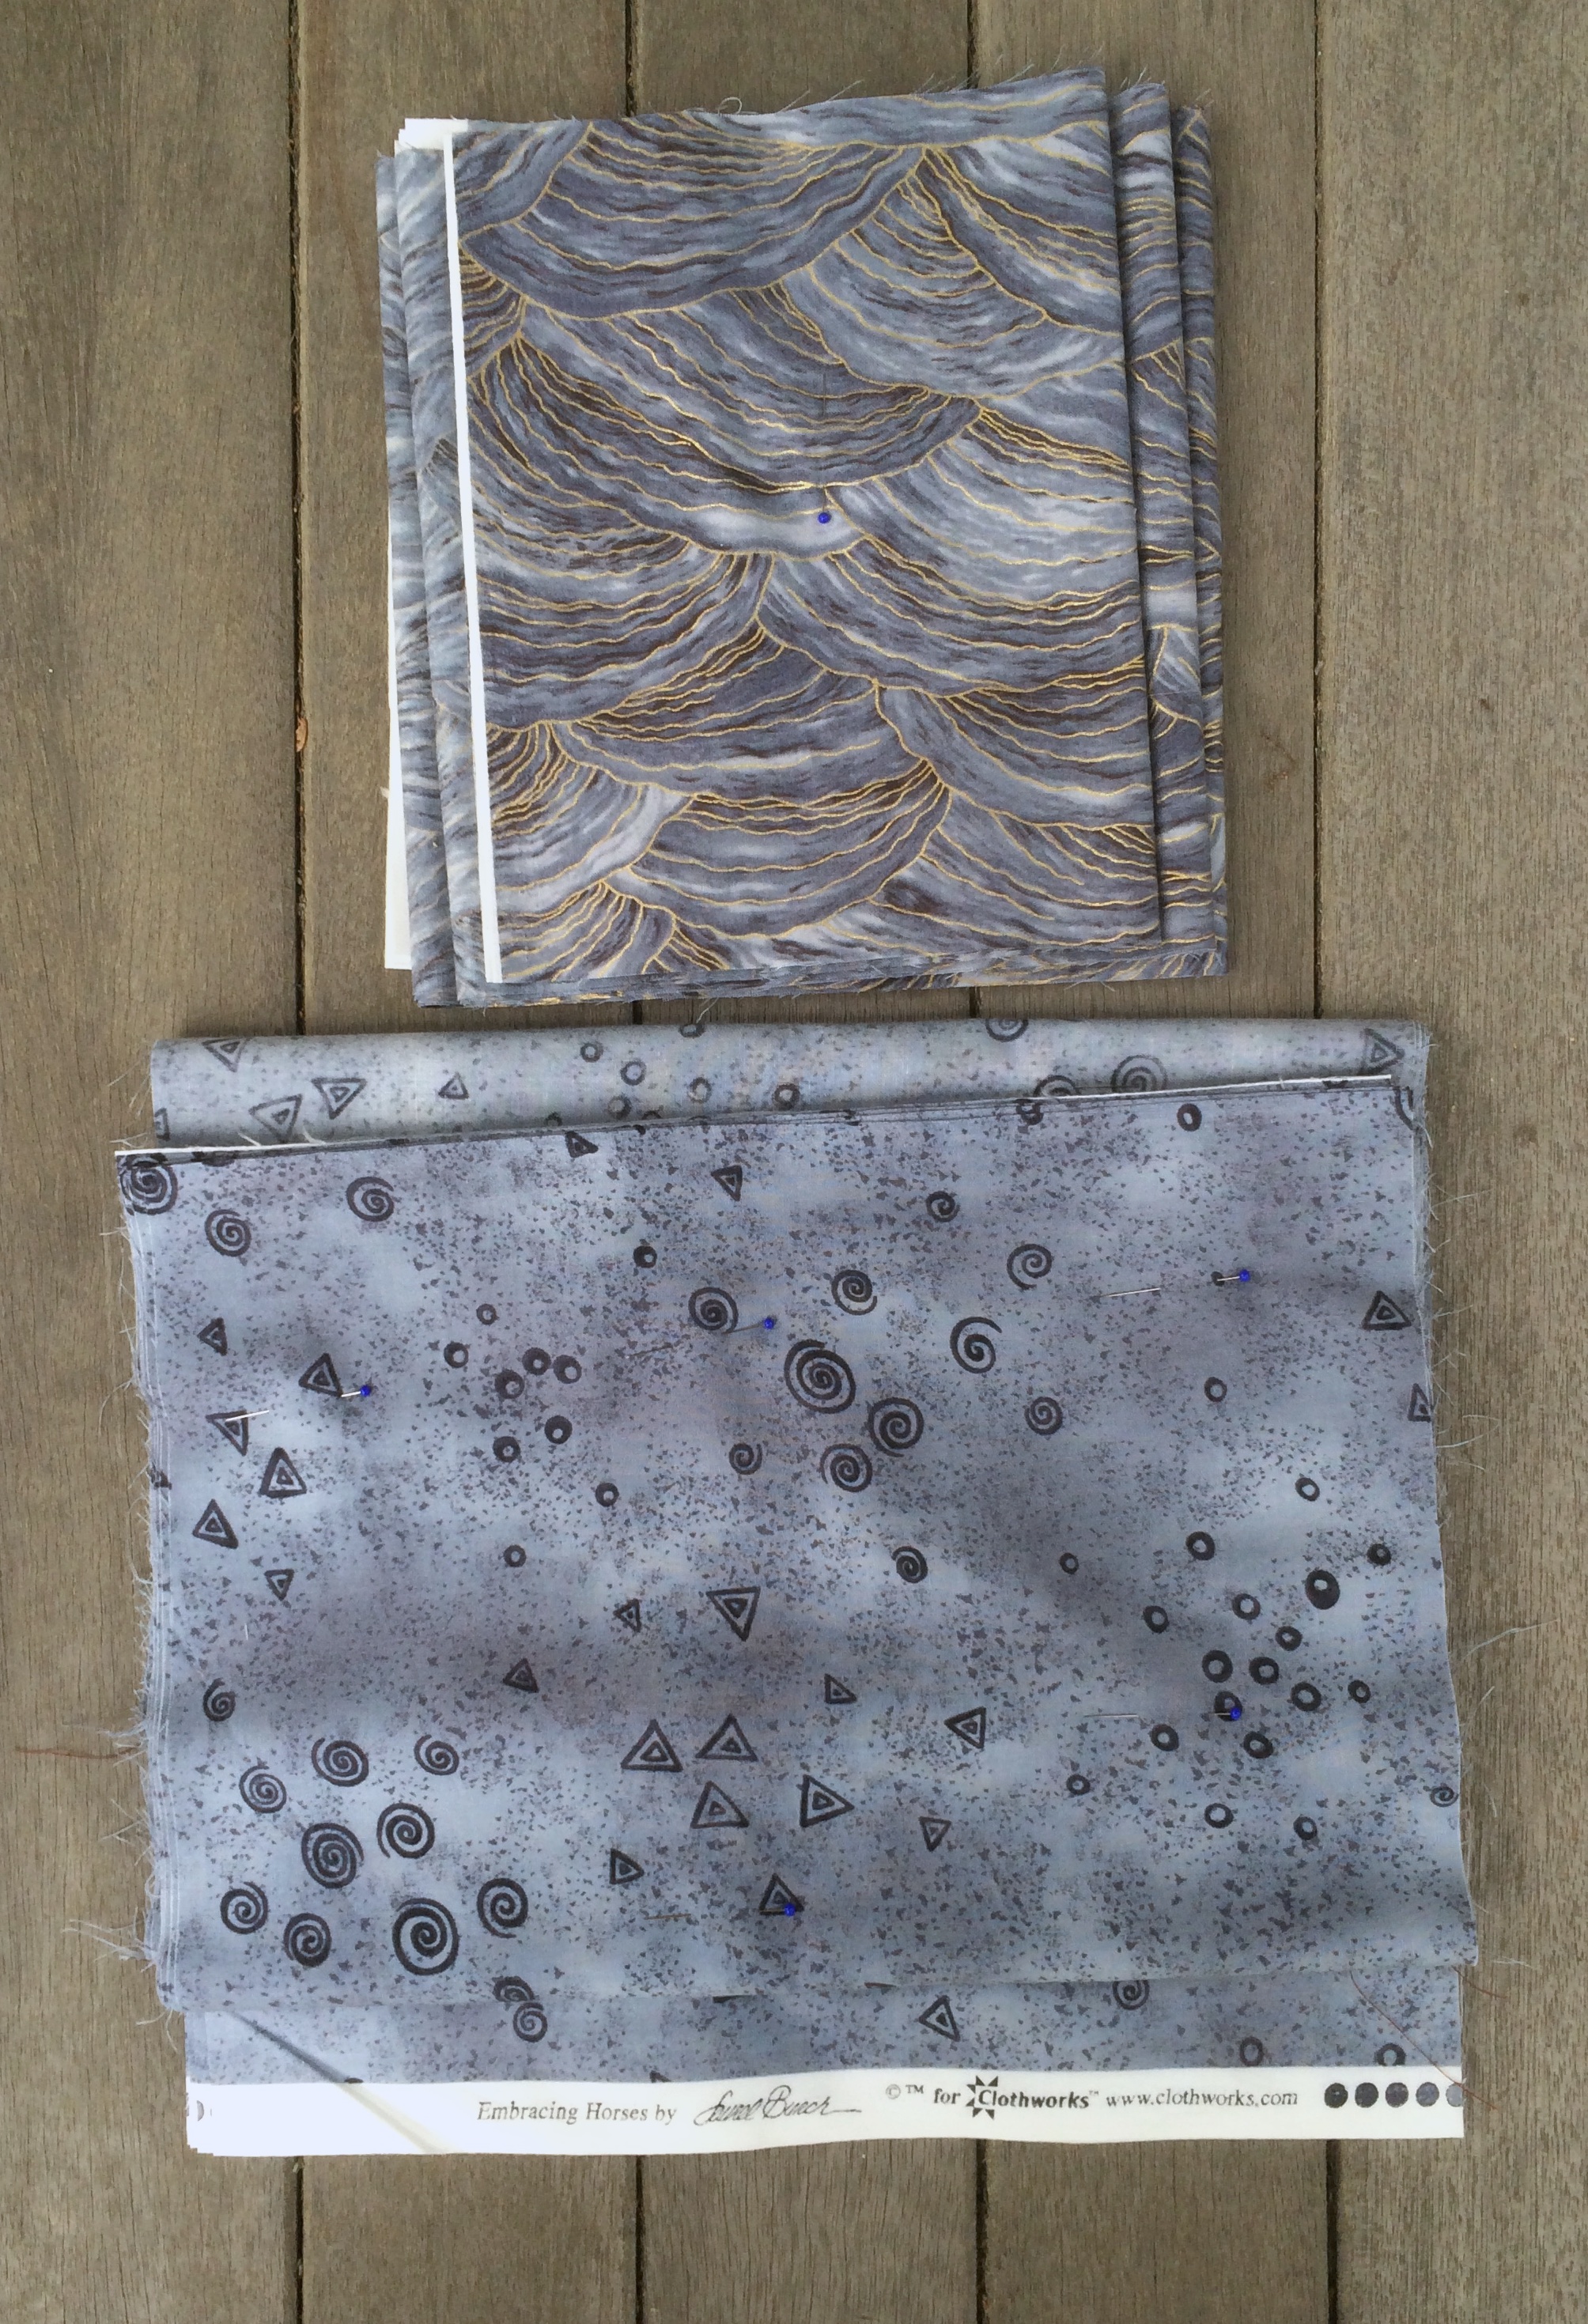
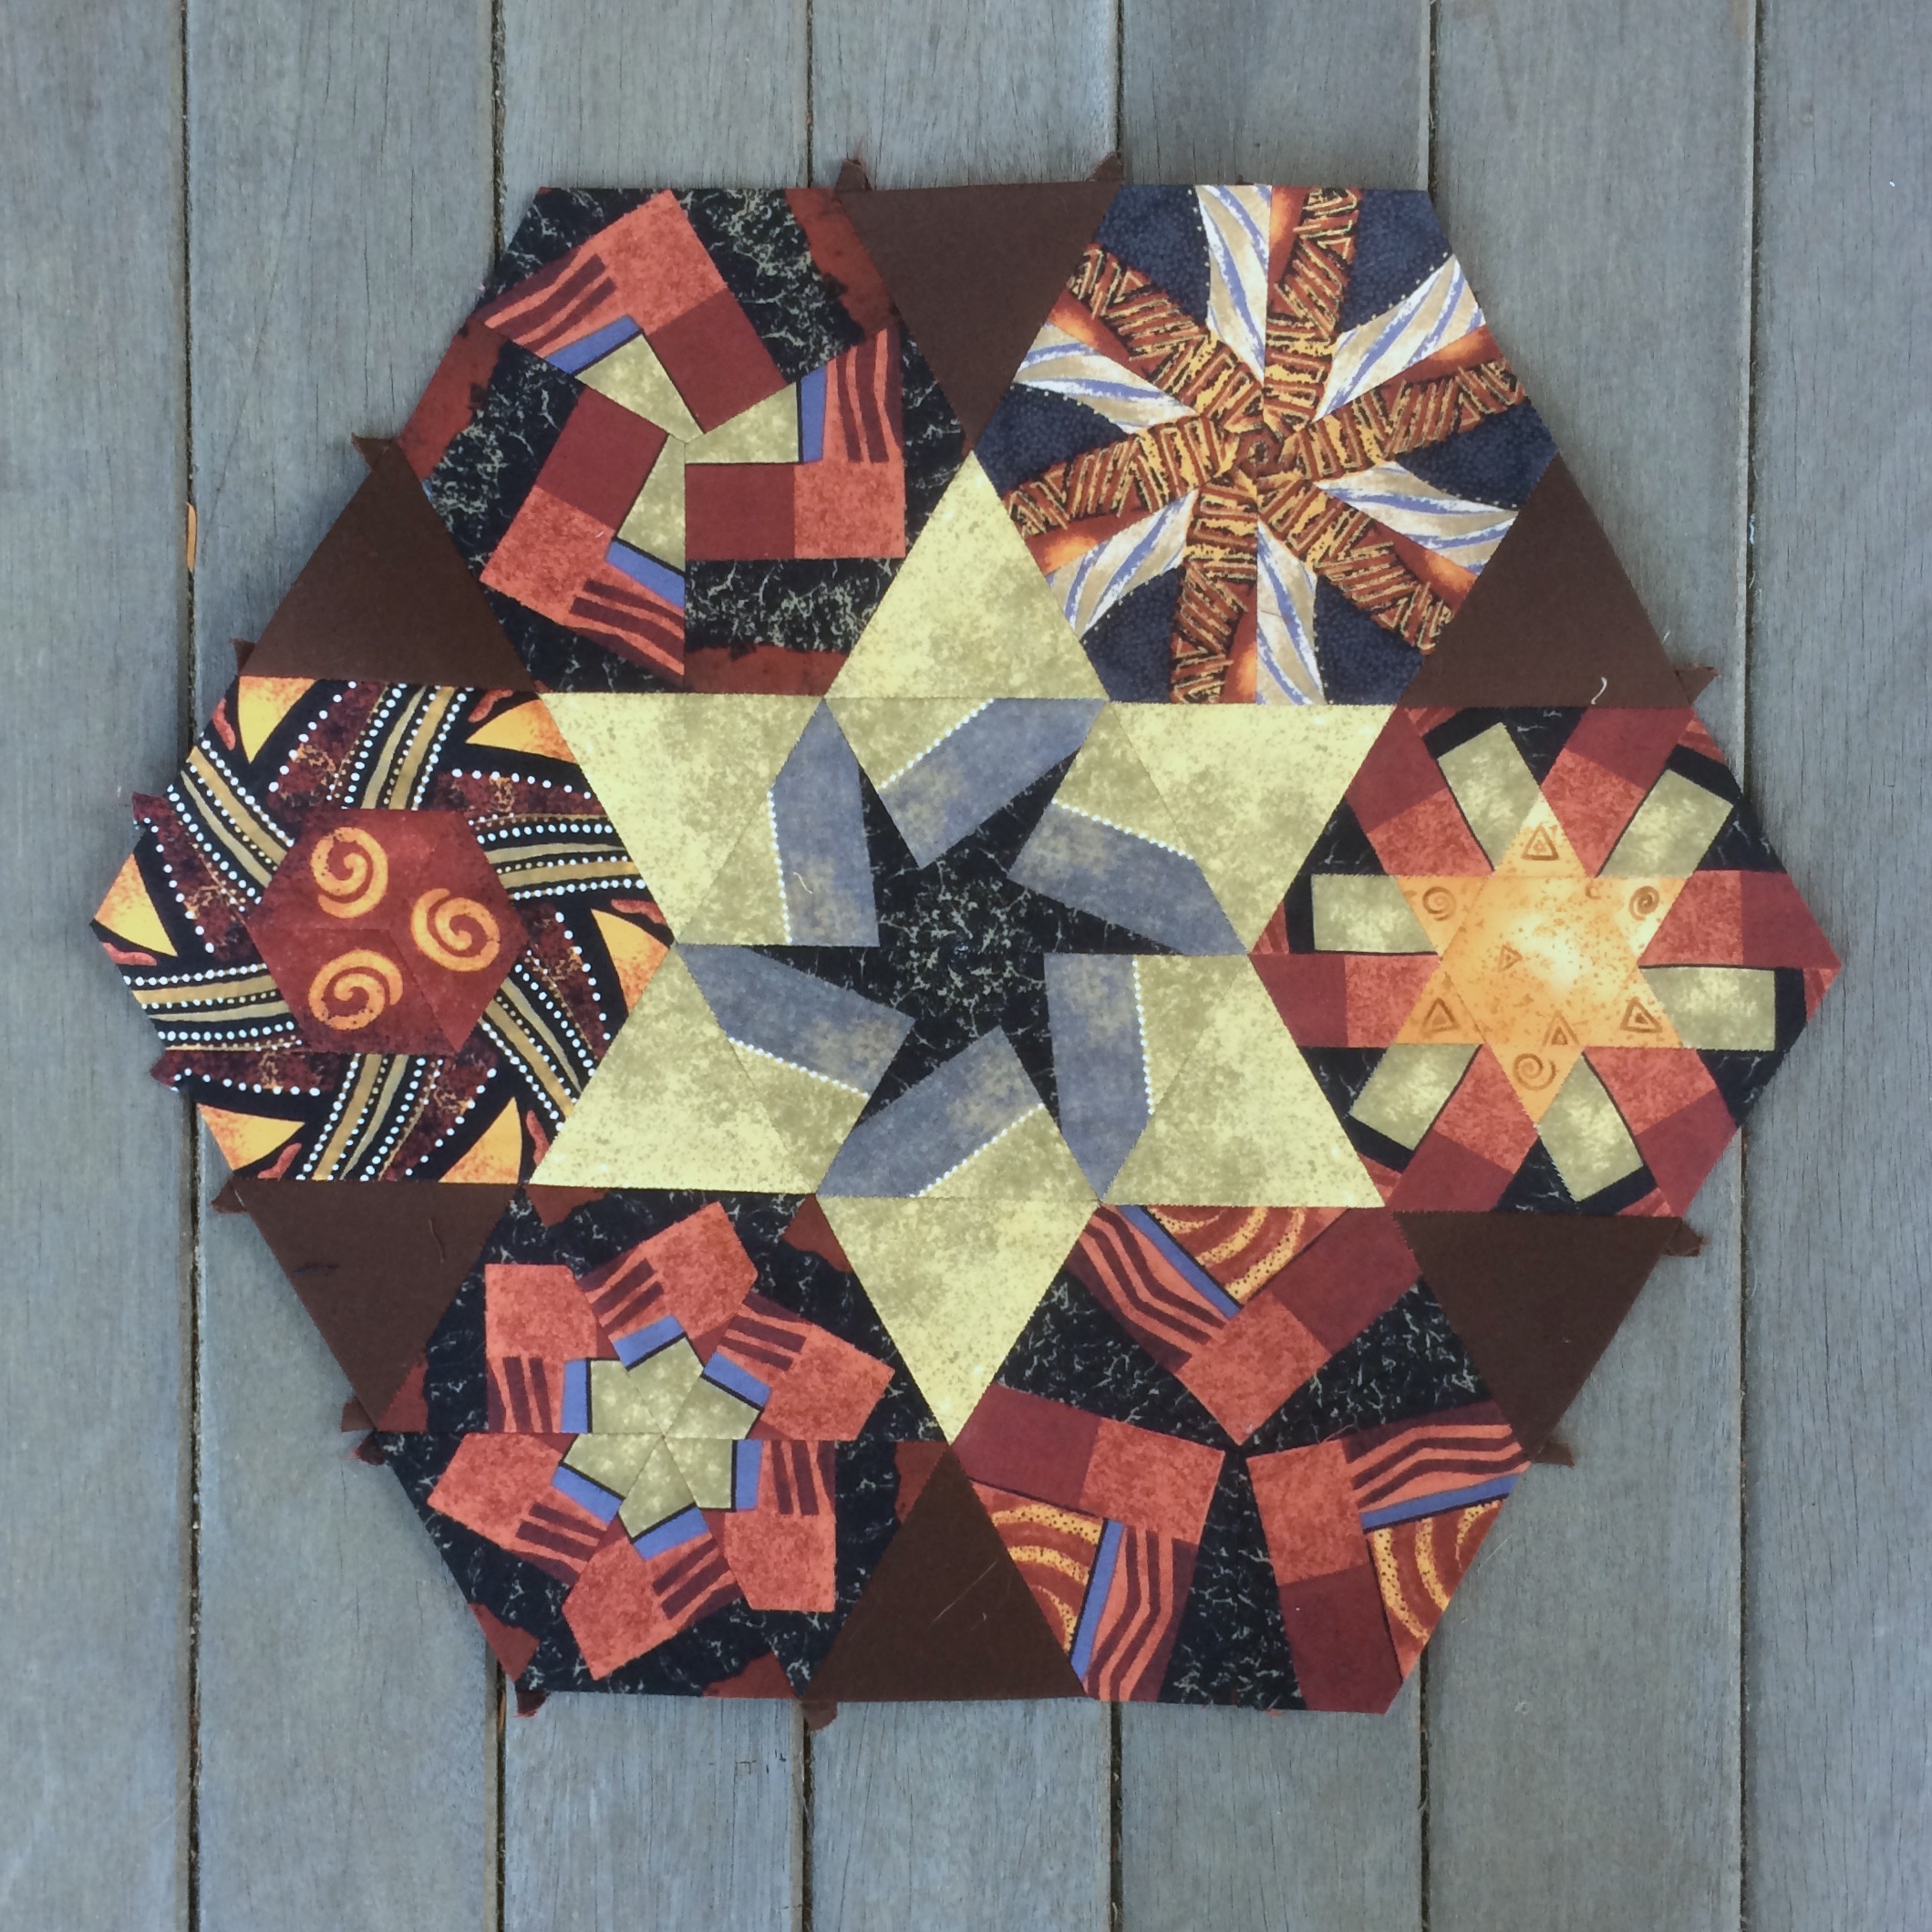
Above we have an eight inch wide stack of the Blue Mane fabric. We also have a twelve inch wide stack of the Blue Mottled fabric. The top stack amounts to 48 inches of yardage and the bottom stack amounts to two yards of fabric.

I have about two yards of the of the Blue Mane fabric remaining, unfortunately it is in three separate pieces, so I am not sure that I could piece together a stack from what I have. I have only a couple inches left of the Blue Mottled fabric.

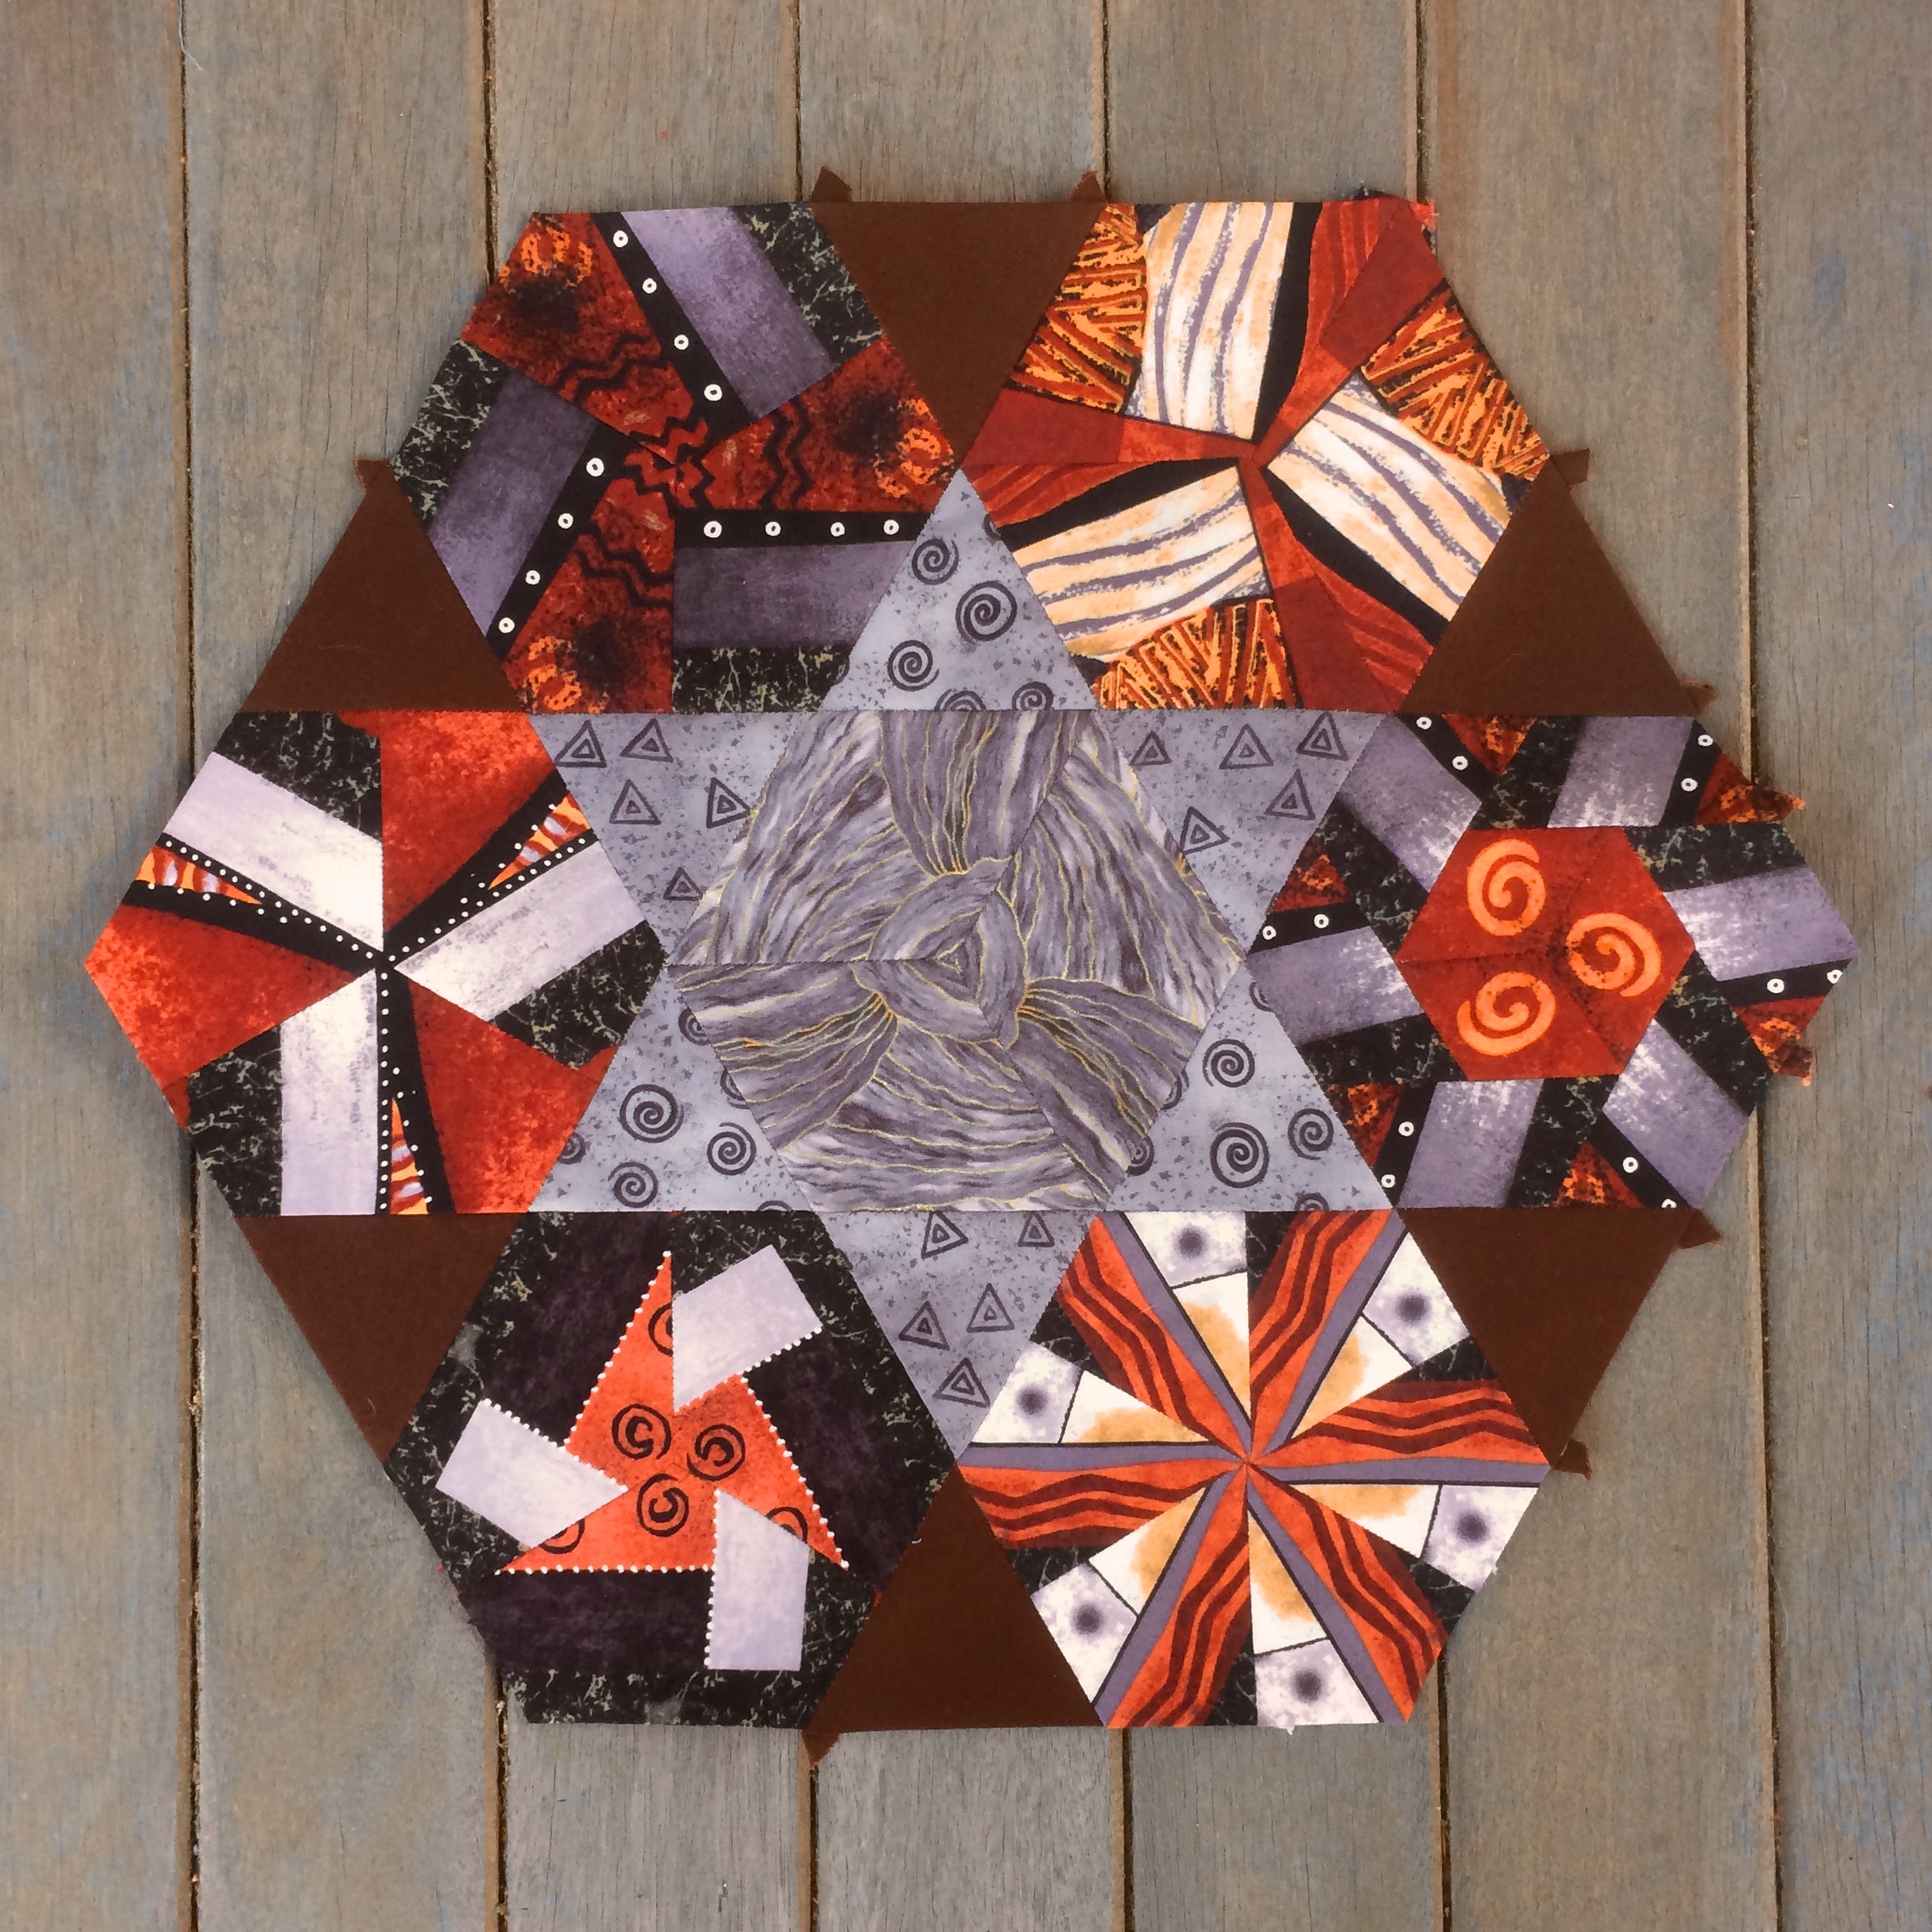
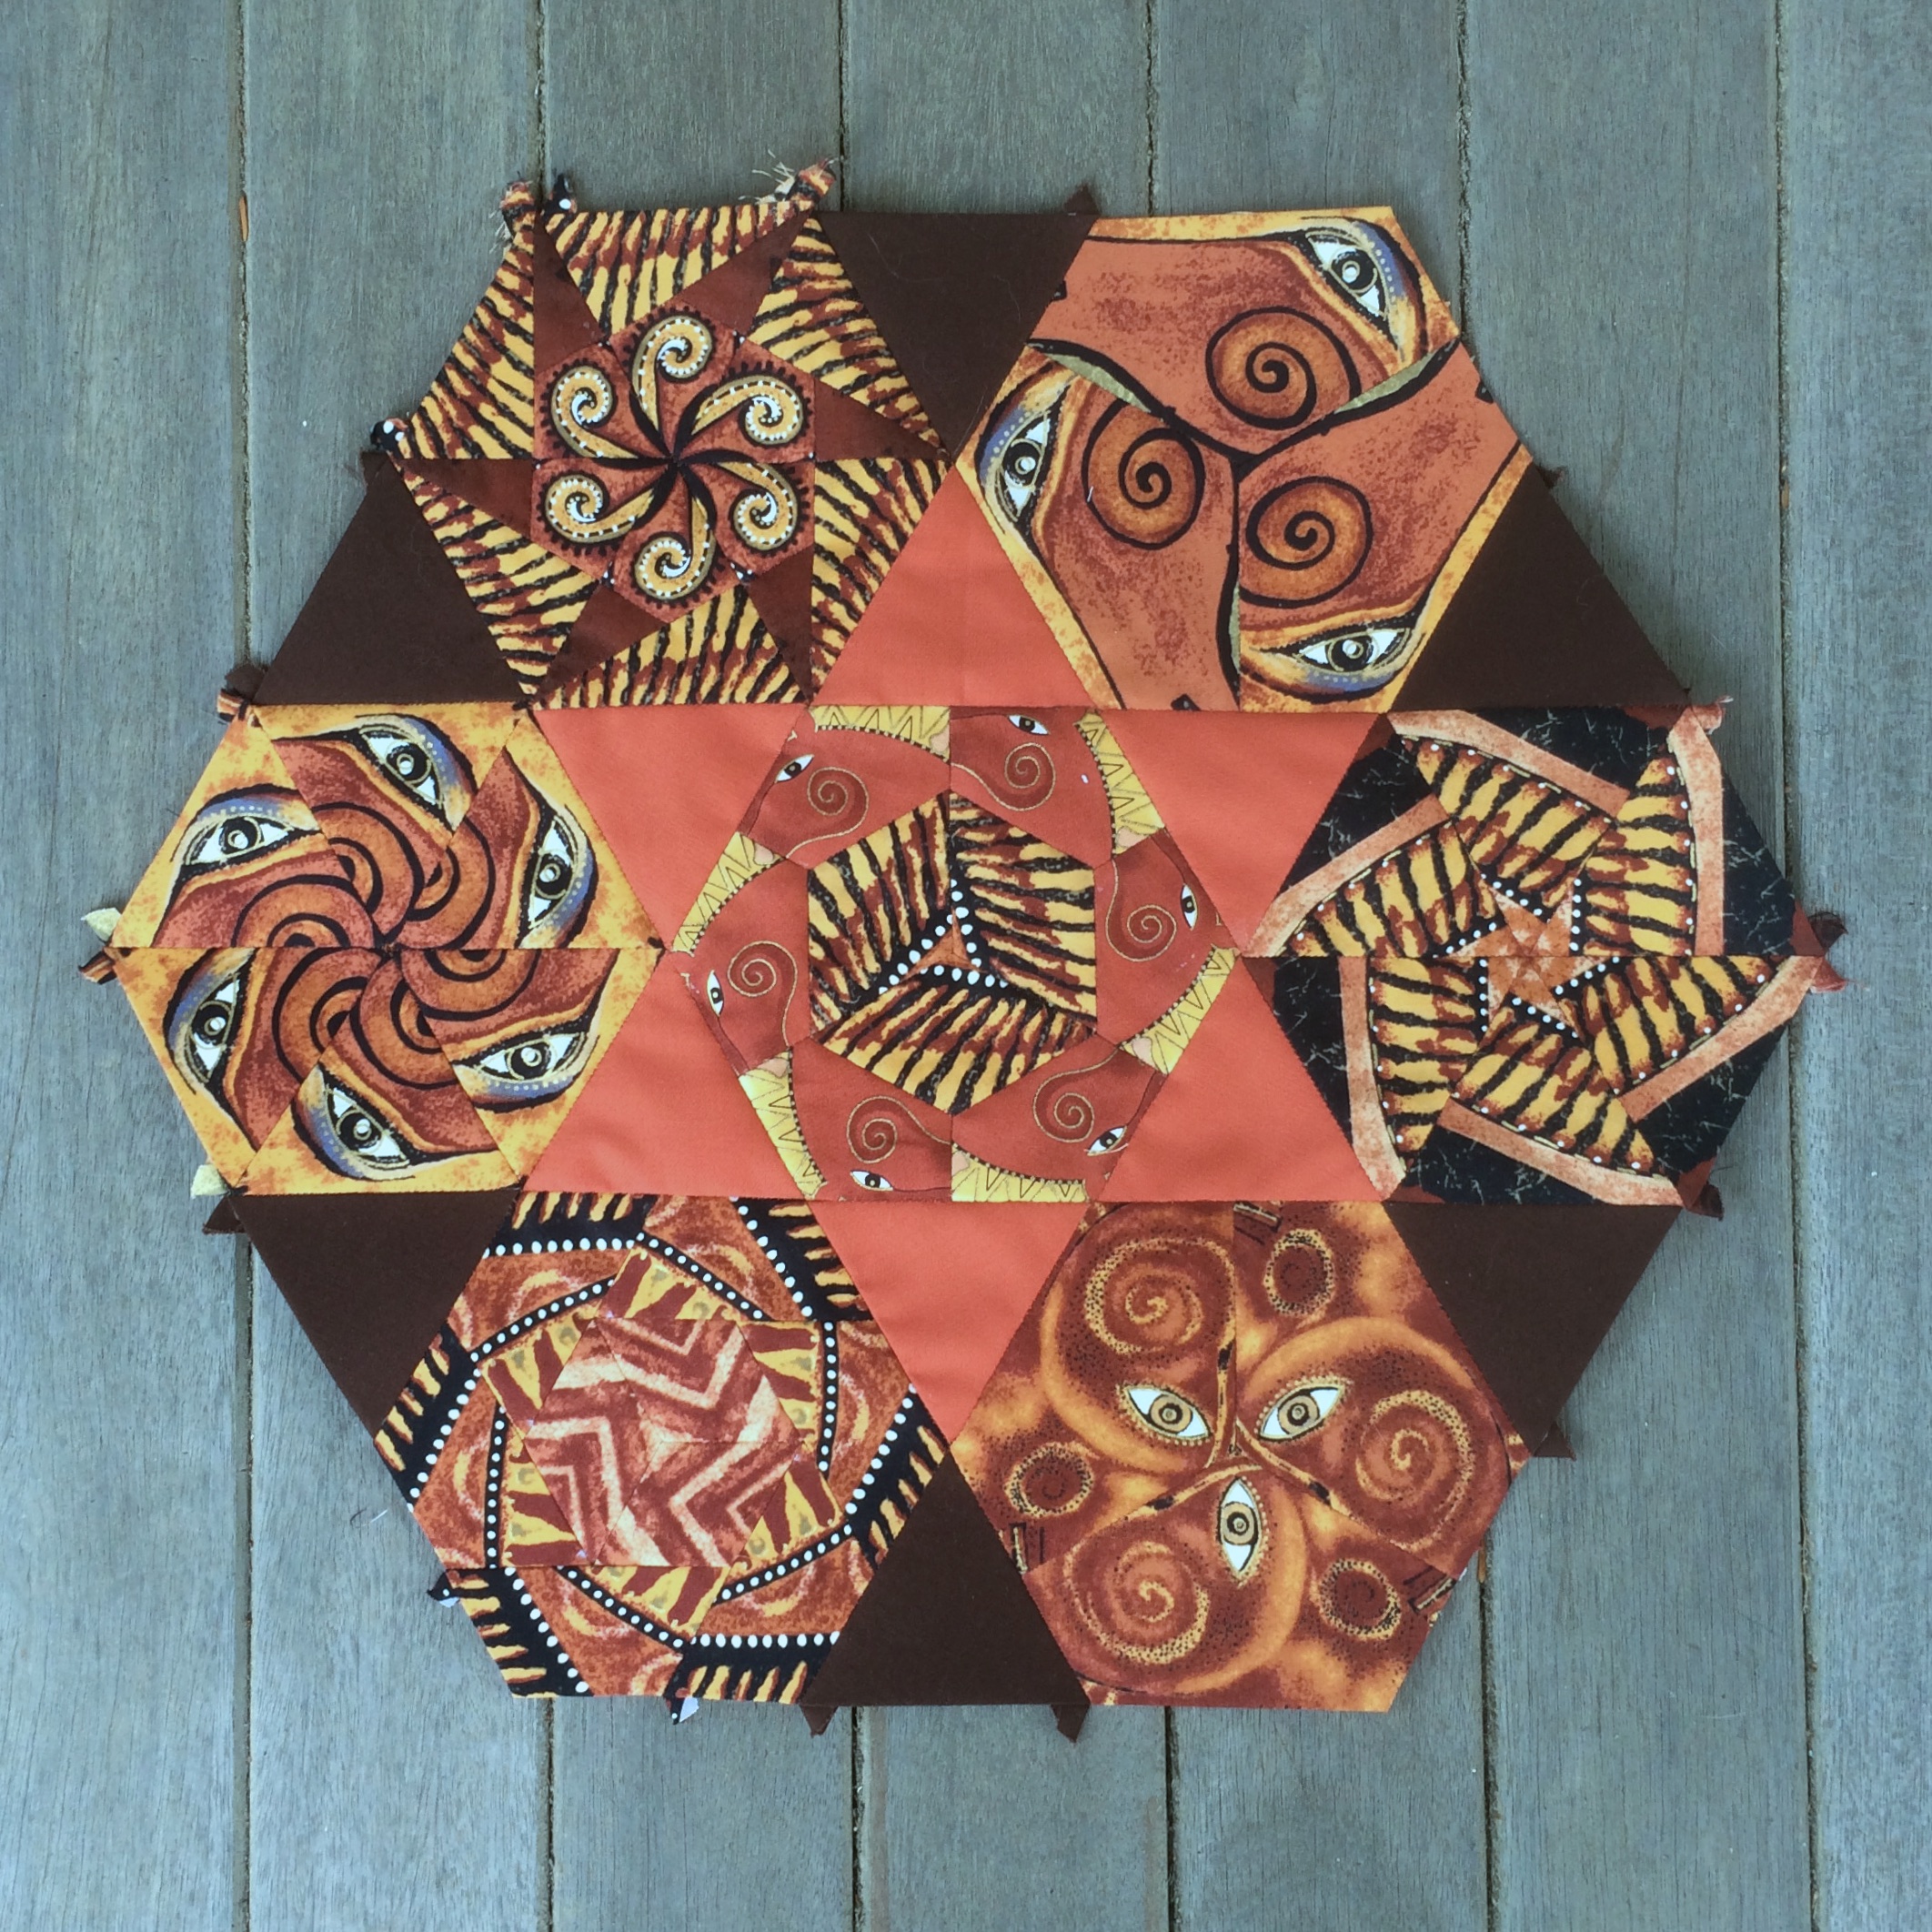
Above we have an eight inch wide stack of the Rust Mane fabric. We also have a twelve inch wide stack of the Yellow Mottled fabric. The top stack amounts to 48 inches of yardage and the bottom stack amounts to two yards of fabric.

I have a yard piece and also a 24 inch piece of the Rust Mane fabric left. I have a yard left of the Yellow Mottled fabric.

Finally we have the fabric that started it all, the Horse Head Fabric. Above we have a twelve inch wide stack which represents two yards of fabric. I have at least eight yards left of this fabric, which is enough to make four more stacks.

So this is what I’ve got. I have twenty yards of fabric already make into stacks, and 40 more yards, most of which can be made into stacks in the future. I think there could be a few quilts here. I certainly have enough fabric to explore many possibilities, especially with the introduction of solids.

This post is about the fabric I have remaining. What I had used up to this point is anyone’s guess. I’d guess at least ten yards, probably more. So we have in excess of seventy yards of fabric purchased to feed my obsession with this project and whatever projects emerge from the remains.

A word of advice to anyone who wants to stick with a collection of fabric for a Glorious Hexagons quilt… Pick a collection still in print and save yourself the need to scour the internet.

Share this:

  • Email
  • Facebook
  • Twitter
  • Pocket

Glorious Hexagons: Assembly Ideas

13 Wednesday Jul 2016

Posted by Terri Schurter in Uncategorized

≈ 1 Comment

I’ve already committed myself to assembling my three inch Glorious Hexagons into larger nine inch Glorious Hexagons. I’ve shown ten of the large hexagons so far. I can continue to put these units together knowing that they will make a fine quilt some day, but I must eventually decide how to put these larger units together, and how to finish off the edges.

I see three possibilities for assembly.

First, I can lay out the large hexagons side by side without any extra shapes. The disadvantage of this is that the individuality of the large hexagon units becomes lost. If I come to regard the large hexagon units as a convenient means of breaking down the work of assembly rather than individual design elements I can accept that result. The real advantage of the layout is that the design takes on a random jewel like quality. This makes it much more in keeping with the spirit of the Glorious Hexagons quilt idea than the other two layouts I will present.

A closeup of the first layout idea shows that new elements emerge where the edges of the large hexagons come together. Chocolate diamonds come forth. In addition to that medium sized (six inch) hexagons are formed. Those medium sized hexagons are composed of three small hexagons and three Chocolate diamonds. The design is essentially composed of three inch, six inch, and nine inch hexagons. The nine inch hexagons, however, become virtually lost in this layout.

The second assembly method involves the use of large triangles as setting pieces used to assemble the large hexagons into rows. Each triangle is nine inches on each side and is composed of one three inch hexagon and three solid Chocolate triangles. The large hexagons do not become completely lost in this method of assembly, but they do fade away a bit, and perhaps the only reason I can see them is because I worked so hard to put them together.

If I were to pursue this second method of assembly I might want to create hexagons specifically designed for the setting triangles. Those hexagons would have centers that would echo the star shapes of the larger hexagons. The images below show this concept in action.

Some of these central star colors are better suited to these jewel pieces shown above. They are offered simply to give the idea of what can be achieved with the use of solid colored stars in the smaller hexagons. Using these stars in the setting triangles might allow the large hexagons to stand out more.

The third method of assembly also involves the use of large setting triangles to assemble the large hexagons into rows. In this case each nine inch triangle is composed of one solid Chocolate three inch hexagon as well as three solid Chocolate triangles. This results in a solid Chocolate nine inch triangle. This method preserves the integrity of the large hexagon units very well if that is to be desired. It also creates a new element in the form of a chocolate star the same size as the various colored stars that make up the centers of the large hexagons.

The three choices range from chaotic, to less chaotic, to ordered. It is no surprise that my husband has a preference for the final method. I do not have a preference myself at this time. I am likely, however, to put the quilt together using the third method to please my husband. I am also likely to continue to create more large hexagons with my wealth of fabrics in the Embracing Horses collection. I will then put together a quilt or at least a wall hanging using the first method.

Once an assembly method is chosen the last thing that needs to be considered in the assembly of the quilt top is how to finish off the edges. The drawing above represents the upper left corner of the quilt top. Along the side of the quilt there will be triangular areas that must be filled. I need to decide how far to extend the edges and plan for the assembly of units to occupy the spaces along the sides. I also need to consider how I am going to finish off the top and the bottom. If I am going to do a standard bias binding I must add some fabric to the top and the bottom so the binding will not extend onto the hexagon shapes. The markings along the top show a solution that will extend the edge by an inch and a half.


Share this:

  • Email
  • Facebook
  • Twitter
  • Pocket

Glorious Hexagons: Big Hexagons 6 Through 10

05 Tuesday Jul 2016

Posted by Terri Schurter in Uncategorized

≈ Leave a comment

Here are the next five big hexagons along with my thoughts about their creation.

The central triangles for this block were cut from a blue fabric exactly like the yellow fabric that was used for the triangles on the first large hexagon that I put together. I alternated triangular and circular patterns for the cuts for these triangles.

I had a hard time deciding on the central hexagon for this block. I considered cutting a piece of the fabric that I used for the triangles and inserting a solid three inch hexagon made from it into the center. I had a Doloris block, however, made with the same color but in a mane patterned fabric. After making that block I thought I was not going to find a good way to use it in the quilt. It called too much attention to itself and it was too different from anything else I had made. Therefore, I thought it was going to stick out like a sore thumb next to the other blocks. However, it blends nicely with the blue patterned diamonds and circles of similar hue and value.

I’m glad I chose to use this unusual block for the center hexagon. The outer hexagons are all composed of pieces cut exclusively from the panel fabric. In retrospect I wish that I had worked harder to find a block with a darker gray element in it for the lower left block. It looks too much like the block immediately above it and to the right. In the final quilt I doubt that I will give it a second thought though.

I had put in an order for some Kona solids to audition for possible use in creating the central stars of the large hexagons. I used one of these solids in the block above and more of them will appear in future large hexagons.

The inner triangles of this block are made from Kona Spice Fabric. This is the fabric that most nearly matches the color in the rust horse mane fabric. It is nearly a perfect match. I used one of my favorite bird blocks for the center. I love the way the bird bodies merely kiss each other leaving a tiny triangle of rust colored fabric at the center of the block. None of the colors of the central hexagon exactly match the Spice fabric so the star seems to be recede to connect to the three outer hexagons that feature the rust mane fabric. I alternated those three blocks with blocks using recognizable large horse heads.

Notice the propeller effect of the manes on the lower right block. This is one of my favorite effects to use in fussy cutting the Large Horse Head Fabric.

One thing that I am not keen about is the way that the light gray in the upper right block draws attention.  If you squint at the block you can see that easily. Three of those horses are just too light and too blue. I think that is the problem. Once again, though, in the big picture it probably won’t matter.

This is my favorite big block so far. I used the green mottled section of the Panel Fabric for the green central triangles of this block. I chose a block for the center hexagon that had a bit of that green which would touch the triangles in three locations. I love the way it turned out. I didn’t alternate the outer hexagons in any special way. I simply chose a variety of blocks with a rust emphasis. The pieces for the blocks were cut primarily from the Panel Fabric with the exception of the lower right block which was cut from the Jumping Horses Fabric.

The central triangles of this large hexagon were cut from Kona Indigo fabric. I was very conflicted about using the Indigo because I knew it would recede into the background whereas the other stars, being lighter, would all pop to the top of the quilt. The central hexagon, one of my favorites, simply screamed for the Indigo triangles, however. Who am I to deny such a noisy block? So Indigo it was, and I am so happy about it. So happy, in fact, that I am thinking about a quilt made of large hexagons with nothing but Indigo centers, but that is an idea for another day. Three of the outer hexagons in this block have a definite blue emphasis to harmonize with the central block. They are alternated with blocks with more of a brown emphasis.

On the heels of my success with the previous Indigo star I could not stop. I had to do another. The triangles of this large hexagon were also cut from Kona Indigo fabric. The central hexagon chosen for this block melds nicely with the triangles surrounding it. This keeps it at the same visual level as the triangles. Three of the outer hexagons were cut from the Panel Fabric and have a very light blue emphasis and contrast sharply with the edge of the central triangle. The other three alternating hexagons were cut from the Large Horse Head fabric and have a rust color emphasis. Notice, however, that all three have elements of dark blue in the background to harmonize with the Indigo of the central star.

I’m still assembling large hexagons and starting to lay them out on my queen sized bed to try to decide how I am going to finish off the edges. When I have five more completed I will post them.

Share this:

  • Email
  • Facebook
  • Twitter
  • Pocket

Glorious Hexagons: Big Hexagons 1 Through 5

02 Saturday Jul 2016

Posted by Terri Schurter in Uncategorized

≈ 1 Comment

Recently I had to clean up the dining room, which also happens to be my work area for my Glorious Hexagons work. We had company for a week and we needed a place to eat meals.

That left me with no place to cut fabric and no place to glue baste my pieces. I had everything pushed to the side and I thought I was going to get by for a week without stitching, but I failed to realize how strong the urge would be to take up needle and thread.

It seemed that the least messy way to satisfy my urge would be to assemble some of my three inch assembled Glorious Hexagon blocks into a larger hexagon unit. I was only going to make one of these blocks, but after making one I realized that I would assemble the entire quilt using these large blocks. They would provide me with an intermediate step between small block assembly and final quilt construction. They would provide me with a means to insert the colored star units with minimal fuss. They would also save me from having to fiddle with nearly 300 small blocks when it came time to sew the quilt top together. It seemed like a no brainer for me. So I just kept on sewing those large hexagons until I had quite a few. Currently there are eleven finished, one in the works, and four more big block units portioned out into plastic bags ready to assemble.

I will be showing the first five blocks in this post..

I came up with the idea of putting together hexagons and triangles in the same configuration as the block named Willa from The New Hexagon book. All of the blocks will use Kona Chocolate for the outer triangles. The inner triangles will change color from block to block. For this block I pieced the inner triangles from very small scraps of a yellow patterned fabric that is a part of the Embracing Horses collection. Each triangle is made up of four smaller triangles which are joined randomly. The outer hexagons are all primarily rust colored and composed of pieces cut from multiple fabrics in the Embracing Horses collection. Looking at the top edge of the central hexagon you can see that the yellow of the triangles melds nicely with the yellow of the hexagon above the bird.

This block uses the mottled green section of the Panel Fabric for the central triangles. All of the hexagons are composed of pieces cut exclusively from the Panel Fabric. These hexagons are very mechanical in feel. There are no horsey parts to be found.

The inner triangles of this block are cut from Kona Tera Cotta fabric. It is a bit on the bright side but I thought that it worked well with the surrounding hexagons. All of the hexagons are composed of pieces cut exclusively from the Panel Fabric with the one exception of the horse heads along the outer edge of the central hexagon. This piece has an emphasis on horse eyes. They appear in the central hexagon as well as three of the outer hexagons. The outer hexagons with horse eyes are alternated with hexagons that make use of the mane fabric. The upper left hexagon is a block named Katja. I like the way that Katja looks, but she is a bitch to assemble. She also presents difficulties when piecing her to other units because of the three points that come together at the end of each edge of the block. The outer blocks were alternated with horsey eye blocks followed by mechanical mane blocks. Even though they are basically the same color and value they do have a different feel to them.

The central triangles of this block are cut from Kona Ash fabric. For the first time I tried a bit of a different configuration for the outer hexagons in terms of color placement. I alternated hexagons that were primarily blue in color with hexagons that were primarily rust in color. I have since repeated this alternation concept a number of times with other large hexagons. This placement of blocks gives a bit of a dimensional look to the larger block that resembles plane propellors.

The central triangles of this block are cut from Kona Butterscotch fabric. I continued with the concept of alternating the outer hexagons. In this case I chose three highly detailed blocks that had some lighter elements in them. I chose to alternate those blocks with three blocks that were primarily heavier and darker in value. The darker blocks appear to fall back in space and the lighter blocks appear to come forward a bit.

My next post will feature the next five large hexagons.

Share this:

  • Email
  • Facebook
  • Twitter
  • Pocket

Subscribe to Blog via Email

Enter your email address to subscribe to this blog and receive notifications of new posts by email.

Join 41 other subscribers

Recent Posts

  • Not Sure if I Want To Blog Anymore
  • Annoyed With Bluehost
  • Pandemic Still Life
  • Staying with Bluehost
  • Farmer’s Wife Friday: Week 20

Recent Comments

  • AmandaEcobiab on Not Sure if I Want To Blog Anymore
  • Wynne.price, nz on Not Sure if I Want To Blog Anymore
  • Visionhuq on CJMQG Fall Retreat
  • Deidre Jenkins on Annoyed With Bluehost
  • Wynne on Annoyed With Bluehost

Archives

  • December 2024
  • June 2023
  • June 2020
  • January 2019
  • December 2018
  • November 2018
  • October 2018
  • September 2018
  • August 2018
  • August 2017
  • May 2017
  • April 2017
  • March 2017
  • January 2017
  • November 2016
  • October 2016
  • September 2016
  • August 2016
  • July 2016
  • June 2016
  • May 2016
  • April 2016
  • March 2016
  • February 2016
  • January 2016
  • December 2015
  • November 2015
  • October 2015
  • September 2015
  • August 2015
  • July 2015
  • June 2015
  • May 2015
  • April 2015
  • March 2015
  • February 2015
  • January 2015
  • December 2014
  • November 2014
  • October 2014
  • September 2014
  • August 2014
  • July 2014
  • June 2014
  • May 2014
  • April 2014
  • March 2014
  • February 2014
  • January 2014
  • December 2013
  • September 2013
  • August 2013

Categories

  • UFO
  • Uncategorized

Proudly powered by WordPress Theme: Chateau by Ignacio Ricci.