• About Terri Schurter

Hexy Lady

~ my second act in fiber arts

Hexy Lady

Monthly Archives: April 2015

And the Winner Is…

25 Saturday Apr 2015

Posted by Terri Schurter in Uncategorized

≈ 2 Comments


Delaine.

She has won the autographed copy of the book, and will be receiving it through the mail shortly.

If you liked what you saw during the blog hop, and really wanted to win this book, then please head on over to Amazon where you can get your own copy.

By the way, the item above is no longer in my collection. I took it with me to the First Slow Stitching Movement Retreat where I used it as my entry in a Yankee swap. I had never participated in one of those before, and I wanted to give something that someone would appreciate even though the idea is to give something funny. The container was definitely appreciated, and it created a little buzz for the book at the retreat.

I took all of my finished objects with me to the retreat and placed them out on my table along with the book so people could see them. I also prepared the units necessary to make another convex vase, and completed that at the retreat. I even brought my bag of templates for that project with me so I could show them. When my convex vase reached the end of the “octopus” stage I set it out on the table and left it there for awhile, which drew additional attention. I kept it low key, but it was really nice to be able to hand out my business cards when people commented on the work, and to tell them that they had a chance to win the book since I was keeping the comments section open until the end of the retreat.

Share this:

  • Email
  • Facebook
  • Twitter
  • Pocket

Stash Envy – Getting Ready For Slow Stitching Movement Retreat

19 Sunday Apr 2015

Posted by Terri Schurter in Uncategorized

≈ 4 Comments

As part of our activities for the Slow Stitching Movement Retreat coming up this week we are supposed to bring 24 light 1.5 inch salvage to salvage strips, and 24 dark salvage to salvage strips. Mark Lipinski will be leading us in some “slow stitching” exercises with these strips.

Because I buy fabric mostly to work on specific projects, and when I do buy spontaneously I tend to pick up sets of fat quarters, this was a bit of a challenge for me. Mark forbade us from buying fabric for this. He told us we had to shop our stash.

I ask you what stash? Am I the only quilter out there who doesn’t have a stash?

Luckily I had occasionally bought value ranges of various Kona Solids in order to select colors for projects. I have very few print fabrics in yardage format so I decided to limit myself to solids.

I gathered together my Kona Solids, and I found that I had enough so I would only have to cut two strips from each piece.

I separated out my lights from my darks before cutting.

After cutting I packaged my strips into neatly banded units.

I’m almost ready for the retreat. We have been having a lot of fun chatting among ourselves for the past few weeks in our own private Facebook group.

We are supposed to make three things with these strips. I can’t wait to find out what we will be doing with them.

Share this:

  • Email
  • Facebook
  • Twitter
  • Pocket

Blog Hop for “Contain It” Book Anniversary

17 Friday Apr 2015

Posted by Terri Schurter in Uncategorized

≈ 24 Comments

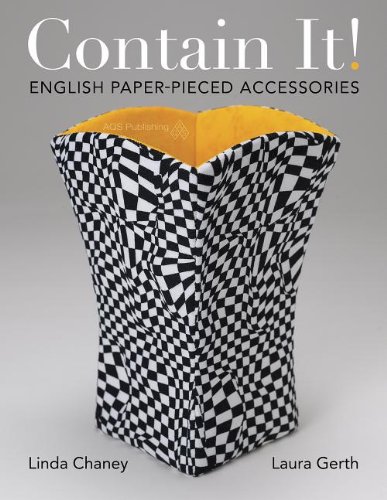
I was pleased to be asked to participate in the blog hop celebrating the one year anniversary of the publication of the book “Contain It! English Paper-Pieced Accessories” available from Amazon.

Don’t order the book just yet though, because if you comment below, you will have an opportunity to win an autographed copy of the book created by the mother/daughter team Linda Chaney and Laura Gerth. Make sure you visit the other five blog hop destinations to optimize your chances of wining. I’ll be listing those web addresses further down.

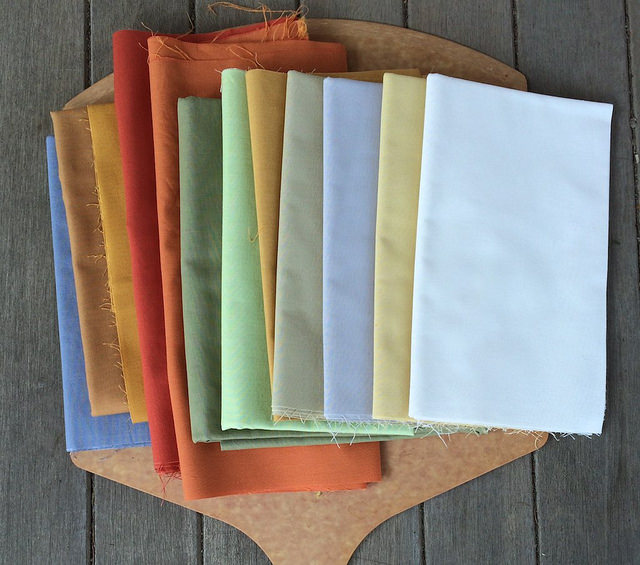
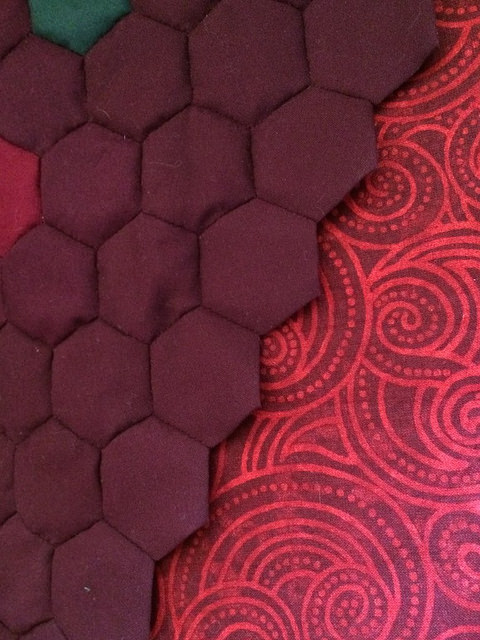
I’ll start by saying that making containers was a bit outside my comfort zone. I had never worked with stabilizer before, and I had never made any dimensional objects with fabric, not even a hand bag. My experience with English Paper Piecing helped me a great deal in grasping the fundamentals put forth in the book, yet I wasn’t sure that I was going to be able to pull this off. I did all the work using hand stitching even though some of the steps could have been achieved using a sewing machine. The book includes clear instructions on how to make a great variety of projects, and I was drawn immediately to the convex vase collection. However, I decided to start off slowly, and easily, with a flat hexagon coaster. I finished up big with a convex vase with a hexagonal base. It is only fitting that I should have started off and ended my journey with hexagons.

Here is a group photo of the projects I created from the book:

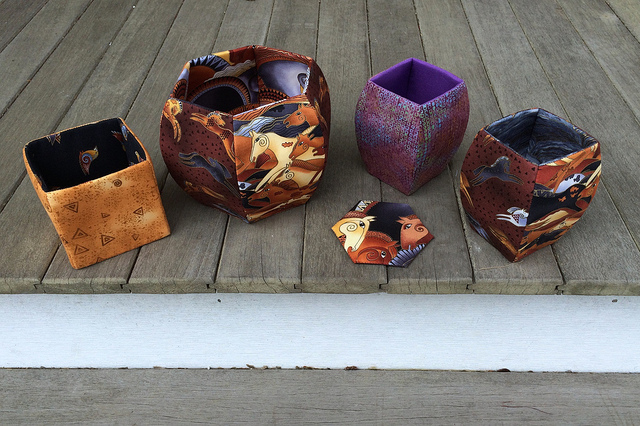
Which of these it not like the others? I obviously deviated from my color pallet somewhere along the line.

Here is my first project, the comfortingly flat coaster.

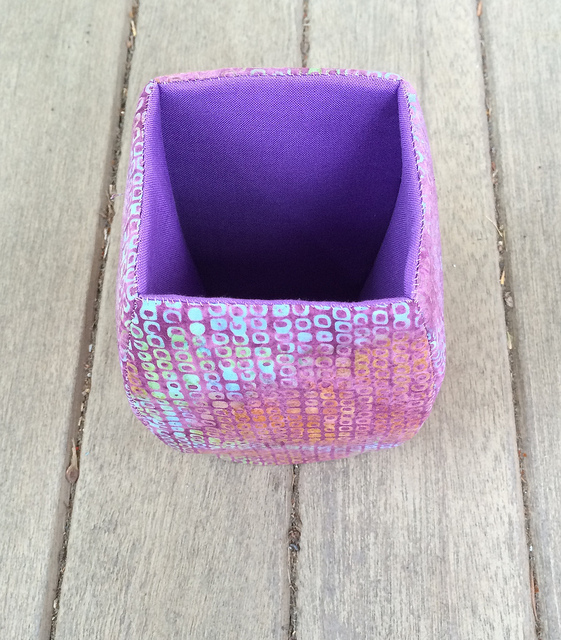
I was very proud of myself after making this little object, and felt that I had built up enough confidence to try making a cube shaped container.  I was definitely NOT yet ready for curves.

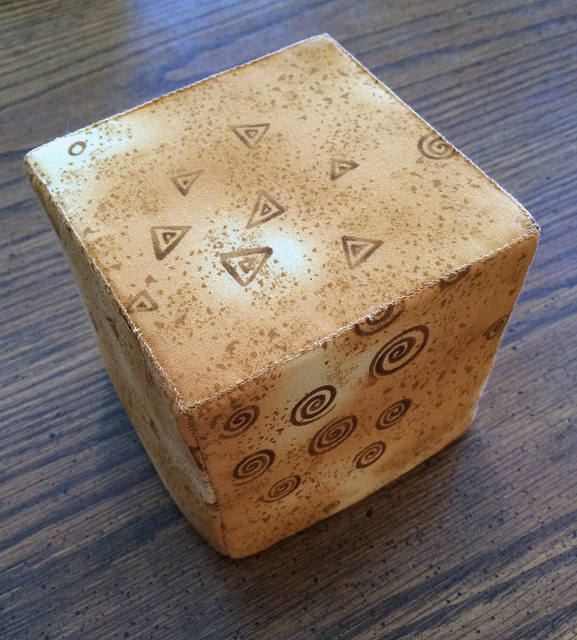
Here is my cube viewed from the top and from the bottom:

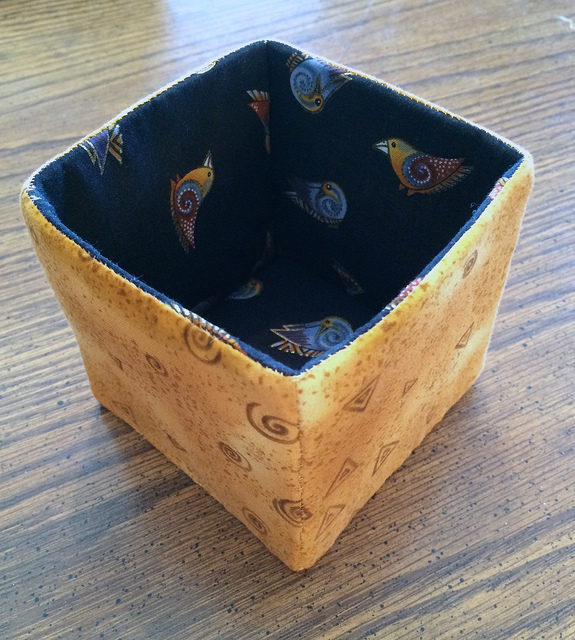
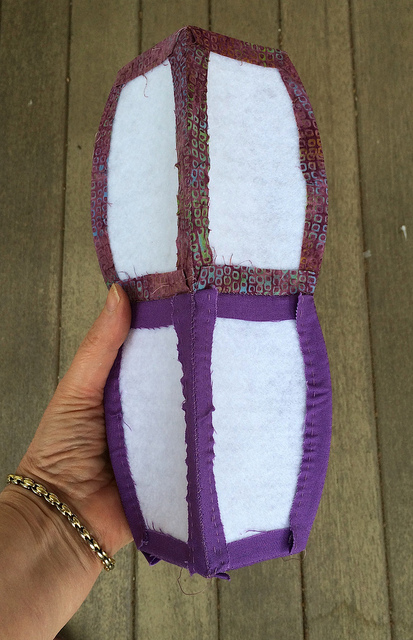
I might point out that sewing up the side seams of the cube required a major leap of faith on my part because I could not imagine how I was going to be able to fold back the outer sides to cover the inner sides. Remember my lack of experience with stabilizer material?

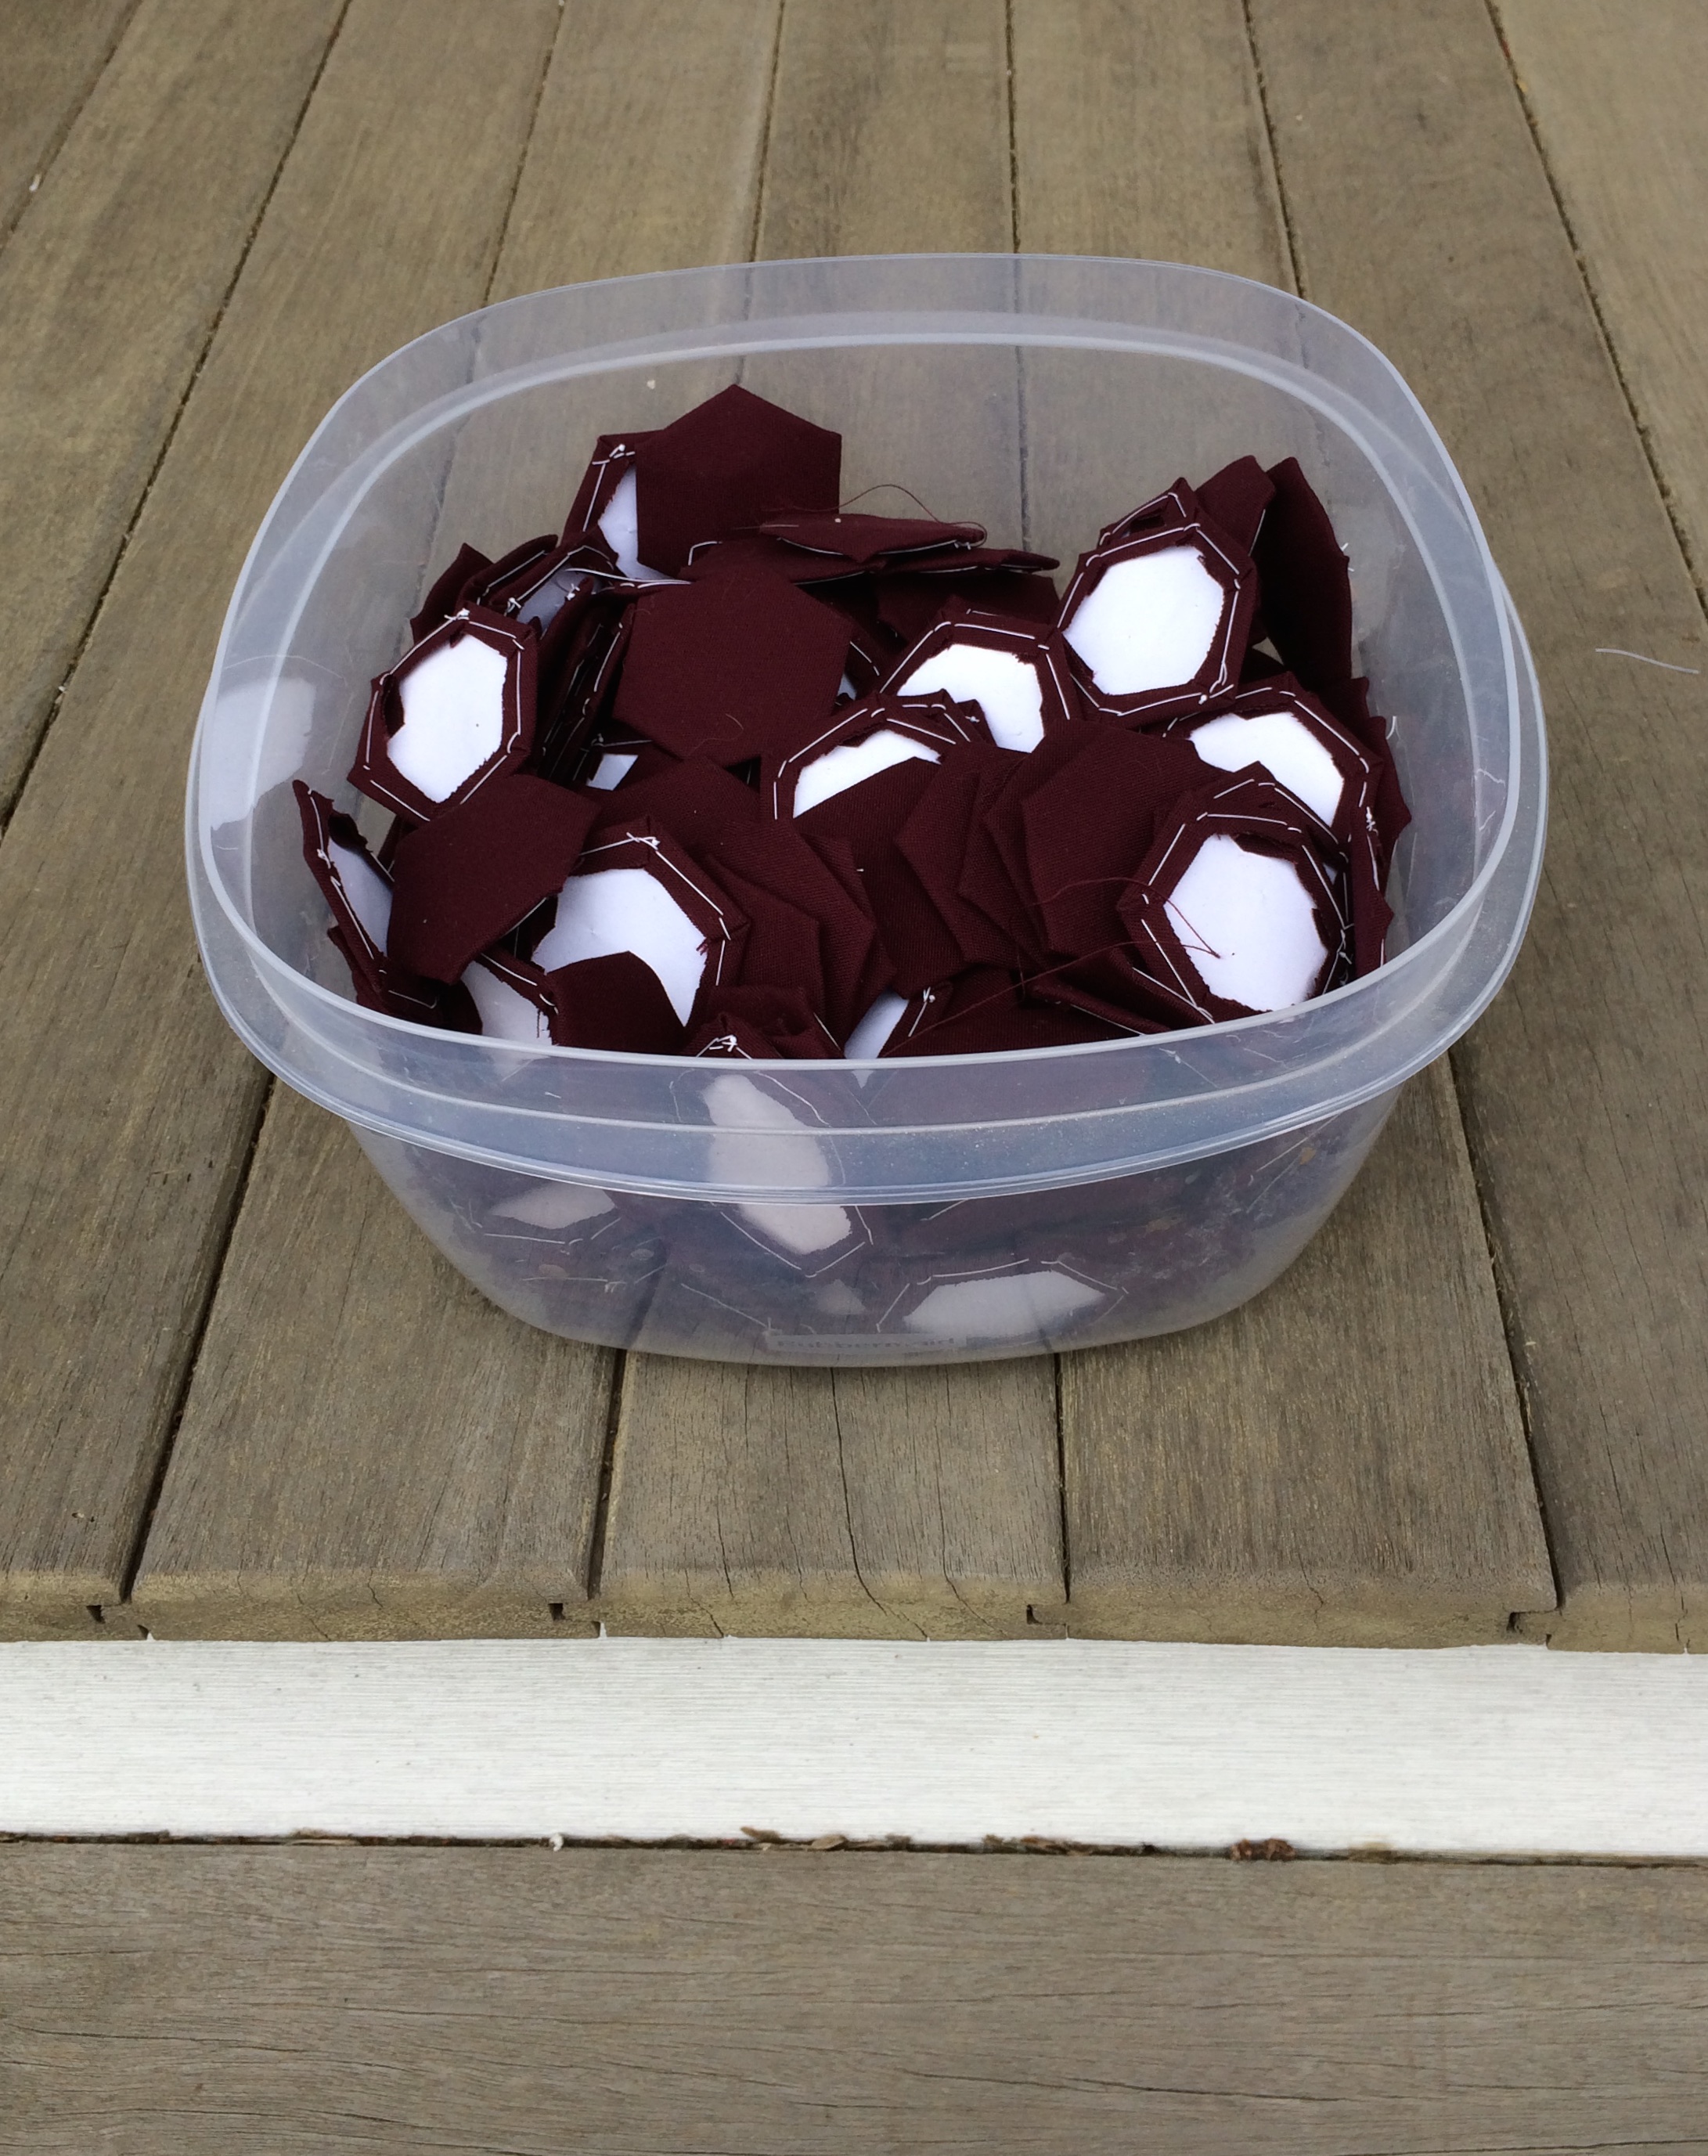
I was so proud of myself after making the cube and feeling a great deal more confident. I decided that it was time to tackle curves. All projects in the book require that you create plastic templates by tracing patterns provided in the book, which happens to be the most difficult step, in my opinion. That step becomes harder when you make containers with curves because you have to freehand your tracing on the plastic template material with a permanent marker. You can’t rest your marker against a ruler or a quilting cutting guide. Don’t let that put you off though. Sure, I was nervous free handing it, especially for the stabilizer shapes, for which accuracy is most important, but I relaxed and got better at the task. You will too. Using doughnuts of removable tape to hold the plastic to the book helps.

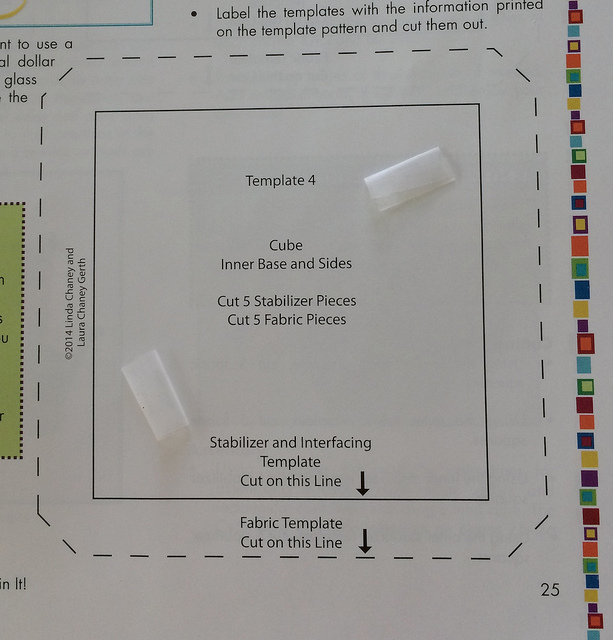
I also used doughnuts of tape to hold the templates in place while cutting around them on the stabilizer material and the fabric.

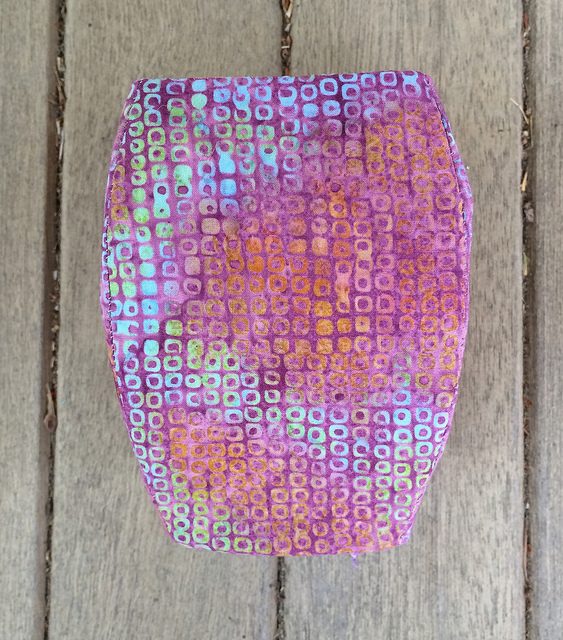
Here is my first convex container:

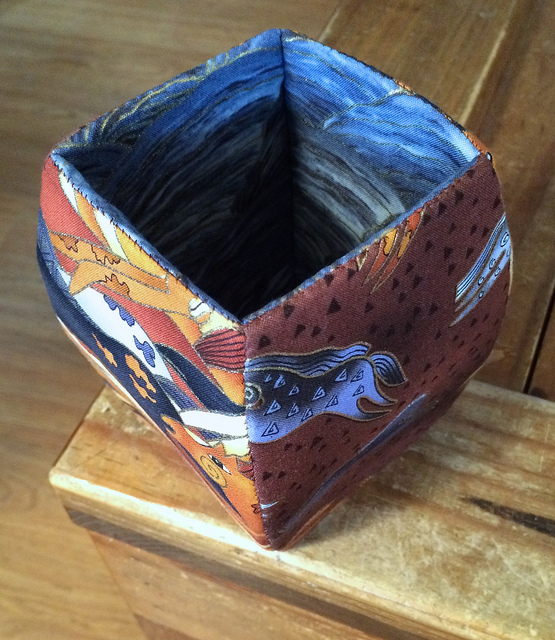
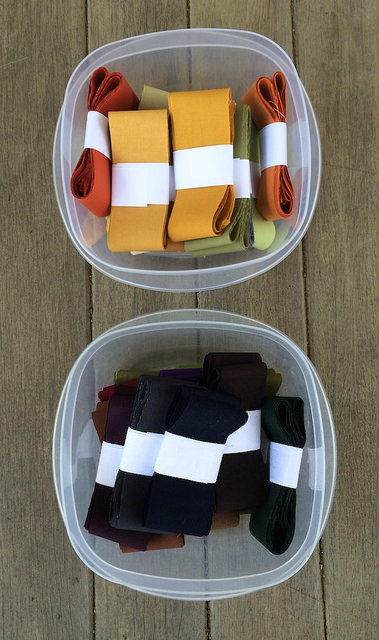
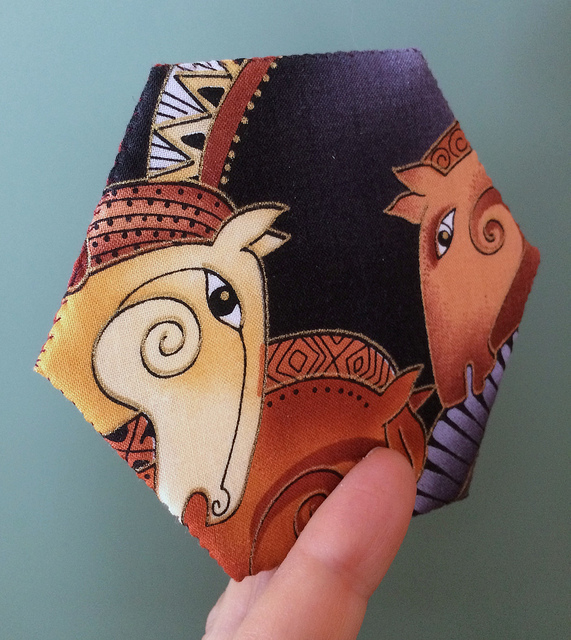
After making the above container I ran out of template material and had to order more, so I deviated from my color pallet and made another convex container using the same templates as I used for the container above.

Here is where you get to see a few process photos showing how the outer sides actually DO fold down over the inner sides. You will not need to make a leap of faith after seeing this:

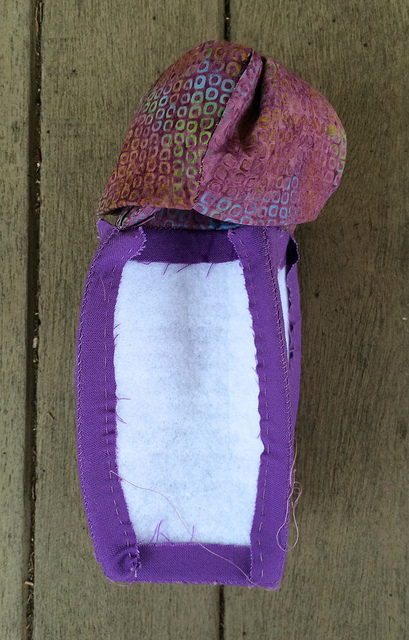
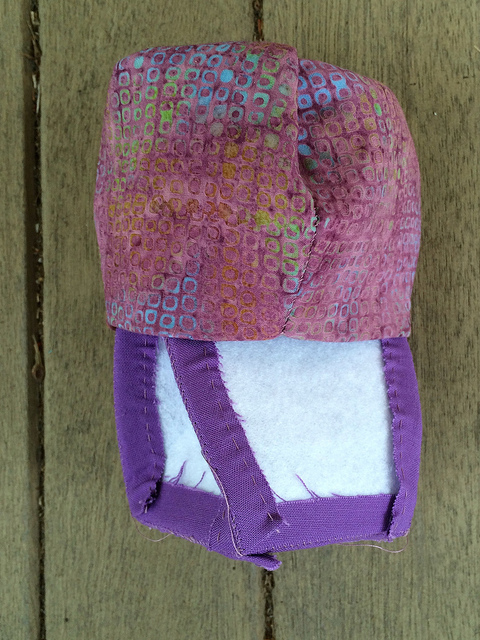
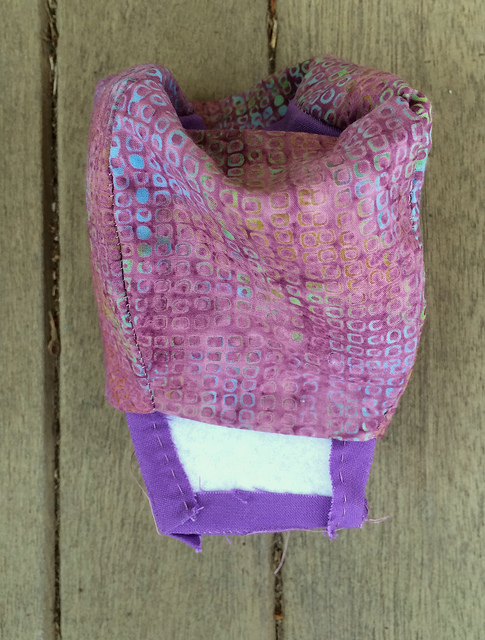
 When the top gets close to the bottom it almost pops into place.

I have to say that making the same container a second time made me realize that even that small amount of repetition makes these containers a great deal easier to make. I developed a workflow. The basic concepts sank in for me, and I didn’t find the need to keep checking the steps in the book to make sure I was doing things correctly. I found the process quite relaxing once I really knew what I was doing.

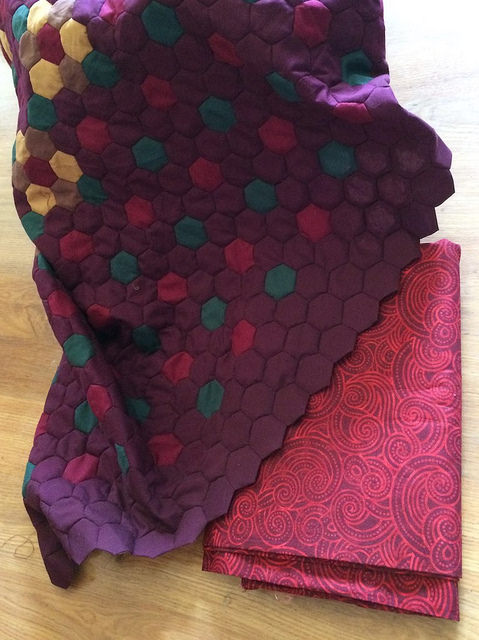
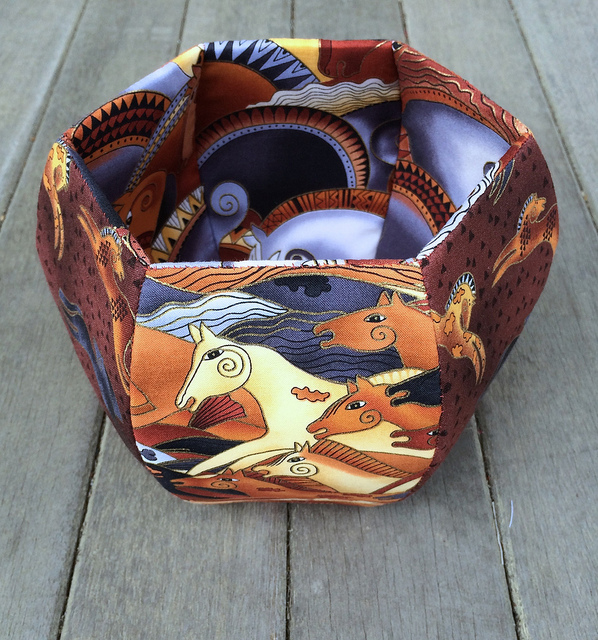
Things really fell into place for me on the final project, and I had a great time making it.

What’s next? I am definitely not finished with containers. That’s for sure. I’ve got my eye on the Scalloped Bowl Collection.

I have taken a great number of process photos for these projects that will give you an idea of what is involved in making them. You can find them in a Flickr Album entitled Containers.

For me these containers are the ideal Guild exchange project. Our guild has an annual Christmas Secret Santa event that I never participated in because I didn’t know what I could make that would take a reasonable amount of time, reflect my personality, and also be appreciated. Now I think that the Large Convex Vase with Hexagonal Base will fit that bill nicely.

Add a comment below for your chance to win a copy of the book, and don’t forget to visit the other stops on the blog hop for more container fun. I will be keeping the comments open until next Friday, so check back to see who wins the following Saturday. Make sure that your email address is associated with your comment, or appears in body of the comment, or I won’t be able to contact you if you win to ask for your mailing address.

Blog hop participants:

April 13 Daryl Perry of Patchouli Moon Studio

April 14 Debbie Voigt of Around the Strawberry Patch

April 15 Christa Watson of Christa Quilts

April 16 Andrea Taddicken of Knitty Bitties

April 17 Terri Schurter of Hexy Lady (That’s Me, and you are here.)

April 18 Ren Murphy of The Inspired Wren


Disclosure: I received a free copy of the book so I could participate in the blog hop, but the opinions expressed are my own.

Share this:

  • Email
  • Facebook
  • Twitter
  • Pocket

More Burgundy Hexagons For My Border

14 Tuesday Apr 2015

Posted by Terri Schurter in Uncategorized

≈ 5 Comments

I spent a good deal of time this week basting more burgundy hexagons to take with me to the upcoming Slow Stitching Retreat next week. I’ll be adding to the borders of my Batik Flower Garden Quilt while there.

In addition to that I spent a great deal of time last week and this week creating fabric containers to show off in my first blog hop experience. I am participating in the “Contain It” blog hop taking place this week. My day is Friday, so please come back to see what I made. I am using the horse themed fat quarters that I purchased awhile back as the fabrics for my containers. If you come back and comment you will have a chance to win an autographed copy of the “Contain It” book. If you head on over to Prairie Sewn Studios you can catch links to the first two stops in the blog hop and comment there.

Clicking on the image below will take you to Amazon where you can read a description of the book and order it if you like. If I were you though, I would visit all six of the blog hop sites to comment for your chance to win a copy first.

Share this:

  • Email
  • Facebook
  • Twitter
  • Pocket

Monthly April Star Count

06 Monday Apr 2015

Posted by Terri Schurter in Uncategorized

≈ 3 Comments

This is where I get to share with others who are participating in the once a month Star Count link back from Jessica’s Life Under Quilts blog.

What has happened since last month at this time?

I went back to the mattress store to do another photo shoot for the Batik Flower Garden Quilt.

I bought a Janome New Home 720 sewing machine from Pocono Sew and Vac to use at the Slow Stitching Movement Retreat in April.

I posted about fleshing out the edges of the Batik Flower Garden Quilt.

I cancelled my Janome 720 Order.

I bought some wonderful 108 inch wide backing fabric for the Batik Flower Garden Quilt.

And I did some math to figure out how much shrinkage I can expect on the Batik Flower Garden Quilt, and to determine how many more rows of hexagons I am going to need to add to the three overhanging edges.

To see all the photographs and details concerning the above happenings, and enjoy the posts in the order in which they were written, I recommend that you scroll quickly all the way down to my March 2nd post, and then scroll slowly back up again until you get to the top.

Enjoy.


Share this:

  • Email
  • Facebook
  • Twitter
  • Pocket

Doing the Math to Finish the Batik Flower Garden Quilt

04 Saturday Apr 2015

Posted by Terri Schurter in Uncategorized

≈ 3 Comments

First of all, the background fabric has arrived for the Batik Flower Garden Quilt, and is pictured above. I purchased three glorious yards of this 108 inch wide fabric from fabric dot com for this project. I think it is going to work beautifully with the burgundy bias binding that I will be applying, which is the same color as the hexagons pictured above.

Now for the math…

Over a year ago I did a post about shrinkage. I needed to wash a panel I had created to keep cool air in my living room and out of my hallway. When I washed that project I took measurements before the wash and after the wash because I thought that might help me estimate shrinkage of future paper pieced hexagon projects. My experiment showed me that there is more shrinkage in one direction than in the other. Who knew?

My previous shrinkage experience with my panel tells me that I can expect shrinkage of the Batik Flower Garden Quilt project in a width wise direction that will amount to one inch of shrinkage for every 22 inches of width. At the present time the quilt top is 80 inches wide, which means that I can expect 3.5 inches of shrinkage, 1.75 inches of which will be on the left overhang, and 1.75 inches of which will be on the right overhang.

My previous shrinkage experience tells me that I can expect shrinkage of this project in the length wise direction that will amount to one inch of shrinkage for every 18 inches of length. At the present time the quilt top is 92 inches long, which means that I can expect 5 inches of shrinkage, which must all come from the bottom overhang, as there is no top overhang.

It is actually a bit unfortunate that I faced the hexagons in the direction I did. Because if I had faced them in the opposite direction I would be dealing with the greater amount of shrinkage in the direction with two overhangs. My bottom overhang shrinkage would have been only 4 inches, and my side overhangs would have increased to 2.25 inches each making the shrinkage amounts closer in size for all overhangs. I’ll file that information away for future reference.

I could easily be done with this quilt top and baste it now, and it would look good. However, since I hope to create a skirt covering the boxspring to go along with the quilt, I definitely want the washed version to extend below the space where the mattress meets the boxspring. I’ve worked too hard to take a short cut now. Therefore, I am planning at least two more rows of hexagons along the bottom overhang, and at least one more row along the left and right overhangs. This means that I will not have this quilt basted in time to take to the Slow Stitching Retreat coming up in April. I will take it along to work on adding the final rows of hexagons.

The good news is that I now have extra time to work on pieces for the blog hop that I will be participating in very soon. I went to Pennington Quilt Works today and bought supplies for that mystery project. Stay tuned to see what I make.

Share this:

  • Email
  • Facebook
  • Twitter
  • Pocket

Subscribe to Blog via Email

Enter your email address to subscribe to this blog and receive notifications of new posts by email.

Join 41 other subscribers

Recent Posts

  • Not Sure if I Want To Blog Anymore
  • Annoyed With Bluehost
  • Pandemic Still Life
  • Staying with Bluehost
  • Farmer’s Wife Friday: Week 20

Recent Comments

  • AmandaEcobiab on Not Sure if I Want To Blog Anymore
  • Wynne.price, nz on Not Sure if I Want To Blog Anymore
  • Visionhuq on CJMQG Fall Retreat
  • Deidre Jenkins on Annoyed With Bluehost
  • Wynne on Annoyed With Bluehost

Archives

  • December 2024
  • June 2023
  • June 2020
  • January 2019
  • December 2018
  • November 2018
  • October 2018
  • September 2018
  • August 2018
  • August 2017
  • May 2017
  • April 2017
  • March 2017
  • January 2017
  • November 2016
  • October 2016
  • September 2016
  • August 2016
  • July 2016
  • June 2016
  • May 2016
  • April 2016
  • March 2016
  • February 2016
  • January 2016
  • December 2015
  • November 2015
  • October 2015
  • September 2015
  • August 2015
  • July 2015
  • June 2015
  • May 2015
  • April 2015
  • March 2015
  • February 2015
  • January 2015
  • December 2014
  • November 2014
  • October 2014
  • September 2014
  • August 2014
  • July 2014
  • June 2014
  • May 2014
  • April 2014
  • March 2014
  • February 2014
  • January 2014
  • December 2013
  • September 2013
  • August 2013

Categories

  • UFO
  • Uncategorized

Proudly powered by WordPress Theme: Chateau by Ignacio Ricci.