• About Terri Schurter

Hexy Lady

~ my second act in fiber arts

Hexy Lady

Monthly Archives: April 2014

Vintage Quilt Inspiration

28 Monday Apr 2014

Posted by in Uncategorized

≈ 1 Comment

At the March meeting of the Central Jersey Modern Quilt Guild one of the members brought in an unfinished vintage hexagon quilt top that she had obtained, probably at a flea market or thrift store.  It was quite a find, and in fragile condition.  I was in awe of the size of the hexagons used in the quilt, and was sorry that I had not managed to take some photographs of it.

The quilt captured my imagination and I thought about it a great deal. I especially thought about how having seen it had changed my perception of the scale of the work I am doing with one inch hexagons.  I wasn’t positive, but I imagined that the piece was made using 1/2 inch hexagons, and I really wanted a closer look, and a few photos.

Luckily, the owner of the quilt top was persuaded to bring it back for the April meeting, and I managed to get some photos of it with my iPhone.  The first photo shows the vintage quilt in the foreground with my own quilt top in the background.  Immediately after taking the first photograph I realized that it didn’t represent the difference in scale well. Because objects closer in space in a two dimensional image appear to be larger than objects farther back in the image, the difference in scale of the two sizes of hexagons was not shown off to best advantage.  That first image appears below.

I went on to take additional images with the quilts side by side, which better show the difference in scale.  The hexagons in the vintage quilt were, in fact, 1/2 inch in size, half the size of my one inch hexagons.

The back of the vintage quilt shows that the artist used a variety of papers such as newspapers, pages of catalogues, and probably any type of paper available to her.

The design of this quilt uses a diamond shape with the same four hexagon unit that I have used in many of the pieces I have created in my first year of English Paper Piecing.  Those four hexagon units are bordered by another fabric choice to create diamonds using two fabrics.  The diamonds are joined with black solid fabric.

I am inspired by this quilt to create a similar quilt. I want to make something with 1/2 inch hexagons. I like the idea because it will be a long term project that I can do simultaneously with other projects.  It will be something that I can carry with me when I travel, and the sewing kit for this project won’t take up much space for the amount of activity it will provide. This project will make it possible for me to make better use of my scraps because the 1/2 hexagon shapes won’t require very large pieces. Plus I can do something scrappy and traditional.  I see myself using my beloved hunter green fabric to join the diamonds together, and I may create my diamonds using two fabrics, as was done in the vintage quilt.  Either that, or I may choose a solid color to be used in the center of each diamond and make each diamond with three fabrics.  That would be reminiscent of log cabin quilts that feature a red square in the center of each block.  I haven’t decided yet, but I think I am leaning toward having a unifying central color, perhaps maroon to carry on with my preferred color pallet.
Share this:

  • Email
  • Facebook
  • Twitter
  • Pocket

Diamond Quilt Progress: Post Eleven

27 Sunday Apr 2014

Posted by in Uncategorized

≈ 3 Comments

This past week I have fleshed out the sides of the Diamond Quilt. Both sides have been completed.  

This may appear to be solid fabric with a hexagon border, but it is actually a lattice work of hexagons with six separate solid areas of fabric appliquéd into place.  You can see the design below, which also shows how the corners will be completed.

The strips of the lattice work were completed separately, assembled, and stitched to the edge of the quilt top.  The seams of the hexagons were reinforced with stitching and the papers removed.  Rectangular pieces of solid green fabric were then appliquéd into place.

The solid hunter green fabric areas correspond in size to the central maroon areas in the large diamond shapes.  You can see these areas in the image below.


Here we can see the double hexagon lattice work between the solid areas of fabric.

Lori shows her relative disinterest in the quilt top.

Share this:

  • Email
  • Facebook
  • Twitter
  • Pocket

Diamond Quilt Progress: Post Ten

21 Monday Apr 2014

Posted by in Uncategorized

≈ 4 Comments

Since the last time I reported progress on my Diamond Quilt I have finished off areas 1, 2, 3, and 4.

I started by creating a bridge unit two hexagons wide.  The purpose of the unit was to span the area between the tips of the large diamonds.  I had to make four of these units.

These bridge units were then stitched into place creating the shape where I would add the solid hunter green fabric.

I knew that getting the solid fabric to lie flat and pin the hexagons into place was going to be challenging enough, so I decided to cut large rectangles instead of triangles.  I’m glad I did.  Even though I cut them a few inches larger than necessary in each direction, it turned out to be a big challenge to handle such a large quilt top.  The weight of the piece made it difficult to get a small area of it to be flat on my dining room table.


I really enjoyed sewing the solid fabric into place.  I like the look of the double row of hexagons next to the solid fabric.  I am going to enjoy coming up with quilting to enhance the difference between the hexagonal areas and the solid areas. It took three hours per area to create the bridge, cut and pin the fabric, reinforce seams so papers could be removed, and sew the solid fabric in place.  So that makes twelve hours of work this week. One of the reasons I didn’t mind cutting rectangular pieces to go behind the triangular areas is because I knew I would be able to cut squares for hexagons from the scraps.  Below you can see the squares on the right and the remaining scraps on the left.  I’ll think of something to do with them, I’m sure.  Hunter green is my new favorite color.

Here are a few photos of the quilt top on the queen sized bed with areas 1, 2, 3, and 4 added.


On the agenda for next week is the addition of areas 5 and 6.  These areas have been designed, but those details will wait until the next post.


Share this:

  • Email
  • Facebook
  • Twitter
  • Pocket

Diamond Quilt Progress: Post Nine

13 Sunday Apr 2014

Posted by in Uncategorized

≈ 6 Comments

Since the last time I posted progress on this project I have done a lot of thinking about how to flesh out the edges.

There are ten areas I need to flesh out as shown above.

I came across three pieces I had put together that I was planning to use in a valance for a room divider that I have not yet written about.  I’ll get to that in some future “Second Act Saturday” post.

I used one of these units as the starting point for designing areas 1, 2, 3 and 4 for my Diamond Quilt.

I placed the unit along the edge of the existing quilt top work, and I could see that this idea held potential.

I started by adding three hexagons to get a diamond shape to insert into the space.

I then added a single green border of hexagons to one end of the diamond.

What followed was a series of designs laid out with the aid of hexagons and maroon units that I had completed previously.

I’m actually quite fond of the last one.

I went on to add a second hunter green border to the green patterned diamond and lay out some other options.  I won’t bore you with them here because the pictures are too dark, and I also don’t intend to use any of those options.

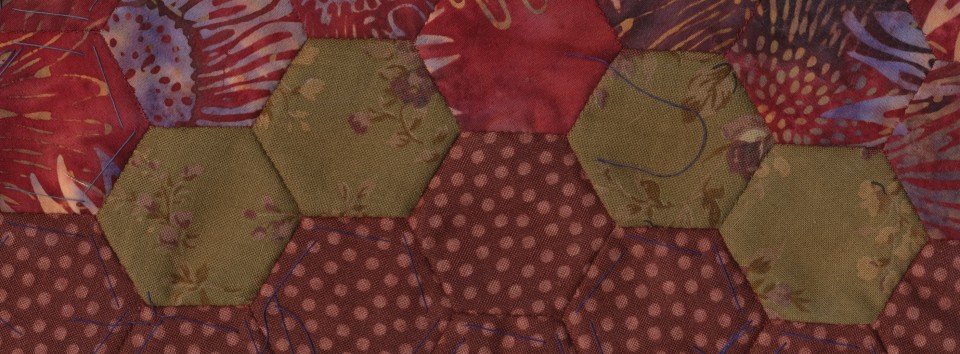
What I decided after all the thinking and planning is that these areas should be solid hunter green so they do not compete with the large diamonds.  I am going to use solid fabric to fill in those areas, but I am going to create a green hexagon border for each area to serve as the edge of the quilt.  The solid hunter green fabric will be sewn under the quilt top.  Or, in other words, the quilt top will be appliquéd to the solid fabric.  I will still need to decide how to bind the quilt but I am leaning toward allowing the shapes of the hexagons to remain in the binding.

The relatively large expanses of solid fabric will give the borders a whole cloth look, and I will be able to do some nice hand quilting in these areas.

I won’t be counting any of the time spent doing this design work toward the time spent to finish the quilt.  I estimate that I put in about four to six hours.  Interestingly, I decided to add the full double border of hunter green hexagons to the piece that I used in these design experiments.  I’ll be adding more to it, and I will use it as a testing ground for the quilting I will do on the larger piece.  I may also try an alternate binding method on the experimental piece.


Share this:

  • Email
  • Facebook
  • Twitter
  • Pocket

Beyond Quilting: Clothing Repair

11 Friday Apr 2014

Posted by in Uncategorized

≈ Leave a comment

A couple weeks ago my husband and I were headed off to a luncheon with a group called the Creative Collective.  I noticed at the last minute that my nail polish was terribly chipped from stitching, and I decided to put a quick coat on so my hands wouldn’t look so shabby.  I dripped nail polish on my skirt and had to do a quick change. I was going to throw the skirt away, but I noticed that LL Bean no longer makes the long version of this skirt, which really annoys me because I practically live in it. After rejecting the idea of throwing the skirt away I decided I was going to fold the skirt over itself in such a way as to hide the nail polish. In the close up  you can see some folds and pin marks from that attempt.  After pinning it I decided I could hide the resulting seam with some hexagons.  Then I said to myself, “Duh… why not just cover the polish with hexagons and keep the full length of the skirt?”  So I took out the pins and decided to buy some fabric that would coordinate well with the skirt. Off to the Pennington Quilt Works I went… uh… without the skirt.

Well, I picked out three fabrics that I thought would work well with the skirt based on my visual memory of the color.  One of them is going to yield a great variety of patterned hexagons because it is full of different patterns.

I bought a half yard of each fabric, and cut off about a quarter of each of those pieces to wash and dry.  I don’t ordinarily prewash fabric, but the skirt has been washed many times, and it will be washed many more times at high heat.  So these fabrics are getting the full heat treatment before I cut my hexagons.

Share this:

  • Email
  • Facebook
  • Twitter
  • Pocket

Second Act Saturday: Coffee Table Cover

05 Saturday Apr 2014

Posted by in Uncategorized

≈ Leave a comment

Today I would like to introduce “Second Act Saturday”.

When I first contemplated blogging about quilting I found my brain hurt from trying to figure out how to get started.  Do I show everything I made during my “First Act”, and then show everything I made so far during my “Second Act”, and then start blogging about what I am doing now?  That seemed like it would take too long, and my brain ached even more thinking about how I might accomplish it.  Do I just start where I am now, and catch my readers up later?  An unrealistic sense of the importance of my personal artistic history made that seem so dishonest.  You have to realize that the best paper I ever wrote in the ancient past that was college was titled “The Artist as Historian”, so that gives an idea of where I am coming from in terms of the importance of self reflection in artistic production. Therefore, I could not help but think that people deserve to know where I’ve been artistically before they see where I am headed now.

The decision was taken out of my hands a few months ago when I joined the Central Jersey chapter of the Modern Quilt Guild. They wanted to know my web site URL.  I knew then that I had to spring to action and start blogging in ernest immediately.  I chose the option of just diving head first into the murky pool of current artistic activity. Yet, I did want to find a way eventually to catch my readers up on the big picture of who I am artistically.

Therefore, today I am introducing “Second Act Saturday”.  On Saturdays I will occasionally show an already finished object from my second act in fibers.  Soon to come will be “First Act Friday” through which I will occasionally show objects completed during my first act in fibers.  I’ll be reaching back forty to thirty years in the past to do this.

Today I will share the second object I created during my second act in fiber arts.  This is a coffee table cover made immediately following the couch runner that I blogged about previously. I’ll provide one photo of the couch runner below.

The coffee table cover is definitely related to the couch runner that came immediately before it. It was was well within my comfort zone using fabrics and shapes with which I had become familiar.

I was using fabrics based on a pallet chosen to be compatible with my This End Up couch.  Below is a photo of the fabric covering the couch.  I walked into the local quilt shop one day with a pillow from the couch under my arm and came out with 13 fabrics selected to work with the couch.

After completing the couch runner I had left over basted hexagons and also left over four hexagon units I had put together.  It made sense to use them to create a piece that would be on display so close to the couch runner.  I decided to use more of the polka dot fabric and less of the green patterned fabric than I did in the couch runner, but all of the fabrics were the same.

The piece got off to a good start.  You can see the folded couch runner in the photograph above. The four part units are pictured above with the green patterned fabric functioning as a background.  The four hexagon unit is featured prominently in the photo below.  They are joined to form columns in both of these pieces.

Lori the cat enjoyed the work in process as usual. She is on my lap as I piece hexagons together.

I’m showing off the reverse side before the piece was basted to the batting and backing.  I baste my hexagons using 2.5 inch squares of fabric, but I trim them before joining.

This piece utilizes a method of binding which I created on my own, although I am sure others have come up with this before me.  I join hexagons together, secure the seams so the hexagons will maintain their shape, then remove the papers before joining the border to the quilted piece.  The binding can best be viewed from the back of the piece where it contrasts with the backing fabric.

A close up reveals not only the beauty of the binding as well as how it allows the shape of the hexagon to be maintained along the border, but also shows significant amounts of crumbs and cat hair.  Oops.

This piece spends a good deal of time as a head rest on the back of my husband’s favorite chair.  In this photo you can see myself as a high school senior in the smaller portrait, and my quilt making  grandmother two years older in the larger portrait.

Share this:

  • Email
  • Facebook
  • Twitter
  • Pocket

Diamond Quilt Progress: Post Eight

03 Thursday Apr 2014

Posted by in Uncategorized

≈ 2 Comments

Since my last progress report I have added a border of hunter green hexagons around the entire edge of the quilt.  It took me 40 hours to complete the border over the course of ten days.  That’s four hours per day on average.

I am showing the quilt on the king sized bed so more of the area of the quilt shows, but later in this post I will show it on the queen sized bed it will occupy when it is finished.

There are some areas that still need to be fleshed out. These additions may not result in straight edges. The binding is still up for grabs. I need to design additions for the spaces between diamonds at the top and the bottom of the quilt.  These are wide half diamond wedges that run horizontally.

I need to design additions for the sides.  These are thinner half diamond wedges that run vertically.

I need to design additions for the corners.  I guess you could think of these areas as quarter diamonds running horizontally.

 In order to get an idea of how the quilt would fit on the queen sized bed, I laid it out there and found that it will fit nicely in the vertical direction, but I think it will fall a bit short in the horizontal direction, so I need to take that into account when I flesh out the left and right edges.  I also need to take into account that I will lose a few inches from shrinkage in both directions when the quilt is first washed.

You can see that there is sufficient length for the queen sized bed.

I’ve reached a point in the work where I really need to think about where to go from here design wise.  I love the mindless sewing together of hexagons.  I will be able to start that again after I made a few design decisions. I have many options for designing the remaining sections which will finish off the edge of the quilt.  I’ll need to make ten sections total, of four specific types, to accomplish that finish.

My initial thought was that I wanted the solid maroon fabric to feature prominently in the finishing of the edges.  However, I have a limited number of maroon hexagons left, and no way to obtain more of this specific fabric.  I have a great number of the printed plum colored fabric, so it’s an option to use that.  One thing I am considering at this point is using the printed green fabric along with the hunter green to finish off the edges.

There are so many possibilities to finish this quilt that I think I need some time to reflect.  I’ll order more of the hunter green fabric, the printed green fabric, and some of a solid green that is available that matches the background of the printed green fabric.  It’s part of the collection. So my next post should involve some decision making.

I am linking up to the Monday Morning Star Count at Life Under Quilts.

Share this:

  • Email
  • Facebook
  • Twitter
  • Pocket

Subscribe to Blog via Email

Enter your email address to subscribe to this blog and receive notifications of new posts by email.

Join 41 other subscribers

Recent Posts

  • Not Sure if I Want To Blog Anymore
  • Annoyed With Bluehost
  • Pandemic Still Life
  • Staying with Bluehost
  • Farmer’s Wife Friday: Week 20

Recent Comments

  • AmandaEcobiab on Not Sure if I Want To Blog Anymore
  • Wynne.price, nz on Not Sure if I Want To Blog Anymore
  • Visionhuq on CJMQG Fall Retreat
  • Deidre Jenkins on Annoyed With Bluehost
  • Wynne on Annoyed With Bluehost

Archives

  • December 2024
  • June 2023
  • June 2020
  • January 2019
  • December 2018
  • November 2018
  • October 2018
  • September 2018
  • August 2018
  • August 2017
  • May 2017
  • April 2017
  • March 2017
  • January 2017
  • November 2016
  • October 2016
  • September 2016
  • August 2016
  • July 2016
  • June 2016
  • May 2016
  • April 2016
  • March 2016
  • February 2016
  • January 2016
  • December 2015
  • November 2015
  • October 2015
  • September 2015
  • August 2015
  • July 2015
  • June 2015
  • May 2015
  • April 2015
  • March 2015
  • February 2015
  • January 2015
  • December 2014
  • November 2014
  • October 2014
  • September 2014
  • August 2014
  • July 2014
  • June 2014
  • May 2014
  • April 2014
  • March 2014
  • February 2014
  • January 2014
  • December 2013
  • September 2013
  • August 2013

Categories

  • UFO
  • Uncategorized

Proudly powered by WordPress Theme: Chateau by Ignacio Ricci.