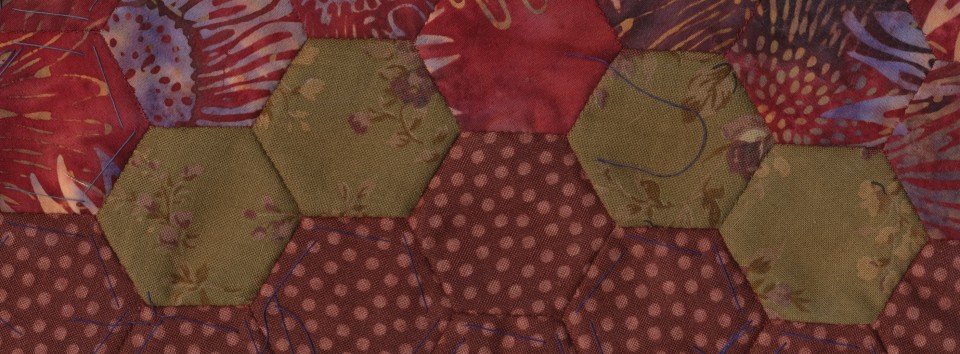
I spent a good deal of time this week gathering together pre basted hexagons, trimming those that needed it, and placing them in a container. I may be sorting them out by color group at some point, or I may be using this container as a source of hexagons for spontaneous scrappy piecing.
I have also been basting even more hunter green hexagons. My container is now nearly overflowing with hunter green goodness.
I’m pleased to say that the Double Wedding Ring paper pieces I ordered arrived this week. I ordered enough pieces to make a quilt with 36 rings.
The pieces come in three types, A, B, and C shown below in order.
I’m sad to say that the acrylic templates that I bought to accompany these paper pieces were a total waste of money for me, but not much of a loss at $8.00 for the set. I’ll tell you why I have no use for these templates so others can benefit from my mistake. The standard 3/8th inch seam allowance is way too large, and it costs an extra ten dollars to get the templates with a 1/4 inch seam allowance, which would have brought the price of the set to $18.00.
More importantly, however, anyone with any sense of spacial relations can easily cut a satisfactory seam allowance with a pair of scissors once the paper has been pinned in place on a strip of fabric. It’s not rocket science. The time one would invest in cutting around acrylic templates with a rotary cutter (even if they had a smaller seam allowance) would be a total waste of time. Who wants to be hunched over a table with a rotary cutter when she could be sitting on a couch with a strip of fabric and a pair of scissors in hand? The only reason I can think of to use these templates is if I wanted to do some fussy cutting. Even then, I would probably end up trimming my the seam allowances by hand after basting.
Even though I’m not yet ready to tackle a full quilt, I went to the trouble of basting a few of the “C” shapes. They were easy to baste. I added an extra stitch along each edge rather than just doing the corners. I think that extra stitch will be important in maintaining the subtle curves of the pieces.
I’m going to the trouble of making sure that I fold my fabric over in such a way that I can remove the papers before appliquéing the rings without having to do any additional reinforcement. The directions that come with the pieces recommend leaving the paper pieces in place when you appliqué the rings, and then cutting the fabric from the back to remove the papers. That seems to me as if it would make it very difficult to sew the rings in place with the thickness of the papers getting in the way and making the piece inflexible. It also seems like a lot of extra unnecessary effort to cut through the fabric for paper removal. Rather than using a full cloth background, I’ll be cutting individual pieces to appliqué behind the openings in the rings. Perhaps I’ll do this as the piece progresses. Perhaps I may wait until I’ve pieced all of the rings. I haven’t decided yet.
The green pieces I am working with right now are simply for practice. I’ll probably do one ring as a table topper to experience the process before I start to work on a full quilt design. I’m big on making samples before tackling a big project. I’m thinking of planning out something in advance and purchasing the fabric necessary to complete it rather than going scrappy. The package of paper pieces comes with a line drawing of the 36 circle quilt that you can color for planning purposes.
I’ve got a 20% off birthday coupon from the Pennington Quilt Works that I need to use this month. Though I purchase my solids online from sample cards, I like to see prints in person before I buy them. I will likely buy a lot of batting and some fabric for a wedding ring quilt with my coupon this year. I’m also interested in getting another rotating self healing cutting mat.
I have an idea of basting up enough pieces for a full quilt completely from scraps. This would be a very long term project. I’d put the pieces into separate containers by type, A, B, and C. I’d then pull pieces randomly as I assembled the arcs. The only rule would be that if I picked the same fabric two times in a row I would throw it back and try again.
I also thought about tracing a set of the papers, scanning them, and then enlarging them to 200%. This would create a much larger ring for a more modern look. A 200% increase in size would create rings 30.5 inches in size.
It’s time for a report on my experimental binding piece. This piece has endured 14 regular washes and dries. It has endured an additional 4 gentle washes and dries. While my binding became quite crinkly from the regular drying, my little seams are holding up very well, and that’s what I’m interested in evaluating.
I am linking back my weekly progress report to the Monday Morning Star Count on Life Under Quilts with Jessica Alexandrakis, whose book “Quilting One The Go” is available from Amazon.


double wedding ring is on my bucket list .. it probably won’t happen though lol! thanks for sharing the beginning of yours.
Really helpful to have your thoughts on those templates – thank you.
Wow you have been busy! I also want to stitch a double wedding ring quilt…someday! I like your idea of sorting the scraps in advance…I may use that one! Great job!